
Rosetower Woods 100% Exploration Guide
★ Season 1: Part 2 Releases 10/29!
☆ All Season 1 New Aniimo
★ Best Teams | Best Starter | Best DPS
☆ Trending: Lita | Wendell | Wonder Egg
✪ Follow Game8's Aniimo X for news & guides!
Share your thoughts! ➤ Aniimo Player Survey
Rosetower Woods is an area in Breezy Plains in Aniimo. Learn more about the collectibles, including egg locations, and all Aniimo in this area through this guide!
List of Contents
Rosetower Woods Interactive Map
Rosetower Woods Points of Interest
| Jump to a Section! | |||||||||||
|---|---|---|---|---|---|---|---|---|---|---|---|
 Aniimos |
 Chests |
 Lumin Ambers |
|||||||||
 Pathfinder Challenges |
 Dr Glass's Trials |
 Caves |
|||||||||
 Eggs |
- | ||||||||||
All Rosetower Woods Aniimo
Notice: Marking Aniimos on the interactive map will not reflect on this table.
| Aniimo | Map Images | |||||||
|---|---|---|---|---|---|---|---|---|
 Budsquire Budsquire
|
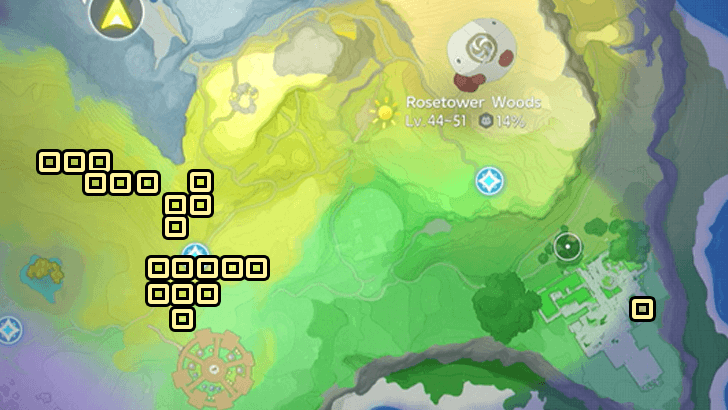 |
|||||||
 Cubbo Cubbo
|
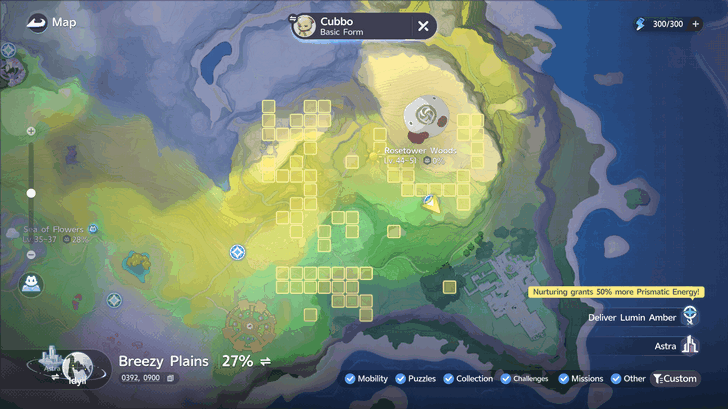 |
|||||||
 Dewy Dewy
|
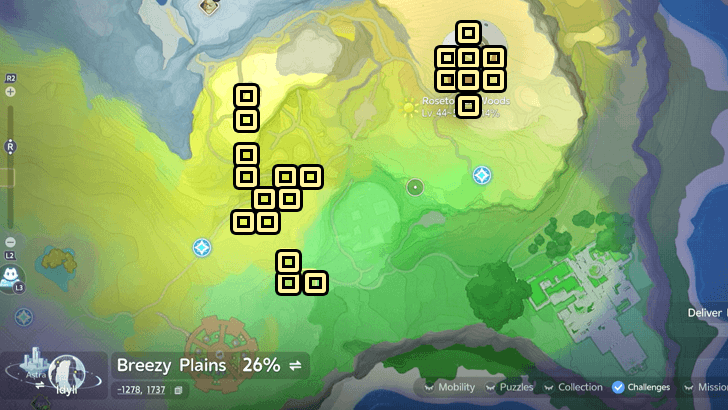 |
|||||||
 Grizbo Grizbo
|
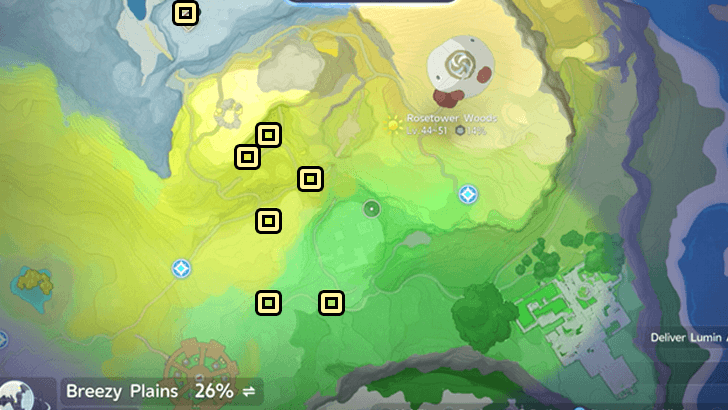 |
|||||||
 Melloblum Melloblum
|
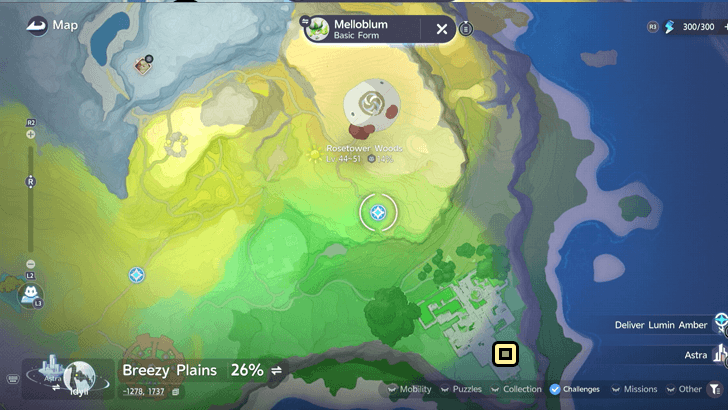 |
|||||||
 Nighttime Bonesky Nighttime Bonesky
|
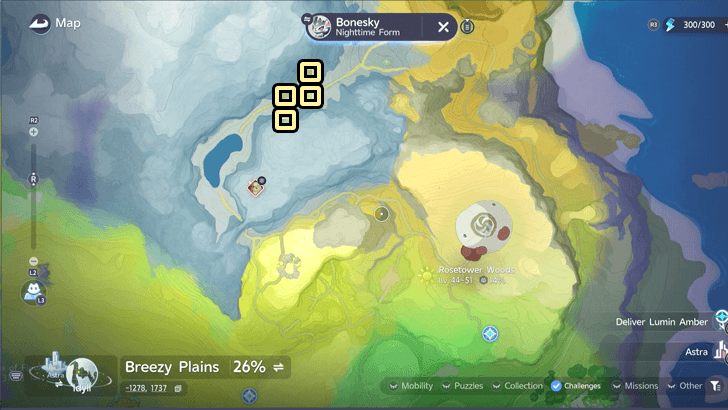 Conditions:

Nighttime Bonesky spawns during Nighttime. |
|||||||
 Nighttime Fenrier Nighttime Fenrier
|
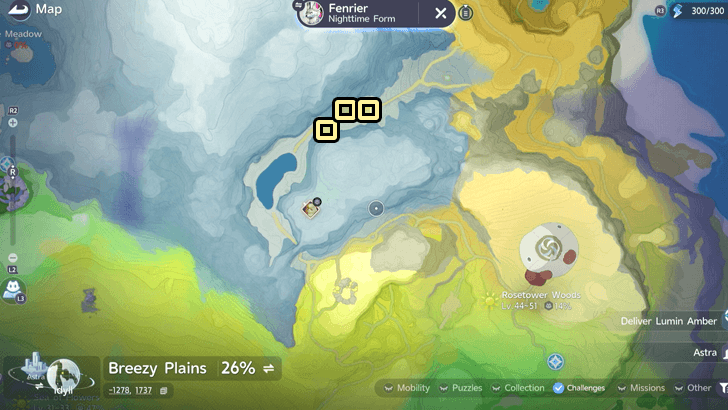 Conditions:
Nighttime Fenrier spawns during Nighttime. |
|||||||
 Nighttime Glynsera Nighttime Glynsera
|
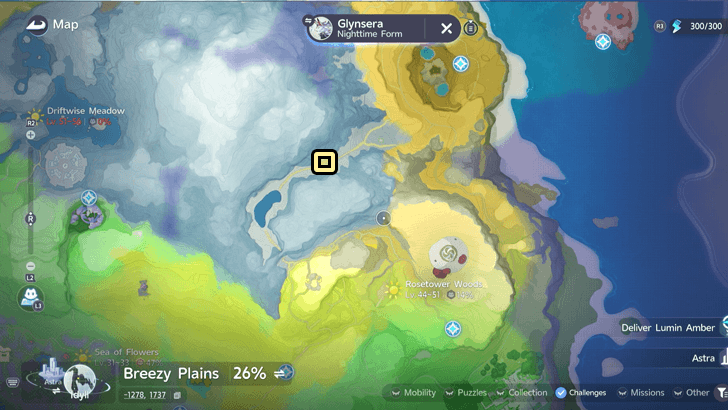 Conditions:
Nighttime Glynsera spawns during Nighttime. |
|||||||
 Pomawk Pomawk
|
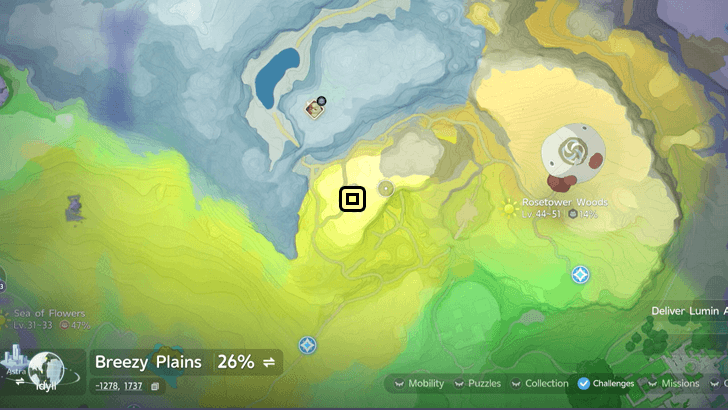 There is a lone Pomawk to the south of the Alpha Grizbo's cave. Speak to the Worried Pomegg and help it to respawn more Pomawks every new night cycle. |
|||||||
 Pomegg Pomegg
|
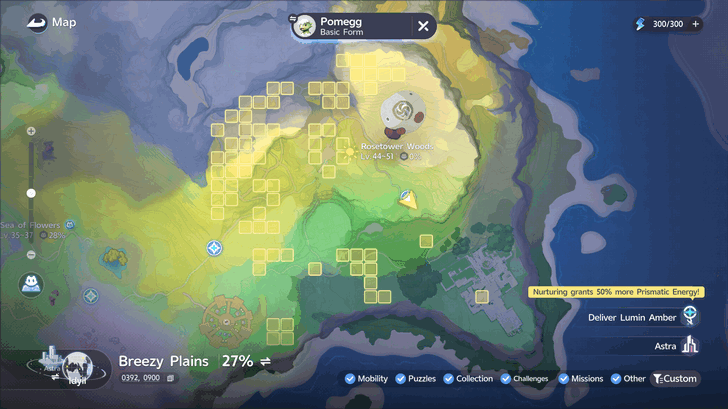 |
|||||||
 Prismana Grizbo Prismana Grizbo
|
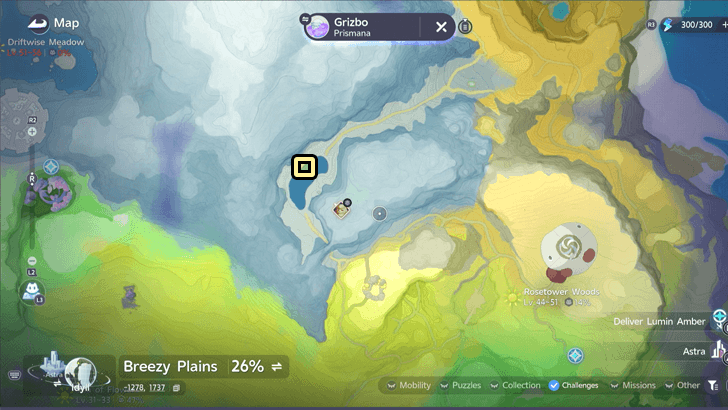 Conditions:

Prisman Grizbo only spawns while there is a Prismana Flow. |
|||||||
 Snowfield Pomegg Snowfield Pomegg
|
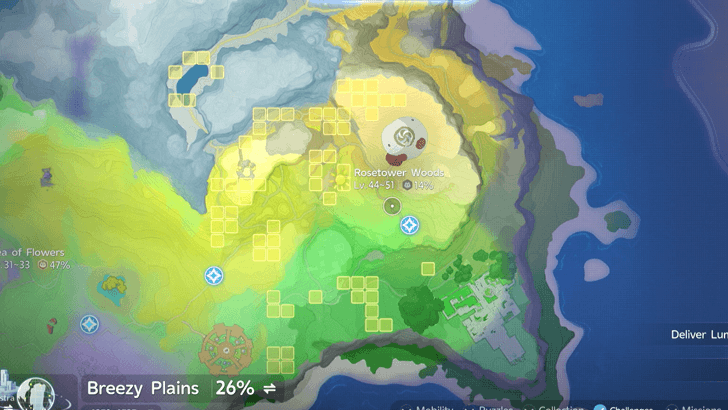 Conditions:

Snowfield Pomegg only spawns during Snowy weather. |
|||||||
 Towerwood Budsquire Towerwood Budsquire
|
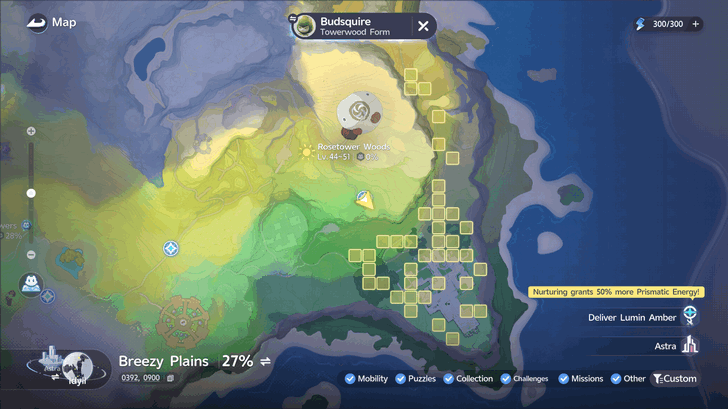 |
|||||||
 Towerwood Thornblade Towerwood Thornblade
|
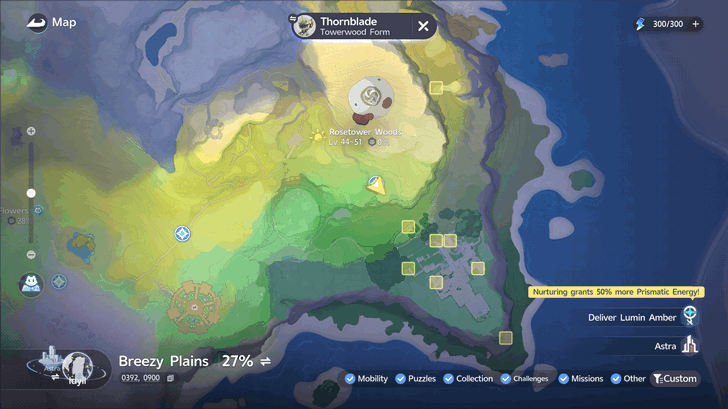 |

 DPS
 Sword Dance

 Raging Rampage

 Support
 Dangerous Fragrance
 Phantom Opening

 Biting Wind
 Break
 Tuning
All Rosetower Woods Chests
| Collectibles | Details |
|---|---|
|
Rosetower Woods Chest 1 |
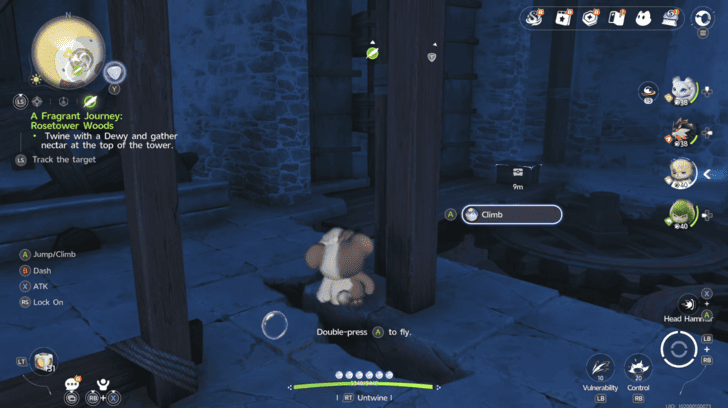 Coordinates: 0368, 1071 How to Get: Found inside the Whiterose Tower in Rosetower Woods. You must smash the rock blocking the gears from moving in the upper level to open the door containing the chest. |
|
Rosetower Woods Chest 2 |
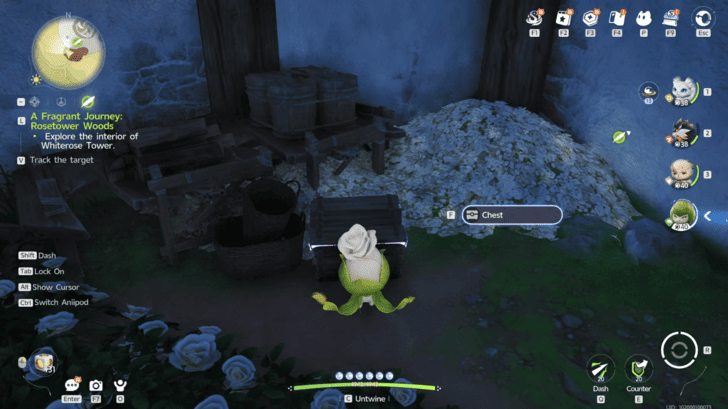 Coordinates: 0359, 1013 How to Get: Found as you enter the Whitrose Tower in Rosetower Woods through the hole in the wall. |
|
Rosetower Woods Chest 3 |
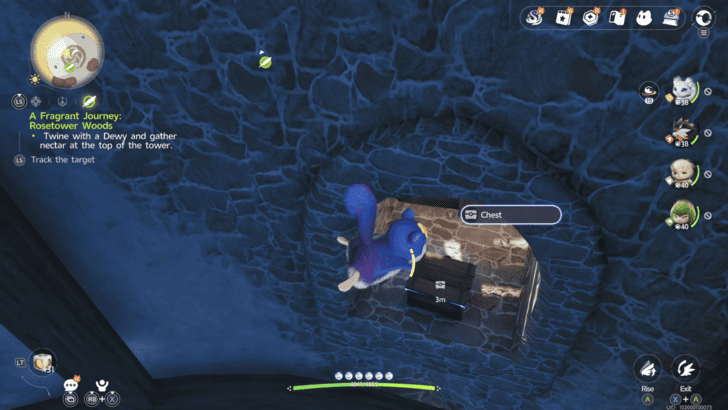 Coordinates: 0373, 1057 How to Get: Found on a window at the upper level of the Whiterose Tower in Rosetower Woods. You must smash the rock blocking the gears from moving in the upper level to activate the wind tunnel and fly upwards to reach it. |
|
Rosetower Woods Chest 4 |
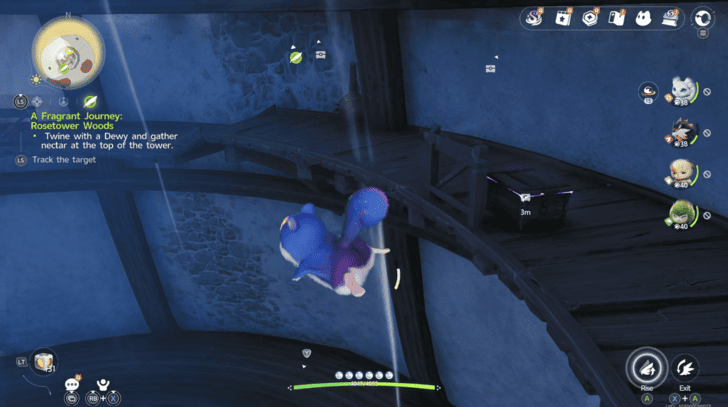 Coordinates: 0381, 1061 How to Get: Found on the upper level of the Whiterose Tower in Rosetower Woods. You must smash the rock blocking the gears from moving in the upper level to activate the wind tunnel and fly upwards to reach it. |
|
Rosetower Woods Chest 5 |
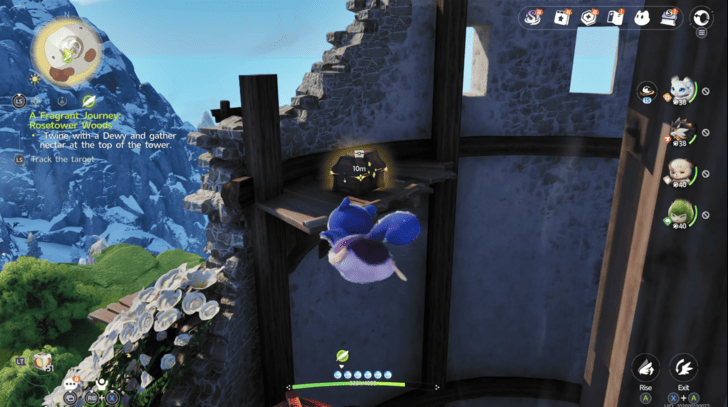 Coordinates: 0375, 1054 How to Get: Found at the highest level of the Whiterose Tower in Rosetower Woods. You must smash the rock blocking the gears from moving in the upper level to activate the wind tunnel and fly upwards to reach it. |
|
Rosetower Woods Chest 6 |
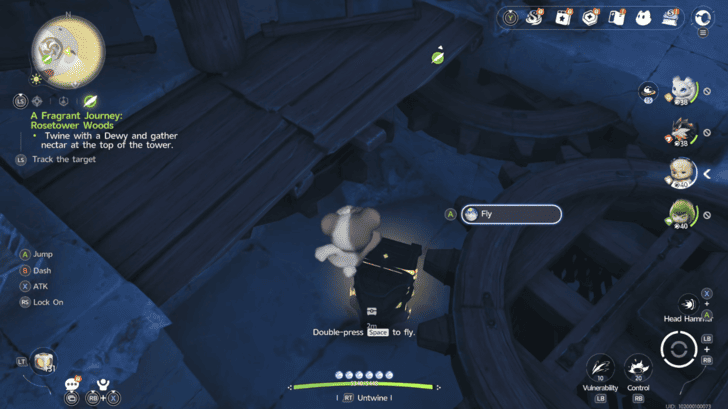 Coordinates: 0410, 1043 How to Get: Found inside the Whiterose Tower in Rosetower Woods. You must smash the rock blocking the gears from moving in the upper level to open the door containing the chest. |
|
Rosetower Woods Chest 7 |
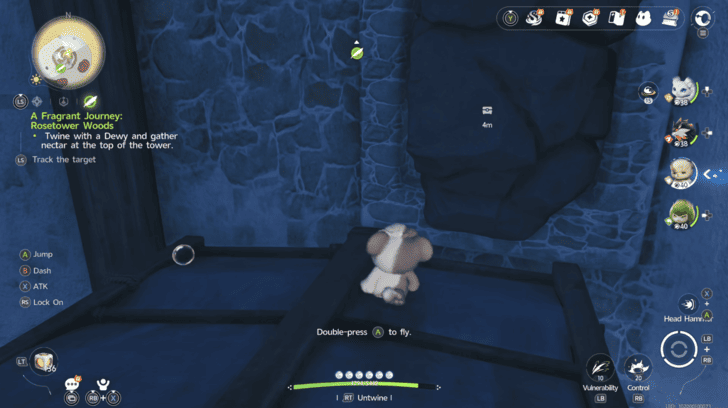 Coordinates: 0392, 1059 How to Get: Found on a window blocked by rocks at the upper level of the Whiterose Tower in Rosetower Woods. Yoou must stand on the fan blades and smash the rocks blocking the window to get the chest. |
|
Rosetower Woods Chest 8 |
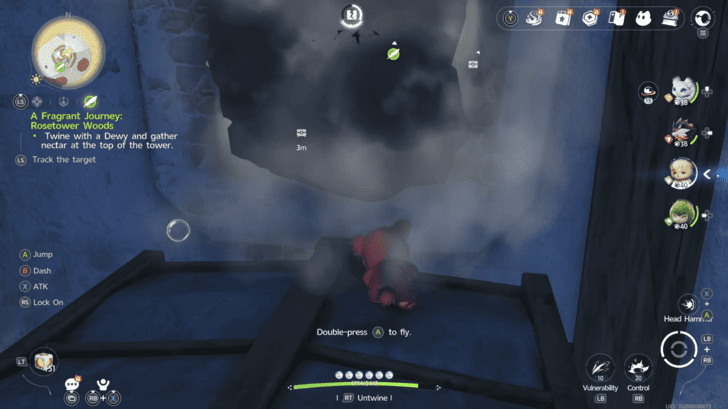 Coordinates: 0391, 1059 How to Get: Found on a window blocked by rocks at the upper level of the Whiterose Tower in Rosetower Woods. Yoou must stand on the fan blades and smash the rocks blocking the window to get the chest. |
|
Rosetower Woods Chest 9 |
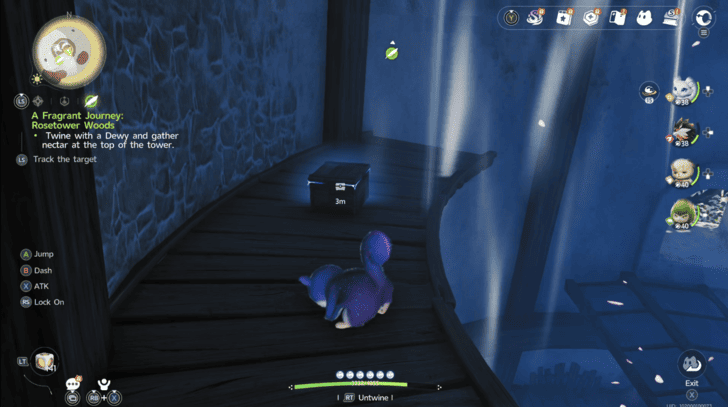 Coordinates: 0392, 1044 How to Get: Found on the upper level of the Whiterose Tower in Rosetower Woods. You must smash the rock blocking the gears from moving in the upper level to activate the wind tunnel and fly upwards to reach it. |
|
Rosetower Woods Chest 10 |
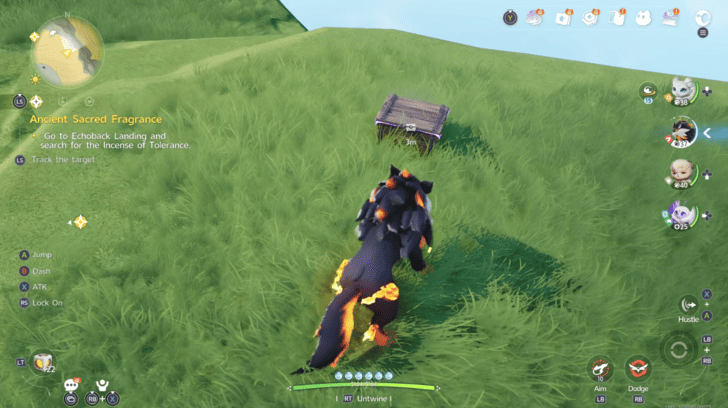 Coordinates: 0433, 1102 How to Get: Found on a cliff overlooking the ocean on the northeast side of Rosetower Woods. |
|
Rosetower Woods Chest 11 |
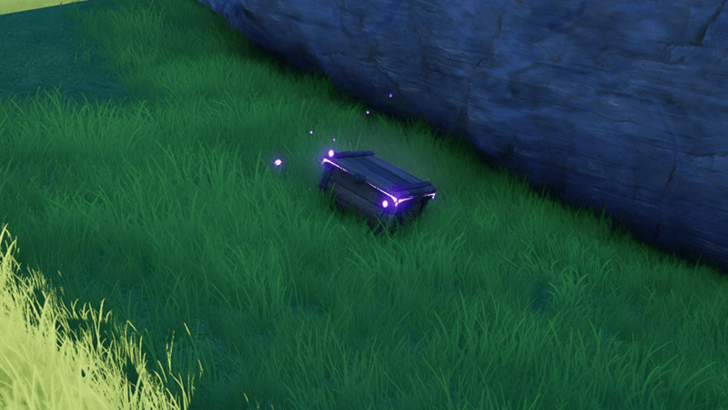 Coordinates: 0058, 0599 How to Get: Found near a cliff facing the ocean. |
|
Rosetower Woods Chest 12 |
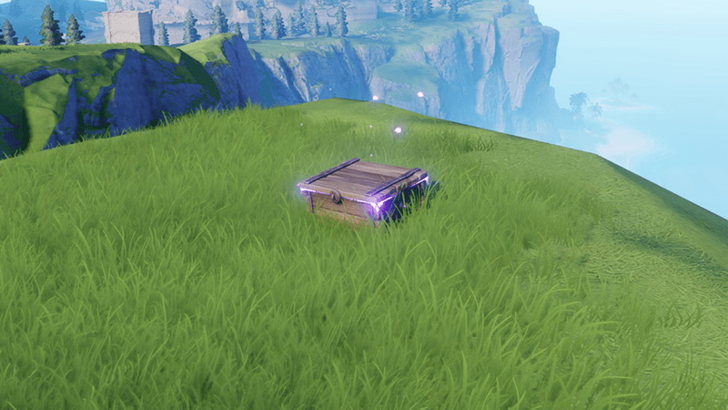 Coordinates: 0193, 0655 How to Get: Found near a cliff facing the ocean. |
|
Rosetower Woods Chest 13 |
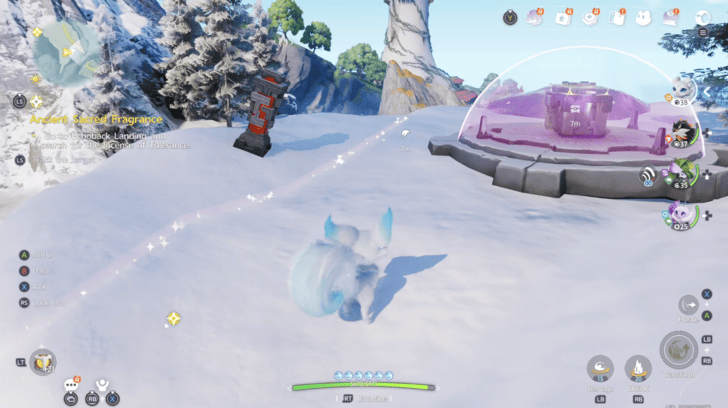 Coordinates: 0029, 1052 How to Get: Found inside a forcefield on a rocky mountain on the northwest side of Rosetower Woods. Twine with a fire element Aniimo to light up the two pillars on each side of the forcefield, then melt the block of ice behind you to free the frozen box. Use the Control ability to move the box towards the button to open the forcrefield and get the chest. |
|
Rosetower Woods Chest 14 |
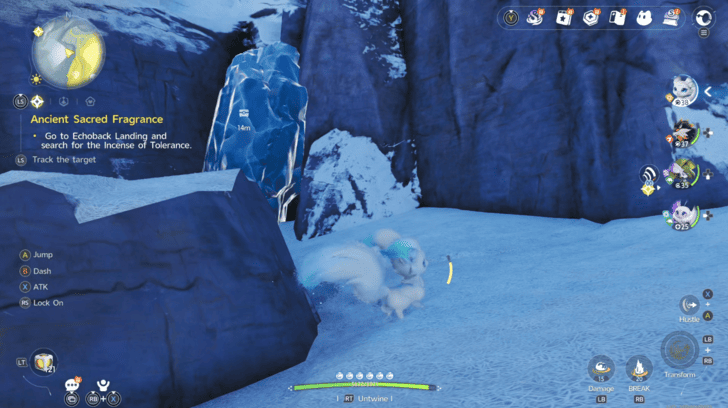 Coordinates: 0039, 1003 How to Get: Found behind a block of ice on the rocky mountain on the northwest side of Rosetower Woods. Twine with a fire element Aniimo to melt the ice and get the chest. |
|
Rosetower Woods Chest 15 |
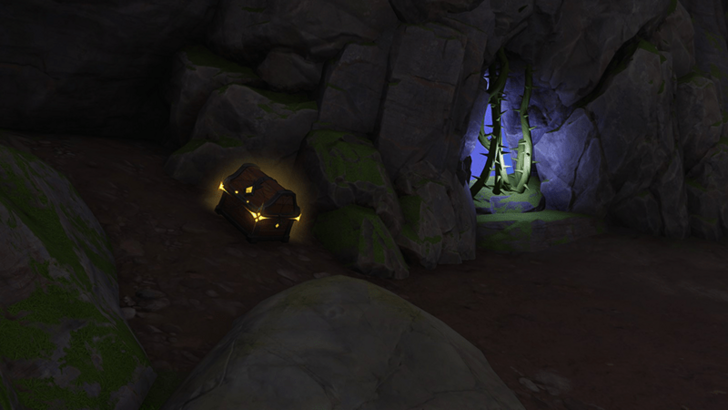 Coordinates: 0122, 0683 How to Get: Found inside a cave accessible via the beach down south. It's placed next to a cave entrance. |
|
Rosetower Woods Chest 16 |
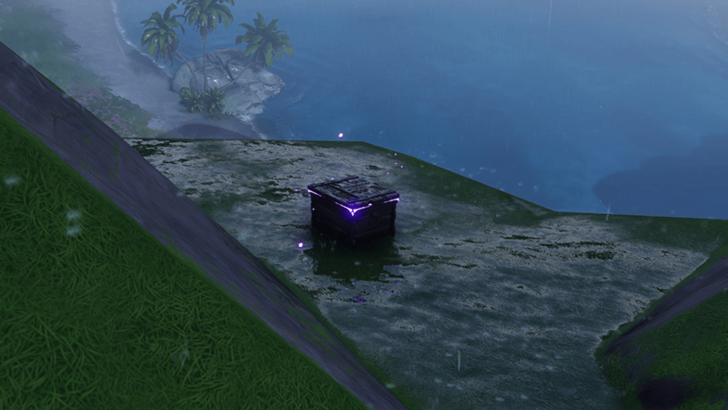 Coordinates: 0343, 0969 How to Get: Found on a small ledge facing the southern ocean. |
|
Rosetower Woods Chest 17 |
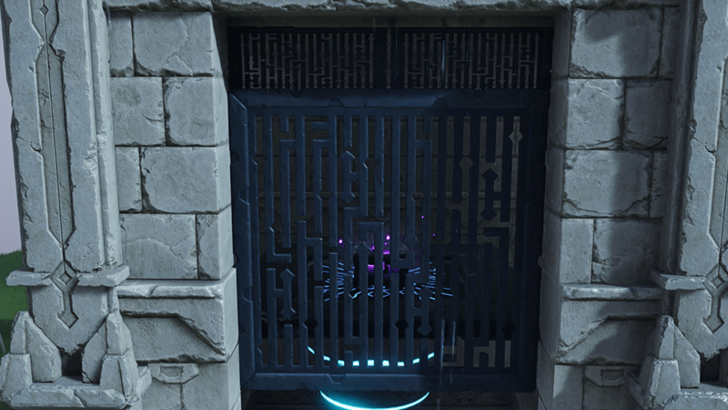 Coordinates: 0380, 0748 How to Get: Found inside a cage place atop of a floating platform held up by a gravity manipulating device. Remove the cage outside to redirect the gravity towards the outside so that the platform can be put down. |
|
Rosetower Woods Chest 18 |
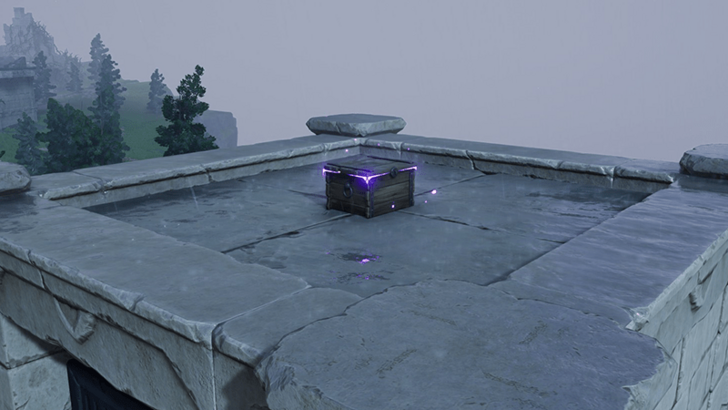 Coordinates: 0380, 0748 How to Get: Found atop the roof of a small stone tower. |
|
Rosetower Woods Chest 19 |
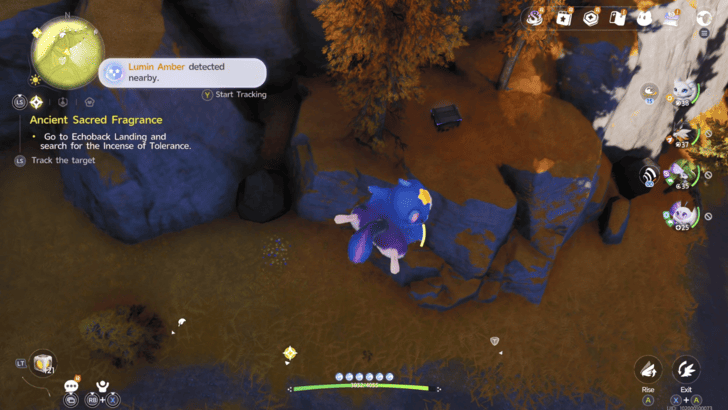 Coordinates: 0182, 0969 How to Get: Found on a cliff overlooking the entrance to a cave on the northern side of Rosetower Woods. |
|
Rosetower Woods Chest 20 |
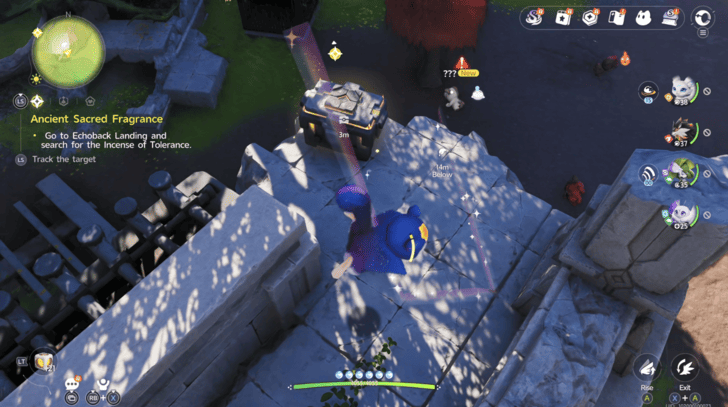 Coordinates: 0251, 0956 How to Get: Found on top of the ruins near the middle of Rosetower Woods. |
|
Rosetower Woods Chest 21 |
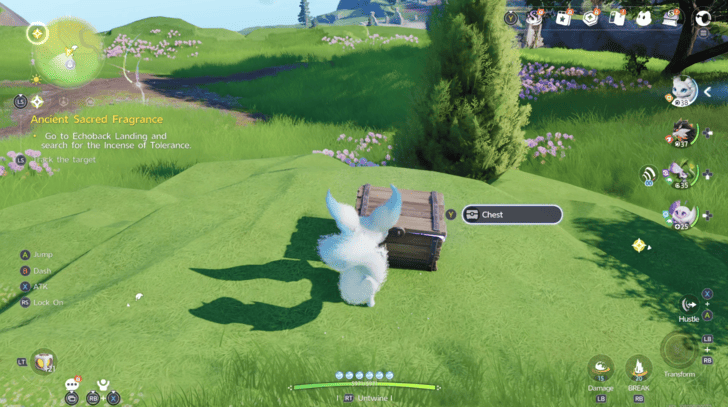 Coordinates: 0318, 0936 How to Get: Found on a small cliff north of the Bloom in the middle of Rosetower Woods. |
|
Rosetower Woods Chest 22 |
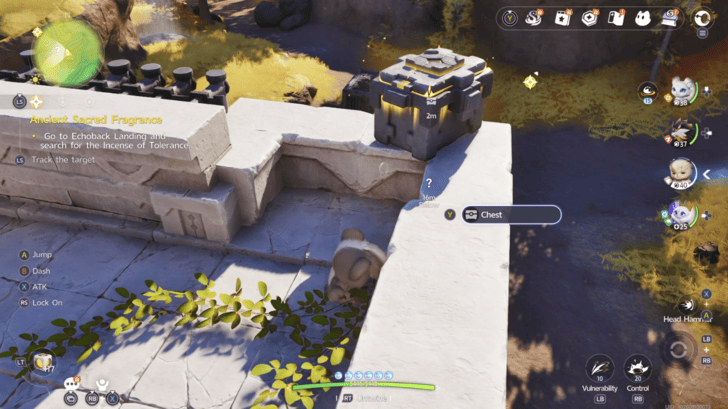 Coordinates: 0209, 0907 How to Get: Found on the ledge of the ruins near a metal cage at the central area of Rosetower Woods. |
|
Rosetower Woods Chest 23 |
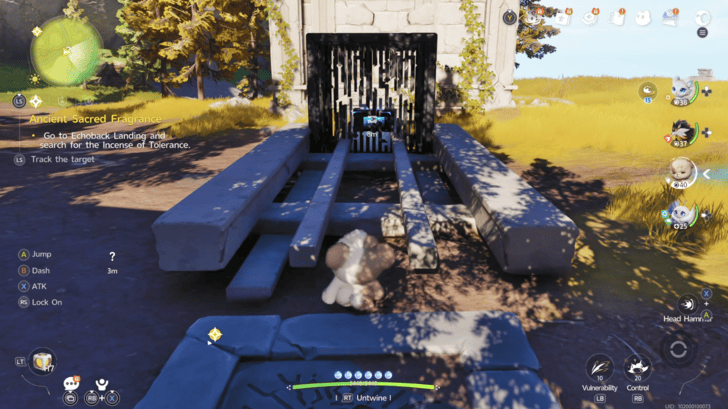 Coordinates: 0190, 0907 How to Get: Found inside a metal cage in the central area of Rosetower Woods. Twine with an earth element Aniimo to smash the cage and free the chest. |
|
Rosetower Woods Chest 24 |
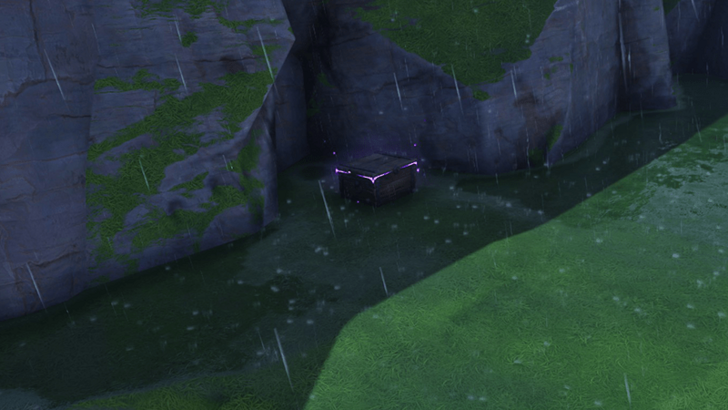 Coordinates: 0437, 0699 How to Get: Found near a cliff facing the ocean. |
|
Rosetower Woods Chest 25 |
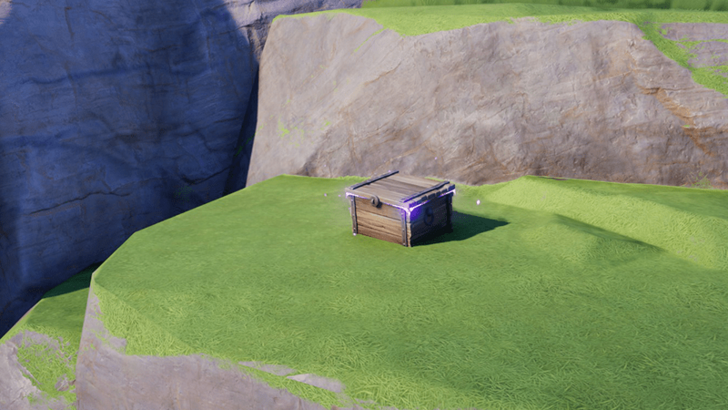 Coordinates: 0526, 0645 How to Get: Found near a cliff facing the ocean. |
|
Rosetower Woods Chest 26 |
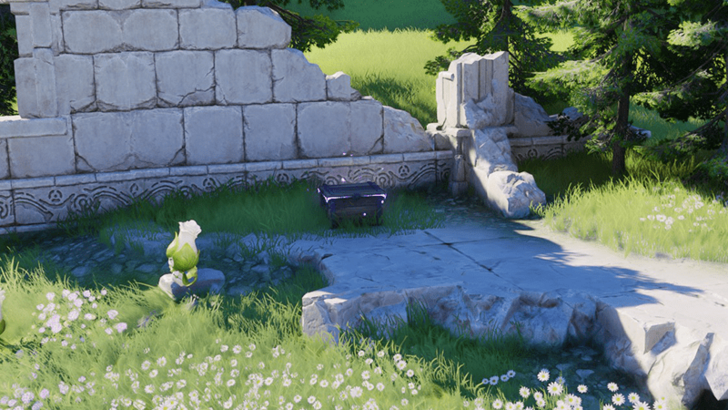 Coordinates: 0395, 0810 How to Get: Found in the middle of a small ruin. |
|
Rosetower Woods Chest 27 |
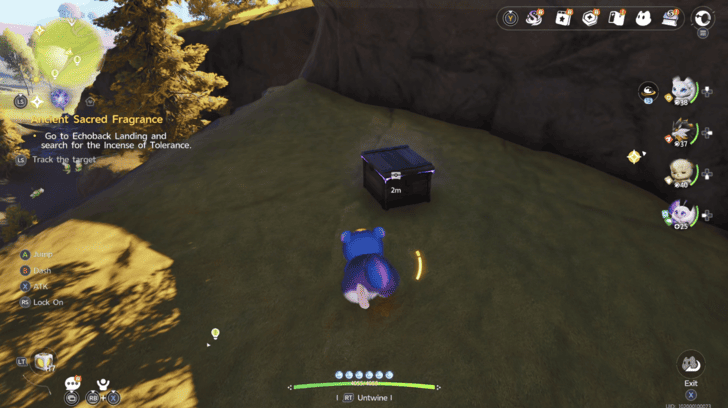 Coordinates: 0093, 0868 How to Get: Found on a cliff overloking the road going to the southwest side of Rosetower Woods. |
|
Rosetower Woods Chest 28 |
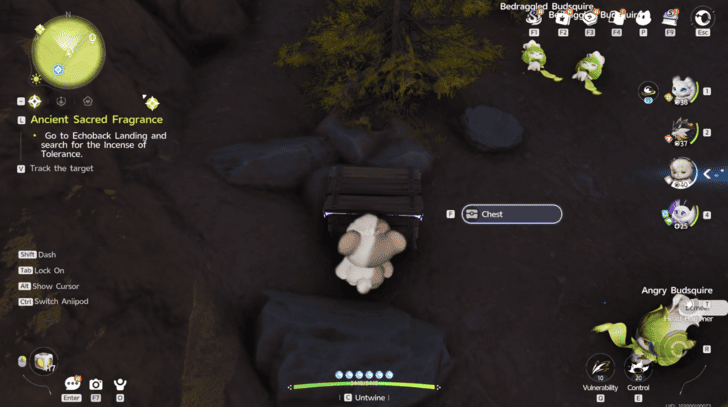 Coordinates: 0073, 0838 How to Get: Found buried underneath some rocks on the road to the southwest side of Rosetower Woods. Smash the rocks to get the chest. |
|
Rosetower Woods Chest 29 |
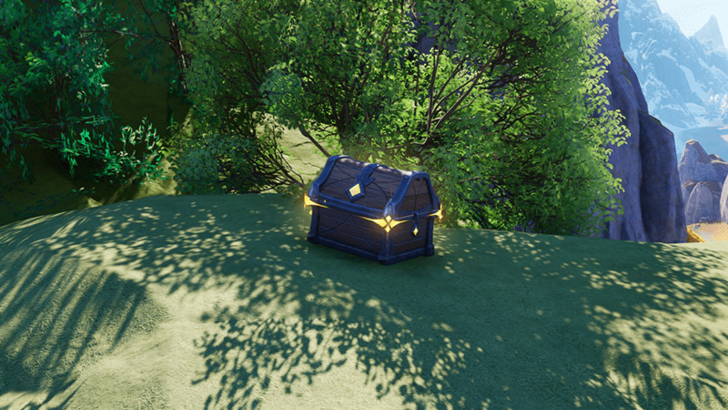 Coordinates: 0514, 1053 How to Get: Found on top a large stone arch rock formation. |
|
Rosetower Woods Chest 30 |
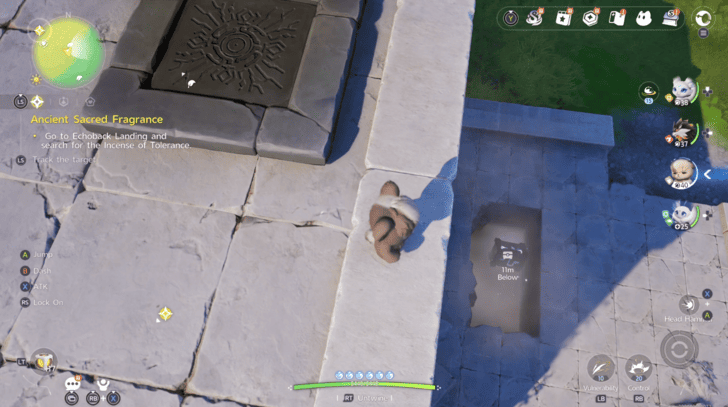 Coordinates: 0172, 0818 (eval at /var/lib/app/app/models/saola/condition/base/if_eval.rb:24):1: syntax error, unexpected end-of-input, expecting ')' ...d reveal the chest.\).present?) ... ^ (eval at /var/lib/app/app/models/saola/condition/base/if_eval.rb:24):1: syntax error, unexpected end-of-input, expecting ')' ...and reveal the chest.\).blank?) ... ^ |
|
Rosetower Woods Chest 31 |
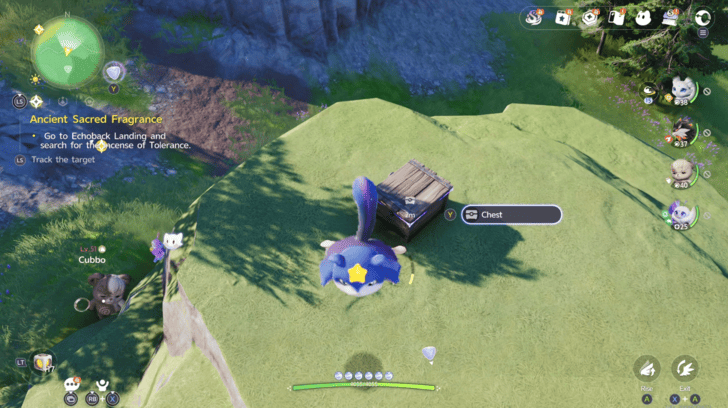 Coordinates: 0187, 0770 How to Get: Found on a small cliff overlooking the ruins on the southern side of Rosetower Woods. |
|
Rosetower Woods Chest 32 |
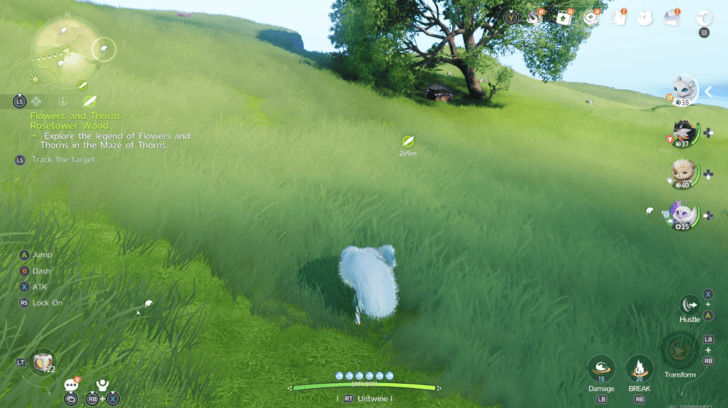 Coordinates: 0441, 0976 How to Get: Found under a tree on the eastern side of Rosetower Woods. |
|
Rosetower Woods Chest 33 |
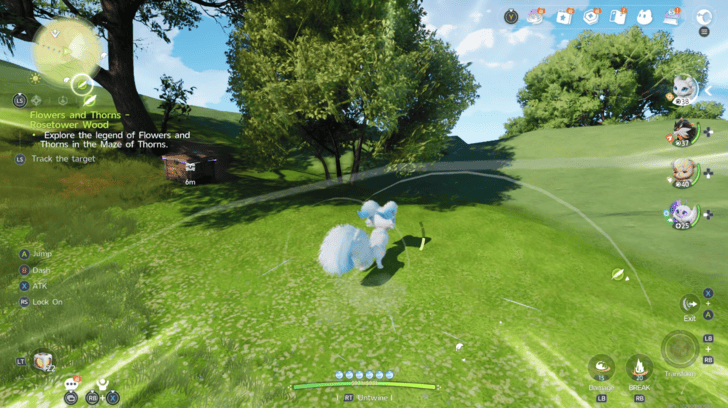 Coordinates: 0452, 0925 How to Get: Found under a tree on the eastern side of Rosetower Woods. |
|
Rosetower Woods Chest 34 |
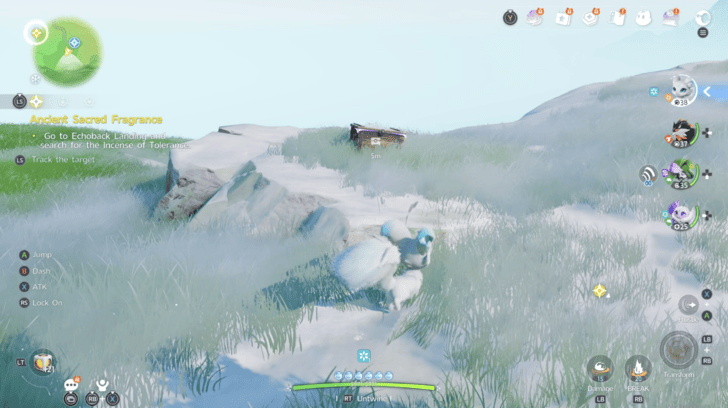 Coordinates: 0383, 0878 How to Get: Found on a cliff south of the Whiterose Tower Bloom. |
|
Rosetower Woods Chest 35 |
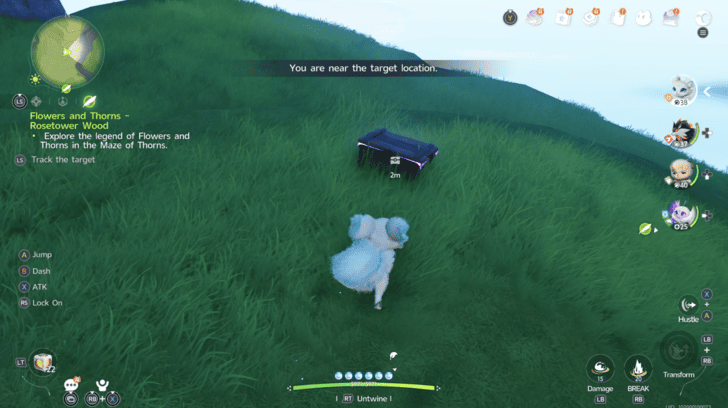 Coordinates: 0562, 0954 How to Get: Found on a cliff overlooking the ocean on the eastern side of Rosetower Woods. |
|
Rosetower Woods Chest 36 |
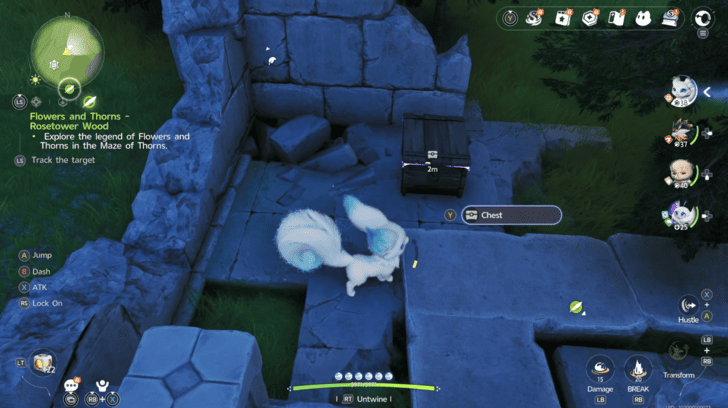 Coordinates: 0542, 0899 How to Get: Found at the corner of some ruins on the southeast side of Rosetower Woods. |
|
Rosetower Woods Chest 37 |
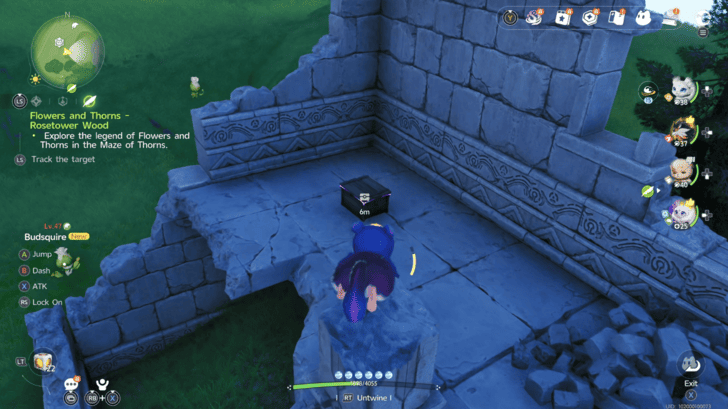 Coordinates: 0538, 0867 How to Get: Found on the upper level of some ruins on the southeast side of Rosetower Woods. |
|
Rosetower Woods Chest 38 |
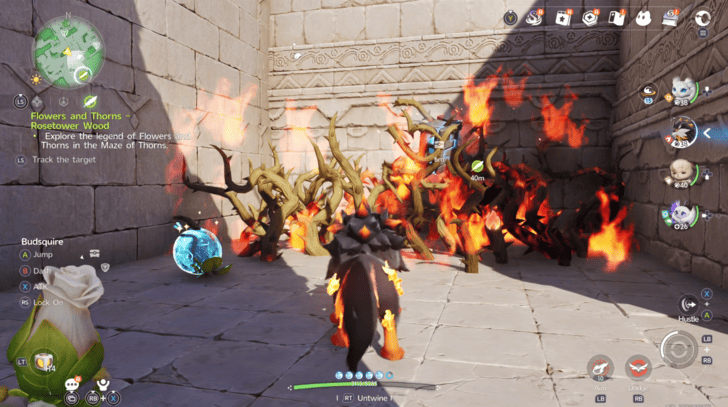 Coordinates: 0526, 0820 How to Get: Found in the top right corner of the ruins on the southeast side of Rosetower Woods. |
|
Rosetower Woods Chest 39 |
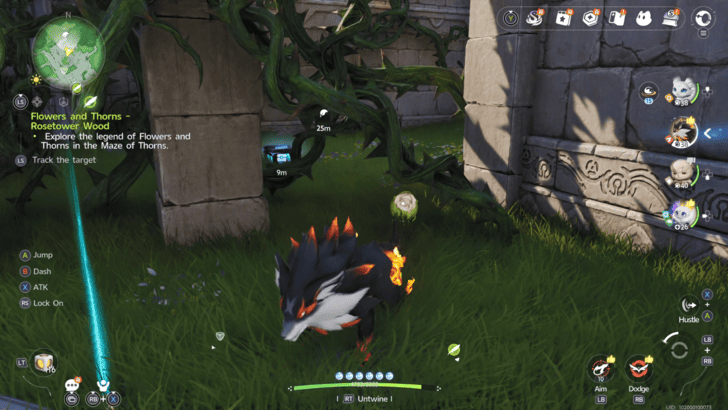 Coordinates: 0528, 0806 How to Get: Found in a room guarded by thorns in the ruins on the southeast side of Rosetower Woods. |
|
Rosetower Woods Chest 40 |
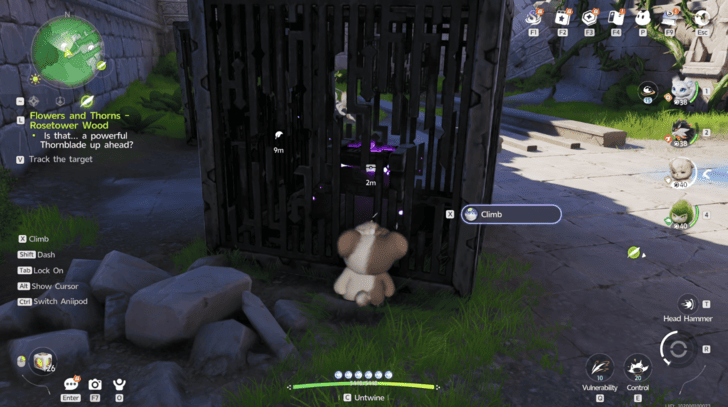 Coordinates: 0456, 0746 How to Get: Found inside a metal cage on the top left corner of the ruins in the southeast side of Rosetower Woods. Smash the cage to get the chest. |
|
Rosetower Woods Chest 41 |
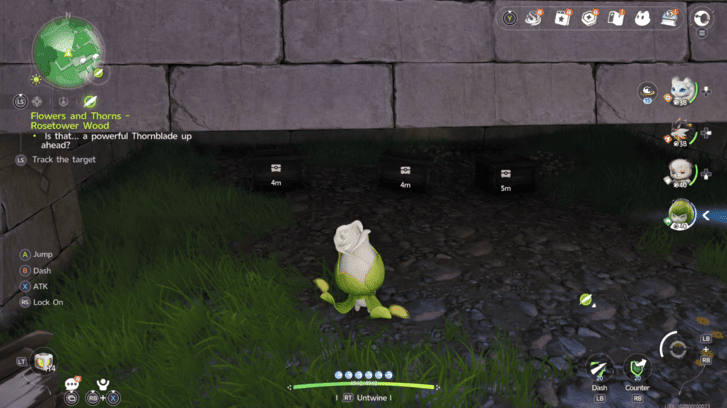 Coordinates: 0462, 0773 How to Get: Found on the top left corner of the ruins in the southeast side of Rosetower Woods. Twine with a Budsquire and press the button to get the chest. |
|
Rosetower Woods Chest 42 |
Coordinates: 0468, 0768 How to Get: Found on the top left corner of the ruins in the southeast side of Rosetower Woods. Twine with a Budsquire and press the button to get the chest. |
|
Rosetower Woods Chest 43 |
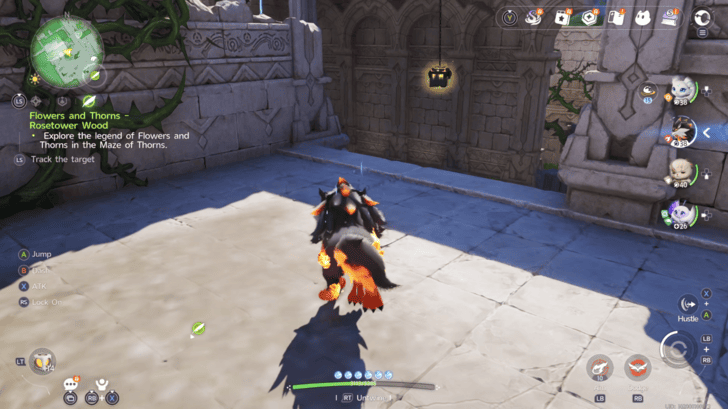 Coordinates: 0490, 0751 How to Get: Found hanging from the ceiling of the ruins in the southeast side of Rosetower Woods. |
|
Rosetower Woods Chest 44 |
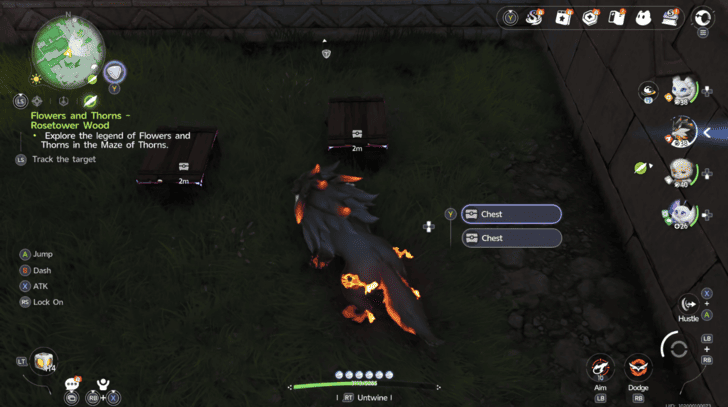 Coordinates: 0509, 0758 How to Get: Found inside a room in the ruins at the southeast side of Rosetower Woods. Burn the vines covering the gap in the room to gain access to it. |
|
Rosetower Woods Chest 45 |
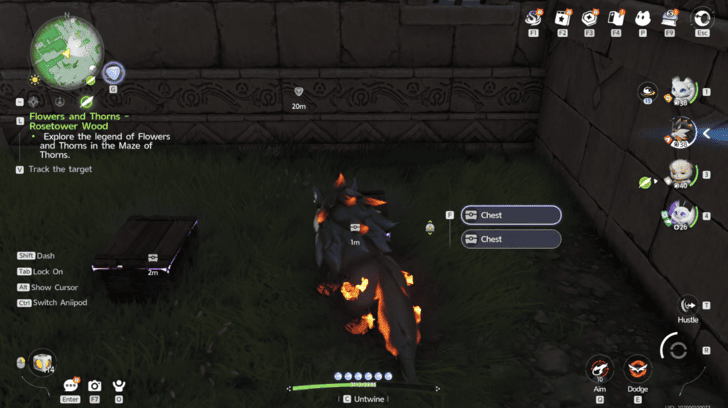 Coordinates: 0508, 0759 How to Get: Found inside a room in the ruins at the southeast side of Rosetower Woods. Burn the vines covering the gap in the room to gain access to it. |
|
Rosetower Woods Chest 46 |
Coordinates: 0533, 0738 How to Get: Found surrounded by thorns at the end of a corridor in the ruins in the southeast side of Rosetower Woods. Burn the thorns to get the chest. |
|
Rosetower Woods Chest 47 |
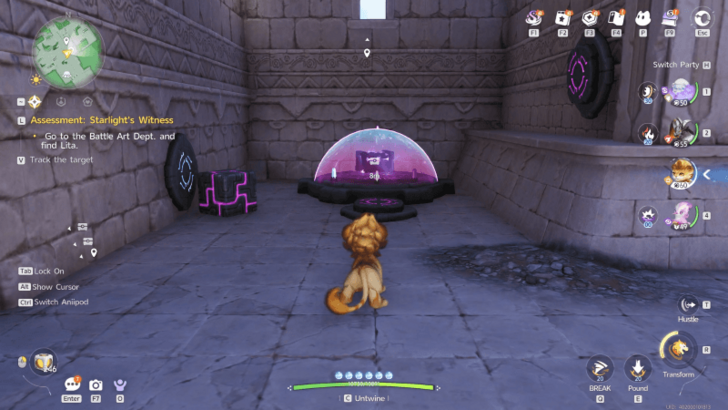 Coordinates: 0545, 0734 How to Get: Found inside a forcefield in a closed off room at the ruins on the southeast side of Rosetower Woods. The forcefield will be opened if all 3 buttons in the room are being pressed at the same time. To do this, get 3 boxes scattered throughout the ruins and place them on the buttons to free the chest. |
|
Rosetower Woods Chest 48 |
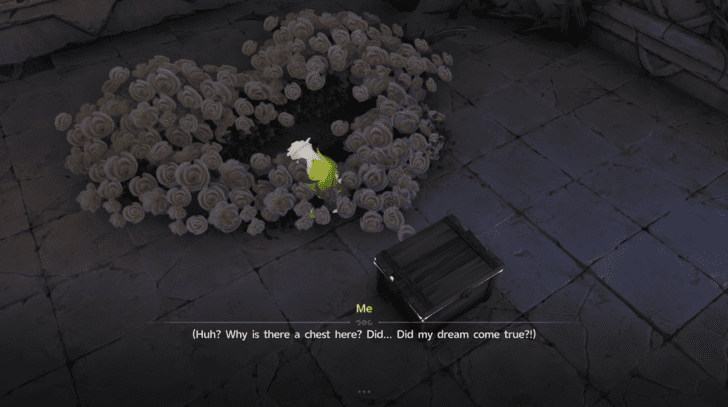 Coordinates: 0489, 0733 How to Get: Found inside a room sealed by vines on the left side of the ruins in the southeast side of Rosetower Woods. To enter the room, burn the vines then twine with a Budsquire and speak with the Budsquire taking a nap on the heart shaped flower arrangement. Take a nap with the Budsquire and you will get the chest. |
|
Rosetower Woods Chest 49 |
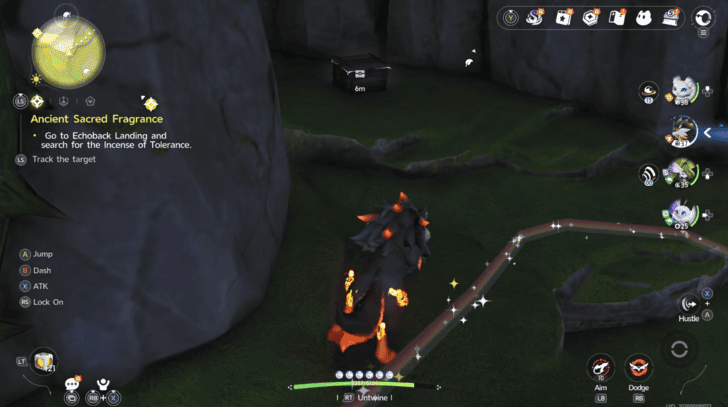 Coordinates: 0219, 0998 How to Get: Found behind a waterfall surrounded by thorns on the northern side of Rosetower Woods. |
|
Rosetower Woods Chest 50 |
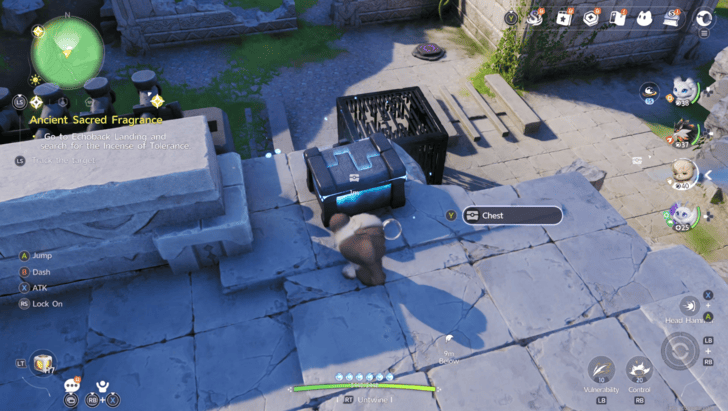 Coordinates: 0231, 0827 How to Get: Found on the ruins in the southern side of Rosetower Woods |
|
Rosetower Woods Chest 51 |
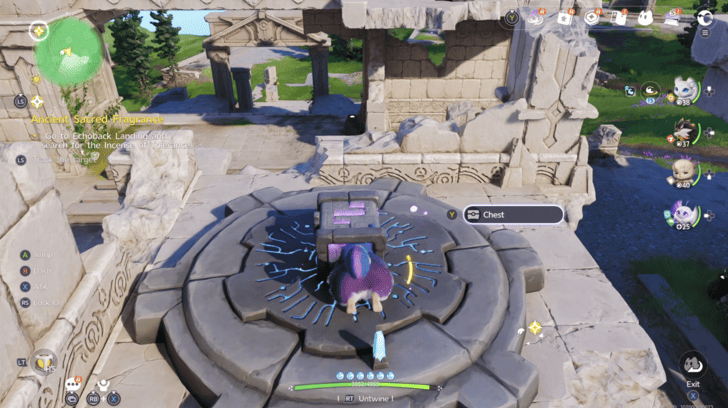 Coordinates: 0242, 0833 How to Get: Found inside a forcefield in the ruins in the southern side of Rosetower Woods, Push the metal cage towards the button on the ground to free the chest. |
|
Rosetower Woods Chest 52 |
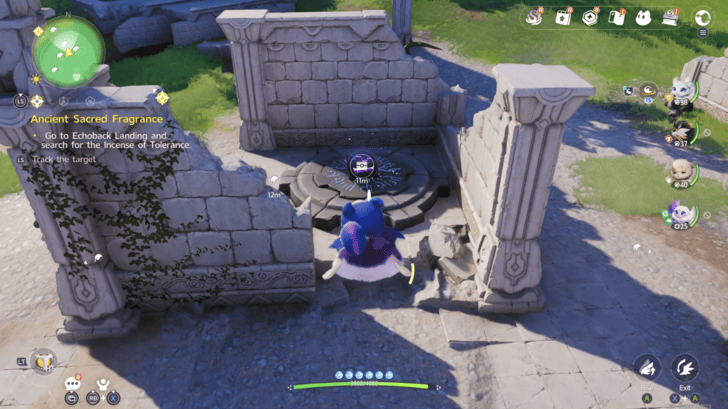 Coordinates: 0248, 0869 How to Get: Found inside a forcefield on the northern part of the ruins in the southern side of Rosetower Woods. From the higher level across the forcefield, push the metal cage towards the button to free the chest. |
|
Rosetower Woods Chest 53 |
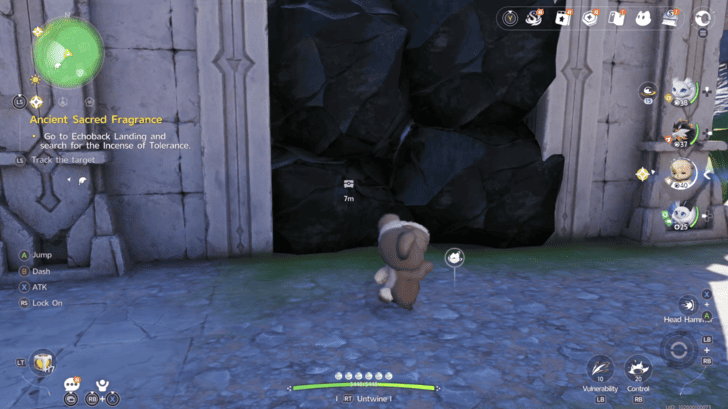 Coordinates: 0245, 0852 How to Get: Found inside a room blocked by rocks in the ruins in the southern side of Rosetower Woods. Smash the rocks to get the chest. |
|
Rosetower Woods Chest 54 |
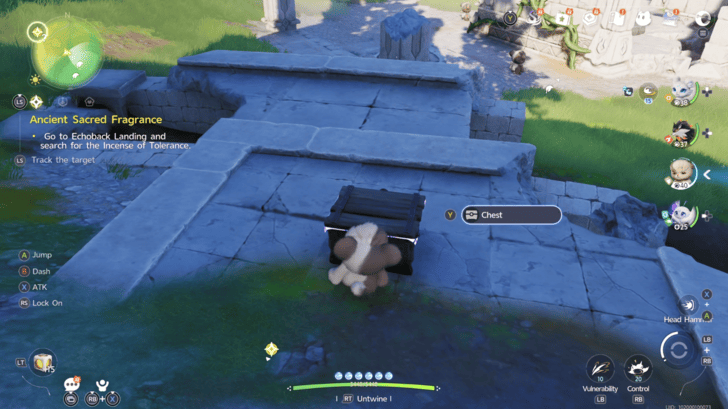 Coordinates: 0230, 0888 How to Get: Found near the ruins in the southern side of Rosetower Woods. |
|
Rosetower Woods Chest 55 |
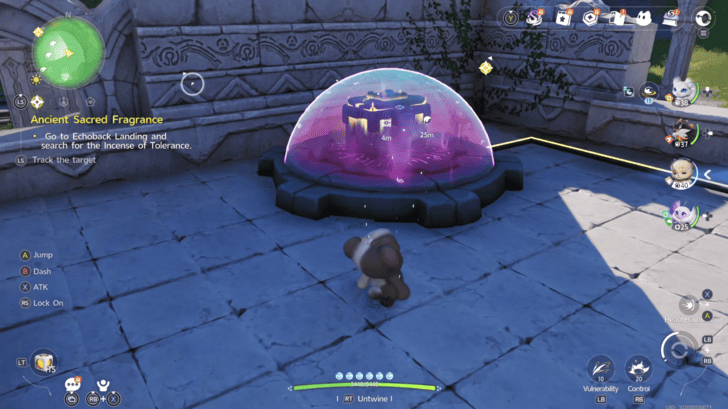 Coordinates: 0269, 0859 How to Get: Found inside a forcefield on a roof on the northeast side of the ruins on the southern side of Rosetower Woods. From the room below, smash the metal cage to make the boxes fall and free the chest. |
|
Rosetower Woods Chest 56 |
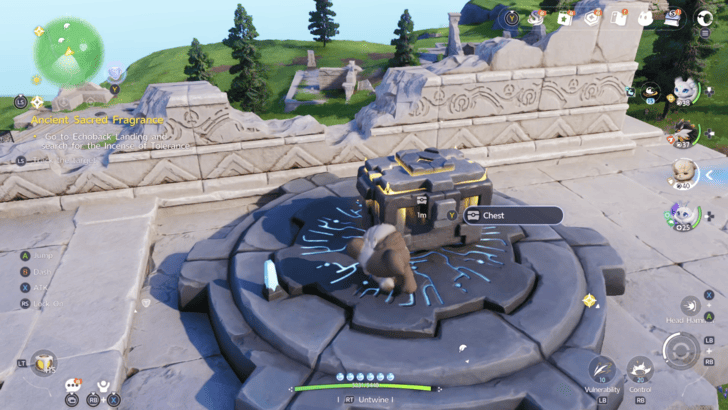 Coordinates: 0245, 0815 How to Get: Found inside a forcefield on the southwest side of the ruins on the southern side of Rosetower Woods. Push a metal cage towrds the button to free the chest, |
|
Rosetower Woods Chest 57 |
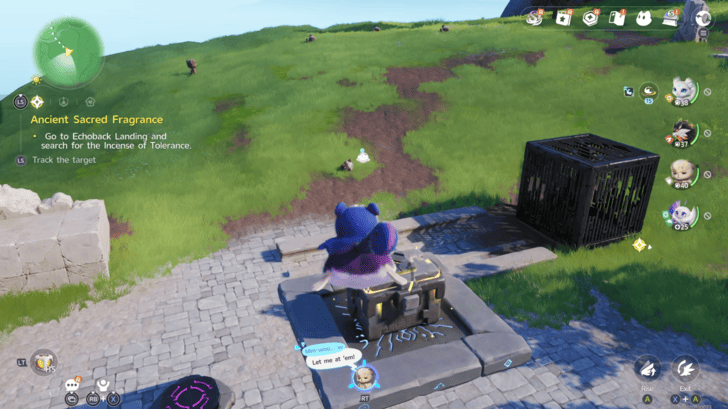 Coordinates: 0285, 0745 How to Get: Found on a floating platform on the southern side of Rosetower Woods. |
|
Rosetower Woods Chest 58 |
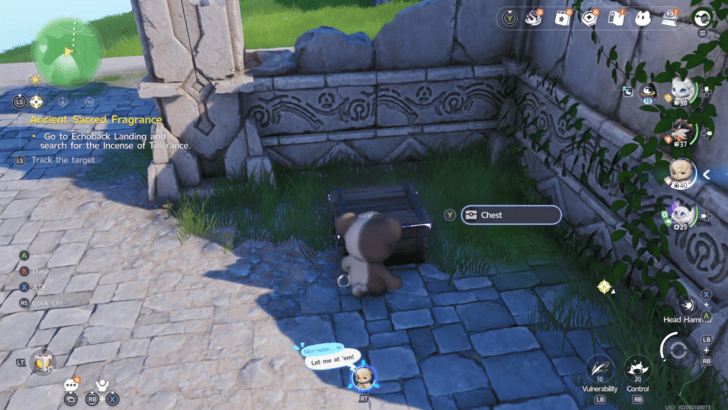 Coordinates: 0221, 0739 How to Get: Found near a metal cage at the corner of some ruins on the southern side of Rosetower Woods. |
|
Rosetower Woods Chest 59 |
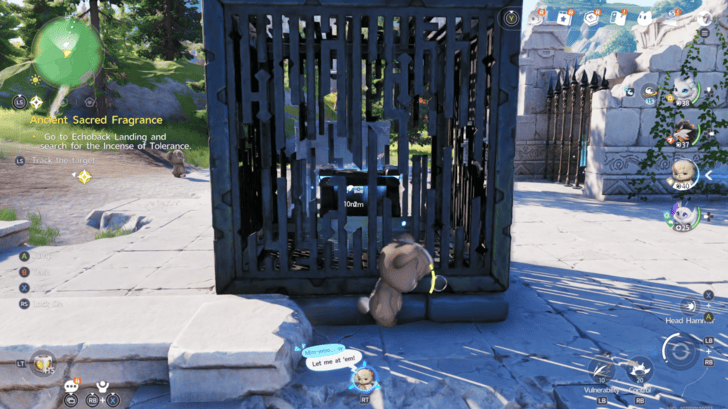 Coordinates: 0186, 0693 How to Get: Found inside a metal cage in the southwest part of Rosetower Woods. Smash the cage to get the chest. |
|
Rosetower Woods Chest 60 |
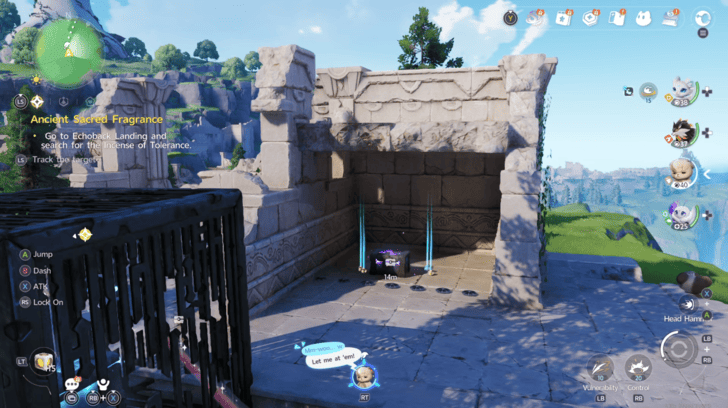 Coordinates: 0191, 0706 How to Get: Found behind a gate in the southwest part of Rosetower Woods. Push the nearby metal cage towards the button to open the gate and get the chest. |
|
Rosetower Woods Chest 61 |
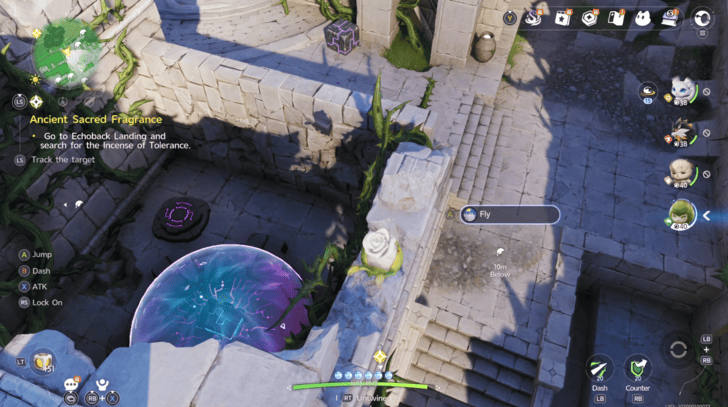 Coordinates: 0509, 0793 How to Get: Found inside a forcefield in a hidden room near the entrance to the ruins on the southeast side of Rosetower Woods. First, break down the wall of the room, then drag the box outside into the room and drop it on the button to free the chest. |
|
Rosetower Woods Chest 62 |
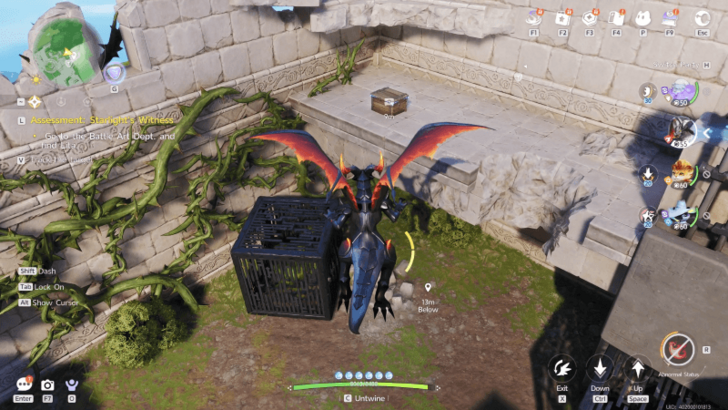 Coordinates: 0562, 0801 How to Get: Found on the upper level of the right side of the ruins on the southeast side of Rosetower Woods. |
|
Rosetower Woods Chest 63 |
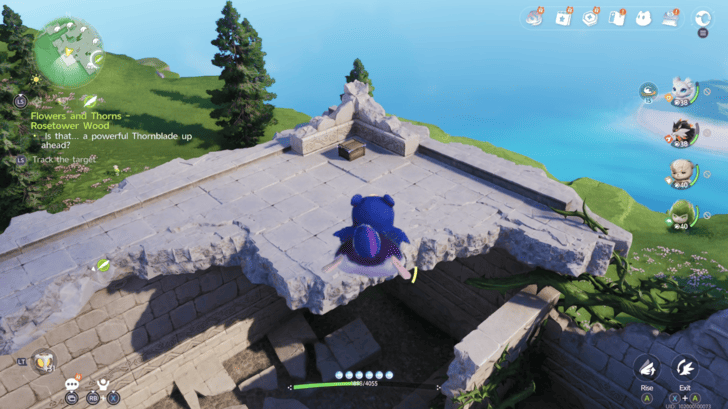 Coordinates: 0504, 0704 How to Get: Found on the bottom left corner of the ruins in the southeast side of Rosetower Woods. |
|
Rosetower Woods Chest 64 |
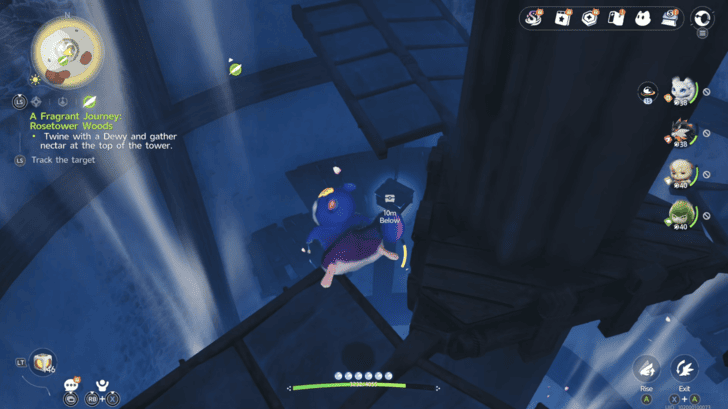 Coordinates: 0368, 1071 How to Get: Found hanging from a blade of the large fan inside the Whiterose Tower in Rosetower Woods. Fly up to the chest and get it. |
|
Rosetower Woods Chest 65 |
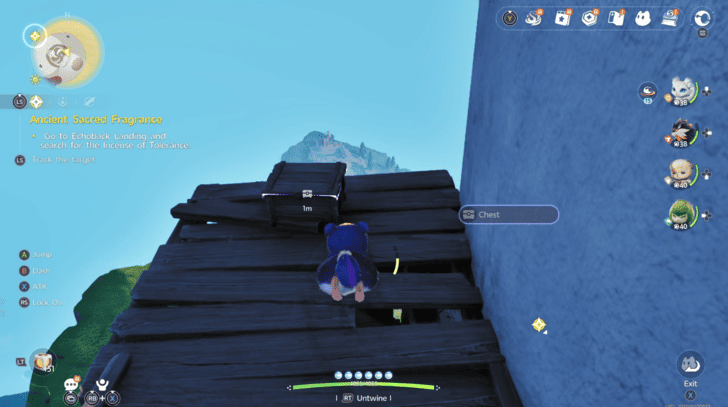 Coordinates: 0397, 1054 How to Get: Found on the right side of the Whiterose Tower in Rosetower Woods. From the very top of the tower, Fly up and toward the right side of the tower to find the chest on the wooden walkway. |
|
Rosetower Woods Chest 66 |
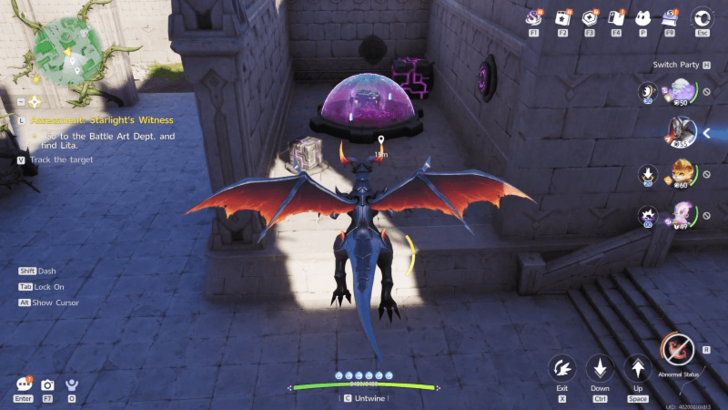 Coordinates: 0538, 0748 How to Get: Found in a forcefield in the center of the ruins on the southeast side of Rosetower Woods. The forcefield will go down if all 5 buttons in the room are being pressed at the same time. Gather all the chests you can find scattered throughout the ruins and place them against the buttons to free the chest. |
|
Rosetower Woods Chest 67 |
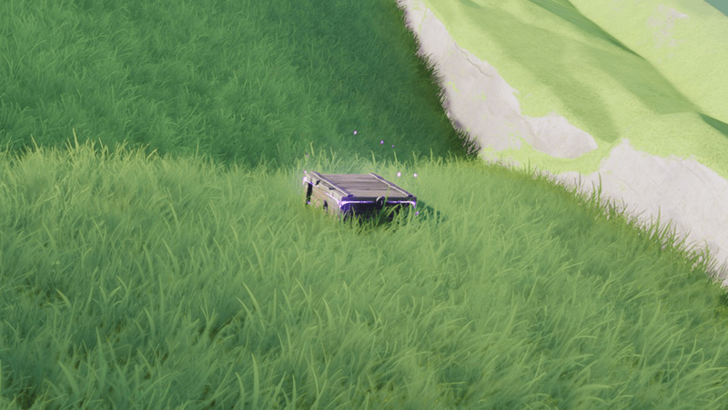 Coordinates: 0322, 1137 How to Get: Found at the top of the hill where the tower covered in thorns is located. |
|
Rosetower Woods Chest 68 |
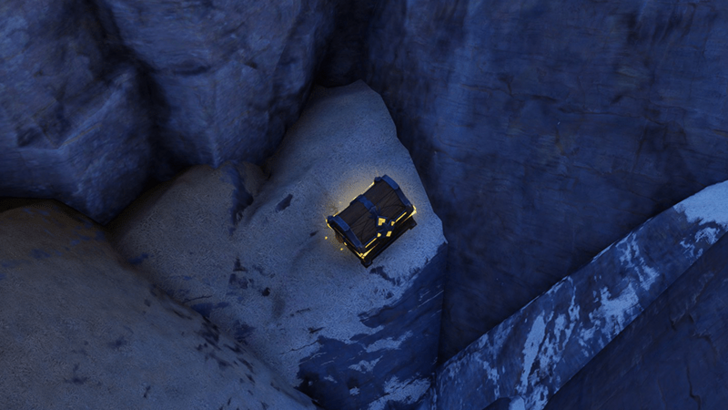 Coordinates: 0265, 1194 How to Get: Found in a secluded open spot in the middle of a large rock formation along the slope of the mountainous area. |
|
Rosetower Woods Chest 69 |
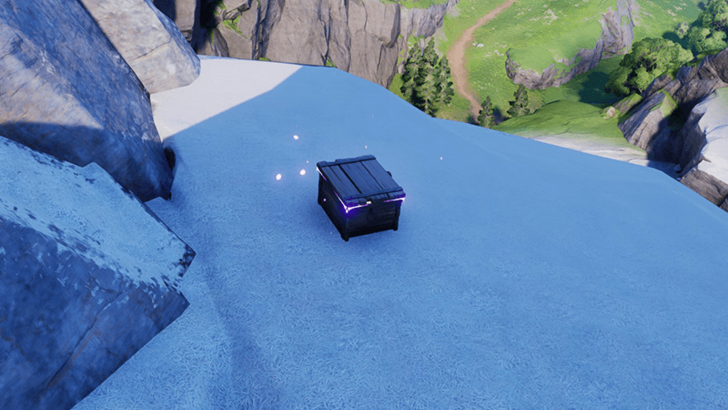 Coordinates: 0170, 1132 How to Get: Found in the snowy mountainous area of the Rosetower Woods. Placed near a ledge. |
|
Rosetower Woods Chest 70 |
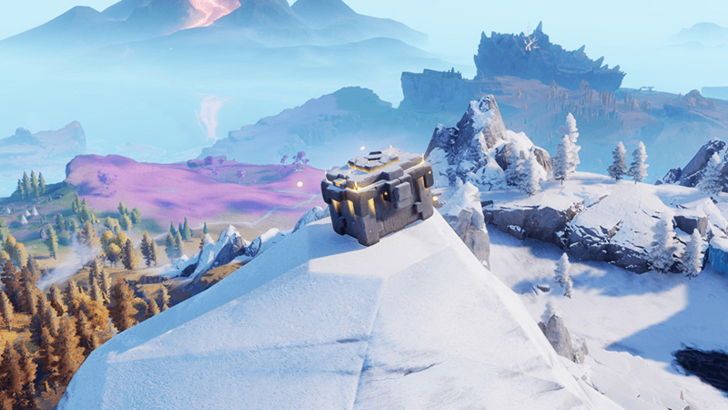 Coordinates: 0112, 1153 How to Get: Found on top of a rock formation at its peak. |
|
Rosetower Woods Chest 71 |
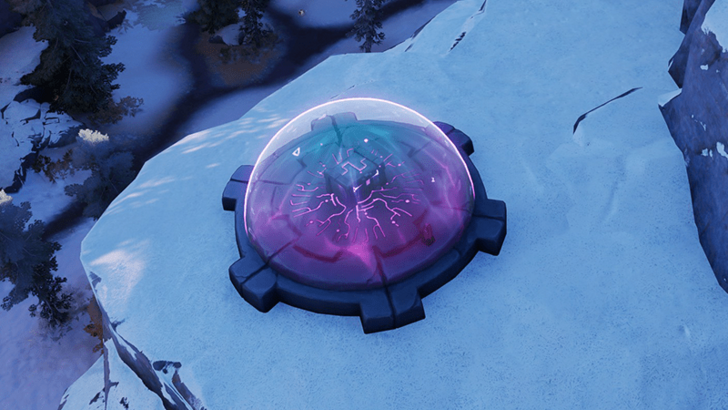 Coordinates: 0087, 1061 How to Get: The chest is protected by a barrier that can be deactivated by hitting a mechanism with an Electric Aniimo skill located right next to the chest. The mechanism will be encased in ice, so use a Fire Aniimo skill to thaw it out. |
|
Rosetower Woods Chest 72 |
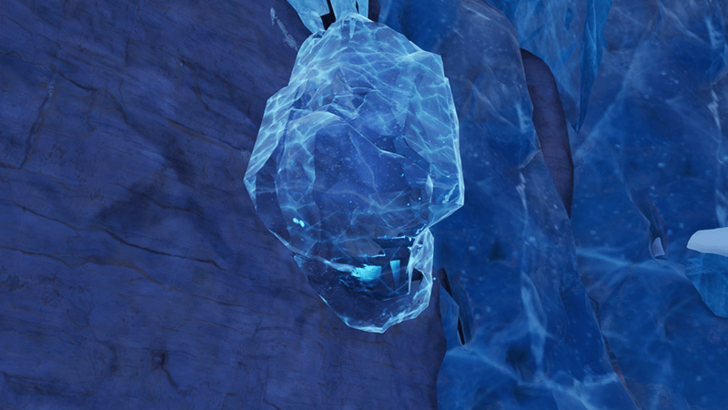 Coordinates: 0045, 1041 How to Get: The chest is encased in ice on the wall. |
|
Rosetower Woods Chest 73 |
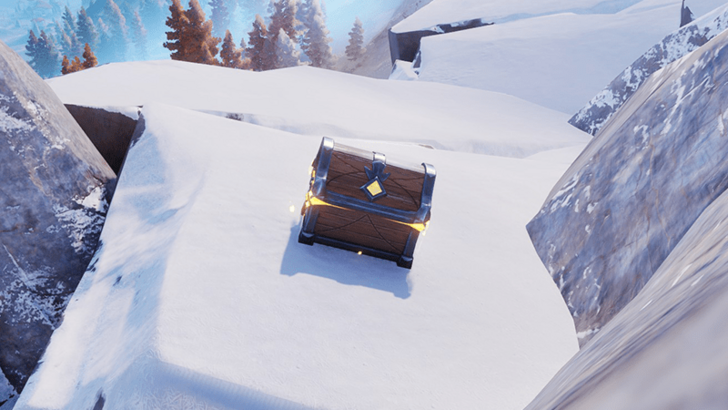 Coordinates: -0030, 1012 How to Get: Found on the side of the mountain. |
|
Rosetower Woods Chest 74 |
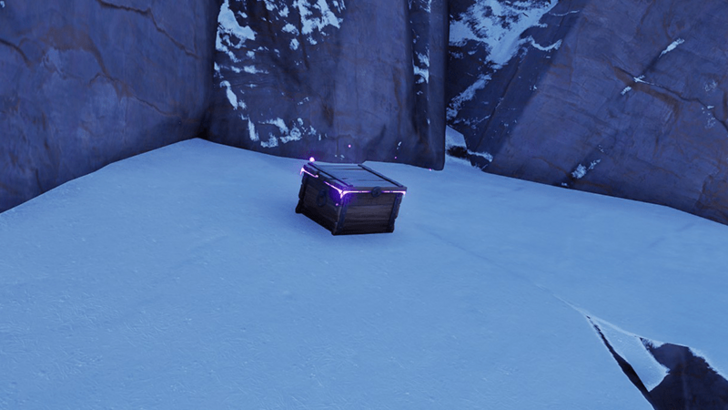 Coordinates: -0029, 1149 How to Get: Found near a ledge. |
|
Rosetower Woods Chest 75 |
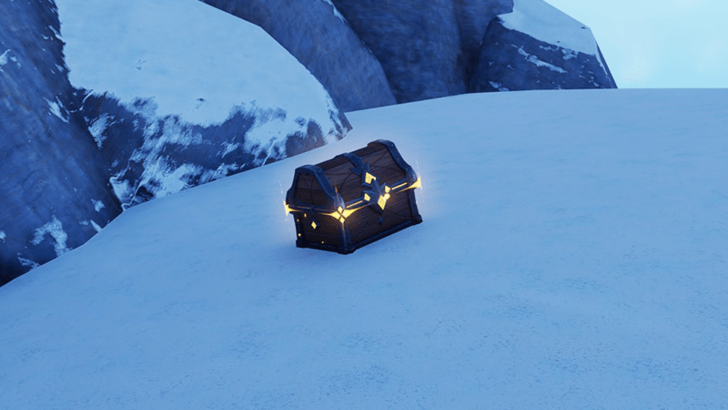 Coordinates: 0106, 1303 How to Get: Found on an open area by the slope of the mountain. |
|
Rosetower Woods Chest 76 |
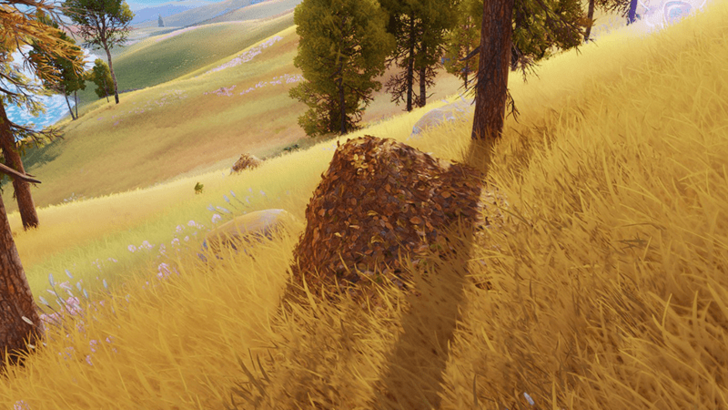 Coordinates: 0036, 0853 How to Get: Buried under a pile of leaves in an open field. |
|
Rosetower Woods Chest 77 |
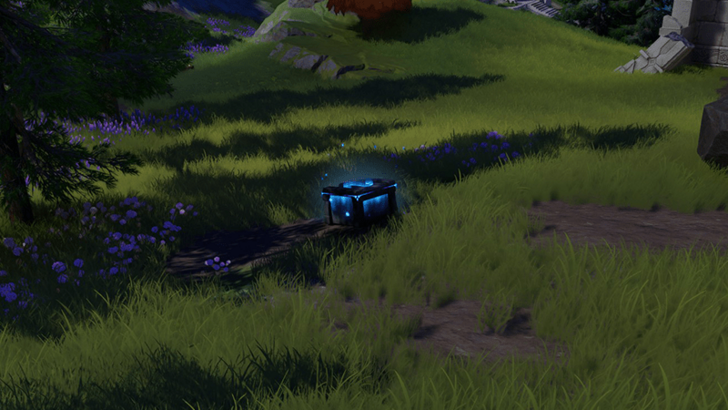 Coordinates: 0161, 0749 How to Get: Found in the open near a small grove of trees. |
|
Rosetower Woods Chest 78 |
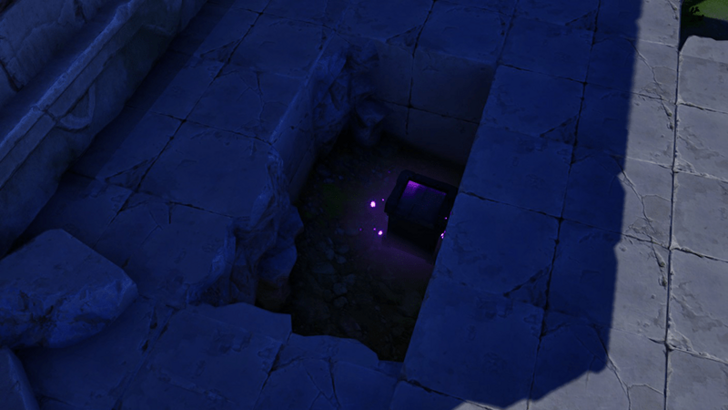 Coordinates: 0173, 0818 How to Get: Found buried underneath stones that can be broken with an Aniimo skill that can Break. |
|
Rosetower Woods Chest 79 |
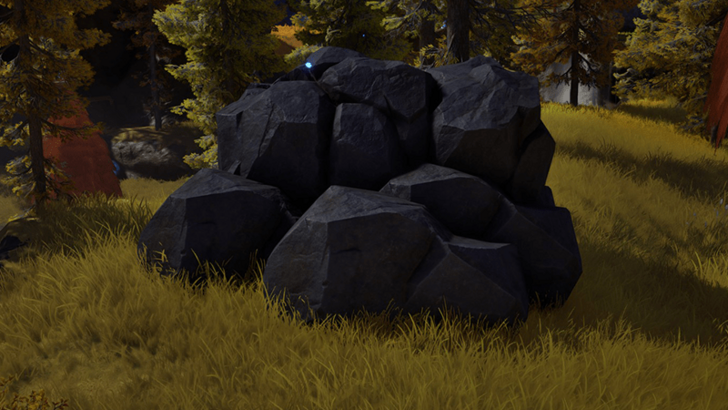 Coordinates: 0169, 0865 How to Get: Found buried underneath stones that can be broken with an Aniimo skill that can Break. |
|
Rosetower Woods Chest 80 |
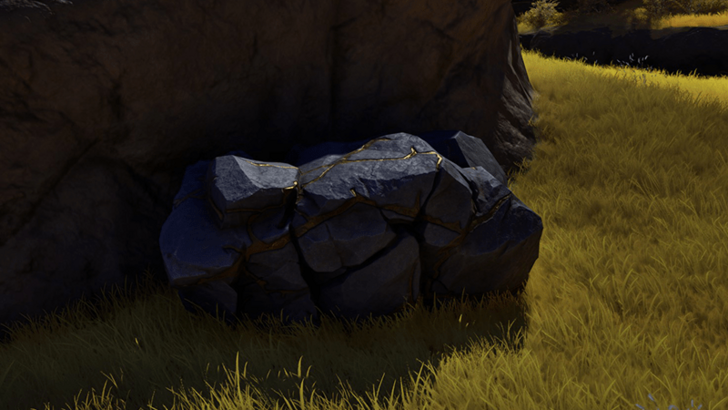 Coordinates: 0197, 0890 How to Get: Found buried underneath stones that can be broken with an Aniimo skill that can Break. |
|
Rosetower Woods Chest 81 |
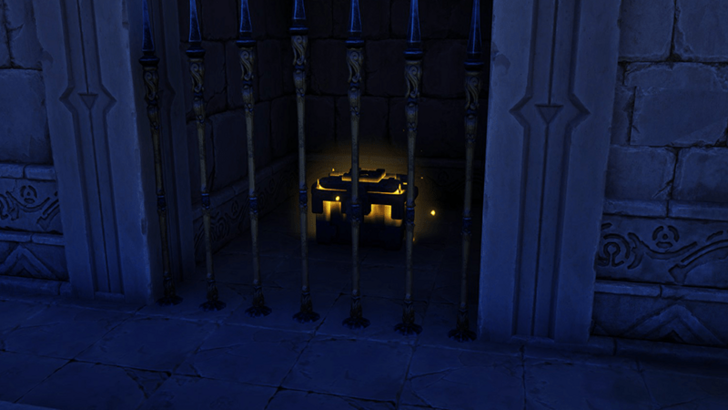 Coordinates: 0334, 0862 How to Get: Found behind iron bars that can be put down by activating a nearby mechanism with Electric Aniimo skills. |
|
Rosetower Woods Chest 82 |
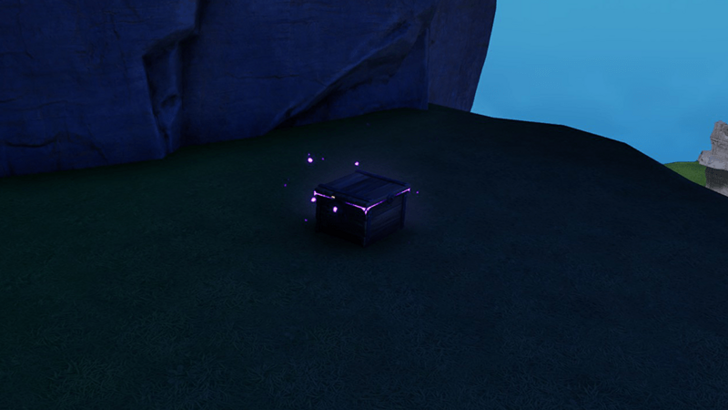 Coordinates: 0426, 0863 How to Get: Found along a cliffwall at an open spot near a ledge. |
|
Rosetower Woods Chest 83 |
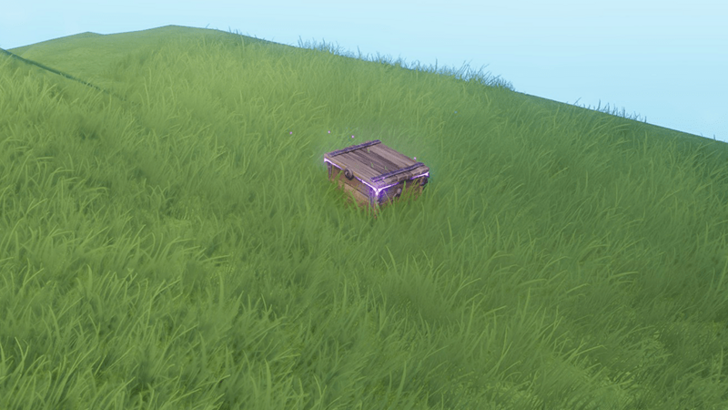 Coordinates: 0476, 0920 How to Get: Found in the open in the near a ledge. |
|
Rosetower Woods Chest 84 |
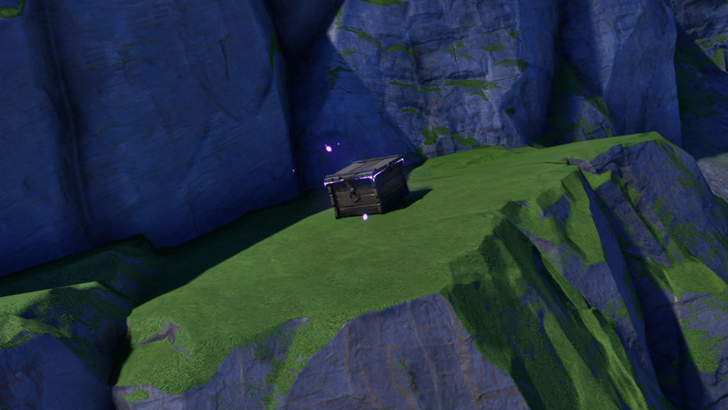 Coordinates: 0418, 0952 How to Get: Placed near a small ledge. |
|
Rosetower Woods Chest 85 |
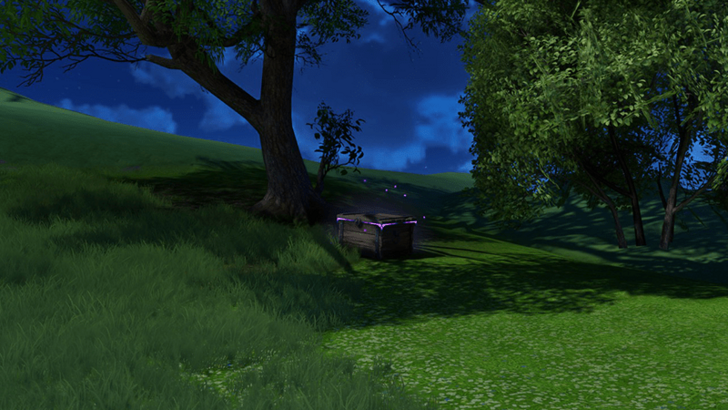 Coordinates: 0441, 0975 How to Get: Placed next to a tree. |
|
Rosetower Woods Chest 86 |
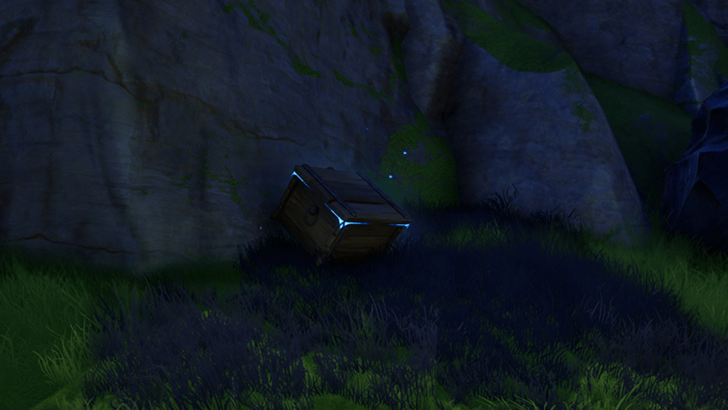 Coordinates: 0259, 1052 How to Get: Placed underneath a breakable stone. |
|
Rosetower Woods Chest 87 |
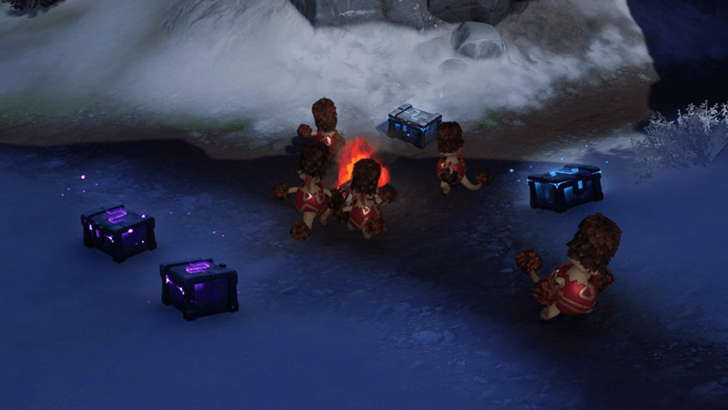 Coordinates: 0210, 1094 How to Get: Find four hiding Highland Pomeggs along the snowy path, and they will all meet up at the foot of the mountain to reward you with a chest. |
|
Rosetower Woods Chest 88 |
Coordinates: 0212, 1093 How to Get: Find four hiding Highland Pomeggs along the snowy path, and they will all meet up at the foot of the mountain to reward you with a chest. |
|
Rosetower Woods Chest 89 |
Coordinates: 0207, 1088 How to Get: Find four hiding Highland Pomeggs along the snowy path, and they will all meet up at the foot of the mountain to reward you with a chest. |
|
Rosetower Woods Chest 90 |
Coordinates: 0211, 1086 How to Get: Find four hiding Highland Pomeggs along the snowy path, and they will all meet up at the foot of the mountain to reward you with a chest. |
|
Rosetower Woods Chest 91 |
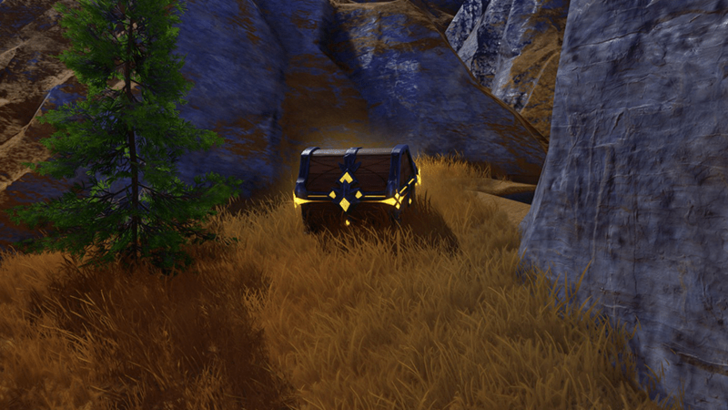 Coordinates: 0185, 1027 How to Get: Found in a secluded spot surrounded by larger stone formations. |
All Rosetower Woods Lumin Ambers
| Collectibles | Details |
|---|---|
|
Into the Valley |
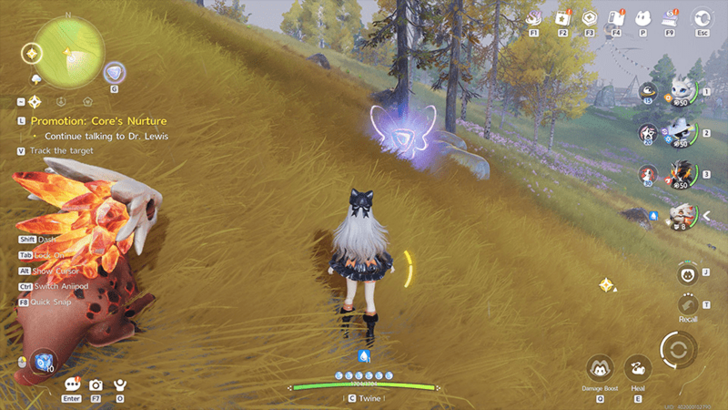 Type: Lumin Collection Coordinates: 0019, 0869 How to Get: Located in the open fields northeast of the western fast travel point. Collect the Lumin energies within a time limit. |
|
Among the Ruins |
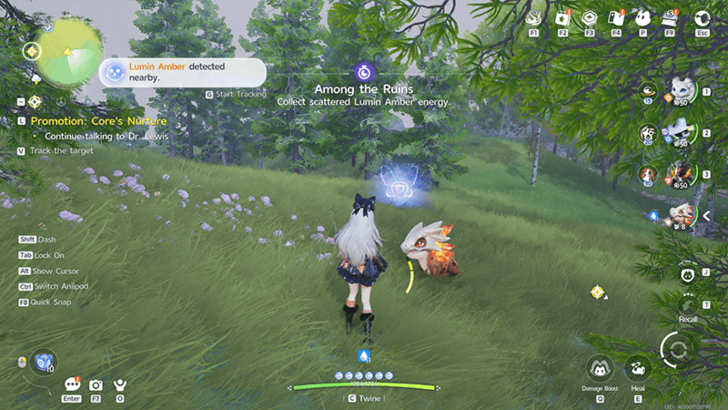 Type: Lumin Collection Coordinates: 0101, 0773 How to Get: Located in the open fields southeast of the western fast travel point. Collect the Lumin energies within a time limit. |
|
Rosetower Woods Lumin Amber 1 |
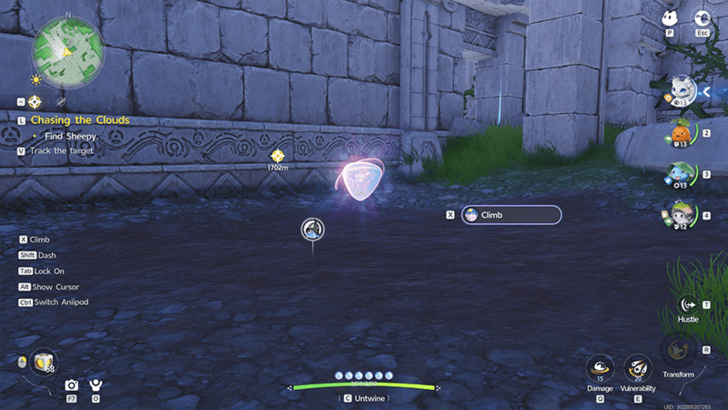 Type: Lumin Amber Coordinates: 0524, 0771 How to Get: Break a cracked floor with any Aniimo skill that can break down structures, and a Lumin Amber will be revealed underneath. |
|
Rosetower Woods Lumin Amber 2 |
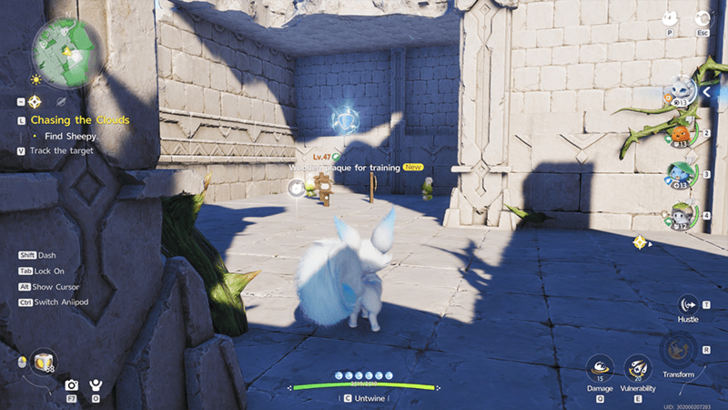 Type: Lumin Amber Coordinates: 0571, 0752 How to Get: Twine with a Towerwood Budspire and hit one of the wooden training dummies to acquire the Lumin Amber. |
|
Rosetower Woods Lumin Amber 5 |
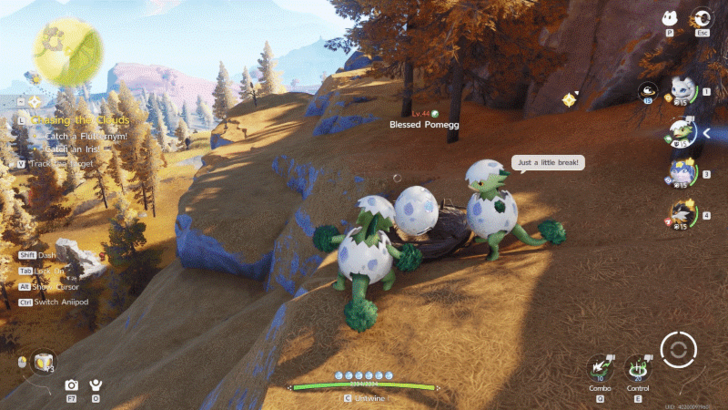 Type: Lumin Amber Coordinates: 0135, 0974 How to Get: Capture the Blessed Pomegg to get the Lumin Amber. |
|
Rosetower Woods Lumin Amber 6 |
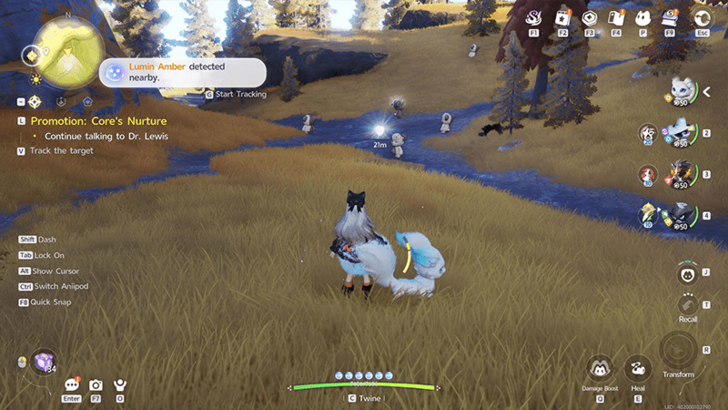 Type: Lumin Amber Coordinates: 0167, 0962 How to Get: Defeat the raging Cubbo protecting the Lumin Amber to acquire it. |
|
Northern Woodland of the Flower Sea |
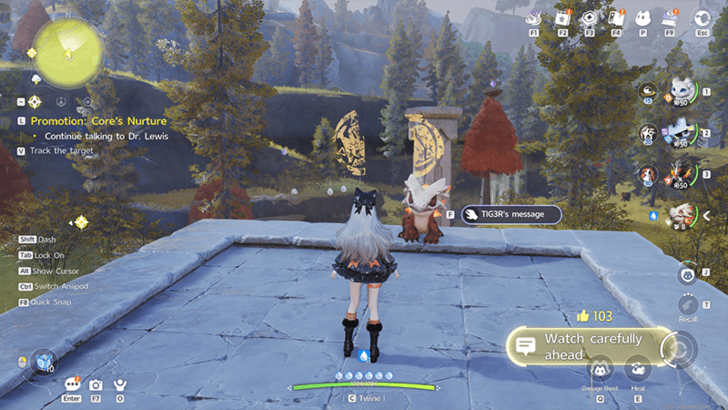 Type: Lumin Marking Coordinates: 0132, 0834 How to Get: Line up your view of the markings on the pillar and the stone wall in the far distance. |
|
Frostlit Trace |
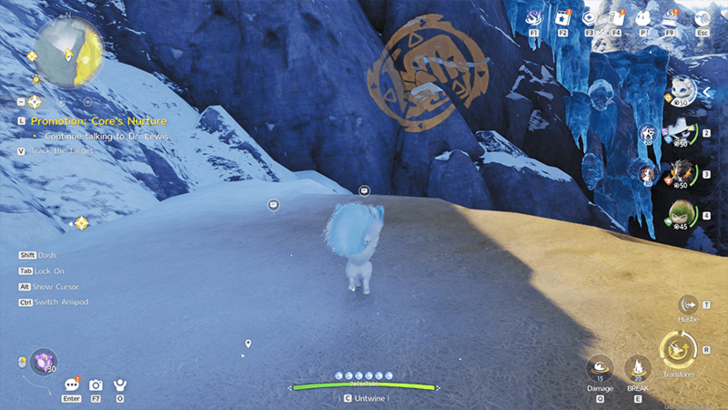 Type: Lumin Marking Coordinates: 0034, 0988 How to Get: Face the mountains and angle your view properly to line up the markings. |
|
Rosetower Woods Lumin Amber 7 |
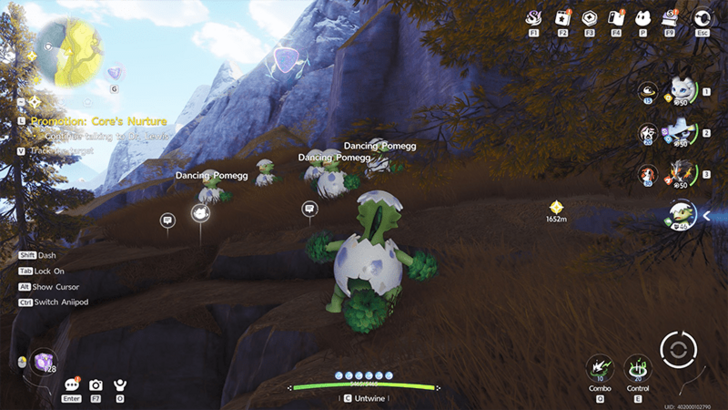 Type: Lumin Amber Coordinates: 0069, 0975 How to Get: Twine as a Pomegg and dance along the other dancing Pomeggs to acquire the Lumin Amber. |
|
Rosetower Woods Lumin Amber 8 |
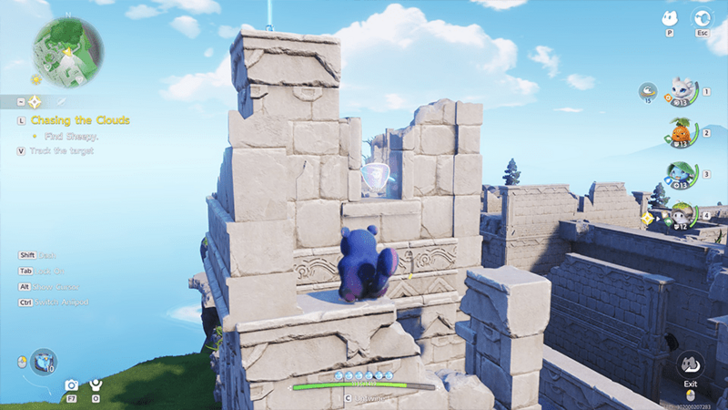 Type: Lumin Amber Coordinates: 0555, 0789 How to Get: The Lumin Amber is placed on top of a ruined tower. |
|
Rosetower Woods Lumin Amber 9 |
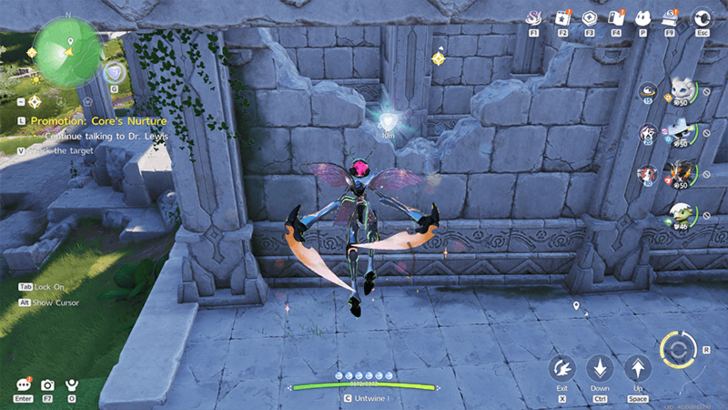 Type: Lumin Amber Coordinates: 0265, 0822 How to Get: Inside an enclosed room in some ruins that is accessible via a large crack on a wall. |
|
Rosetower Woods Lumin Amber 10 |
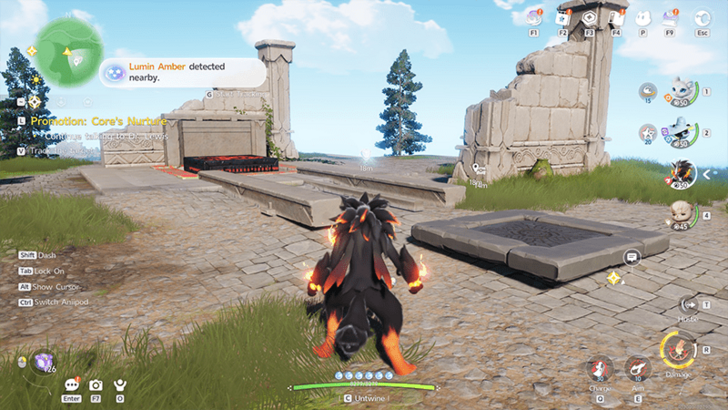 Type: Lumin Amber Coordinates: 0228, 0739 How to Get: Twine with an Aniimo with a strong breaking/striking attack to push a nearby cage onto a rail and into a hole. This spawns the Lumin Amber nearby. |
|
Rosetower Woods Lumin Amber 11 |
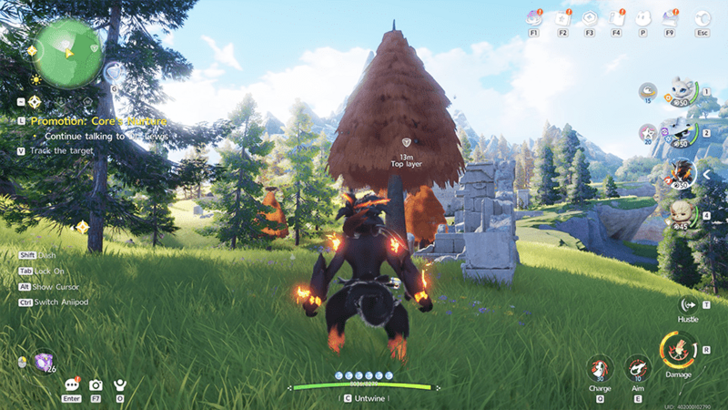 Type: Lumin Amber Coordinates: 0185, 0744 How to Get: The Lumin Amber is stuck inside a crate within the leaves of a tree. Hit the tree hard enough with an Aniimo, and it will spring open and drop a crate containing the Lumin AMBER. |
|
Snowy Mountainside |
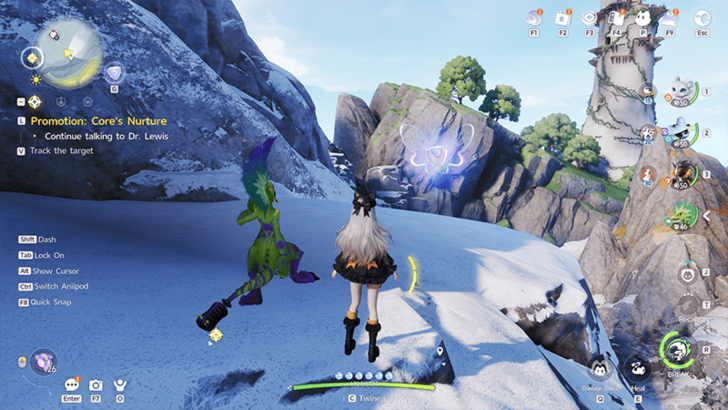 Type: Lumin Collection Coordinates: 0097, 1077 How to Get: This Lumin Collection begins at the side of the mountain where you glide across the chasm collecting Lumin energy within a time limit. |
|
Snowy Mountain Run |
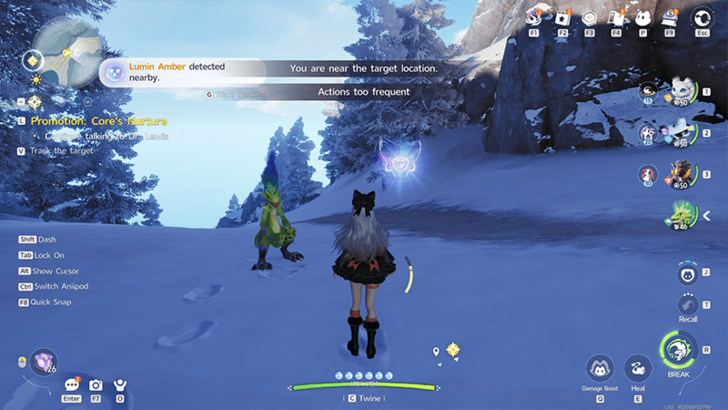 Type: Lumin Collection Coordinates: 0076, 1202 How to Get: This Lumin Collection is along the mountain path, where you collect Lumin energy within a time limit. |
|
Rosetower Woods Lumin Amber 12 |
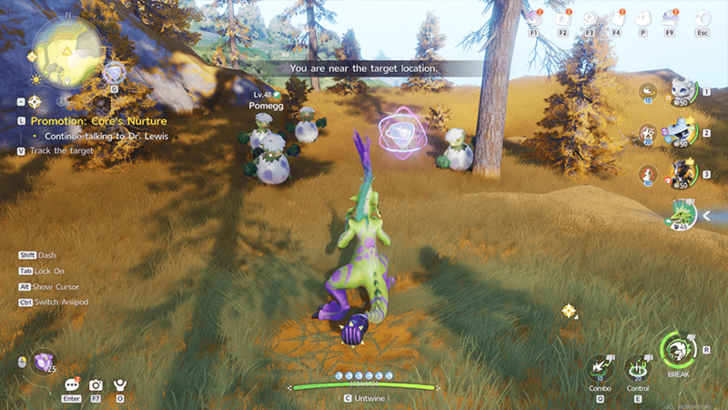 Type: Lumin Amber Coordinates: 0140, 1022 How to Get: Defeat the Pomegg surrounding the Lumin Amber to acquire it. |
|
Rosetower Woods Lumin Amber 13 |
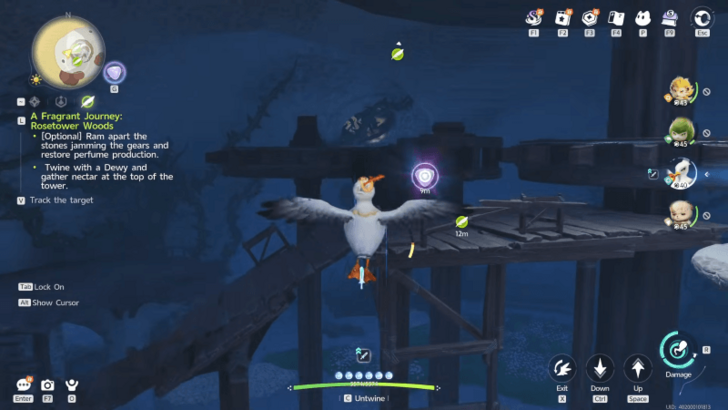 Type: Lumin Amber Coordinates: 0375, 1054 How to Get: Found in a large perfumery north of the Whiterose Tower Bloom. This Lumin Amber is accessible after completing the Flowers and Thorns - Rosetower Wood sidequest, then starting A Fragrant Journey: Rosetower Woods. |
All Rosetower Woods Pathfinder Challenges
| Collectibles | Details |
|---|---|
|
Martha |
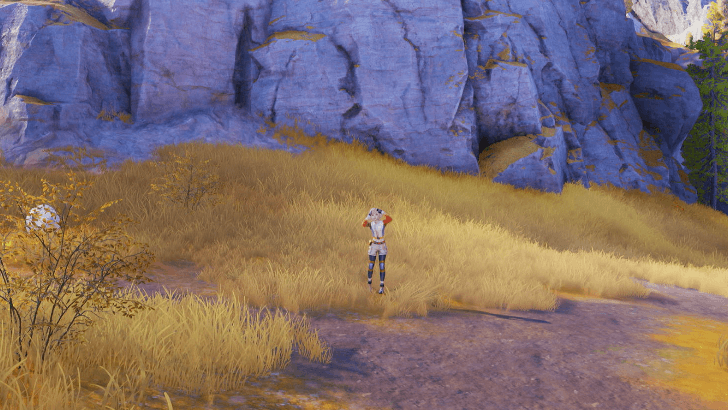 Coordinates: 0100, 0915 How to Get: Martha is found along an intersecting road located northeast of the Rosetower Woods Bloom. |
|
Daisy |
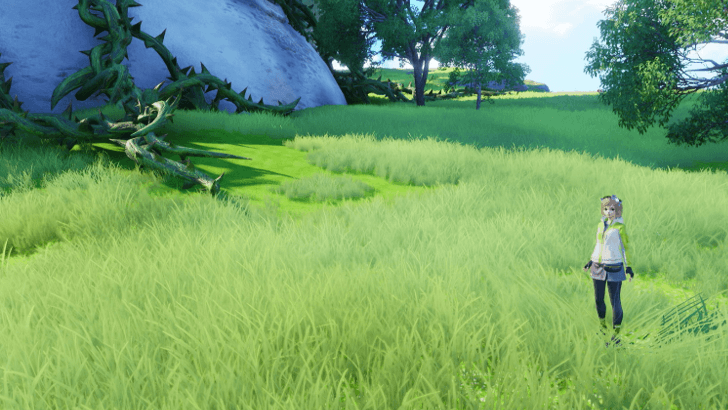 Coordinates: 0419, 0996 How to Get: Daisy is located northeast of the Whiterose Tower Bloom, next tower wrapped in thorns. |
|
Rex |
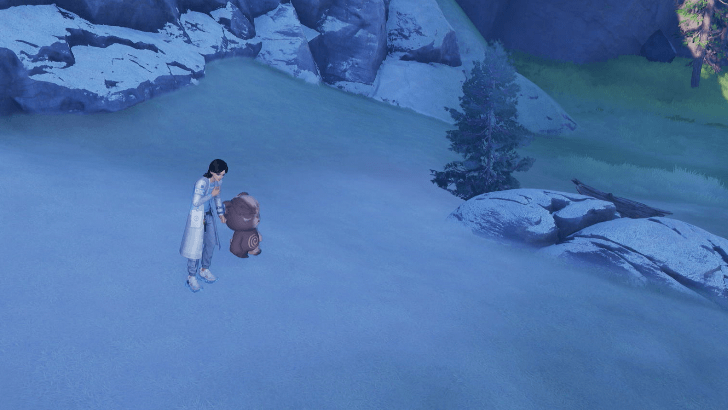 Coordinates: 0351, 0795 How to Get: Rex is found along the road near the huge maze area that is found southwest of the Whiterose Tower Bloom. He is accompanied by a Cloudmist Turbo. |
|
Somna |
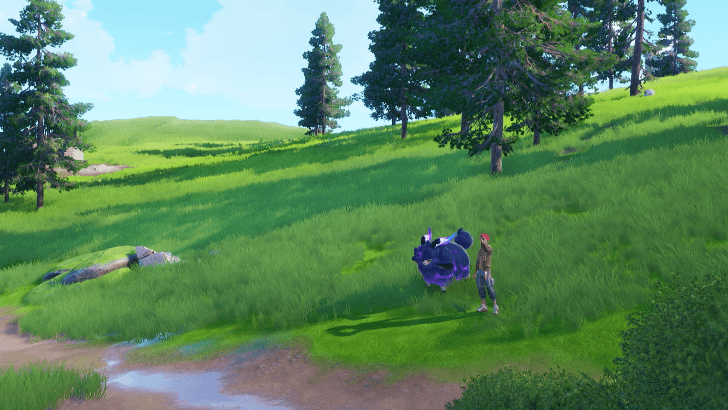 Coordinates: 0227, 1101 How to Get: Somna is located along the road leading to the Alpha Grizbo's Cave in Rosetower Woods. She is accompanied by an Insomniac Cubbo. |
|
Aster |
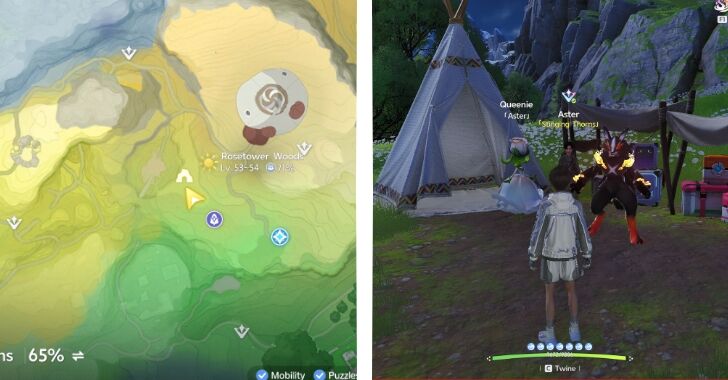 Coordinates: 0299, 0938 How to Get: You can find Aster in his camp at Rosetower Woods, near the Bloom or Whiterose Tower fast travel point. You need to defeat Aster during the Promotion: Core's Nurture quest first to unlock his Elite Pathfinder challenge. |
All Pathfinder Challenge Locations
All Rosetower Woods Dr. Glass's Trials
| Collectibles | Details |
|---|---|
|
Dr. Glass's Trial - Budsquire |
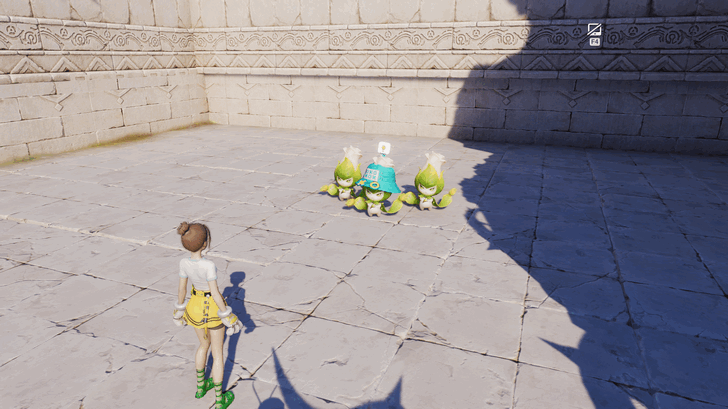 Coordinates: 0539, 0699 How to Get: This trial requires you to twine with a Budsquire. Use its Thorny Defense skill to perfect counter the incoming attacks. It's recommended to gain distance from the enemies after perfect countering them to finish the cooldown of your skill and make it ready for the next attack. |
All Rosetower Woods Caves
| Collectibles | Details |
|---|---|
|
Cave 11 |
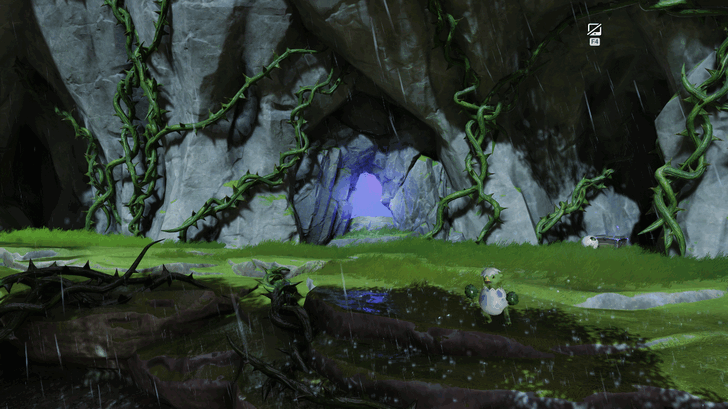 Coordinates: 0287, 0966 How to Get: This cave includes Grizbos inside. |
All Rosetower Woods Eggs
| Collectibles | Details |
|---|---|
|
Alpha Egg |
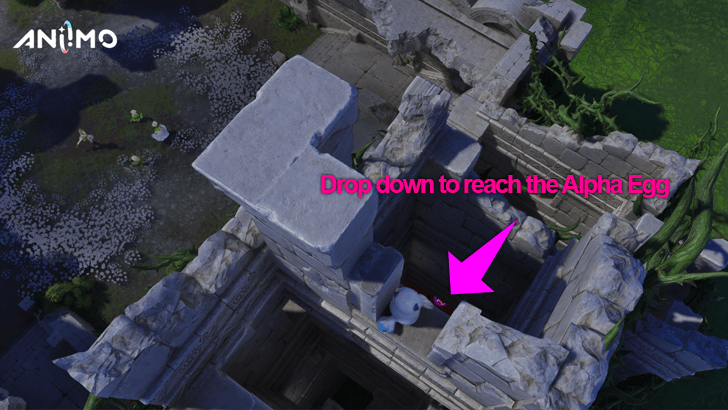 Coordinates: 0578, 0672 How to Get: Found in the southeast corner of the ruins. Defeat First Lethal Thorn to reach the area. |
|
Incredible Egg |
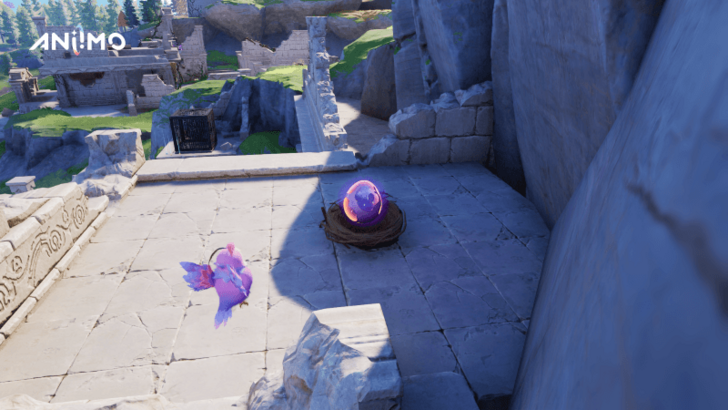 Coordinates: 0349, 0858 How to Get: This Incredible Egg can be found on ruins by the cliff, southwest of the Whiterose Tower Bloom. |
|
Incredible Egg |
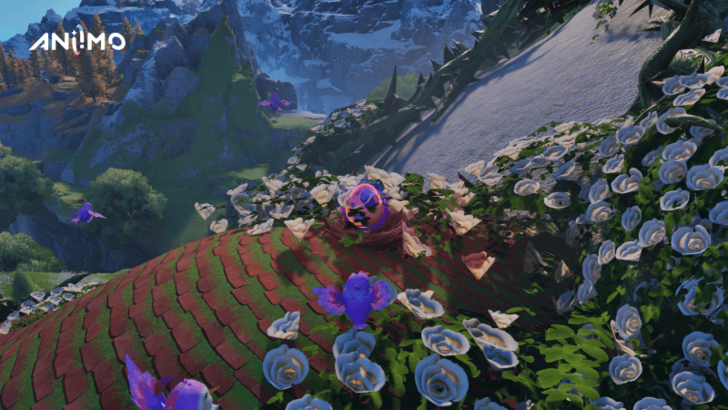 Coordinates: 0381, 1015 How to Get: This Incredible Egg is located on one of the large perfumery's smaller roofs, north of the Whiterose Tower Bloom. |
|
Incredible Egg |
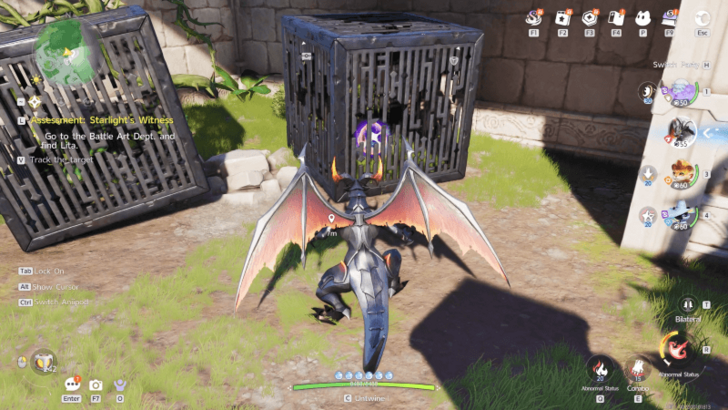 Coordinates: 0559, 0801 How to Get: An Incredible Egg can be seen inside a metal cage, northeast of the ruins. Break the cage to get the egg. |
Aniimo Related Guides

Points of Interest
 Sanctum |
 Lumin Amber |
 Chests |
 Pathfinder Challenges |
 Morphling's Memory |
 Bloom |
| Dr. Glass Trial |
All Cave Locations |
 RV Park Locations |
Egg Locations |
Region Guides
Other Guides
| All Shops and Items Sold | Astra Map and Key Locations |



Author

Rosetower Woods 100% Exploration Guide

Rankings
Gaming News





Popular Games

Genshin Impact Walkthrough & Guides Wiki
Fire Emblem: Fortune's Weave (FEFW) Walkthrough & Guides Wiki
Aniimo Walkthrough & Guides Wiki
Wuthering Waves Walkthrough & Guides Wiki
Dragon's Dogma 2 (DD2) Dark Arisen Walkthrough & Guides Wiki
Umamusume: Pretty Derby Walkthrough & Guides Wiki
Honkai: Star Rail Walkthrough & Guides Wiki
Zenless Zone Zero Walkthrough & Guides Wiki
Pokemon TCG Pocket (PTCGP) Strategies & Guides Wiki
AION 2 Walkthrough & Guides Wiki









Recommended Games
Fire Emblem Heroes (FEH) Walkthrough & Guides Wiki
Where Winds Meet Walkthrough & Guides Wiki
Diablo 4: Lord of Hatred Walkthrough & Guides Wiki
Super Smash Bros. Ultimate Walkthrough & Guides Wiki
Persona 3 Reload Walkthrough & Guides Wiki
The Legend of Zelda: Tears of the Kingdom Walkthrough & Guides Wiki
Elden Ring Walkthrough & Guides Wiki
Pokemon Brilliant Diamond and Shining Pearl (BDSP) Walkthrough & Guides Wiki
Cyberpunk 2077: Ultimate Edition Walkthrough & Guides Wiki
Monster Hunter World Walkthrough & Guides Wiki










All rights reserved
©2025 Pawprint Interactive Entertainment Pte. Ltd.. All rights reserved.
The copyrights of videos of games used in our content and other intellectual property rights belong to the provider of the game.
The contents we provide on this site were created personally by members of the Game8 editorial department.
We refuse the right to reuse or repost content taken without our permission such as data or images to other sites.
How do you even unlock those vines at the cave?