
Blitzwood 100% Exploration Guide
★ Season 1: Part 2 Releases 10/29!
☆ All Season 1 New Aniimo
★ Best Teams | Best Starter | Best DPS
☆ Trending: Lita | Wendell | Wonder Egg
✪ Follow Game8's Aniimo X for news & guides!
Share your thoughts! ➤ Aniimo Player Survey
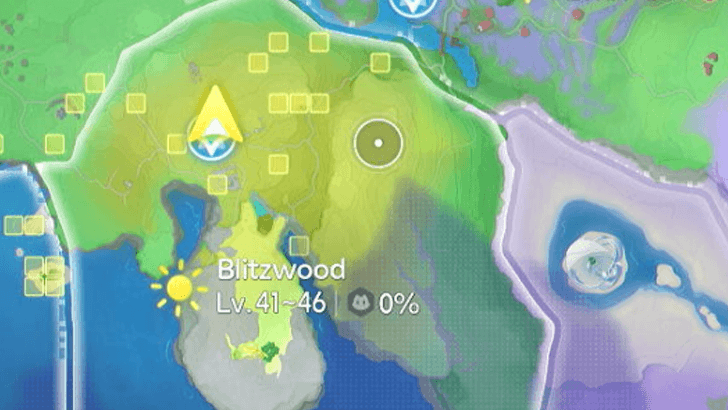
Blitzwood is an area in Breezy Plains in Aniimo. Learn more about the collectibles, including egg locations, and all Aniimo in this area through this guide!
List of Contents
Blitzwood Interactive Map
Blitzwood Points of Interest
| Jump to a Section! | |||||||||||
|---|---|---|---|---|---|---|---|---|---|---|---|
 Aniimos |
 Chests |
 Lumin Ambers |
|||||||||
 Pathfinder Challenges |
 Sanctums |
 Dr Glass's Trials |
|||||||||
 Caves |
 Eggs |
||||||||||
All Blitzwood Aniimo
Notice: Marking Aniimos on the interactive map will not reflect on this table.
| Aniimo | Map Images | |||||||
|---|---|---|---|---|---|---|---|---|
 Bolty Bolty
|
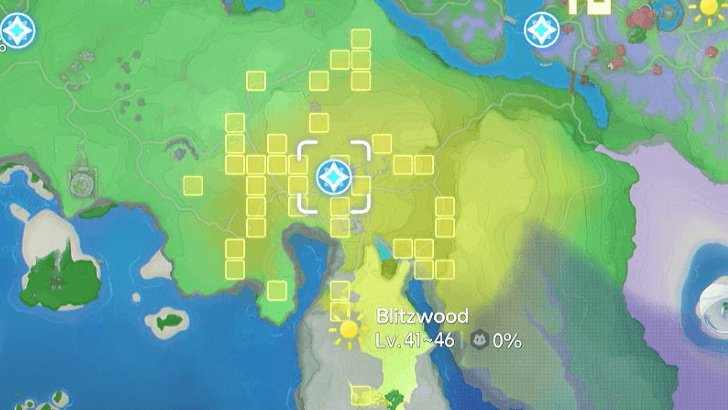 |
|||||||
 Mountain Woods Bolty Mountain Woods Bolty
|
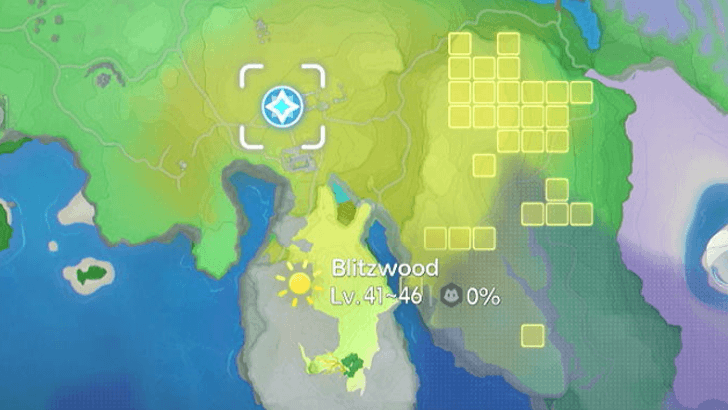 How to Get: Only appears during a rainstorm or thunderstorm. |
|||||||
 Blazen Blazen
|
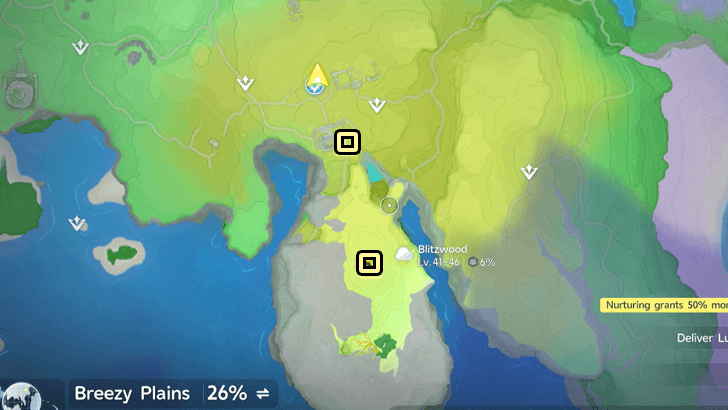 |
|||||||
 Prismana Blazen Prismana Blazen
|
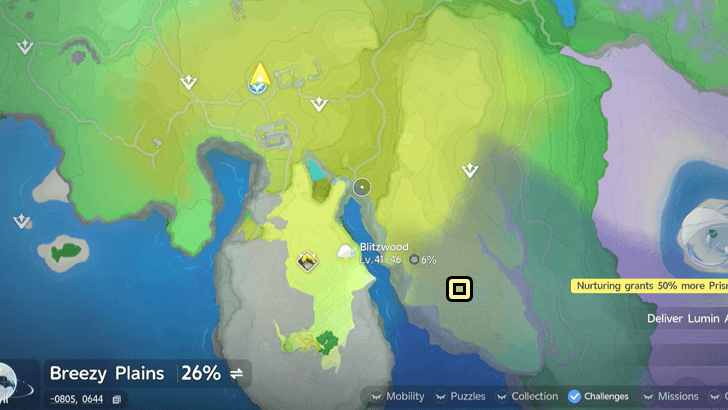 Conditions:

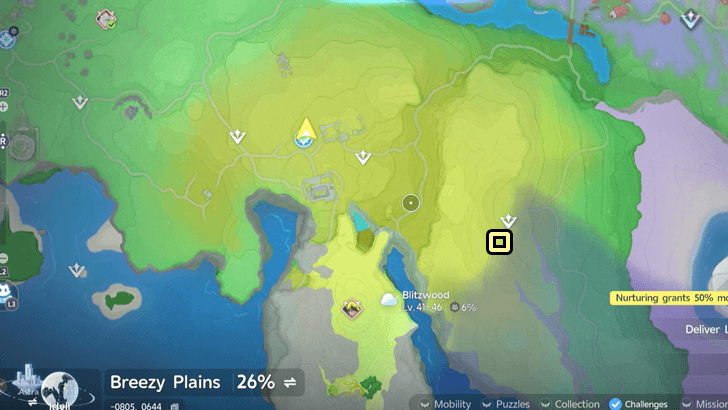
How to Get: Only obtainable during a Prismana flow, at a plateau, east of Blitzwood. |
|||||||
 Flutternym Flutternym
|
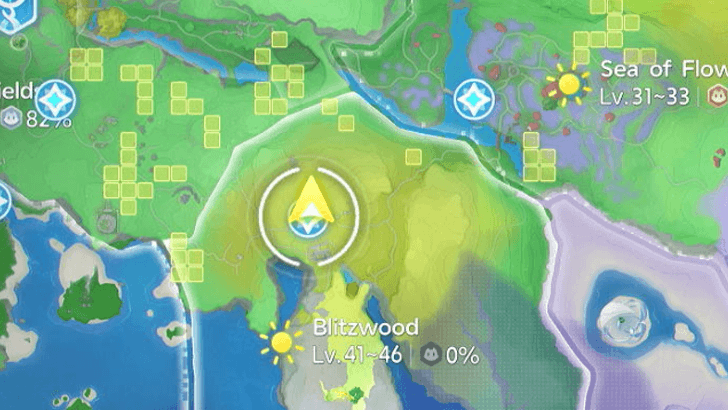 |
|||||||
 Mountain Woods Flutternym Mountain Woods Flutternym
|
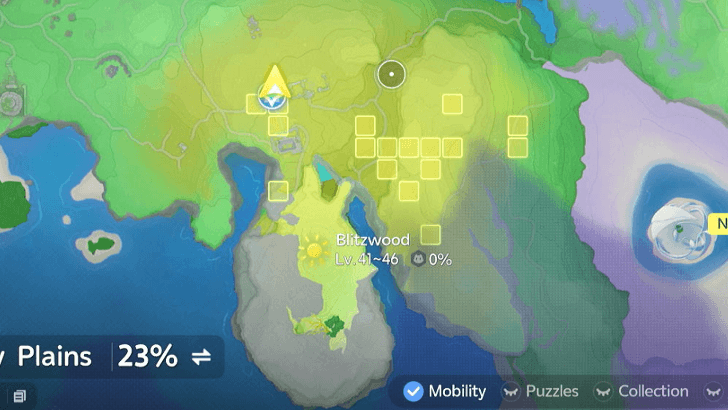 |
|||||||
 Mountain Woods Gracewing Mountain Woods Gracewing
|
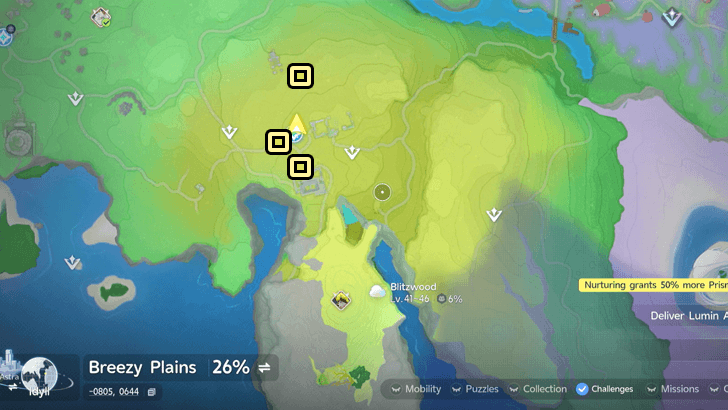 How to Get: Can be spawned after progressing The Land of Dancing Illusions quest. |
|||||||
 Hummin Hummin
|
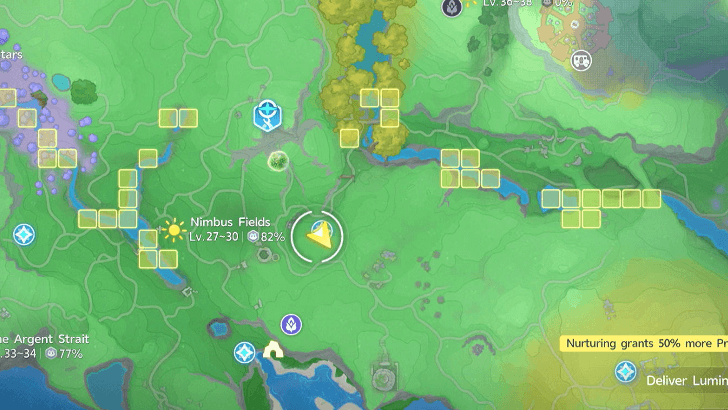 |
|||||||
 Grassland Iris Grassland Iris
|
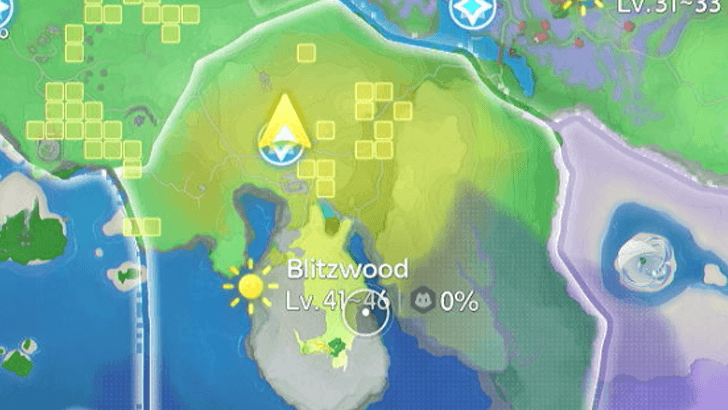 |
|||||||
 Grassland Irisal Grassland Irisal
|
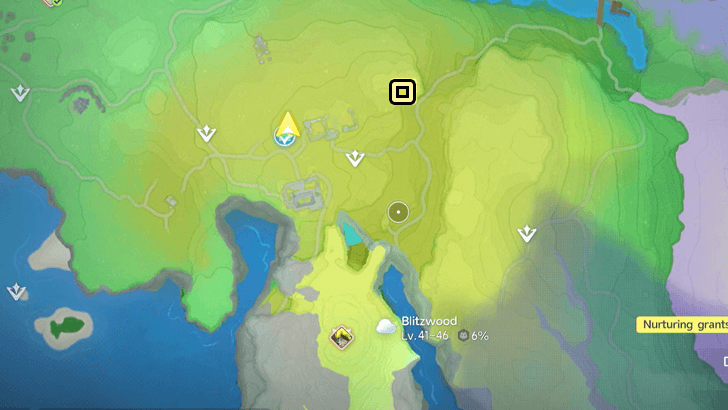 |
|||||||
 Highland Wisptis Highland Wisptis
|
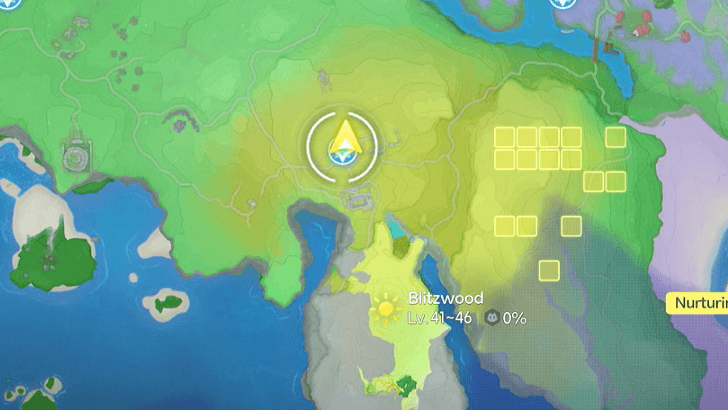 Conditions:

How to Get: Only appears during nighttime. |
|||||||
 Highland Ignitis Highland Ignitis
|
 Conditions:
How to Get: Appears after Basic Form Ignitis defeats 6 Highland Form Wisptises. |
|||||||
 Chirpi Chirpi
|
 |
|||||||
 Sparki Sparki
|
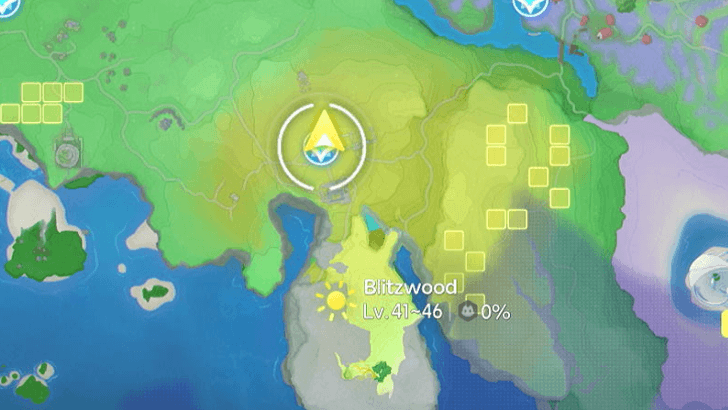 Conditions:
How to Get: Only appears during nighttime. |
|||||||
 Squarrel Squarrel
|
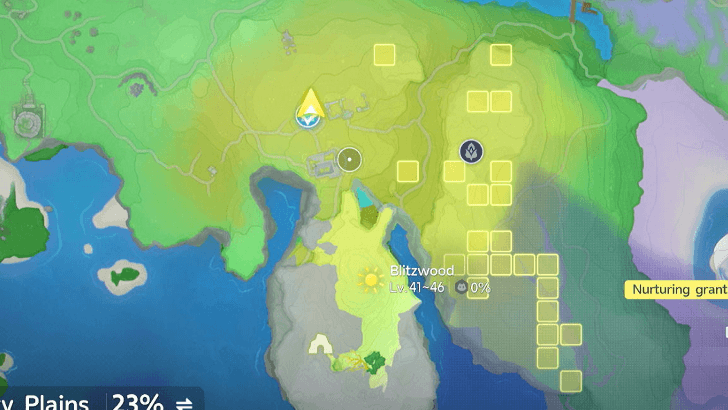 |
|||||||
 Squashel Squashel
|
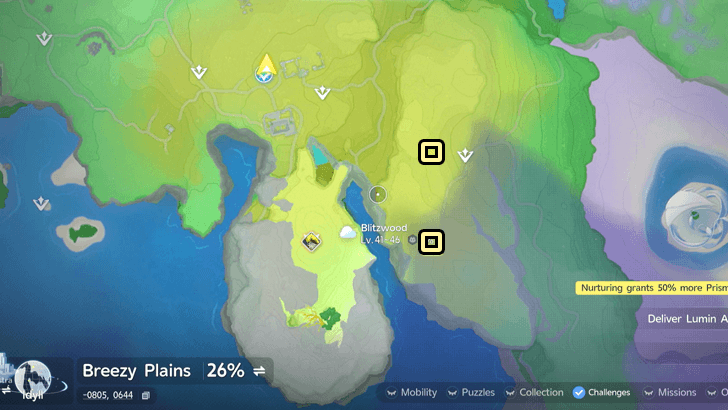 |

 Break
 Power Sustain


 Heal
 Flutter Heal


 Energized
 DPS
 Disco Aniimo

 Battle Fervor
 Support
 Band Member
 Regen
 Blazing Flames
 Raging Fire
Blitzwood Alpha and Omega Aniimo
| Collectibles | Details |
|---|---|
|
Alpha Blazen |
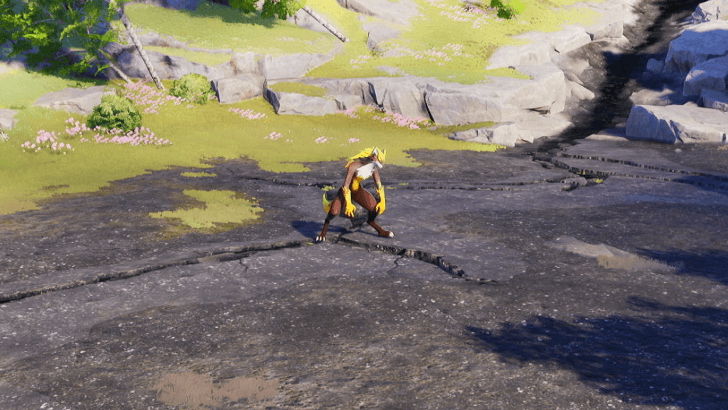 Coordinates: -0762, 0467 How to Get: Alpha Blazen can be found south of Blitzwood Bloom on top of a mountain. |
All Blitzwood Chests
| Collectibles | Details |
|---|---|
|
Blitzwood Chest 1 |
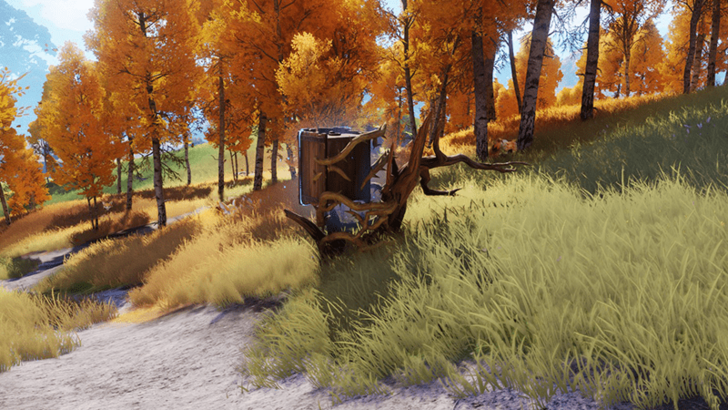 Coordinates: -0849, 0626 How to Get: Placed on top of some wood, surrounded by brambles that can be burned off with fire from an Aniimo skill. |
|
Blitzwood Chest 2 |
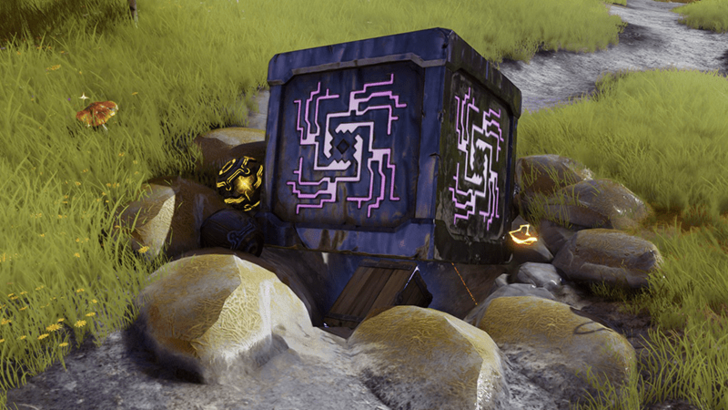 Coordinates: -0827, 0623 How to Get: The chest is wedged underneath a large metal cube that can conduct electricity. |
|
Blitzwood Chest 3 |
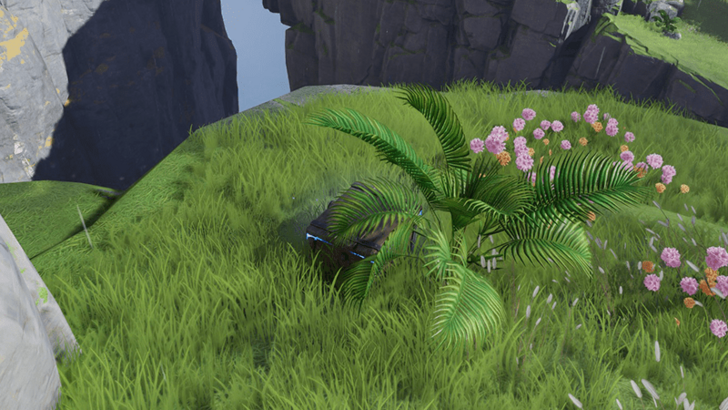 Coordinates: -0834, 0589 How to Get: Near the ledge of a cliff, placed next to a plant with large leaves. |
|
Blitzwood Chest 4 |
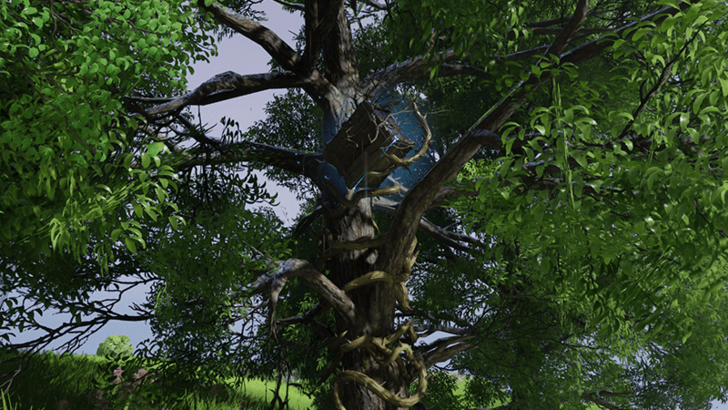 Coordinates: -0985, 0584 How to Get: Stuck on top of a tree while surrounded by several flammable brambles. Use fire from an Aniimo skill to burn them off to make the chest openable. |
|
Blitzwood Chest 5 |
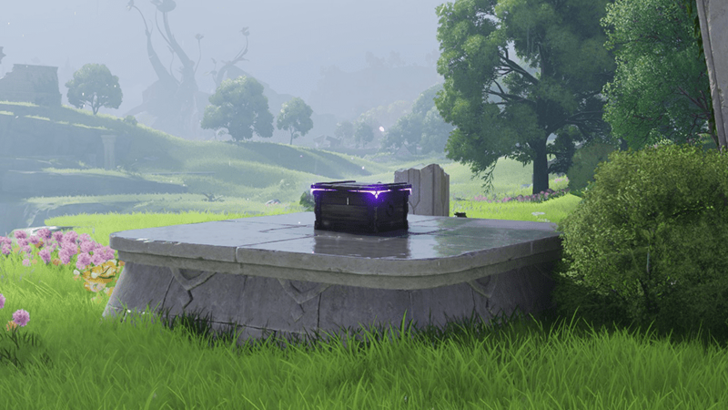 Coordinates: -0979, 0530 How to Get: Placed on top of a stone platform. The chest is protected by a barrier when first encountered and is disabled after defeating the nearby Iris defending it. |
|
Blitzwood Chest 6 |
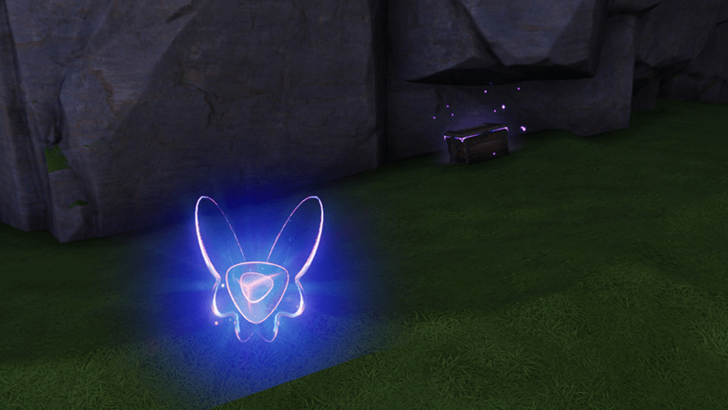 Coordinates: -0870, 0499 How to Get: Found underneath a cliff next to the Woods Glide Lumin Collection. |
|
Blitzwood Chest 7 |
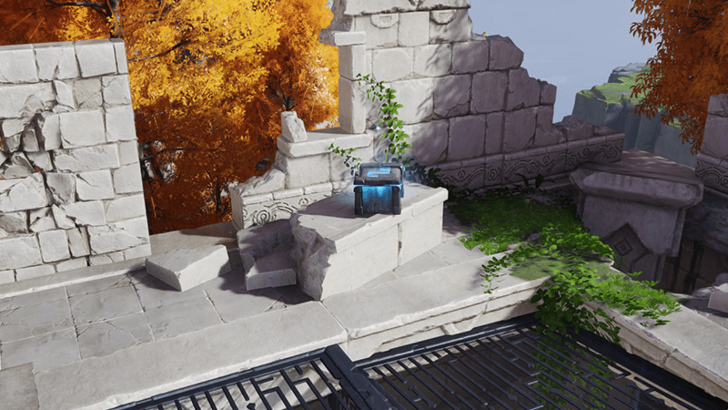 Coordinates: -0793, 0582 How to Get: Found on the rooftop of a ruined building. |
|
Blitzwood Chest 8 |
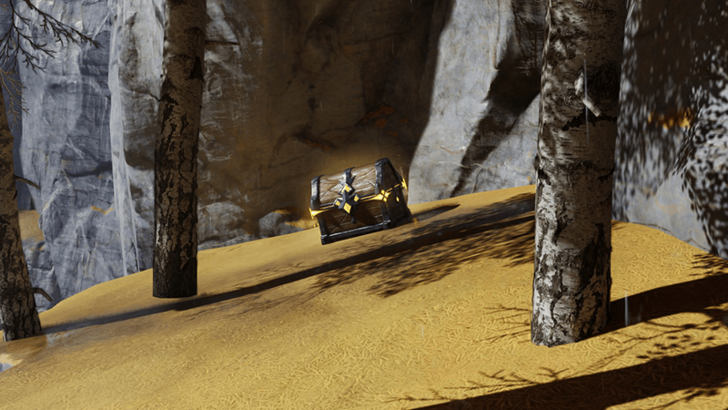 Coordinates: -0803, 0548 How to Get: Placed in a small cliff area surrounded with trees. |
|
Blitzwood Chest 9 |
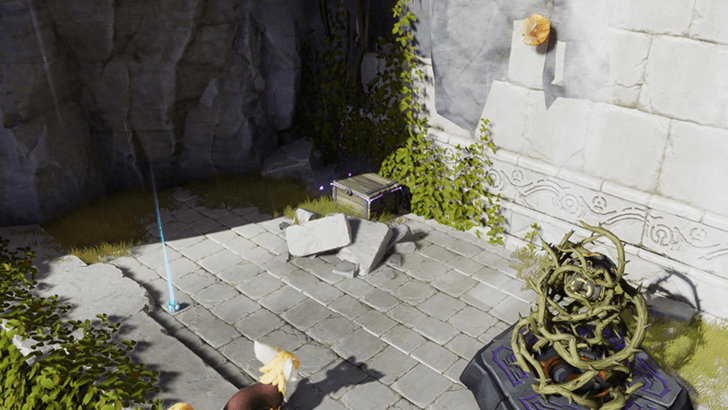 Coordinates: -0798, 0497 How to Get: Found on the rooftop of a ruined building with an electric mechanism nearby. |
|
Blitzwood Chest 10 |
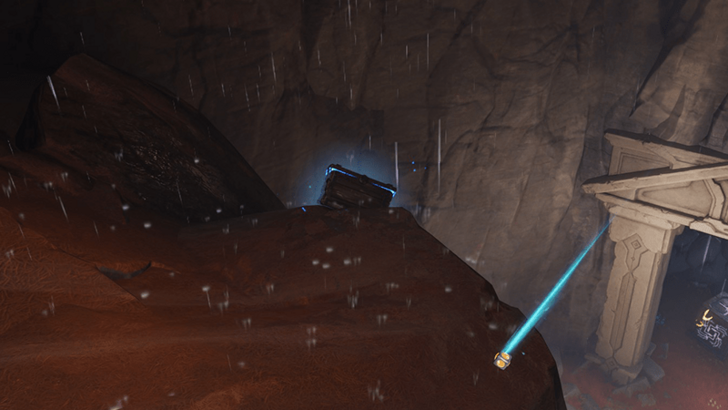 Coordinates: -0778, 0379 How to Get: On a ledge inside a pit. |
|
Blitzwood Chest 11 |
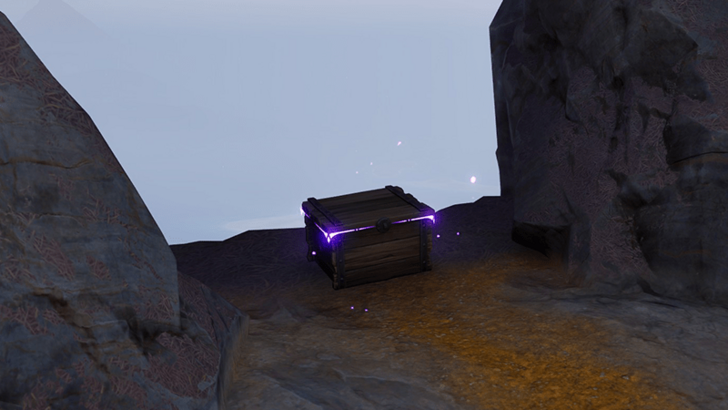 Coordinates: -0795, 0338 How to Get: At the end of a cave, behind a wall of stones that can be broken down with an Aniimo skill. The chest is found next to a cliff facing the ocean. |
|
Blitzwood Chest 12 |
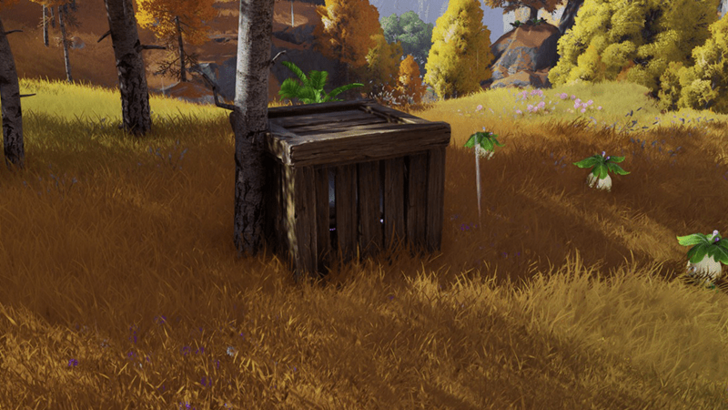 Coordinates: -0736, 0596 How to Get: Placed inside a crate next to a pack of Hummins. |
|
Blitzwood Chest 13 |
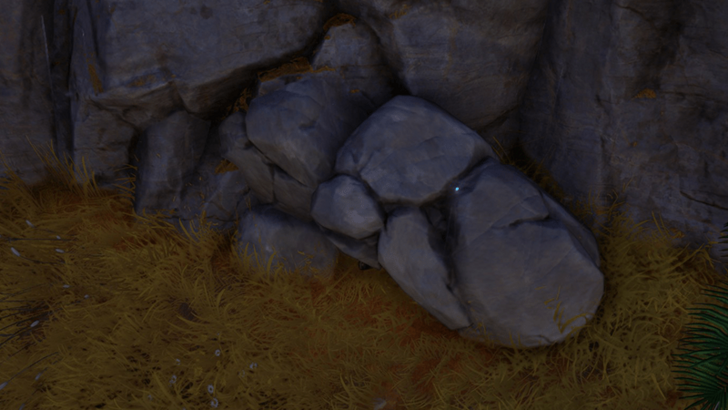 Coordinates: -0723, 0599 How to Get: Buried under a pile of rocks which can be cleared by using an Aniimo skill to break them down. |
|
Blitzwood Chest 14 |
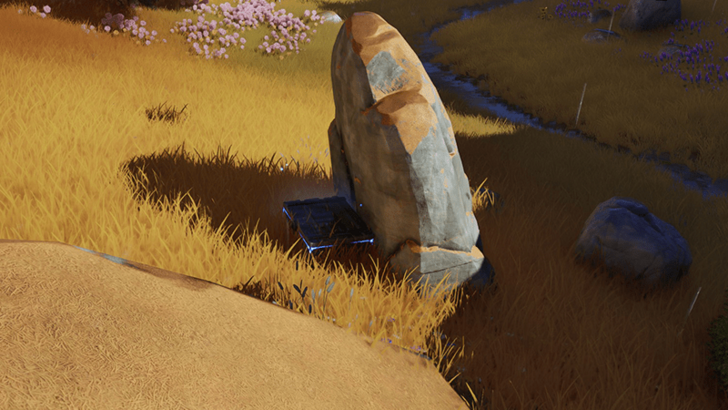 Coordinates: -0684, 0654 How to Get: Found next to a rock. |
|
Blitzwood Chest 15 |
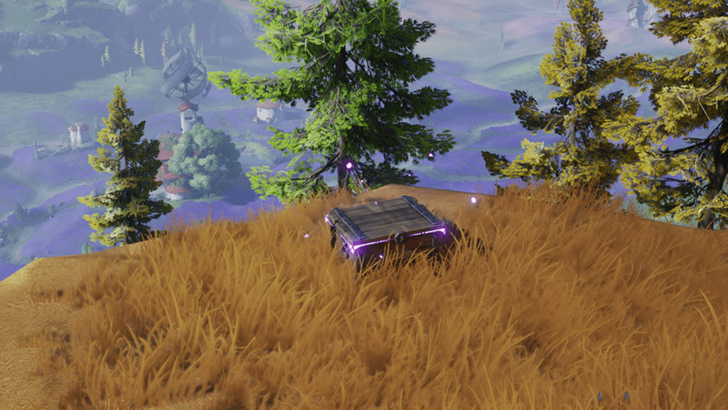 Coordinates: -0596, 0671 How to Get: Nearby a ledge that overlooks the Sea of Flowers region. |
|
Blitzwood Chest 16 |
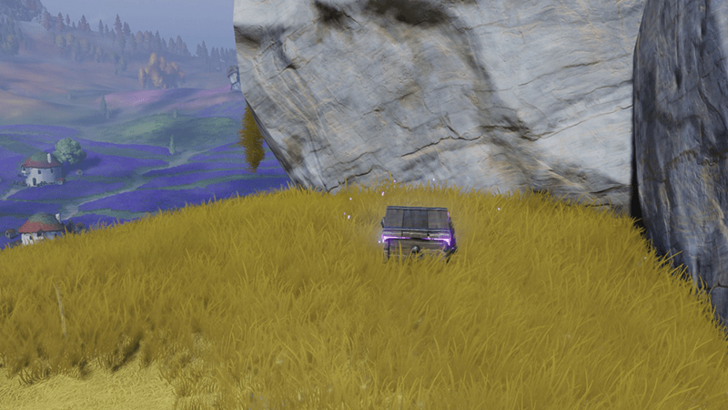 Coordinates: -0587, 0708 How to Get: In a small open area near the cliffs that border towards the Sea of Flowers. |
|
Blitzwood Chest 17 |
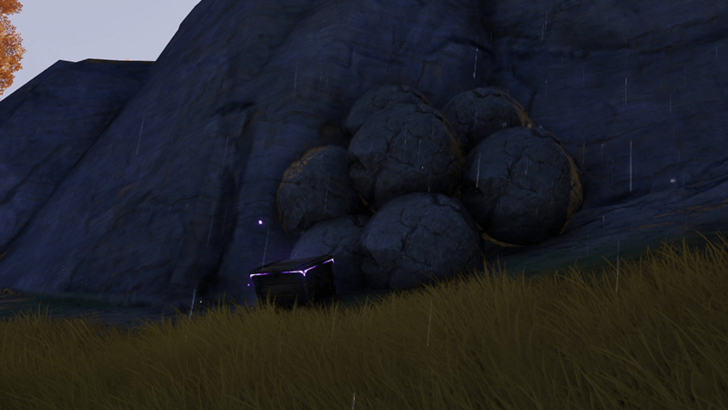 Coordinates: -0585, 0616 How to Get: Next to a pile of stones. |
|
Blitzwood Chest 18 |
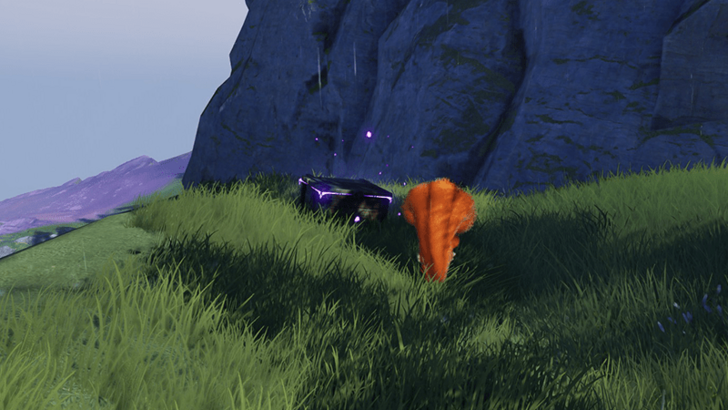 Coordinates: -0549, 0470 How to Get: Placed near a ledge of a cliff. |
|
Blitzwood Chest 19 |
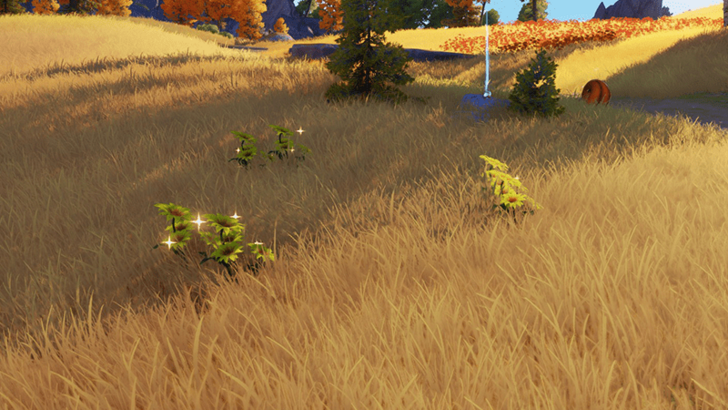 Coordinates: -0583, 0553 How to Get: Pick up the Sunny Daisies that form a circle and a chest will appear in the center. |
|
Blitzwood Chest 20 |
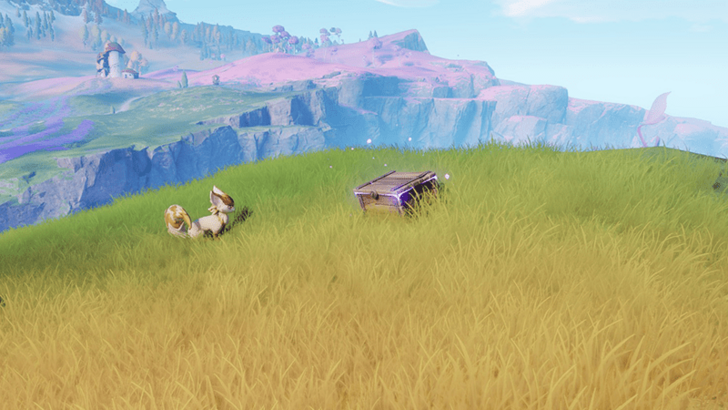 Coordinates: -0525, 0526 How to Get: Visible in an open field, next to a cliff. |
|
Blitzwood Chest 21 |
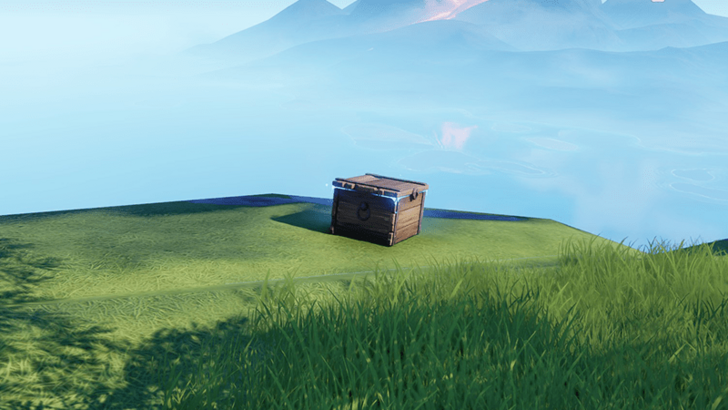 Coordinates: -0527, 0345 How to Get: Placed near the ledge of a cliff. |
|
Blitzwood Chest 22 |
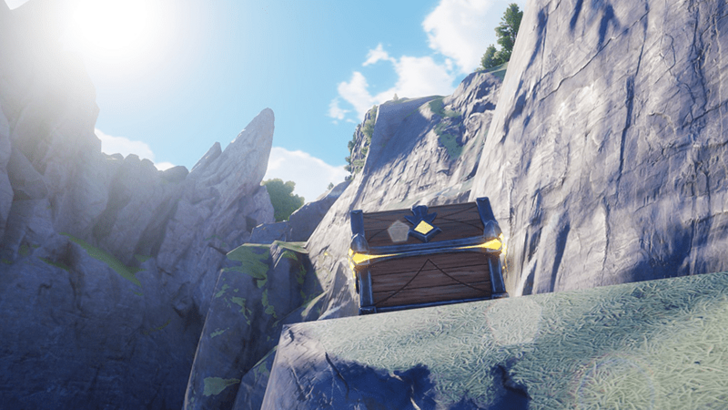 Coordinates: -0585, 0357 How to Get: Placed along the southeastern cliff wall of the Blitzwood region that faces towards the ocean to the south. |
|
Blitzwood Chest 23 |
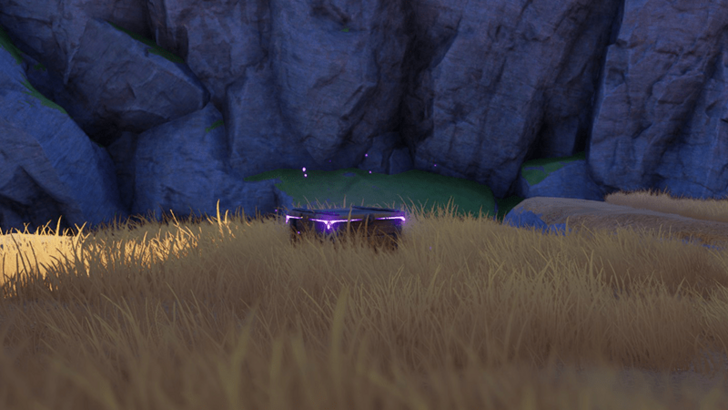 Coordinates: -0653, 0420 How to Get: Placed near the ledge of a cliff. |
|
Blitzwood Chest 24 |
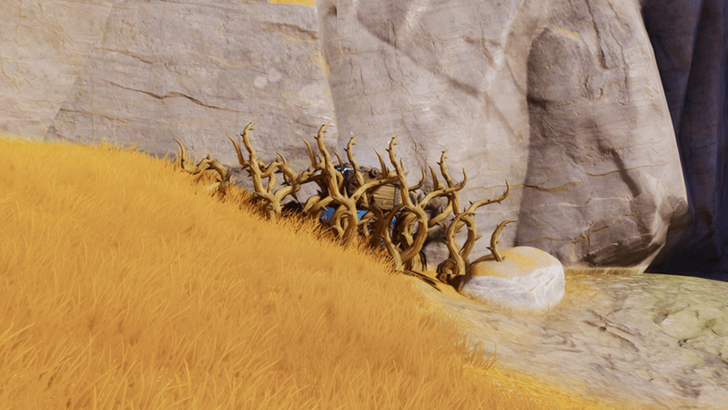 Coordinates: -0683, 0533 How to Get: Covered in brambles near a wall. Use fire from an Aniimo skill to remove the brambles. |
|
Blitzwood Chest 25 |
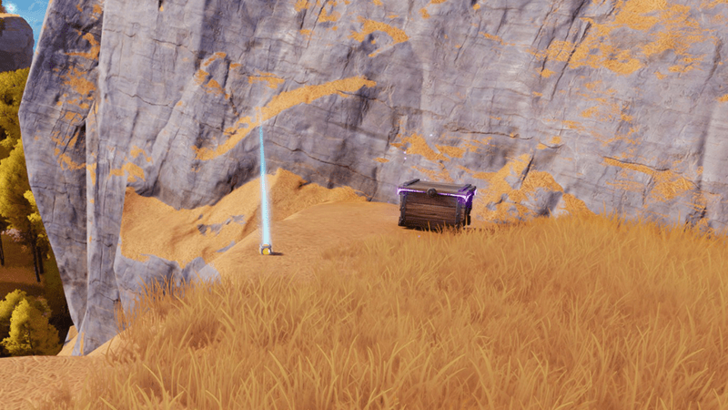 Coordinates: -0666, 0559 How to Get: Placed near a ledge of a cliff overlooking the Electric Flow Sanctum. |
|
Blitzwood Chest 26 |
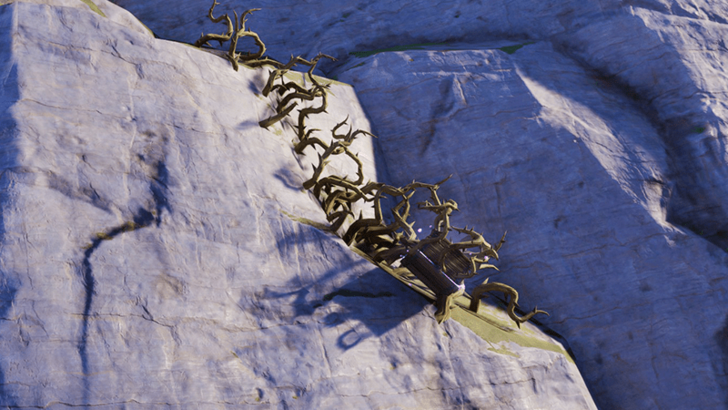 Coordinates: -0640, 0758 How to Get: Placed high above a cliff while being held up by brambles. Use fire from an Aniimo skill to remove the brambles to access the chest. |
|
Blitzwood Chest 27 |
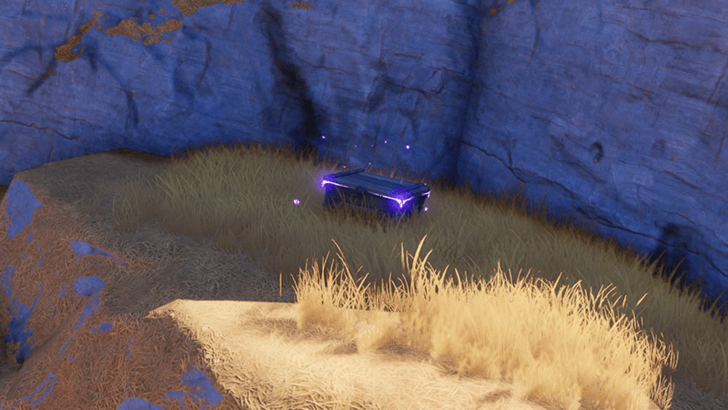 Coordinates: -0701, 0721 How to Get: Placed on top of an elevated surface of a rocky area. |
|
Blitzwood Chest 28 |
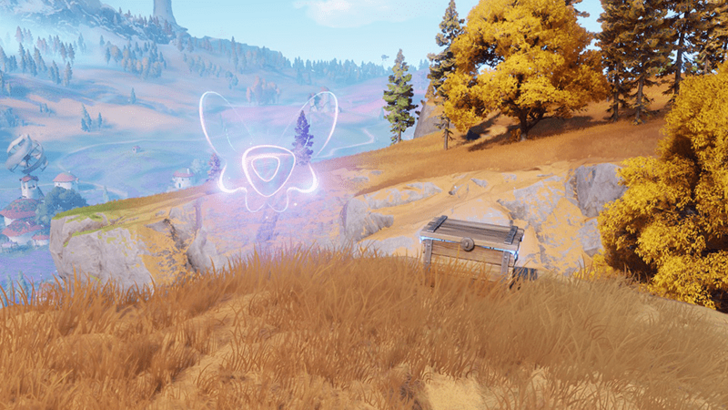 Coordinates: -0692, 0680 How to Get: Placed near the ledge of a cliff next to the Into the Sea of Flowers Runaway Amber. |
|
Blitzwood Chest 29 |
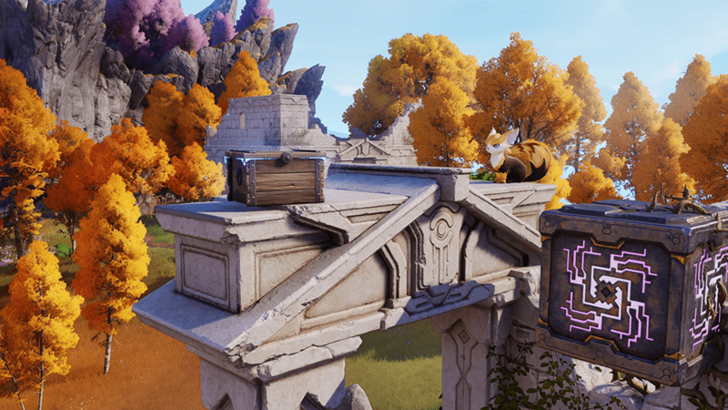 Coordinates: -0768, 0645 How to Get: On top of a stone arch in the middle of ruins. |
|
Blitzwood Chest 30 |
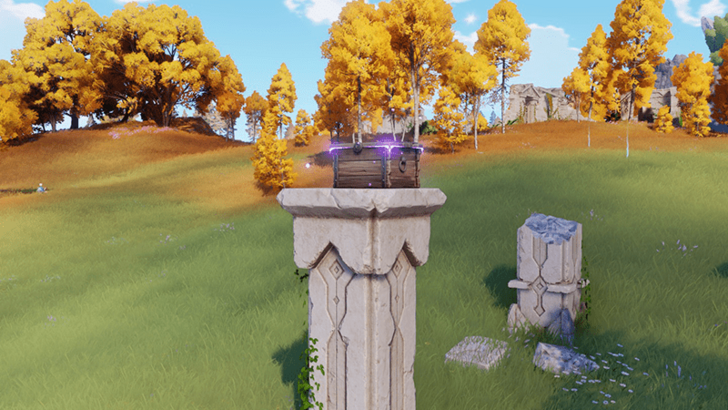 Coordinates: -0824, 0713 How to Get: Chest appears on top of one of the stone pillars after picking up several Aniipod Pro on top of the other pillars. |
|
Blitzwood Chest 31 |
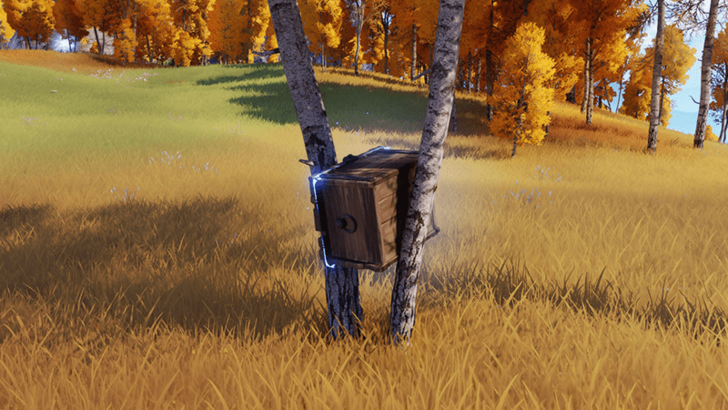 Coordinates: -0846, 0717 How to Get: Chest is wedged in between two thin trees on the open field. |
|
Blitzwood Chest 32 |
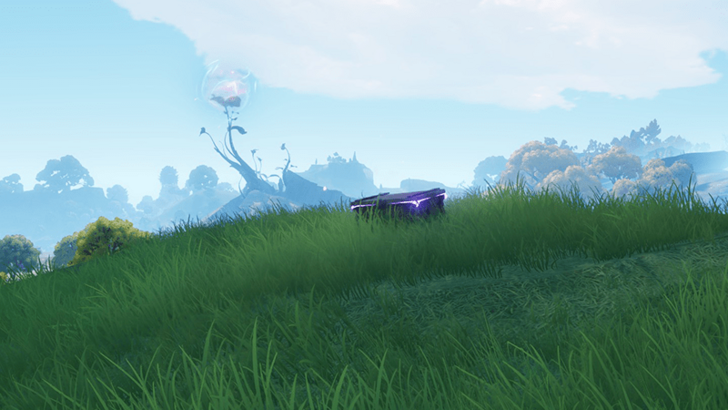 Coordinates: -0876, 0737 How to Get: Near a ledge on top of a hill. |
|
Blitzwood Chest 33 |
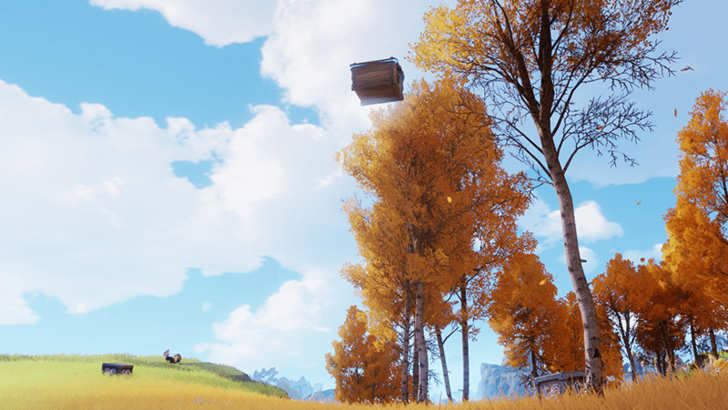 Coordinates: -0901, 0652 How to Get: The chest floats above the air due to wind being exhausted out of a turbine below it. |
|
Blitzwood Chest 34 |
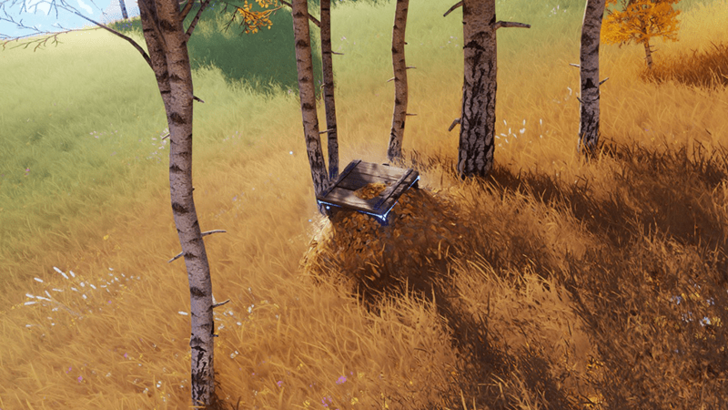 Coordinates: -0921, 0627 How to Get: On the open field surrounded by several thin trees. |
|
Blitzwood Chest 35 |
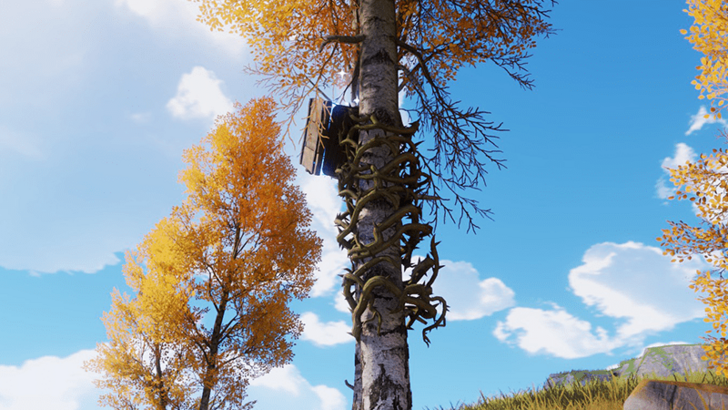 Coordinates: -0953, 0647 How to Get: Wrapped around a tree's trunk by spiky brambles. Use fire from an Aniimo skill to remove them and free the chest. |
|
Blitzwood Chest 36 |
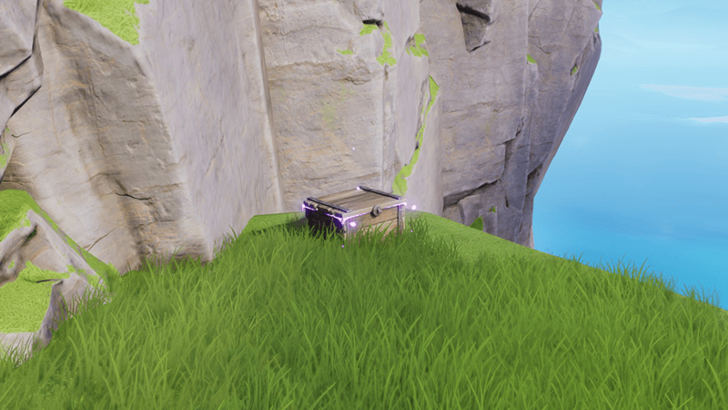 Coordinates: -0892, 0524 How to Get: Placed next to the ledge of a cliff facing towards the south. |
|
Blitzwood Chest 37 |
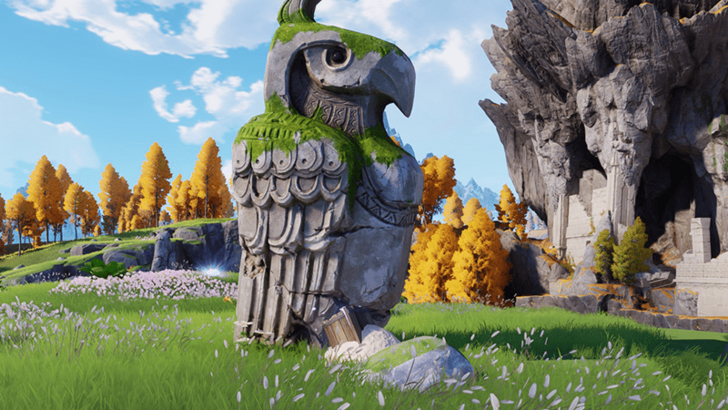 Coordinates: -0875, 0485 How to Get: Chest is placed at the foot of a bird-like statue near the cliff. |
|
Blitzwood Chest 38 |
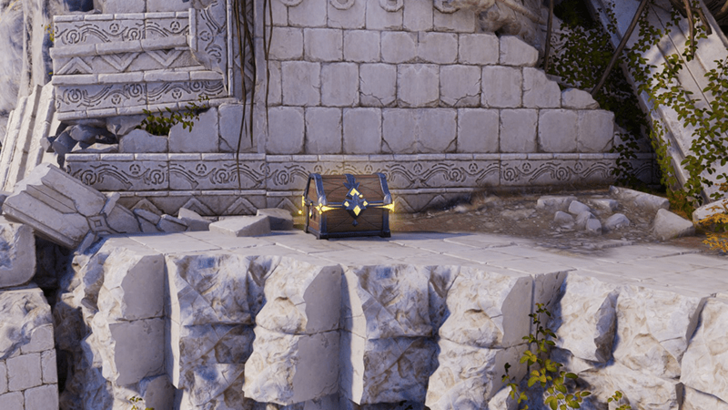 Coordinates: -0841, 0461 How to Get: Chest is placed in a ruined area by the side of a cliff. |
|
Blitzwood Chest 39 |
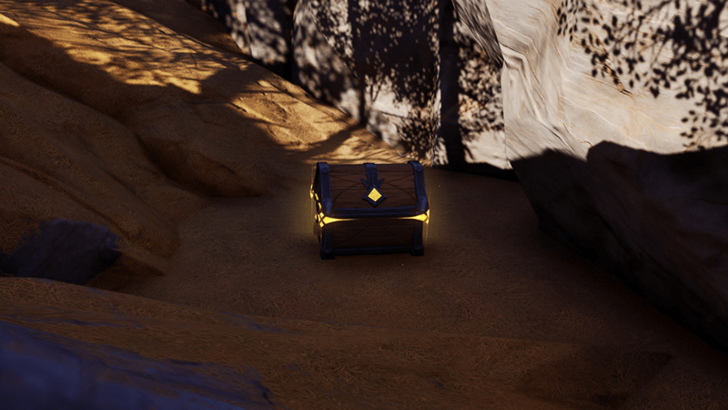 Coordinates: -0810, 0475 How to Get: Chest is hidden in between the stony environment on the surface. |
|
Blitzwood Chest 40 |
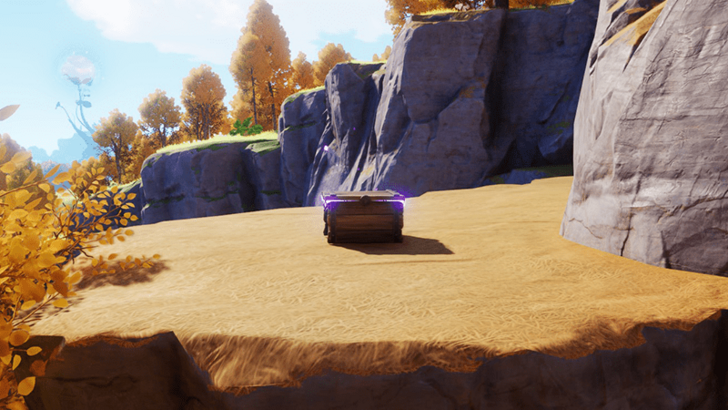 Coordinates: -0804, 0553 How to Get: Chest is found on a flat stone surface. |
|
Blitzwood Chest 41 |
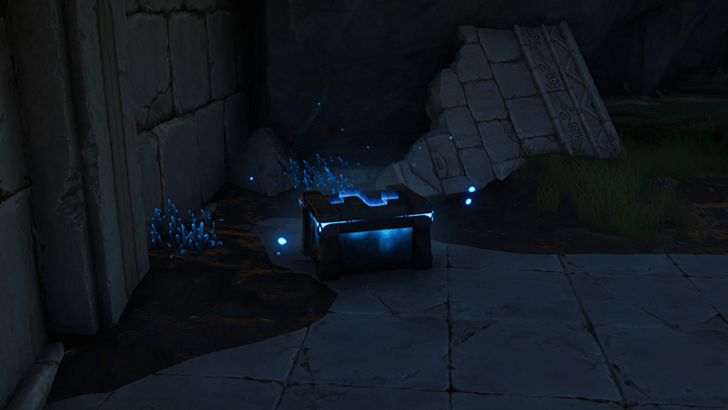 Coordinates: -0792, 0583 How to Get: Found at the bottom of a ruin by entering a hole that leads beneath the building. |
|
Blitzwood Chest 42 |
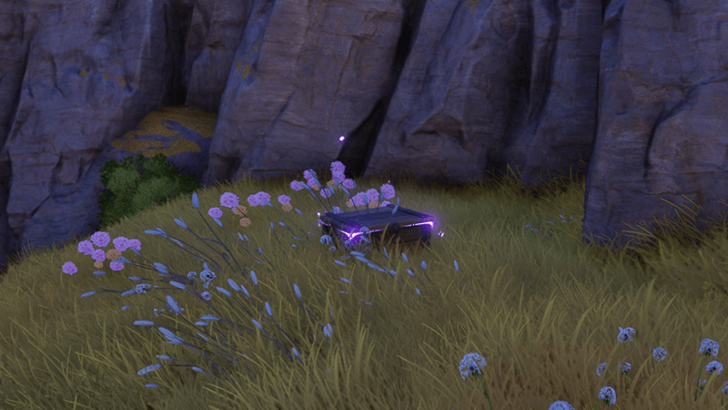 Coordinates: -0755, 0582 How to Get: Found near some purple flowers. |
|
Blitzwood Chest 43 |
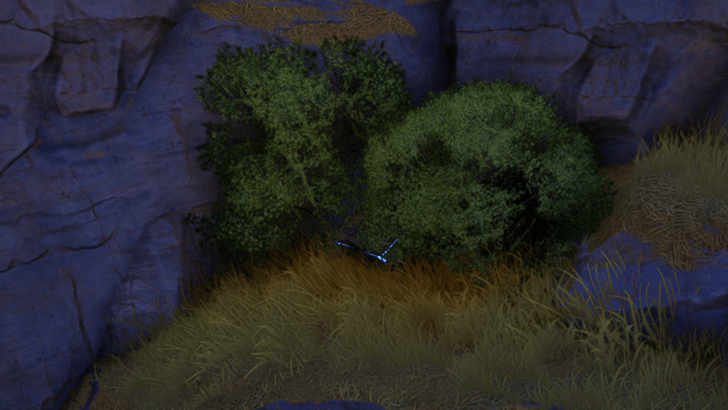 Coordinates: -0763, 0579 How to Get: Found underneath some bushes near another chest. |
|
Blitzwood Chest 44 |
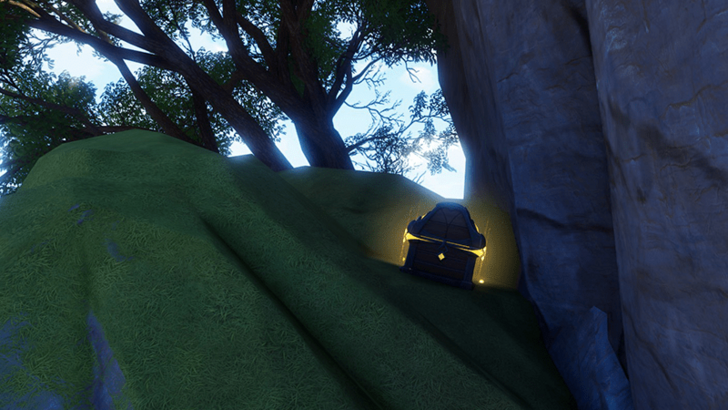 Coordinates: -0681, 0371 How to Get: Placed in between the large rocks of the cliff area southeast of the Alpha Blazen area. |
All Blitzwood Lumin Ambers
| Collectibles | Details |
|---|---|
|
Cliff Mark |
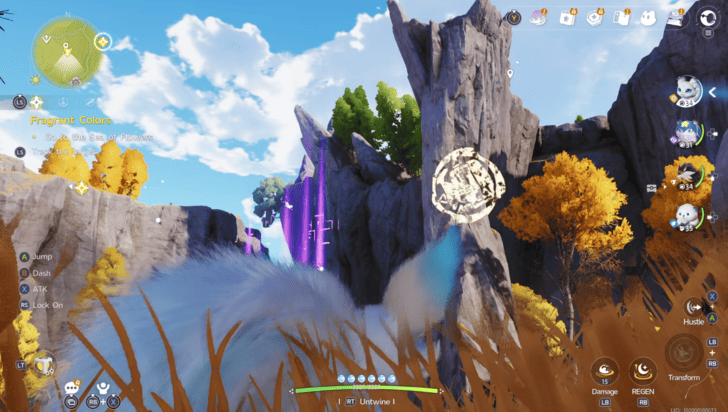 Type: Lumin Marking Coordinates: -0719, 0591 How to Get: Found near the center of Blitzwood on a cliff and a rock. Match the pattern on the cliff and the nearby rock to get the Lumin Amber. |
|
Cliff Vista |
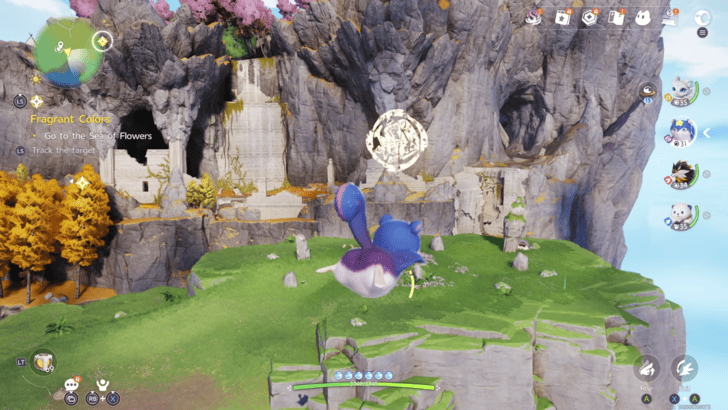 Type: Lumin Marking Coordinates: -0913, 0540 How to Get: Found on the western part of Blitzwood on the side of a cliff. You must use the giant fan on the ground to fly and complete the Lumin Marking. Go back in the air to get the Lumin Amber. |
|
Into the Sea of Flowers |
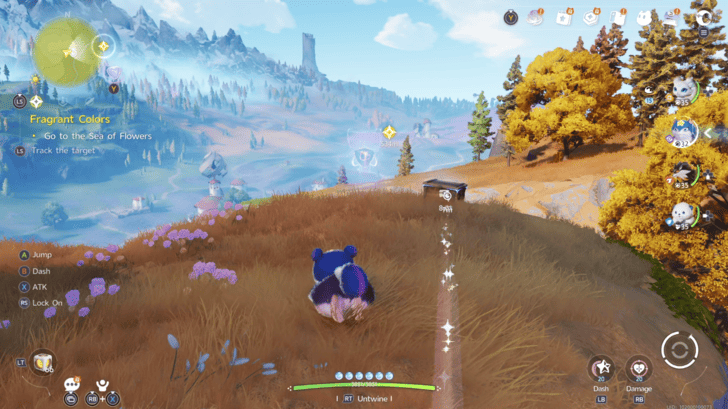 Type: Lumin Collection Coordinates: -0693, 0679 How to Get: Found on the eastern side of Blitzwood on a cliff. Use a flying Aniimo and follow the fleeing Lumin Amber before the time runs out. |
|
Pillar Jump |
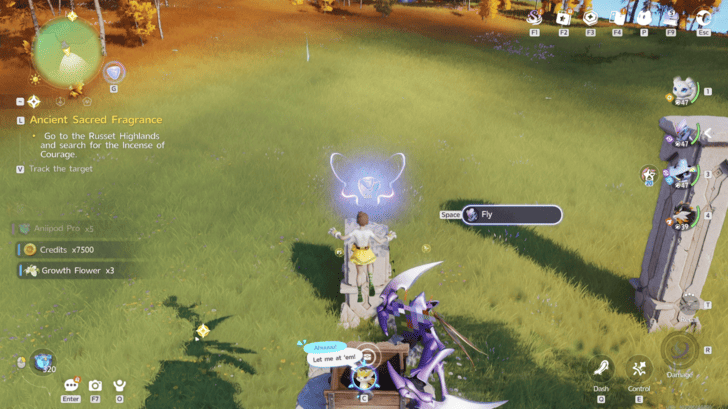 Type: Lumin Collection Coordinates: -0822, 0707 How to Get: Found north of the Blitzwood Bloom on a set of pillars. Fly or jump from one pillar to the next and grab the items that appear. This spawns a chest that, when opened, rewards items and unlocks the Lumin Collection, where you must collect the Lumin Ambers on each pillar to complete it. |
|
Woods Glide |
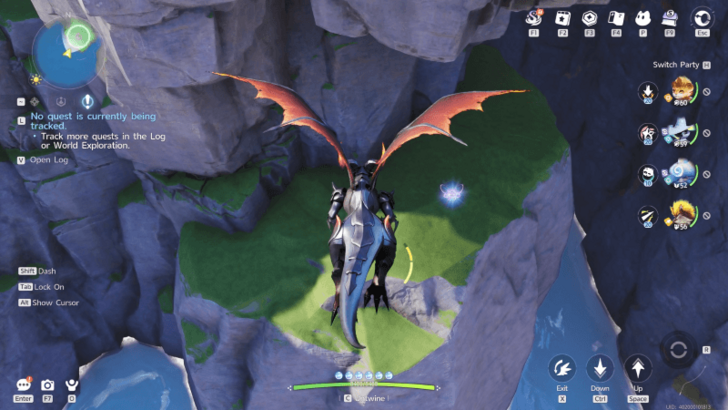 Type: Lumin Collection Coordinates: -0875, 0495 How to Get: Found southwest of the Blitzwood Bloom on the side of the cliff. Fly and follow the cloud rings upwards to catch the fleeing Lumin Amber. |
|
Blitzwood Lumin Amber 1 |
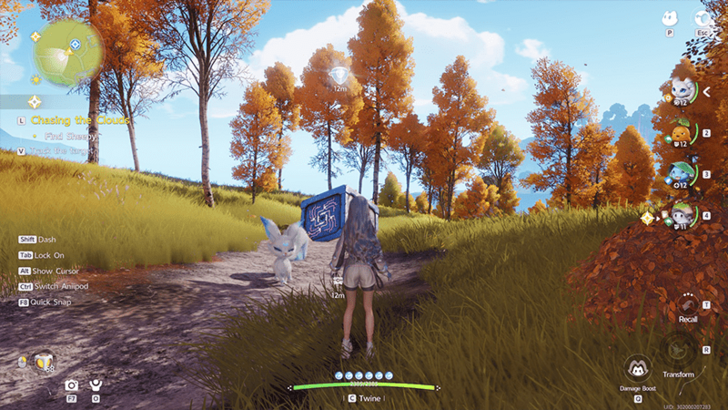 Type: Lumin Amber Coordinates: -0827, 0623 How to Get: Found near the Blitzwood Bloom above a crate on the road. Climb on the crate and fly up to get the Lumin Amber. |
|
Blitzwood Lumin Amber 2 |
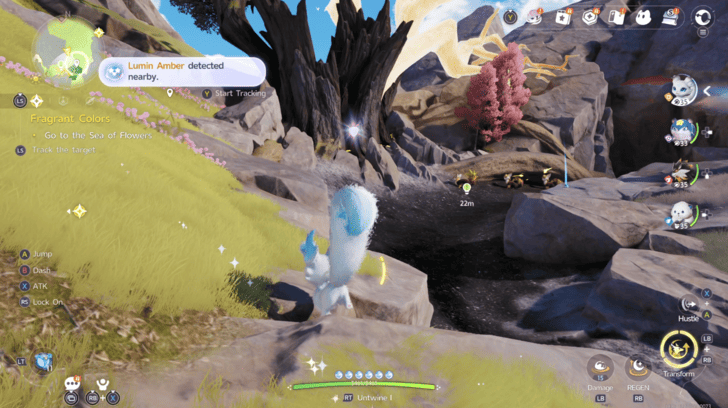 Type: Lumin Amber Coordinates: -0749, 0398 How to Get: Found on the southern part of Blitzwood inside a dead tree. |
|
Blitzwood Lumin Amber 4 |
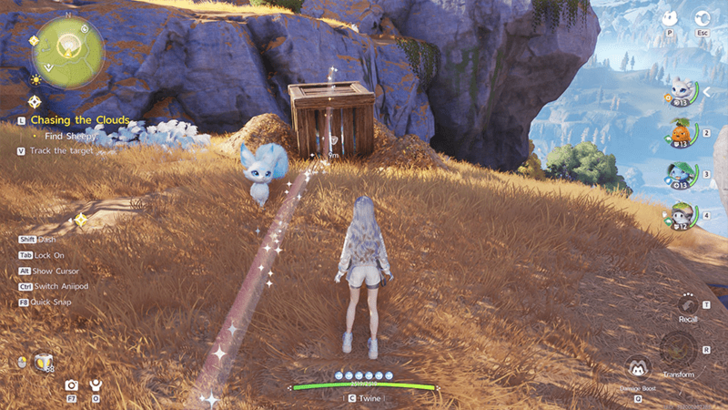 Type: Lumin Amber Coordinates: -0716, 0654 How to Get: Found on the eastern side of Blitzwood, inside a wooden crate. It is guarded by a group of Bolty hiding in the leaves, defeat them and destroy the crate to get the Lumin Amber. |
|
Blitzwood Lumin Amber 6 |
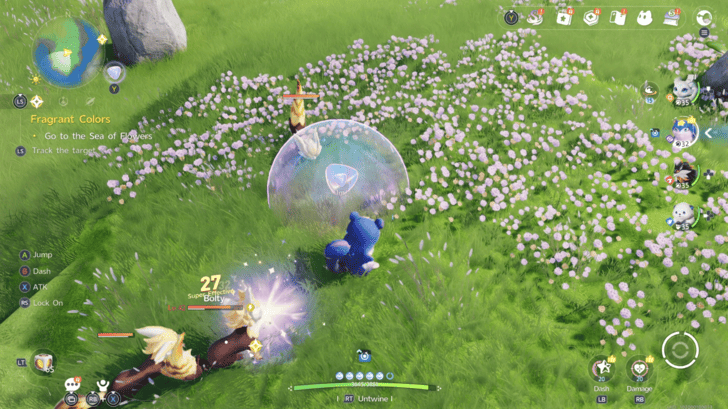 Type: Lumin Amber Coordinates: -0869, 0504 How to Get: Found on the southwest part of Blitzwood on a cliff. This Lumin Amber is guarded by a group of Bolty, defeat them to get it. |
|
Blitzwood Lumin Amber 7 |
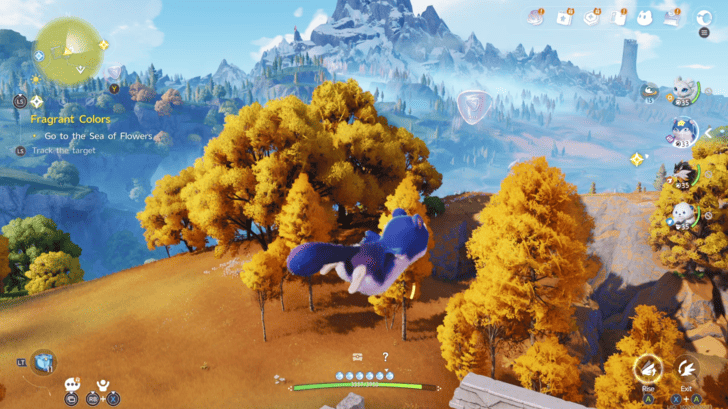 Type: Lumin Amber Coordinates: -0750, 0650 How to Get: Found in the ruins east of the Blitzwood Bloom. It will be in the air, climb up the ruins then twine with a flying Aniimo to reach it. |
|
Quick Dive |
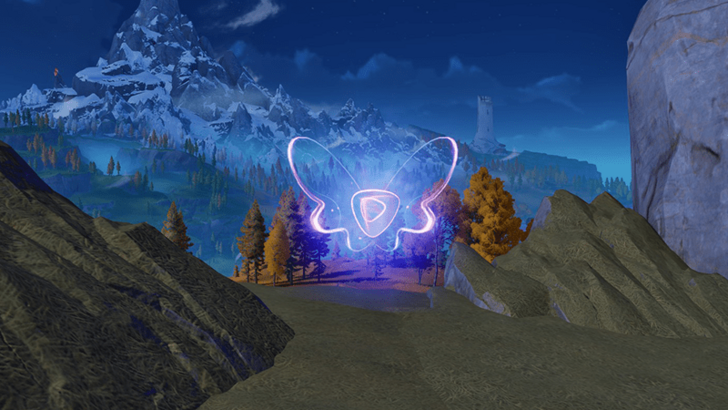 Type: Lumin Collection Coordinates: -0727, 0542 How to Get: Found atop a cliff, southwest of the Electric Flow Sanctum. Collect Lumin Energy within a time limit as you descend from the cliff. |
All Blitzwood Pathfinder Challenges
| Collectibles | Details |
|---|---|
|
Luz |
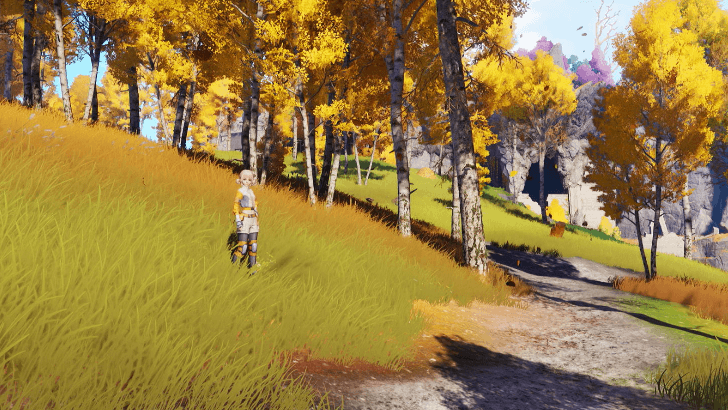 Coordinates: -0874, 0644 How to Get: Luz is found along the main road directly west of the Blitzwood Bloom. |
|
Phil |
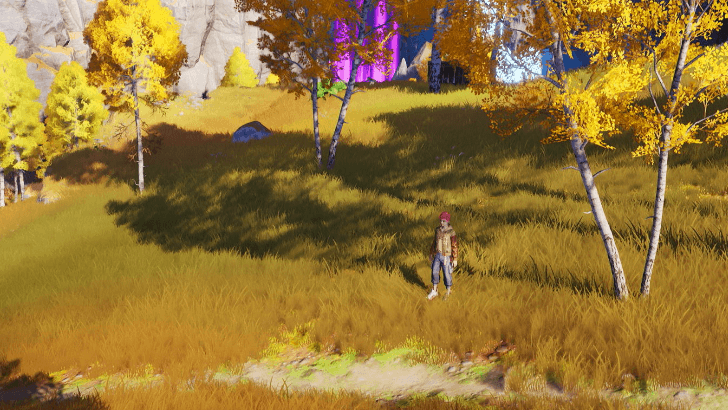 Coordinates: -0746, 0622 How to Get: Phil is located east of the Blitzwood Bloom along the main road, right across a ruined area. |
|
Liuguang |
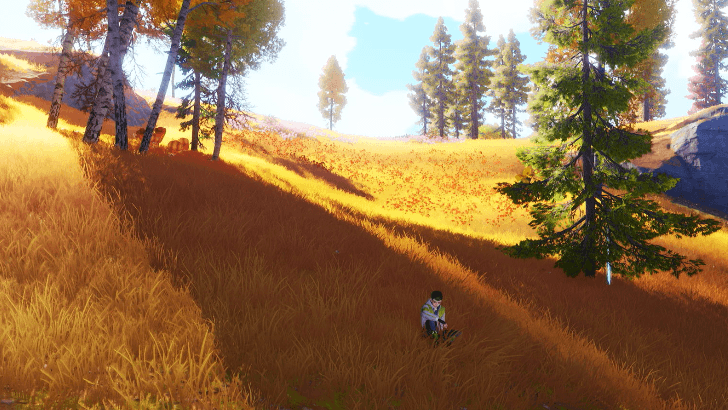 Coordinates: -0597, 0557 How to Get: Liuguang is located southeast of Blitzwood's Nurture along the road. He can be found sitting on the field. |
All Pathfinder Challenge Locations
All Blitzwood Sanctums
| Collectibles | Details |
|---|---|
|
Electric Flow |
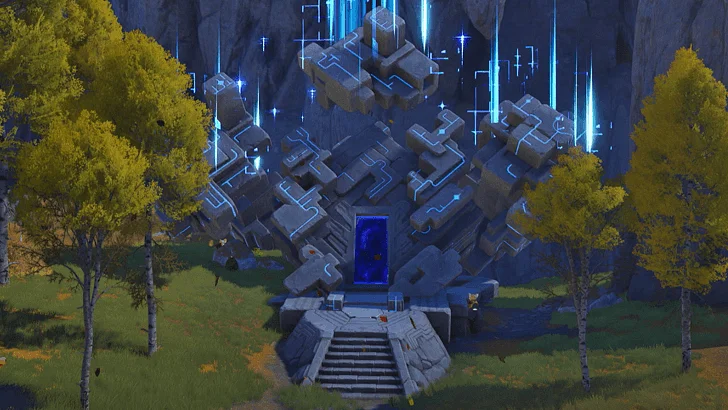 Coordinates: -0703, 0559 How to Get: Electric Flow is located northeast of the Alpha Blazen in Blitzwood. |
All Blitzwood Dr. Glass's Trials
| Collectibles | Details |
|---|---|
|
Dr. Glass's Trial - Bolty |
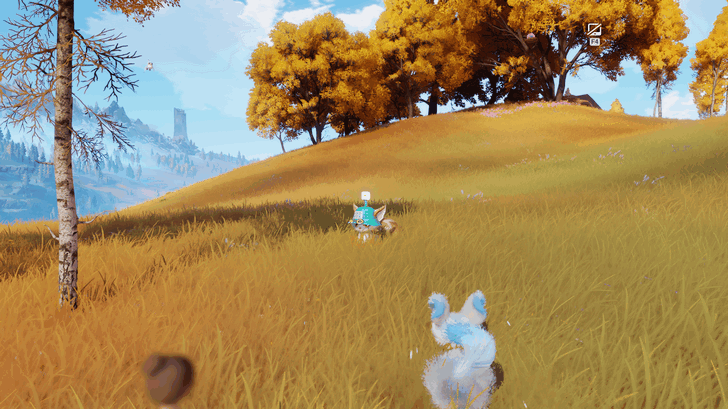 Coordinates: -0778, 0710 How to Get: This trial requires you to twine with a Bolty. Use its High Jump skill to dodge the falling columns and reach the high platform to complete the trial. |
All Blitzwood Caves
| Collectibles | Details |
|---|---|
|
Cave 2 |
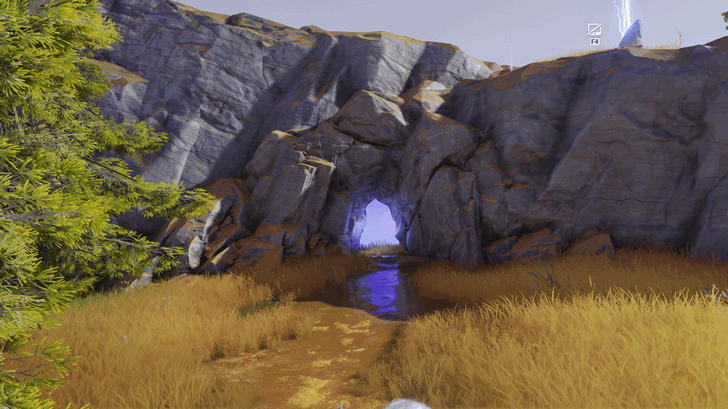 Coordinates: -0570, 0471 How to Get: This cave contains a gathering of Hummins. |
All Blitzwood Eggs
| Collectibles | Details |
|---|---|
|
Alpha Egg |
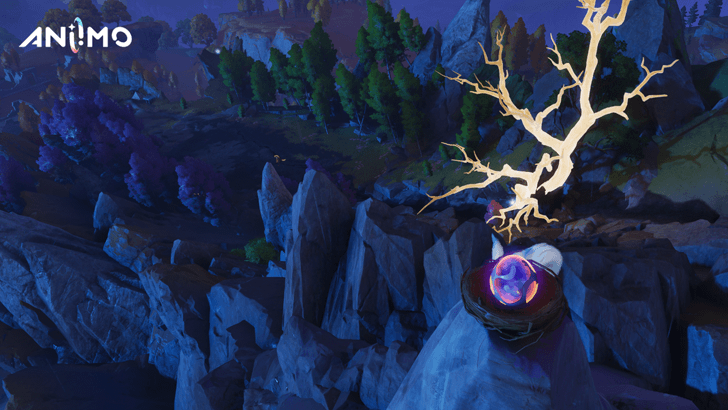 Coordinates: -0823, 0351 How to Get: Found at the peak of the rocky hill behind Alpha Blazen |
|
Incredible Egg |
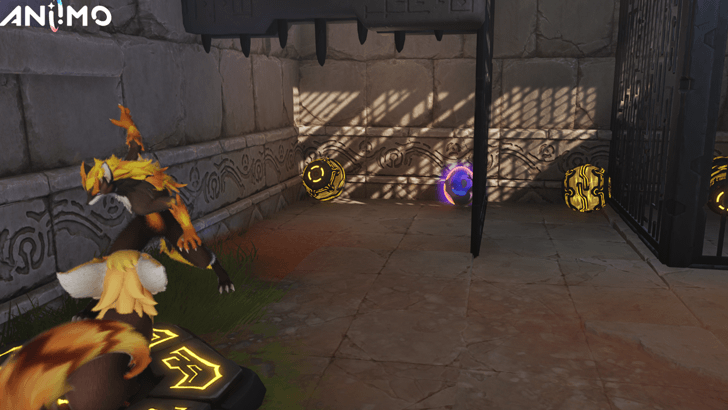 Coordinates: -0785, 0583 How to Get: Found inside a cage in the ruins, south of the Blitzwood Bloom. Twine with Lightning-type Aniimo and charge the sphere with lightning attacks to power up the switch. |
Aniimo Related Guides

Points of Interest
 Sanctum |
 Lumin Amber |
 Chests |
 Pathfinder Challenges |
 Morphling's Memory |
 Bloom |
| Dr. Glass Trial |
All Cave Locations |
 RV Park Locations |
Egg Locations |
Region Guides
Other Guides
| All Shops and Items Sold | Astra Map and Key Locations |




Author

Blitzwood 100% Exploration Guide

Rankings
Gaming News





Popular Games

Genshin Impact Walkthrough & Guides Wiki
Fire Emblem: Fortune's Weave (FEFW) Walkthrough & Guides Wiki
Aniimo Walkthrough & Guides Wiki
Wuthering Waves Walkthrough & Guides Wiki
Dragon's Dogma 2 (DD2) Dark Arisen Walkthrough & Guides Wiki
Umamusume: Pretty Derby Walkthrough & Guides Wiki
Honkai: Star Rail Walkthrough & Guides Wiki
Zenless Zone Zero Walkthrough & Guides Wiki
Pokemon TCG Pocket (PTCGP) Strategies & Guides Wiki
AION 2 Walkthrough & Guides Wiki









Recommended Games
Fire Emblem Heroes (FEH) Walkthrough & Guides Wiki
Where Winds Meet Walkthrough & Guides Wiki
Diablo 4: Lord of Hatred Walkthrough & Guides Wiki
Super Smash Bros. Ultimate Walkthrough & Guides Wiki
Persona 3 Reload Walkthrough & Guides Wiki
The Legend of Zelda: Tears of the Kingdom Walkthrough & Guides Wiki
Elden Ring Walkthrough & Guides Wiki
Pokemon Brilliant Diamond and Shining Pearl (BDSP) Walkthrough & Guides Wiki
Cyberpunk 2077: Ultimate Edition Walkthrough & Guides Wiki
Monster Hunter World Walkthrough & Guides Wiki










All rights reserved
©2025 Pawprint Interactive Entertainment Pte. Ltd.. All rights reserved.
The copyrights of videos of games used in our content and other intellectual property rights belong to the provider of the game.
The contents we provide on this site were created personally by members of the Game8 editorial department.
We refuse the right to reuse or repost content taken without our permission such as data or images to other sites.
You don't have a guide to the puzzle in the other cave in Blitzwood. The entrance is at MAPCOORDINATE_-0793_0407, which is inside the cave where the Frizzy Bolties are. You then need to use an aniimo that can get past, or under, the wind blocking the entrance to this hidden cave. I need help in solving the puzzle inside the cave, to get the three chests. TIA