
How to Beat Empowered Fallen Dragon
The Empowered Fallen Dragon is a superboss in the Dark Arisen DLC of Dragon's Dogma 2 (DD2). Learn where to find the superboss and how to fight it, the best build and party, and rewards here!
List of Contents
Empowered Fallen Dragon Location
Possible Spawn from Devouring Rancor
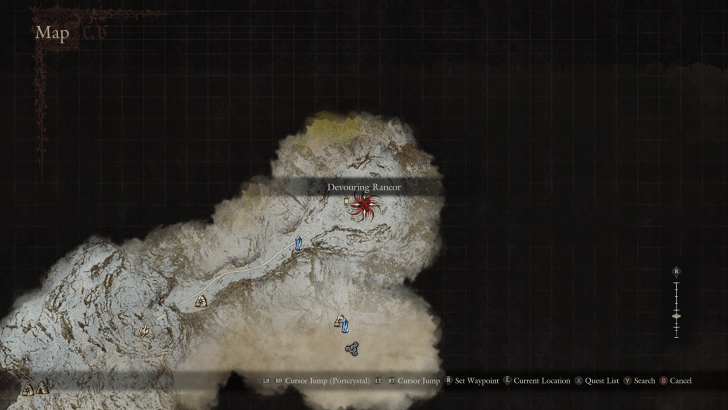
The Empowered Fallen Dragon may spawn as the final boss of a Devouring Rancor, which always appears in the Summit Ritual Grounds in Norgan during a Ruin-Night.
Note: The Empowered Fallen Dragon is not guaranteed to spawn in Devouring Rancors. Death and Satanachia may also spawn as the final boss, though you can retry again by starting another Ruin-Night.
Complete Into Rancor Post-Game Quest
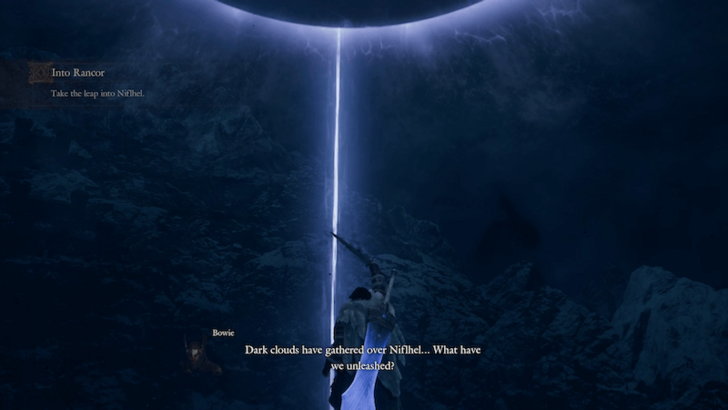
The Devouring Rancor only appears after you complete the Into Rancor post-game quest and defeat Satanachia.
After completing the quest, you can once again present the Blade Rancor above Nifhel to create another Ruin-Night, which will cause the Devouring Rancor to spawn in the Summit Ritual Grounds.
Best Builds for Empowered Fallen Dragon
Best Archer Build
| Moveset | ・
Manifold Shot
・ Cascade Shot ・ Erupting Shot ・ |
|---|---|
| Augments |
・
Zeal
・ Endurance ・ Exaltation ・ Lethality ・ Diligence ・ Subtlety 7th Augment Slot ・ Intrepidity or Athleticism |
| Rings | Ring of Enervation |
 Ring of Dragonsbane
Movesets and Best Relics
Archer's strongest attack in this fight is Erupting Shot with Explosive Arrows to deal heavy damage and potentially destroy the Empowered Fallen Dragon's arms and head. Manifold Shot and Cascade Shot are your alternate damage skills, while Kite Arrow is a sort of finishing move that allows you to deal heavy burst damage against prone enemies.
For relic skills, your main priority is finding Myriad Shot as it is the fastest and most accurate attack you'll have. Stampede Shot is another good option for a stronger add clearing skill both before and during the Empowered Dragon fight. Finally, Eagle Arrow further boosts the damage of Kite Arrow, though you can instead get the Critical Shot passive to boost your damage on weak point hits.
Best Augments and Rings
Zeal, Endurance, and Exaltation are the most important augments for this fight to improve your stamina economy, while Lethality further boosts the damage you deal against the boss' weakpoints which you can easily do with manual aiming.
For your 7th Augment Slot, consider Intrepidity to reduce the loss gauge accumulation when getting hit. Alternatively, you can slot Athleticism as you'll be running around the stage to avoid the boss' ultimate attack.
The best rings for this fight are Ring of Enervation to give you extra stamina sustain when attacking using skills, while Ring of Dragonsbane gives you an additional damage boost to the Empowered Fallen Dragon.
Best Party for Empowered Fallen Dragon
Balanced Party
| Main Pawn | Hired Pawn | Hired Pawn |
|---|---|---|
 Mage |
 Fighter |
 Warrior |
We recommend setting your Main Pawn to Mage to easily customoze their skills and gear for the fight. High Palladium is a must-have to provide shielding, while the Argent Solace upgrade for Argent Succor from relics provides extra stamina recovery and extended healing.
Other options inlcude Exalted Bolt to give your Pawn some damage options, as well as the Grand Halidom upgrade for High Halidom. Celestial Paean is also good for this fight so that you can maintain high stamina throughout the fight.
Hire a Fighter and Warrior to Deal with Adds
A hired Fighter with Shield Summons, the Ring of Derision equipped, or the Provocation augment will draw the boss' aggro as well as other enemies that spawn during the fight.
Warrior is also good to have in this fight since the Empowered Fallen Dragon is very slow, so this vocation has more opportunities to deal massive damage to its weak points with its powerful attacks.
How to Beat Empowered Fallen Dragon
Destroy the Dragon's Head
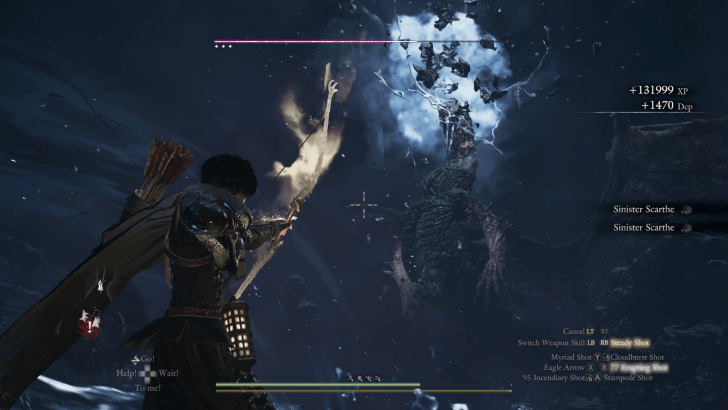
Prioritize destroying the Dragon's head to prevent it from using its ultimate breath attack which can cover the entire stage. The dragon will not regenerate its head unlike in Rumbles in the North, allowing you to permanently cripple the dragon for the rest of the fight.
The dragon can still use many powerful skills throughout the fight, but destroying the head prevents it from using its powerful breath attack.
Destroy the Dragon's Arms to Slow it Down
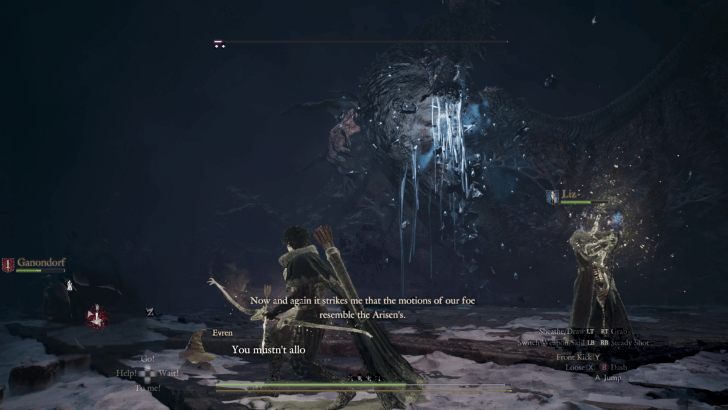
Once the Dragon's head is destroyed, focus on dealing as much damage to its arms to slow its movement for the remainder of the fight. This also prevents it from using powerful ground slam attacks and magic that it casts with its hands.
Hide Behind the Rocks to Avoid its Breath Attack
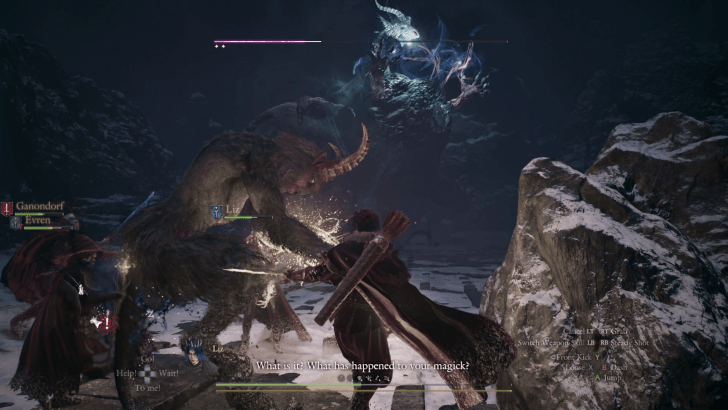
The Dragon's most powerful attack is a breath attack that covers the entire stage and can easily wipe out your party. If you fail to destroy the Dragon's head, quickly run towards the rocks near the side of the stage and hide there until the attack finishes.
Empowered Fallen Dragon Rewards
| Main Rewards |
|---|
|
・XP: 274,999 ・DCP: 2900 ・ Morbid Glare x5 ・Lv. 5 Spoils |
The main reward for defeating the Empowered Fallen Dragon are Morbid Glares, which you need three of to fight Empowered Satanachia.
This boss doesn't have any unique drops apart from Lv.5 Spoils, which you can appraise into some of the best weapons and armor in the game.
Dragon's Dogma 2 Related Guides

All Monsters
| All Monsters and Enemies | |||
|---|---|---|---|
 Gagana |
 Blackdogs |
Blue and Purple Slime |
 Fimbl |
 Blemmyae |
Evil Eye |
 The Dragon |
 Goblin |
 Hobgoblin |
 Wolf |
 Harpy |
 Saurian |
 Chimera |
 Golem |
 Ogre |
 Slime |
 Skeleton |
 Undead |
 Griffin |
 Chopper |
 Rattlers |
 Cyclops |
 Minotaur |
 Knacker |
 Wight |
 Talos |
 Dullahan |
 Drake |
 Sphinx |
 Medusa |
 The Brine |
Rabbit |
| Phantom | Venin Harpy | Redwolf | Asp |
| Gore Harpy | Grim Ogre |
 Gorechimera |
Warg |
 Goreminotaur |
 Lich |
 Lesser Dragon |
 Spider |
 Magma Scale |
 Garm |
 Barbatos |
 Empowered Fallen Dragon |
 Satanachia |
 Death |
||
Monster Tips
| Monster Tips | |
|---|---|
| Monster Respawn Time: When Do Monsters Respawn? | - |
Comment



Author

Dragon's Dogma 2 (DD2) Dark Arisen Walkthrough & Guides Wiki
How to Beat Empowered Fallen Dragon

Rankings
- We could not find the message board you were looking for.
Gaming News





Popular Games

Genshin Impact Walkthrough & Guides Wiki
Fire Emblem: Fortune's Weave (FEFW) Walkthrough & Guides Wiki
Aniimo Walkthrough & Guides Wiki
Wuthering Waves Walkthrough & Guides Wiki
Dragon's Dogma 2 (DD2) Dark Arisen Walkthrough & Guides Wiki
Umamusume: Pretty Derby Walkthrough & Guides Wiki
Honkai: Star Rail Walkthrough & Guides Wiki
Zenless Zone Zero Walkthrough & Guides Wiki
Pokemon TCG Pocket (PTCGP) Strategies & Guides Wiki
AION 2 Walkthrough & Guides Wiki









Recommended Games
Fire Emblem Heroes (FEH) Walkthrough & Guides Wiki
Where Winds Meet Walkthrough & Guides Wiki
Diablo 4: Lord of Hatred Walkthrough & Guides Wiki
Super Smash Bros. Ultimate Walkthrough & Guides Wiki
Persona 3 Reload Walkthrough & Guides Wiki
The Legend of Zelda: Tears of the Kingdom Walkthrough & Guides Wiki
Elden Ring Walkthrough & Guides Wiki
Pokemon Brilliant Diamond and Shining Pearl (BDSP) Walkthrough & Guides Wiki
Cyberpunk 2077: Ultimate Edition Walkthrough & Guides Wiki
Monster Hunter World Walkthrough & Guides Wiki










All rights reserved
©CAPCOM CO., LTD. ALL RIGHTS RESERVED.
The copyrights of videos of games used in our content and other intellectual property rights belong to the provider of the game.
The contents we provide on this site were created personally by members of the Game8 editorial department.
We refuse the right to reuse or repost content taken without our permission such as data or images to other sites.