
All Seeker's Token Locations

Seeker's Tokens are collectibles that you can exchange from rare equipment in Dragon's Dogma 2 (DD2). Read on for a list of all Seeker's Token locations, what Seeker's Tokens are used for, and where to find them.
Seeker's Token Interactive Map
Seeker's Token Map
| Legend for Map Icons | ||
|---|---|---|
 Inn |
 Treasure Chest |
 Golden Trove Beetle |
 Seeker's Token |
 Riftstone |
 Portcrystal |
 Oxcart |
 Caves |
 Statues |
 Lost Rites (DLC) |
- | - |
All Seeker's Token Locations
 |
Location Details |
|---|---|
|
Seeker’s Token 1
|
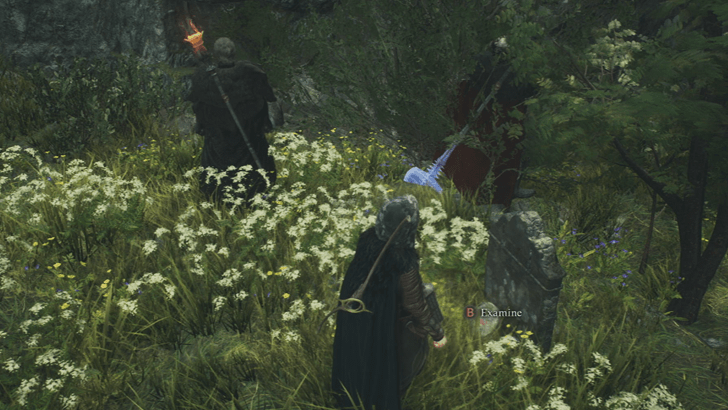 Location: Head northeast from Melve along the path and collect the Seeker’s Token from a tombstone. To get here, you will need to destroy a boulder lodged into the rock wall that opens up a path into the area. |
|
Seeker’s Token 2
|
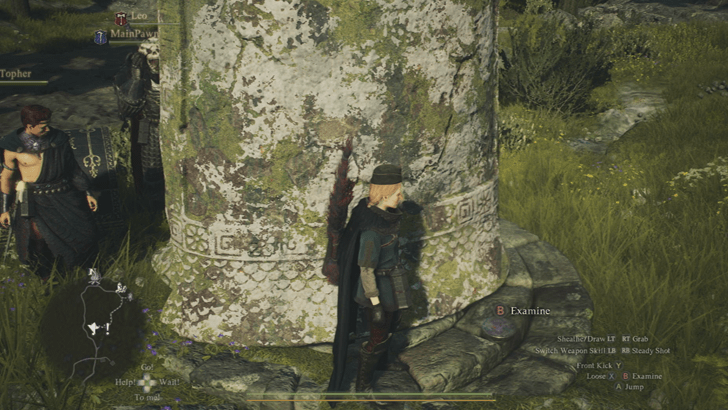 Location: There is a Seeker’s Token right at the base of a giant statue northwest from Borderwatch. |
|
Seeker’s Token 3
|
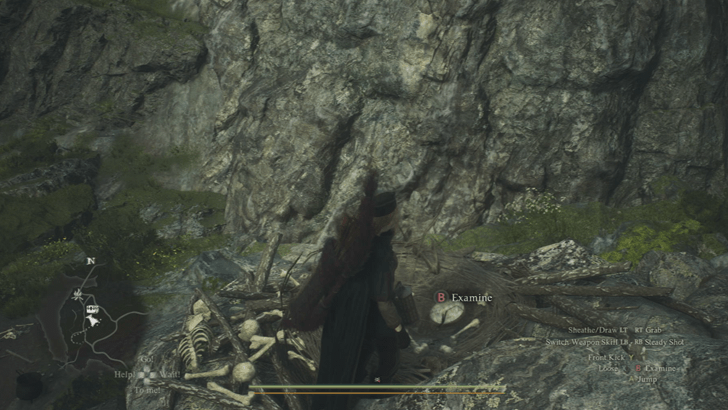 Location: In a Harpy nest on a rocky hill, west of Borderwatch. Climb a nearby hill across the path and cross the rock bridge to get on top. |
|
Seeker’s Token 5
|
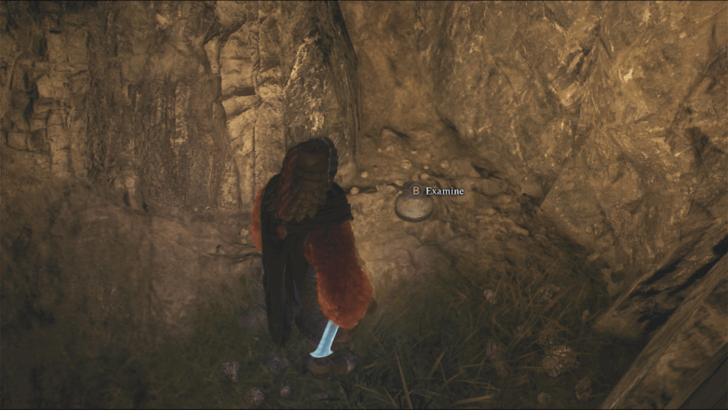 Location: On top of ruins at the Gathering of Beasts, east of Melve town. |
|
Seeker’s Token 6
|
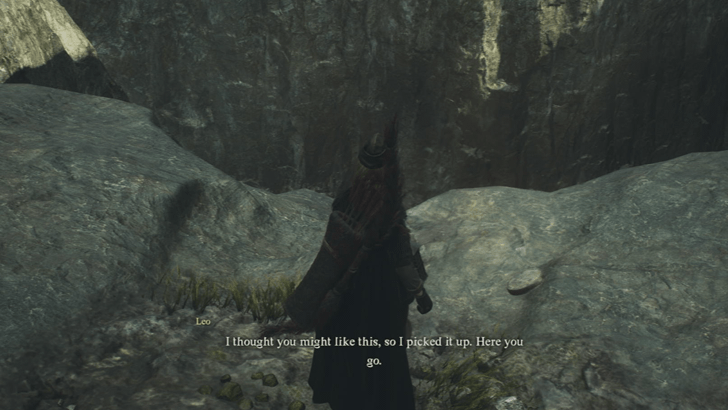 Location: On a cliff overlooking a ravine far east of Melve and east of Gathering of Beasts. |
|
Seeker’s Token 7
|
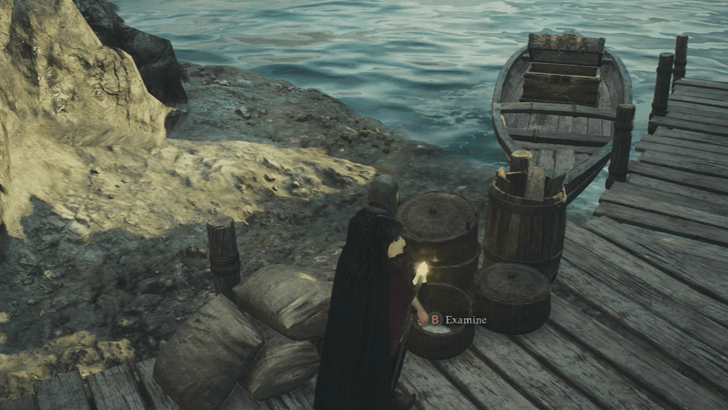 Location: Head east from Vernworth. The Seeker’s Token can be collected from a basket on a small pier by the shore. |
|
Seeker’s Token 8
|
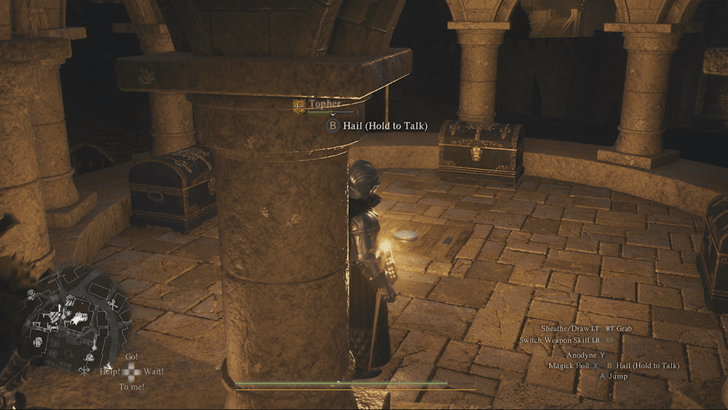 Location: Climb on top of the roof of the building of the Grand Riftstone of Vermund, the Seeker’s Token will be on the ground in front of a couple treasure chests. |
|
Seeker’s Token 9
|
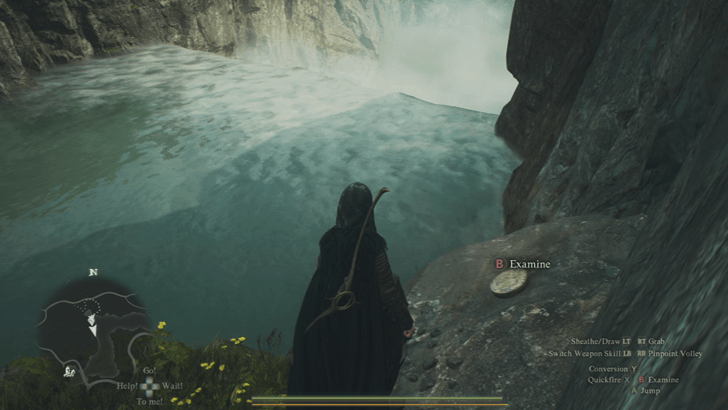 Location: Southwest of Borderwatch. Reach this area by jumping on rocky platforms close to the river’s edge. |
|
Seeker’s Token 10
|
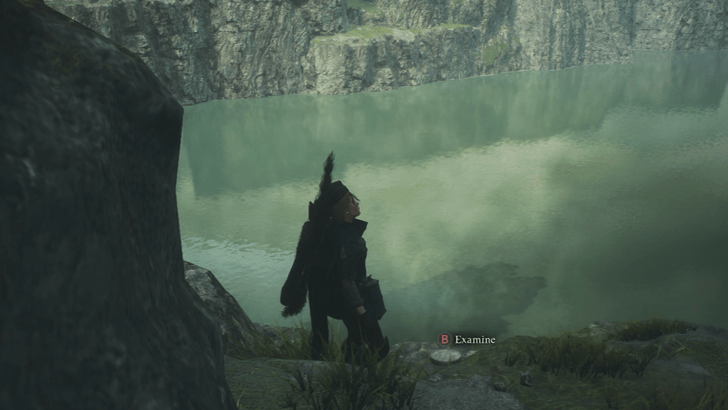 Location: West of Borderwatch, jump down to the rocky area below, close to the water. |
|
Seeker’s Token 11
|
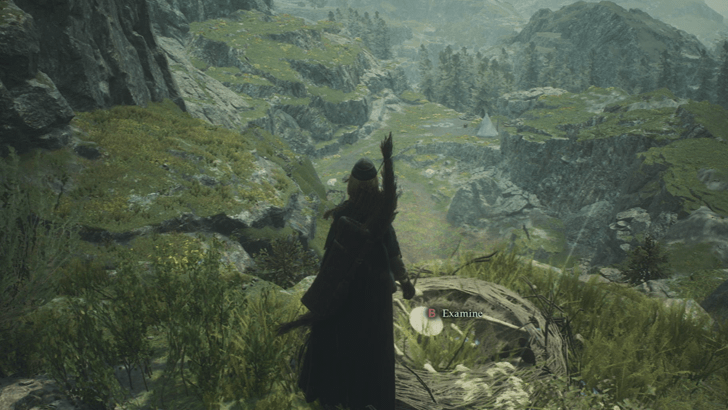 Location: West of Borderwatch and heading up the mountain path. The token is in a Harpy nest at the top of a hill. |
|
Seeker’s Token 12
|
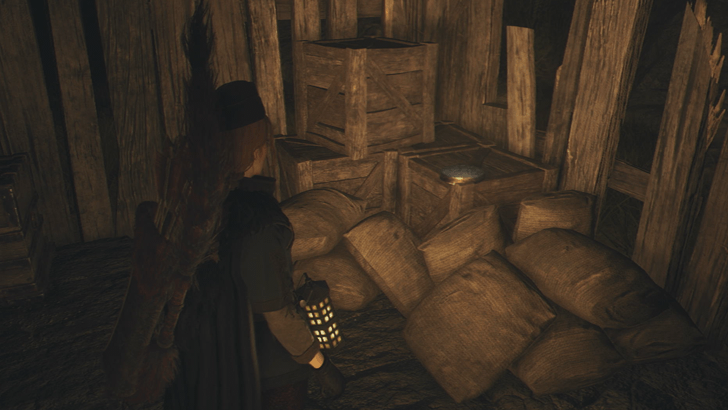 Location: To get here, you must circle around, heading out west from Borderwatch, then north up the mountain path, through The Mountain’s Secret tunnel, then back outside. The token is in an abandoned shack. |
|
Seeker’s Token 13
|
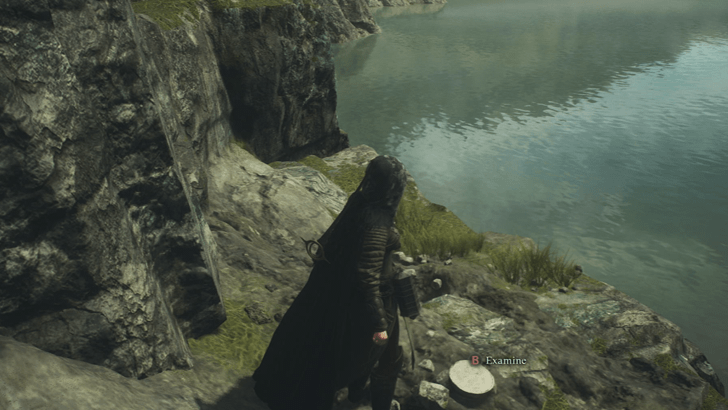 Location: Head southwest of Borderwatch, down to the edge of the river, then jump down to an area close to the water where the token is. |
|
Seeker’s Token 15
|
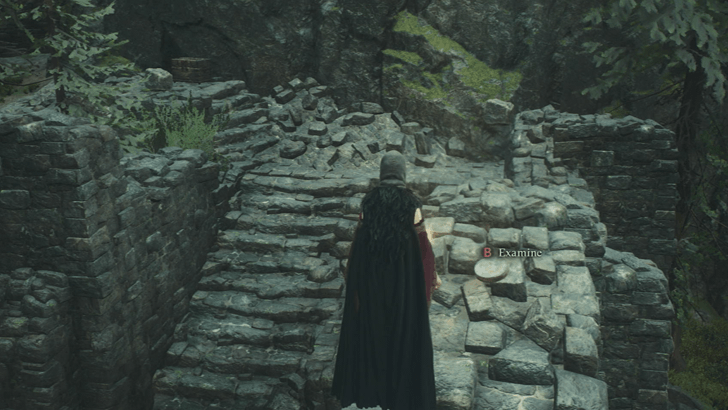 Location: On top of the arch in the castle ruins. |
|
Seeker’s Token 16
|
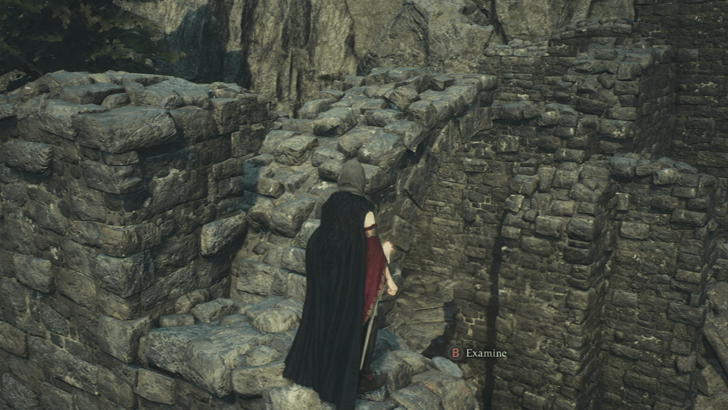 Location: On top of the broken arched wall. |
|
Seeker’s Token 17
|
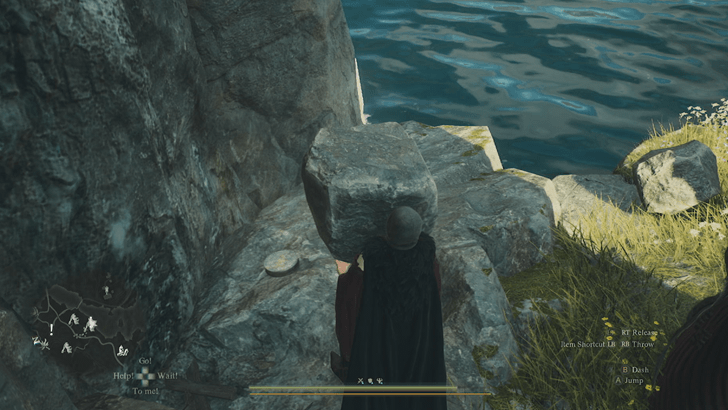 Location: Inside Spirit’s Path cave. Follow the path leading to a dead end, near the water. |
|
Seeker’s Token 18
|
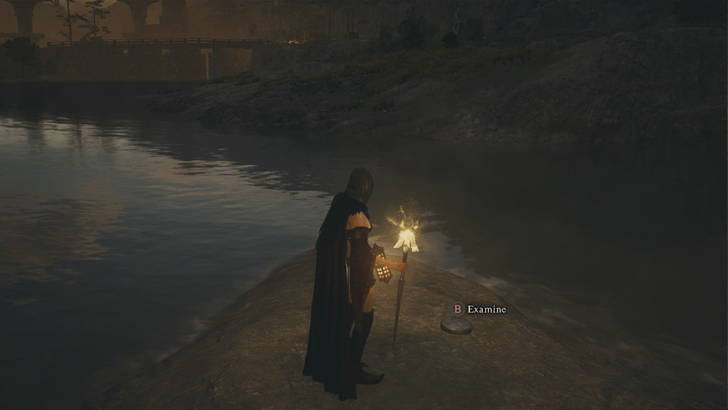 Location: On a rock by the river. Jump towards it to reach the Token. |
|
Seeker’s Token 19
|
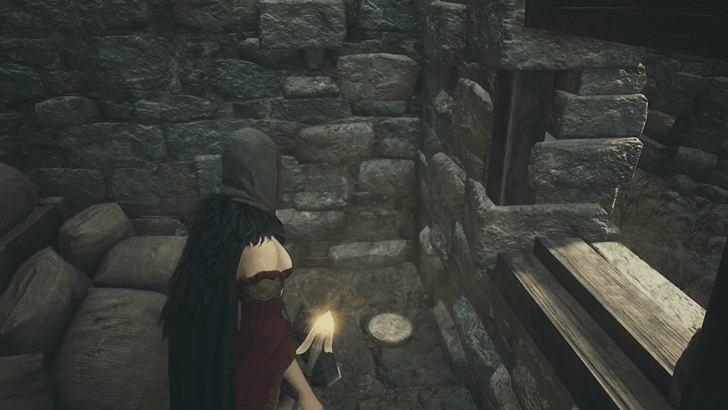 Location: Inside one of the houses. Token can be found to the right hand corner upon entering. |
|
Seeker’s Token 20
|
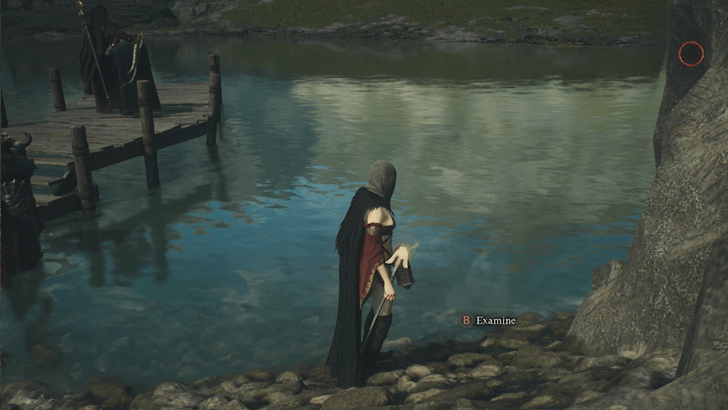 Location: On the beach by the docks. |
|
Seeker’s Token 21
|
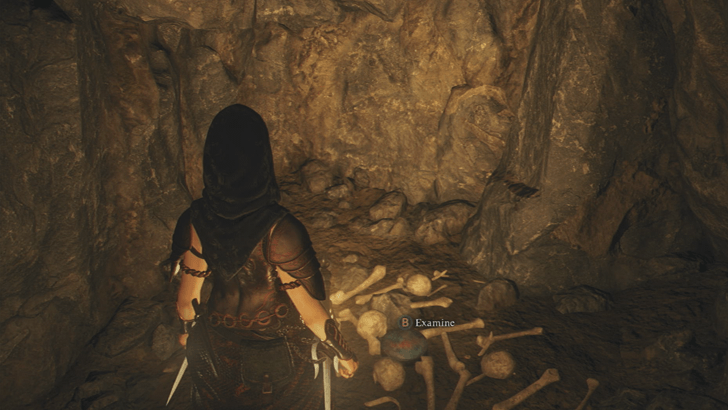 Location: Inside the Trembling Hollow Cave. |
|
Seeker’s Token 22
|
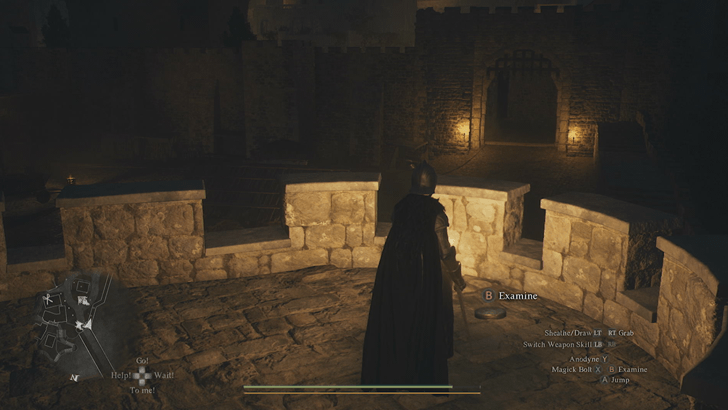 Location: Token can be found on the section of the bridge tower overlooking the sea. |
|
Seeker’s Token 23
|
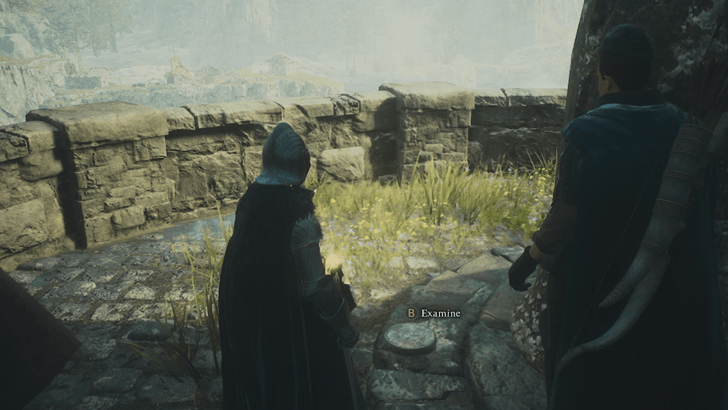 Location: Token can be found at the base of the statue. |
|
Seeker’s Token 24
|
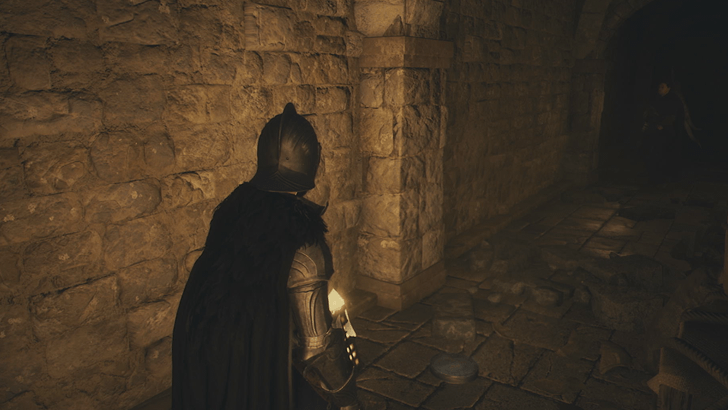 Location: Token can be found on a ledge above the stair entrance of the Gracious Hand’s Vaults. Complete The Heel of History quest to access dungeon. |
|
Seeker’s Token 26
|
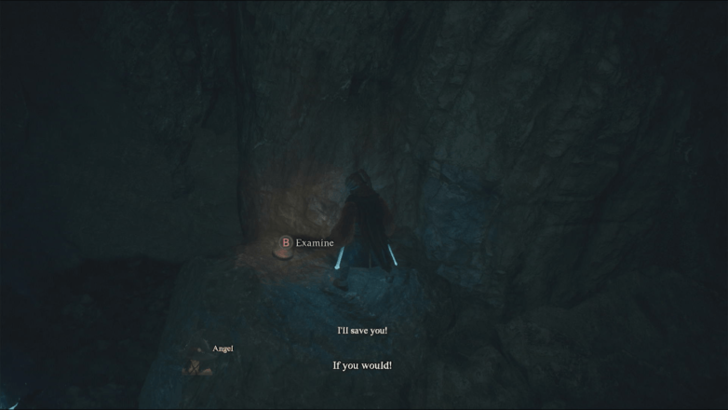 Location: Token can be found on top of a rock beside the base of the waterfall. |
|
Seeker’s Token 27
|
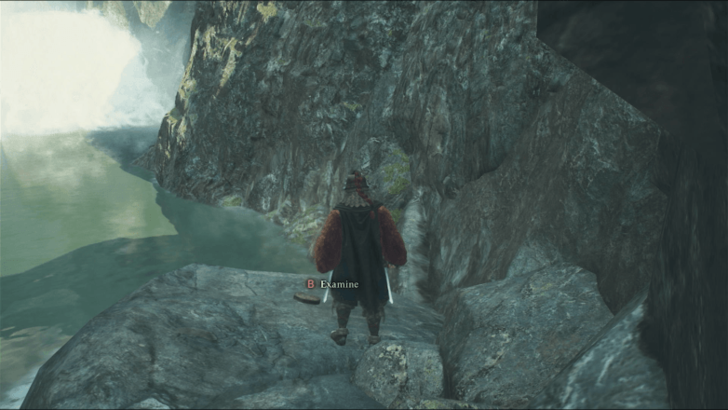 Location: Token can be found by the river’s edge. |
|
Seeker’s Token 28
|
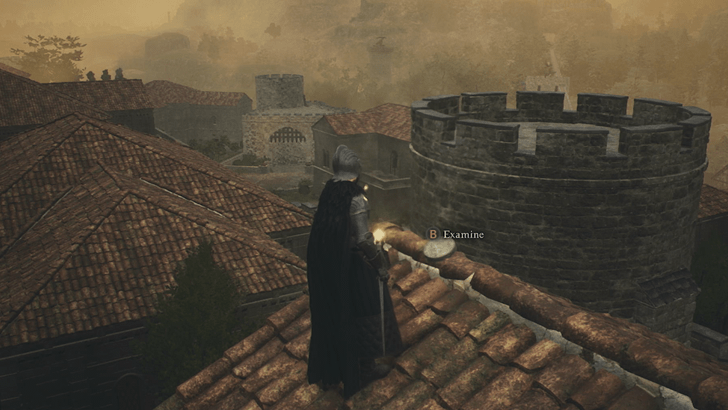 Location: Jump on to the castle walls, then jump on the roof of Baldwin’s estate. The Token can be collected by the northeast section of the roof. |
|
Seeker’s Token 30
|
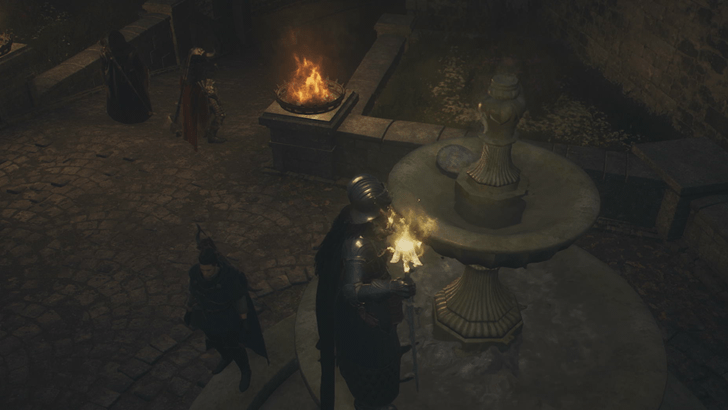 Location: Climb the Water Fountain to get the Seeker’s Token at the top. |
|
Seeker’s Token 31
|
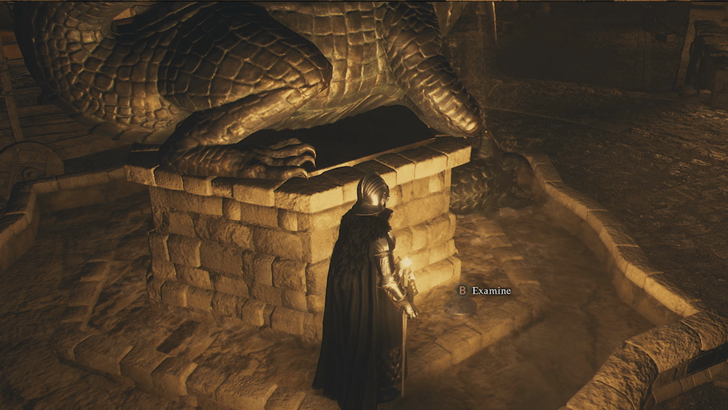 Location: The Seeker’s Token can be found in the water of the Vernworth Fountain, directly in front of one of the lit torches. |
|
Seeker’s Token 32
|
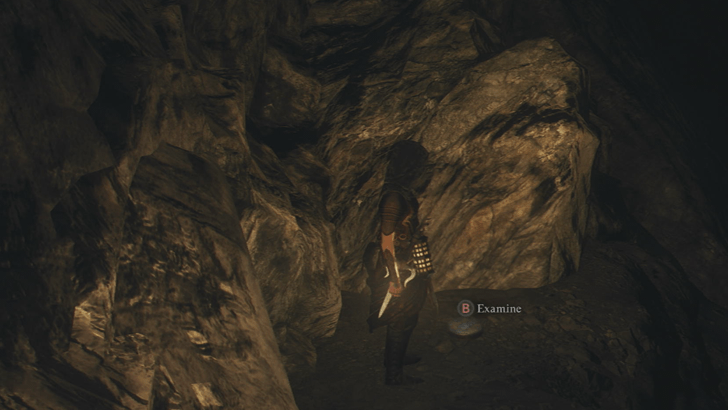 Location: From the Bridge, head down towards the small shore, to find the Token near the rocks. |
|
Seeker’s Token 33
|
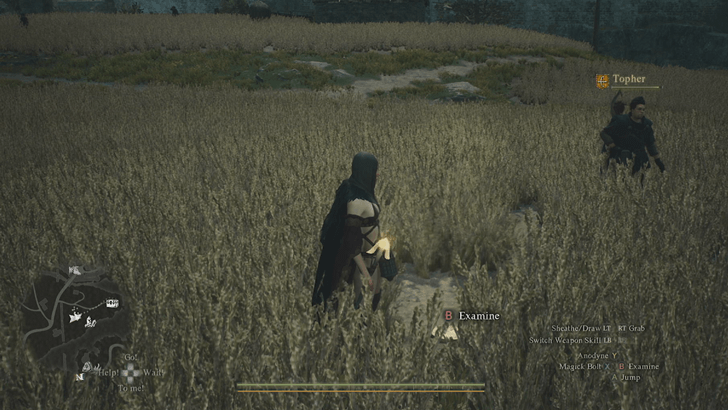 Location: Token can be found hidden in the field. |
|
Seeker’s Token 34
|
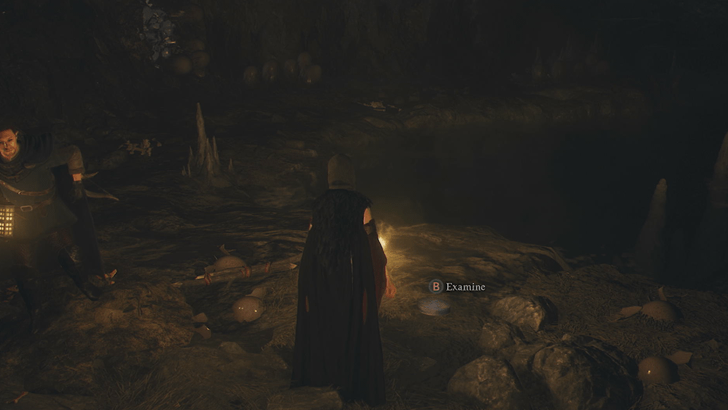 Location: On the ground at the end of the coastal cave. |
|
Seeker’s Token 35
|
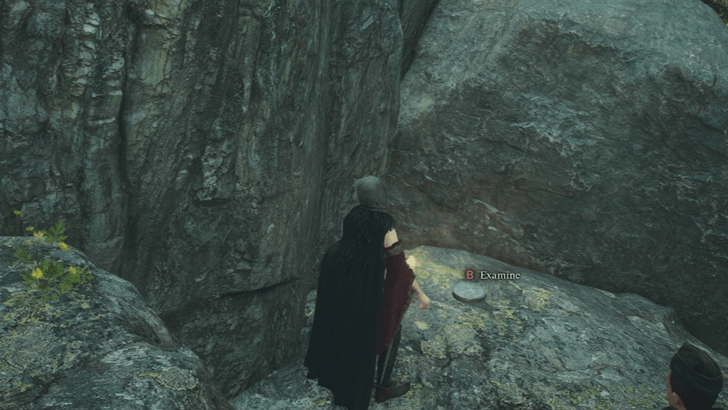 Location: By the cliffs near the ruins. |
|
Seeker’s Token 37
|
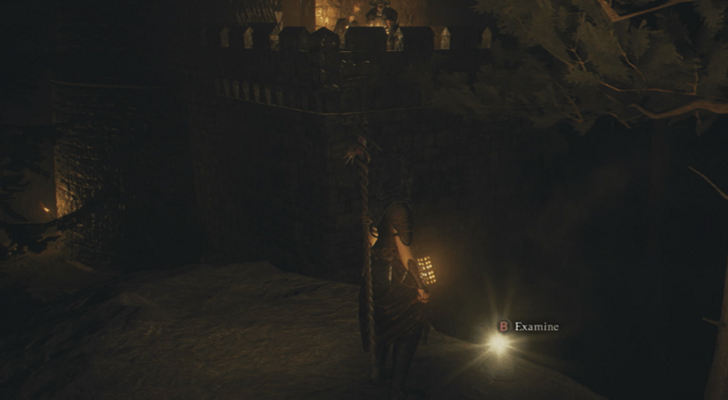 Location: From the chest in the ruins, jump towards the nearby boulder to find the token. |
|
Seeker’s Token 38
|
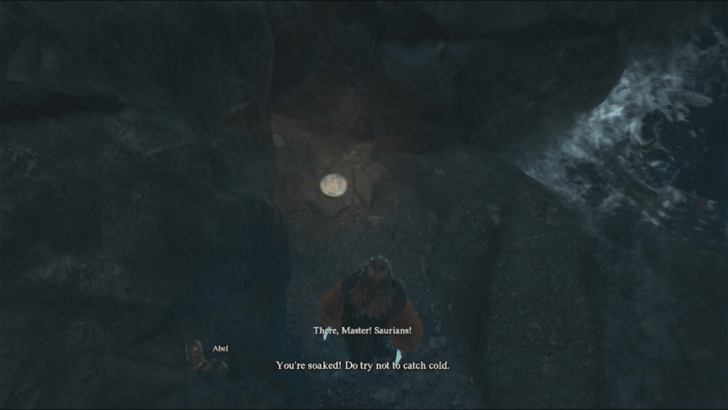 Location: On the beach, near the large rock. |
|
Seeker’s Token 39
|
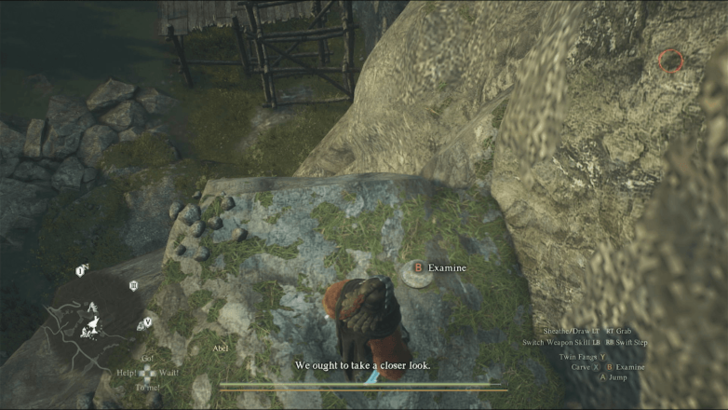 Location: Climb the scaffolding, then onto the cliff to reach the token. |
|
Seeker’s Token 40
|
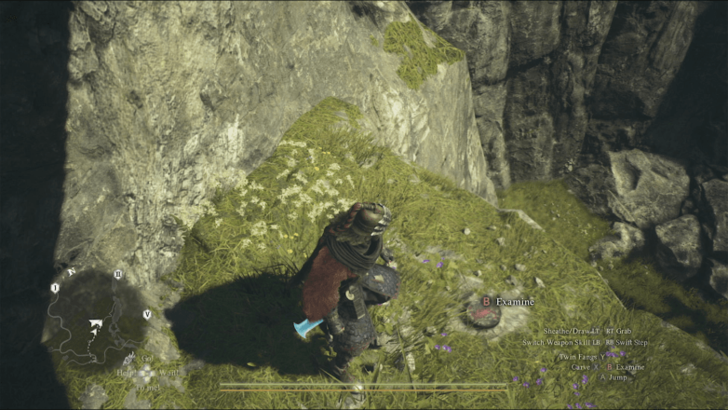 Location: Inside the hidden path, climb up to the second level, then jump to the other side to reach the token. |
|
Seeker’s Token 41
|
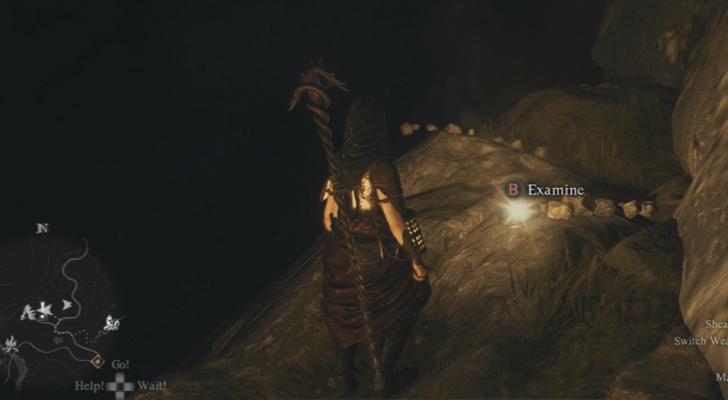 Location: Rests on top of a rock by the Trevo Mine entrance. |
|
Seeker’s Token 42
|
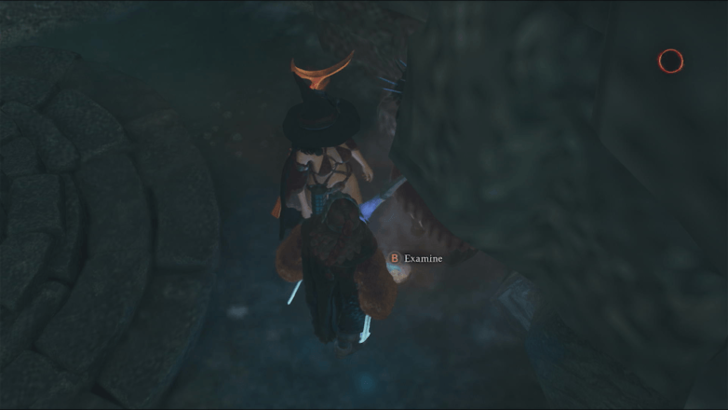 Location: Just beside the Forgotten Riftstone. |
|
Seeker’s Token 44
|
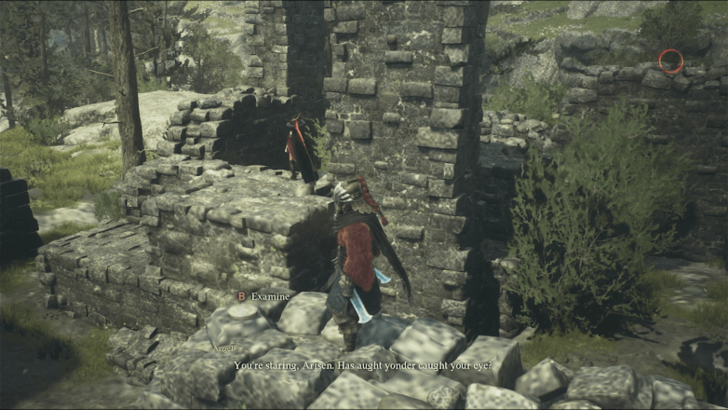 Location: On top of the L-shaped section of the broken walls. |
|
Seeker’s Token 45
|
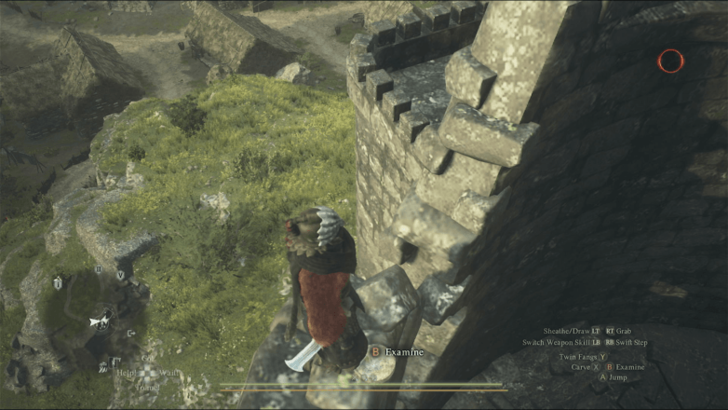 Location: At the top of the old Lighthouse, once you reach the Wyrmslife Crystal, carefully walk the ledge, then jump on top of the wall to find the token. |
|
Seeker’s Token 46
|
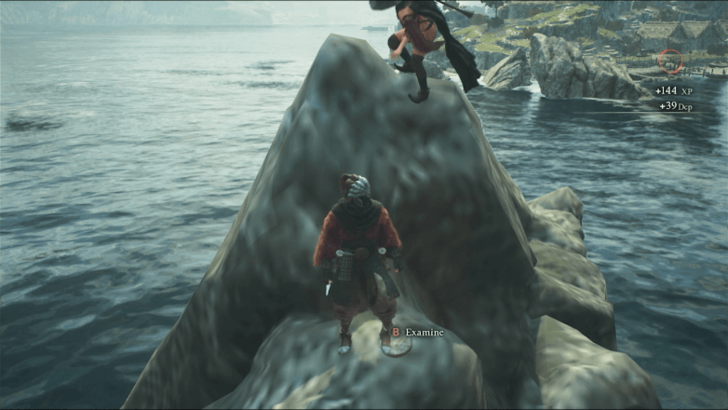 Location: On top of the large rock by the shore. |
|
Seeker’s Token 47
|
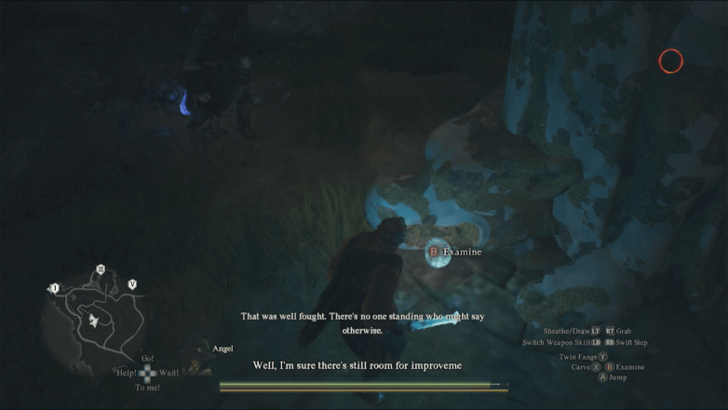 Location: At the base of the statue. |
|
Seeker’s Token 48
|
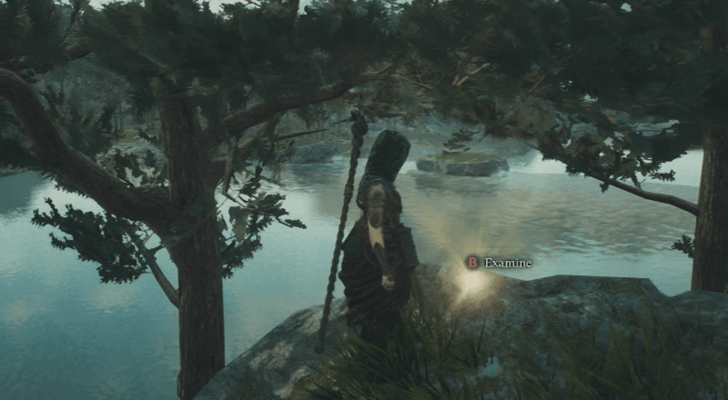 Location: On a hill northeast of the Riverside Cavern. |
|
Seeker’s Token 49
|
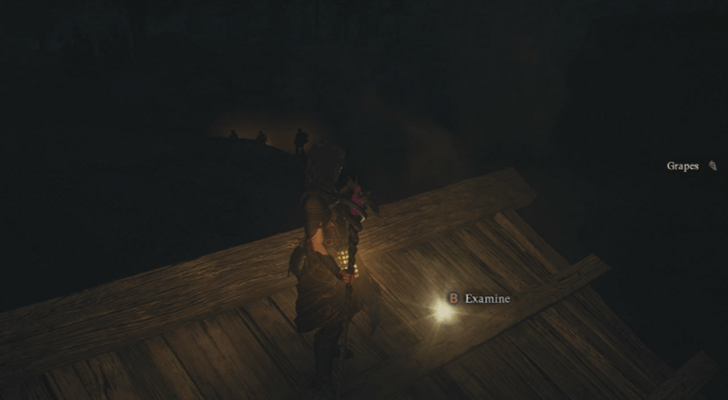 Location: Jump onto the scaffolding, then onto the roof of the house to reach the token. Use Levitate to reach the roof easier. |
|
Seeker’s Token 50
|
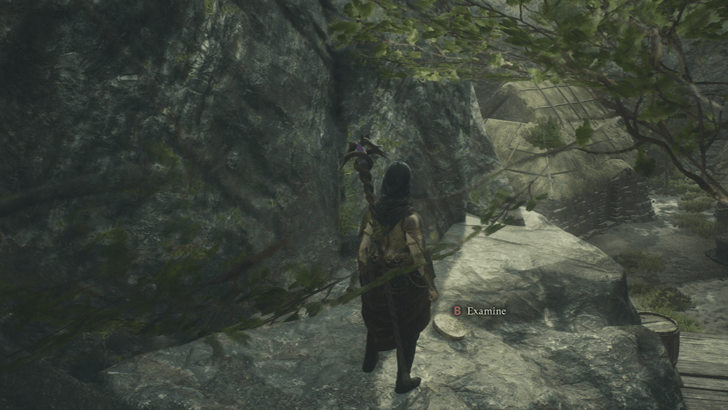 Location: Climb the scaffolding, then onto the cliff to reach the token. |
|
Seeker’s Token 51
|
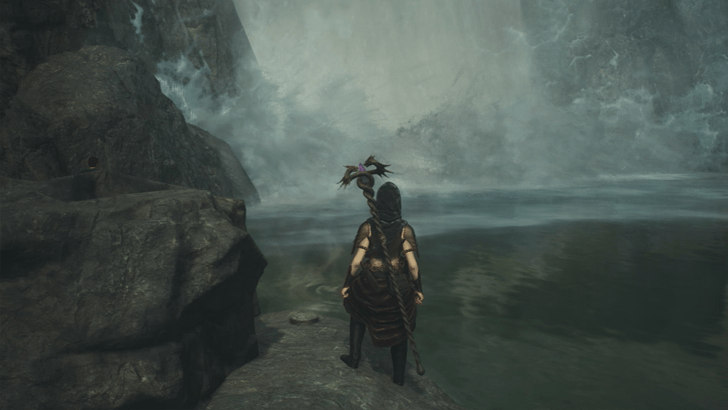 Location: On a rock near the base of the waterfall in Northern Vermund. |
|
Seeker’s Token 53
|
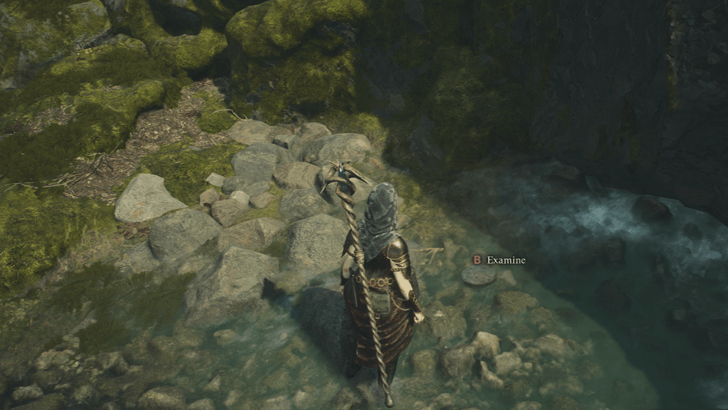 Location: Inside Kough’s Inn in Sacred Arbor. |
|
Seeker’s Token 54
|
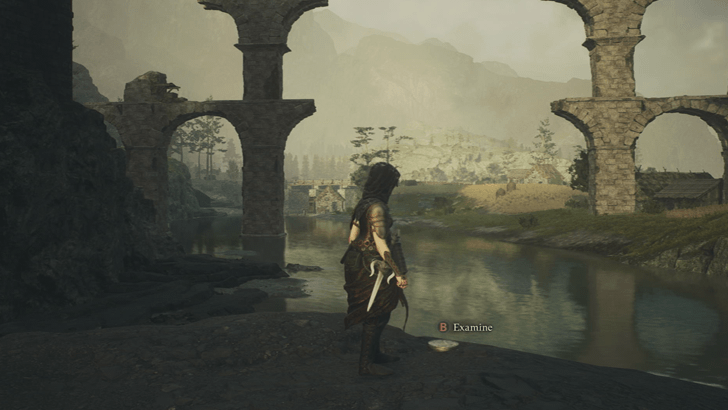 Location: On top of a boulder. |
|
Seeker’s Token 55
|
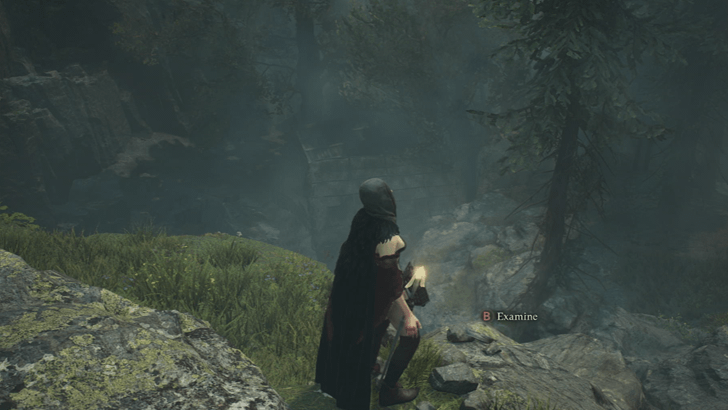 Location: On a cliff near Nameless Village |
|
Seeker’s Token 56
|
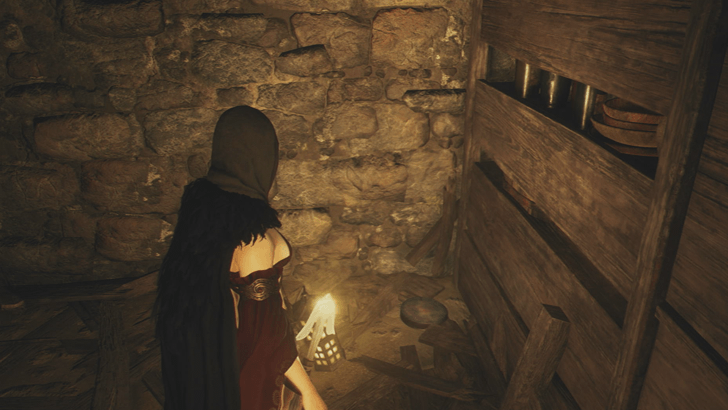 Location: Take the ladder to the basement of the ruins to find the Token under some crates. |
|
Seeker’s Token 57
|
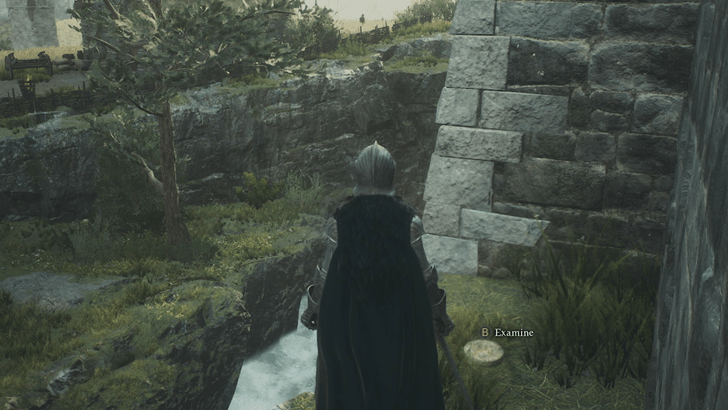 Location: From the bridge outside the city, jump towards the ledge of the outer walls. Use Levitate to cross the blocked path and reach the token. |
|
Seeker’s Token 58
|
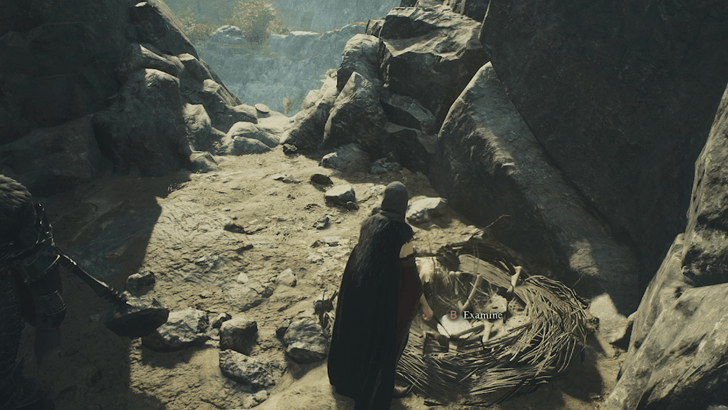 Location: In the Harpy Nest near Twilight Cave. |
|
Seeker’s Token 59
|
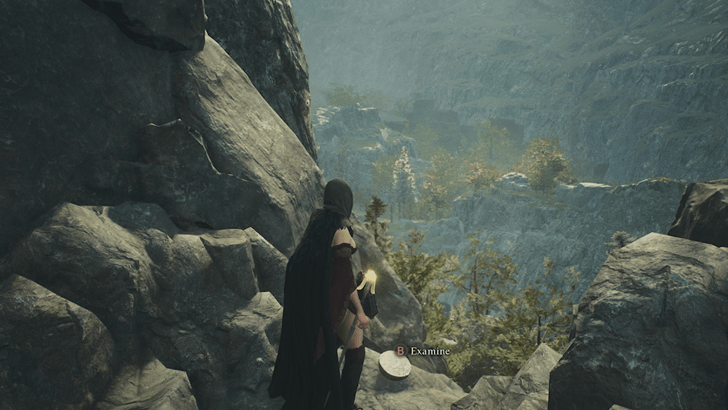 Location: Near the Harpy Nest Token, under a breakable boulder. |
|
Seeker’s Token 60
|
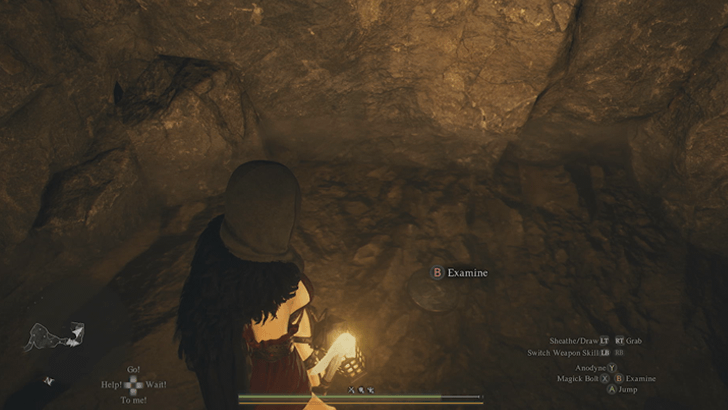 Location: Inside a small pool of water within the Twilight Cave. |
|
Seeker’s Token 61
|
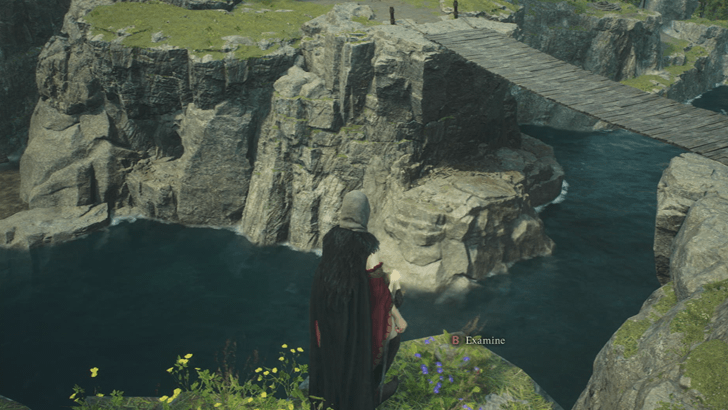 Location: On a ledge near the river. |
|
Seeker’s Token 62
|
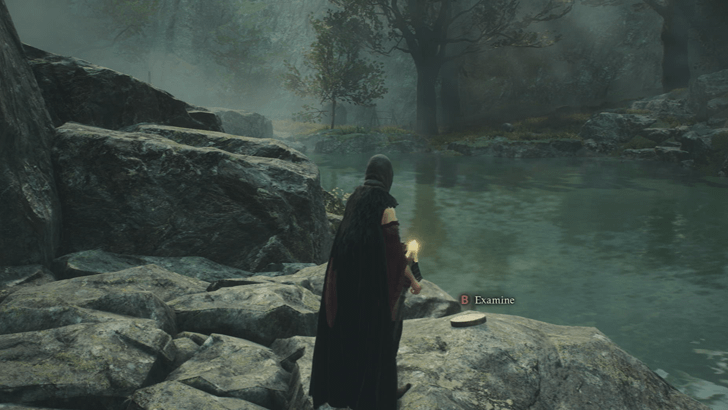 Location: Head down to the lake to find the Token resting above a rock. |
|
Seeker’s Token 63
|
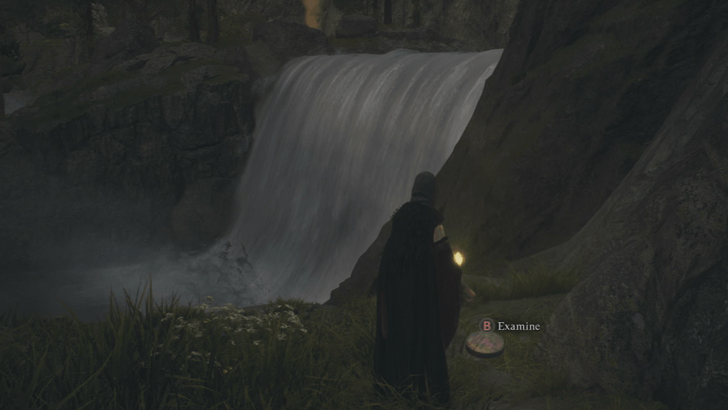 Location: On a ledge overlooking the river. |
|
Seeker’s Token 64
|
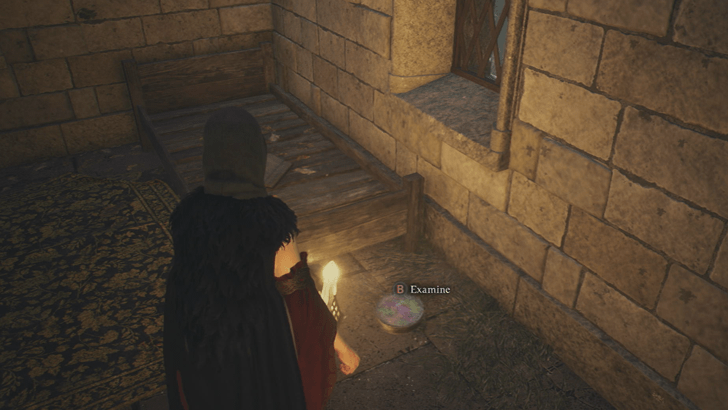 Location: On the second floor of the Old Noble Manor. Jump on top of the fireplace, then jump up and vault to reach the second floor. |
|
Seeker’s Token 65
|
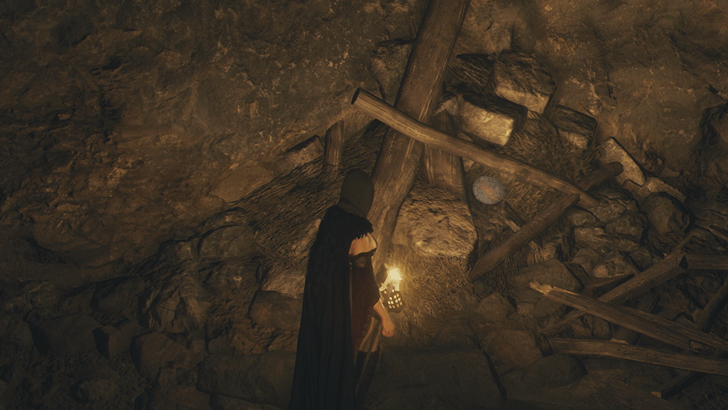 Location: Upon entering the Underbridge Grotto, climb the rocks on the right hand side. The Token can be found near the chest on the second floor. |
|
Seeker’s Token 66
|
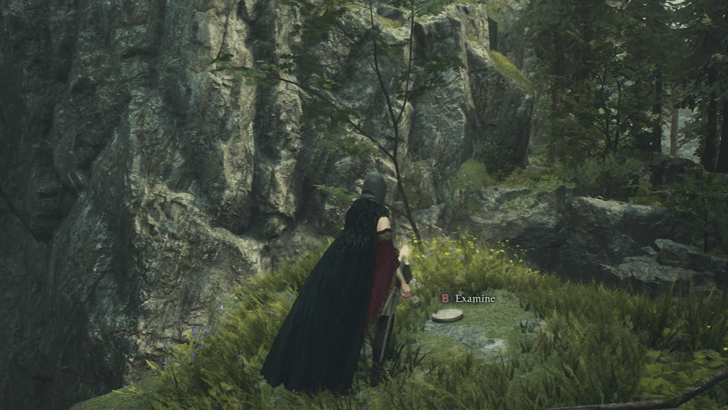 Location: On the edge of a cliff. |
|
Seeker’s Token 67
|
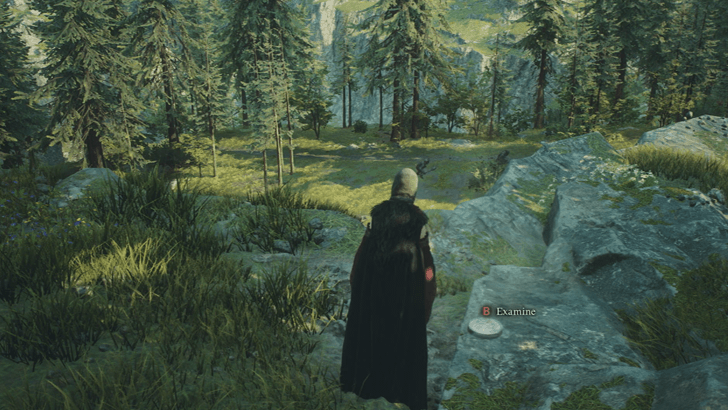 Location: On a rock near the cliff’s edge. |
|
Seeker’s Token 68
|
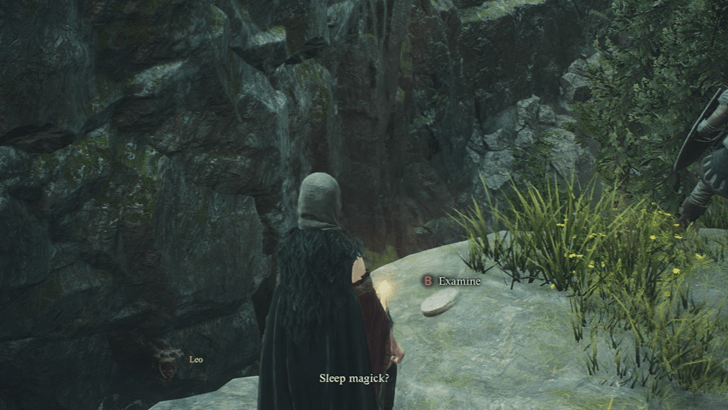 Location: Jump from the cliff with the corpses to the other side to reach the token on the opposite ledge. |
|
Seeker’s Token 69
|
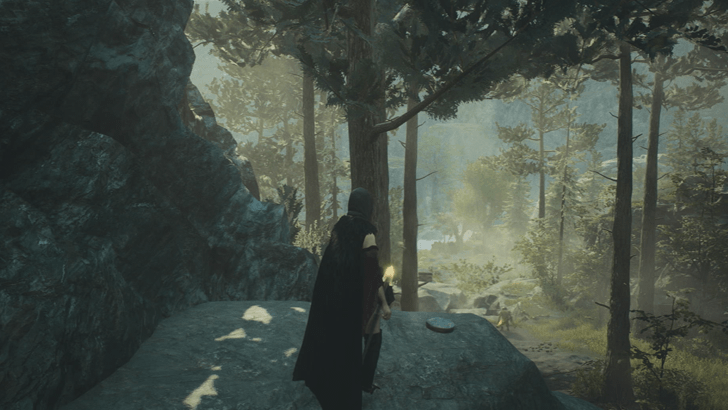 Location: On top of a rock. |
|
Seeker’s Token 70
|
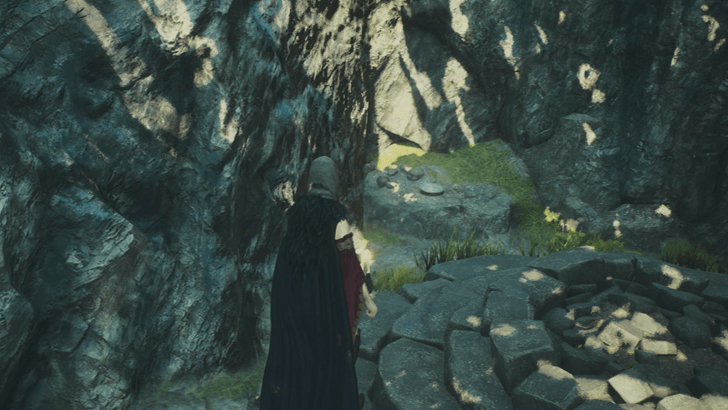 Location: On top of a rock near the Riftstone. |
|
Seeker’s Token 71
|
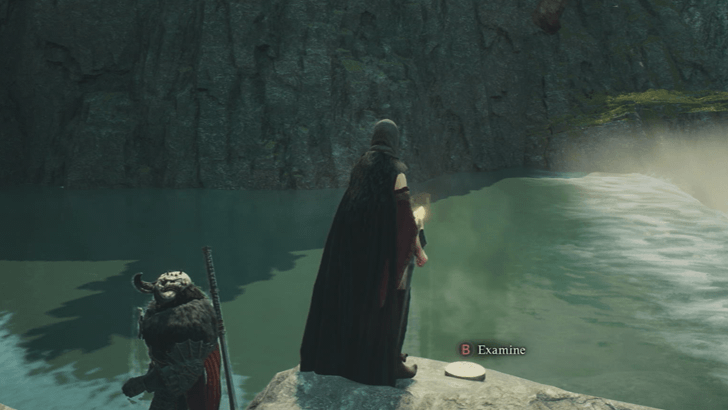 Location: Rests atop a boulder by the campsite. |
|
Seeker’s Token 72
|
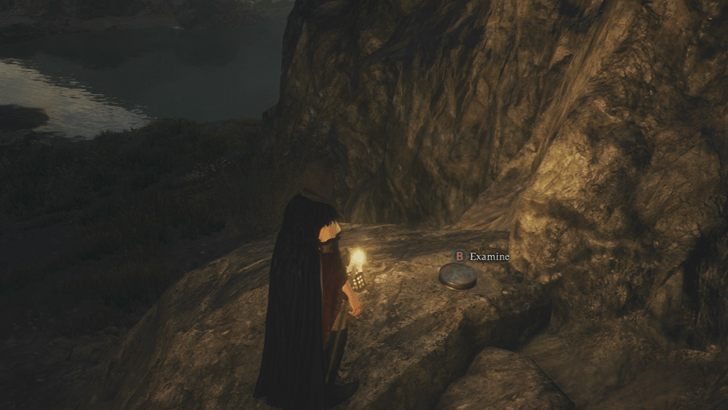 Location: On a rock below the slope heading towards the river. |
|
Seeker’s Token 73
|
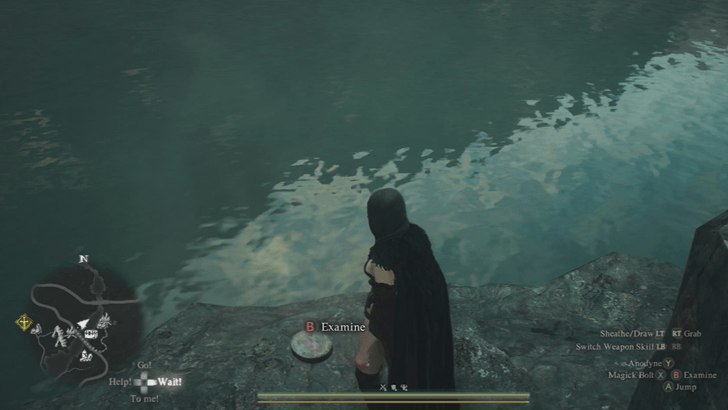 Location: On a small ledge near the water. |
|
Seeker’s Token 75
|
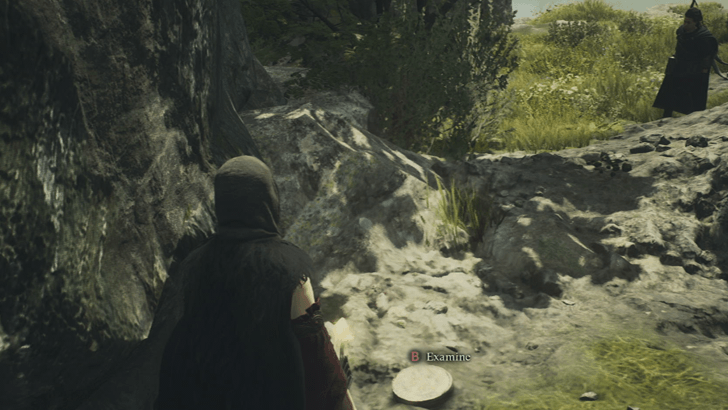 Location: Behind the statue in front of the waterfalls. |
|
Seeker’s Token 76
|
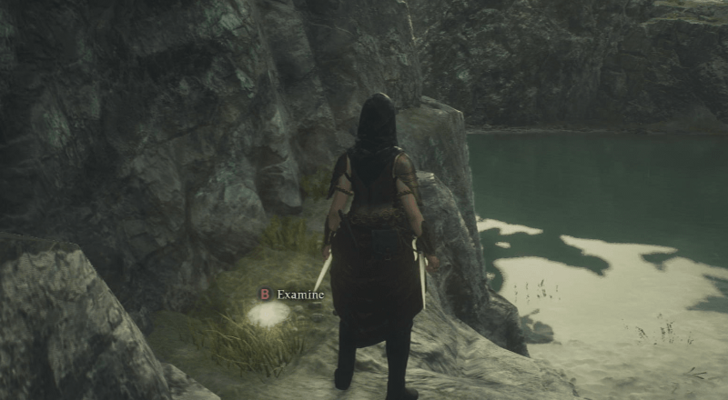 Location: On top of a rock near the wooden bridge. |
|
Seeker’s Token 77
|
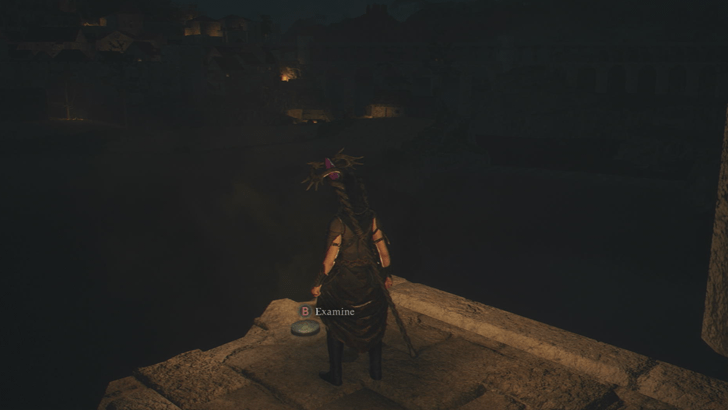 Location: Can be found at the end of the broken bridge. |
|
Seeker’s Token 78
|
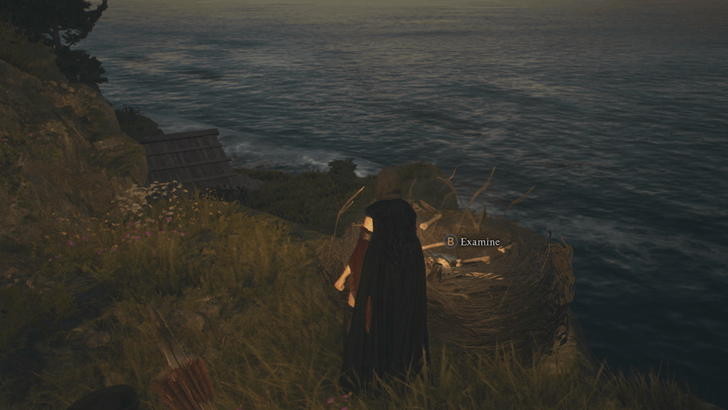 Location: On the Harpy Nest overlooking the water. |
|
Seeker’s Token 79
|
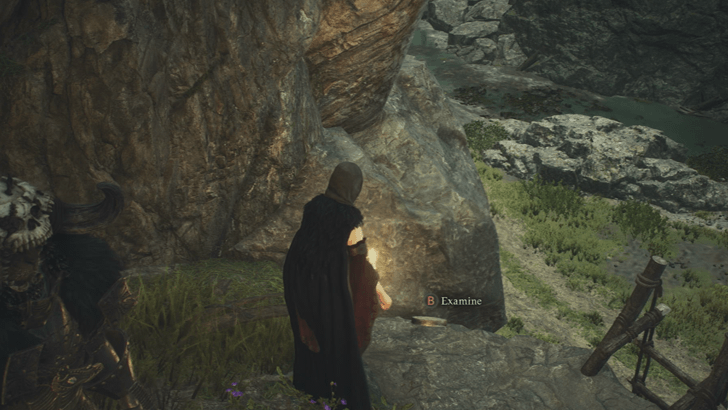 Location: Beside the ladder on the upper cliff of Cavern of the Forsaken. |
|
Seeker’s Token 80
|
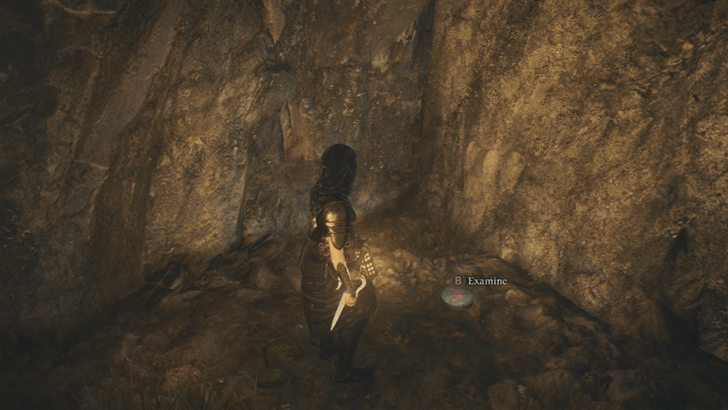 Location: Enter the opening between walls to find a path. Token can be found at the end of the cave’s path. |
|
Seeker’s Token 81
|
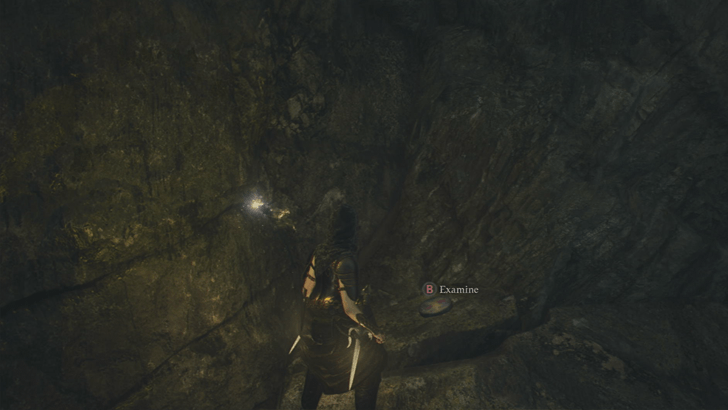 Location: At the end of the ravine, climb up the rocks to find the Token. |
|
Seeker’s Token 82
|
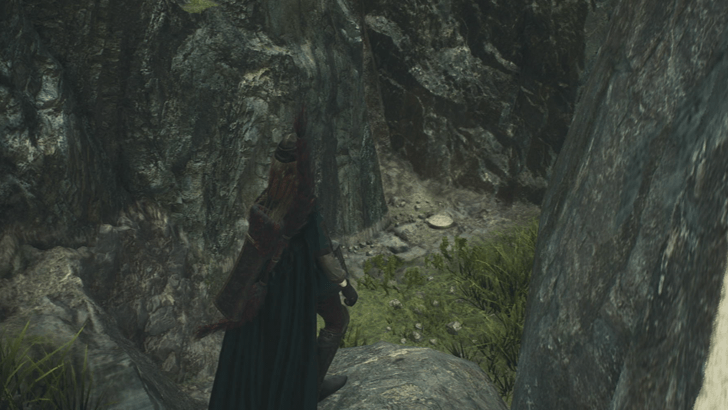 Location: Use Levitate from the stone arch to reach the Token near the chest. |
|
Seeker’s Token 83
|
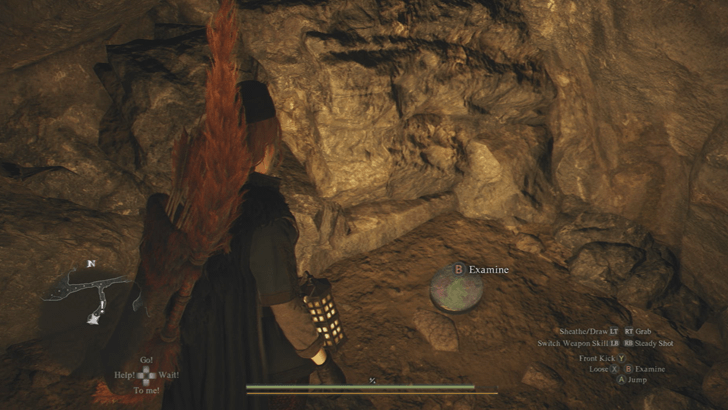 Location: Inside Waterfall Cave, on a ledge accessed by breaking some boxes. |
|
Seeker’s Token 84
|
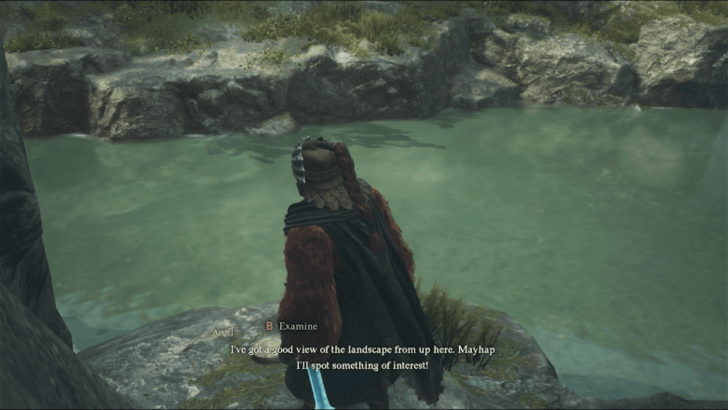 Location: On a rock by the river. |
|
Seeker’s Token 85
|
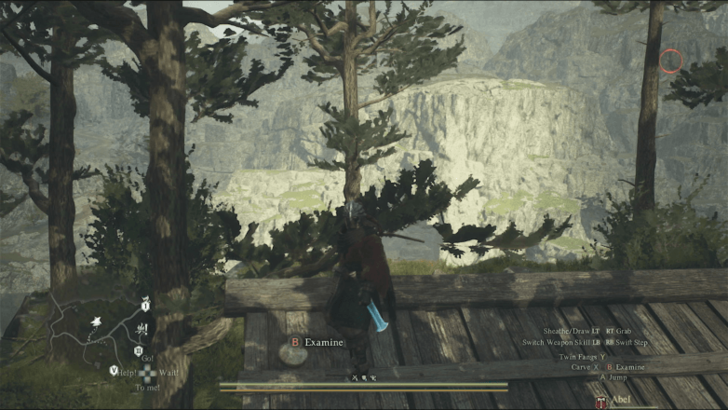 Location: Climb the roof from the back of the house to reach the token. |
|
Seeker’s Token 86
|
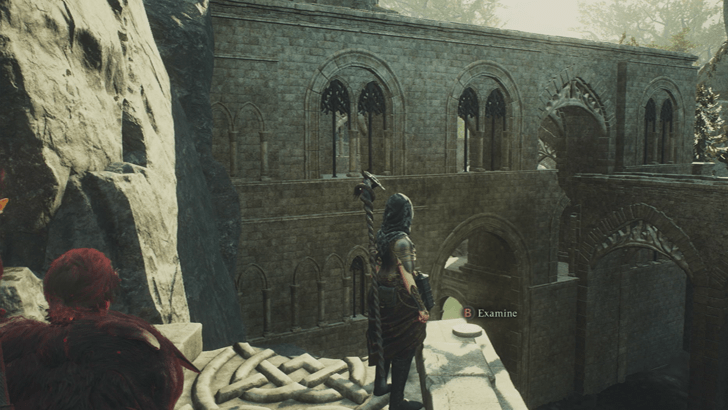 Location: On the edge of the stone arch furthest from the waterfall. |
|
Seeker’s Token 88
|
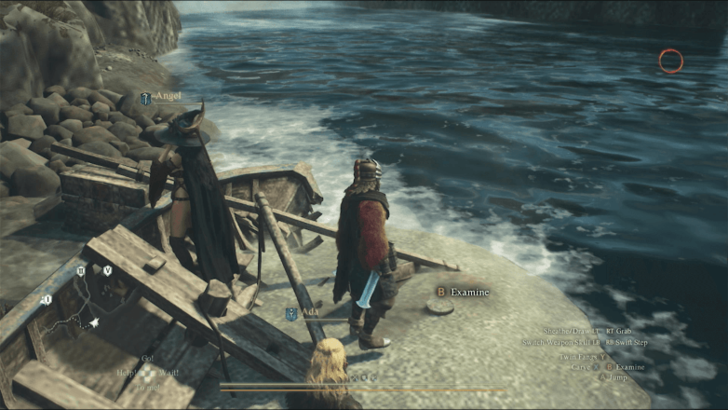 Location: Beside a boat by the shore. |
|
Seeker’s Token 89
|
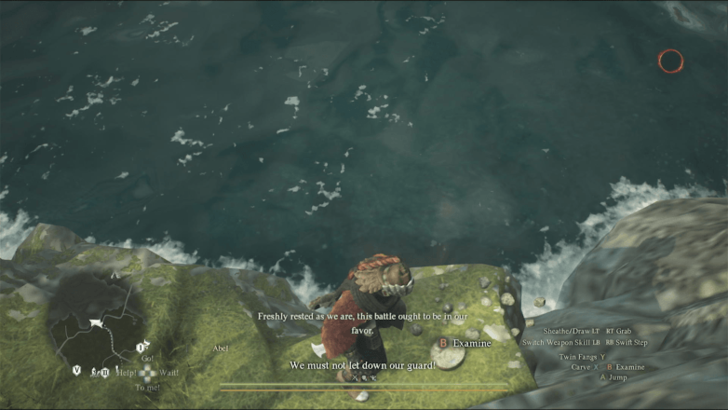 Location: On a cliff overlooking the water. |
|
Seeker’s Token 90
|
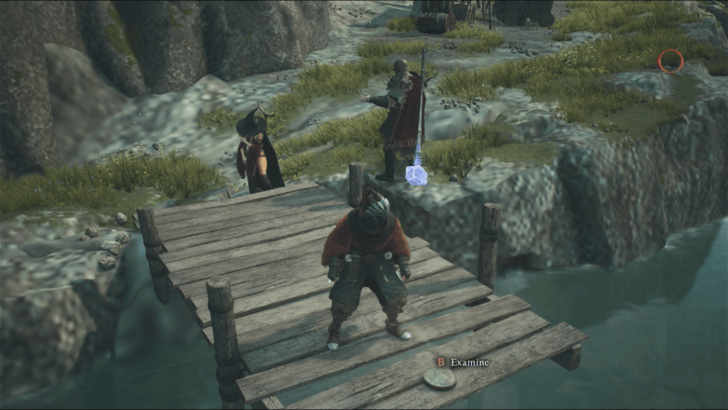 Location: At the end of the wooden dock. |
|
Seeker’s Token 91
|
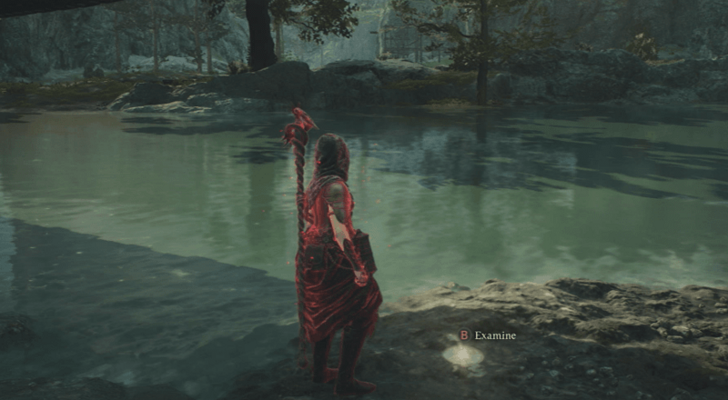 Location: Token can be found under the bridge. |
|
Seeker’s Token 92
|
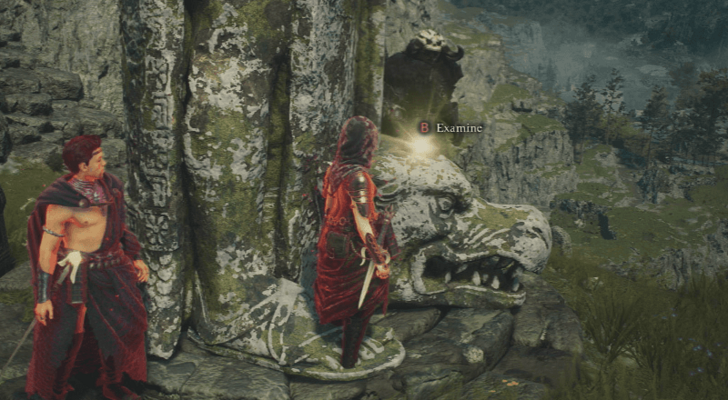 Location: Can be found at the base of the statue with the chest. |
|
Seeker’s Token 93
|
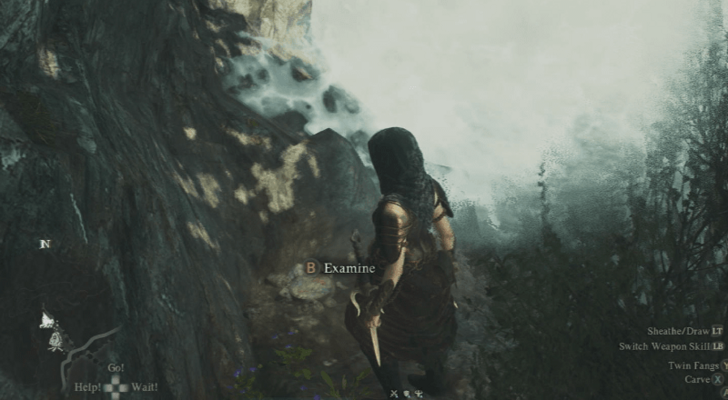 Location: Token can be found near the base of the waterfall. |
|
Seeker’s Token 94
|
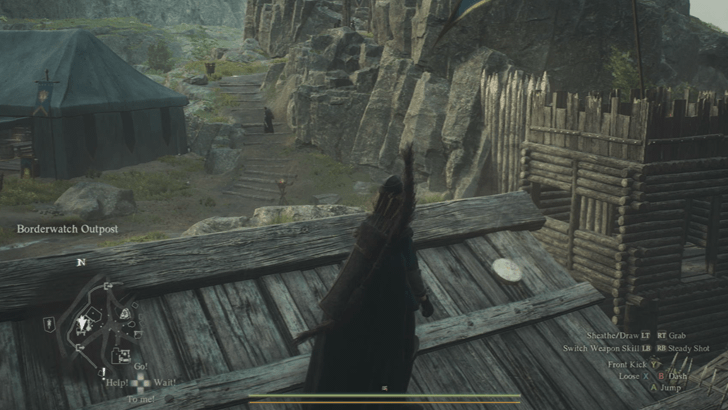 Location: Can be found on the roof of the forge in Borderwatch Outpost. |
|
Seeker’s Token 95
|
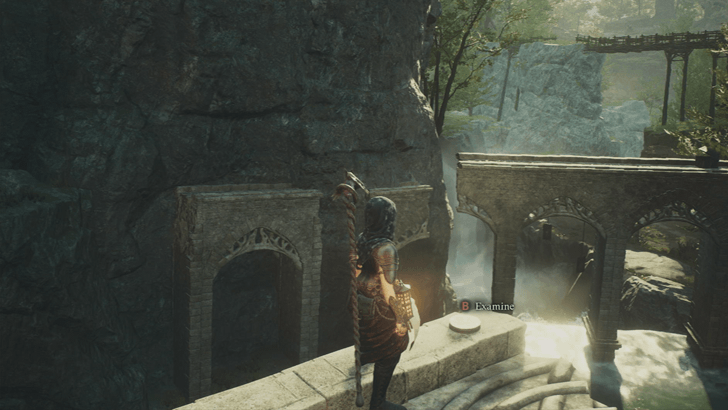 Location: Climb the stone arches and make your way to the top by using Levitate and grabbing onto the ledges. Token can be found on the corner of the wall section facing the waterfall. |
|
Seeker’s Token 96
|
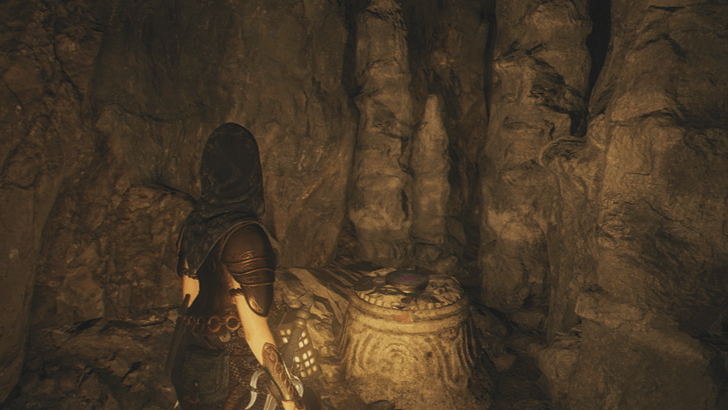 Location: Can be found on a corner of the Forgotten Tunnel after climbing the first set of stones. |
|
Seeker’s Token 97
|
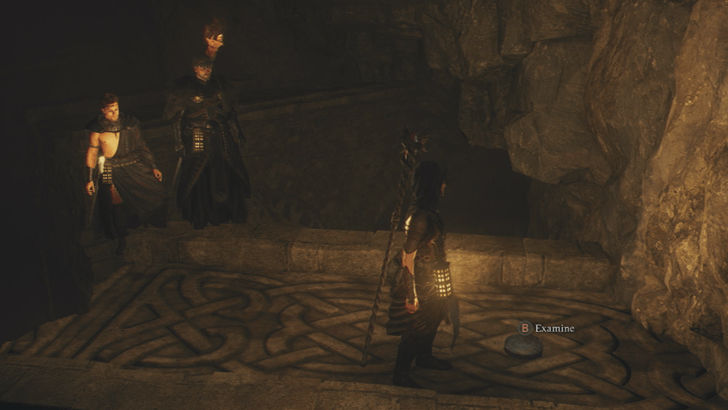 Location: Further in the Forgotten Tunnel, climb the slanted rocks and onto the central structure, then jump towards the easternmost pillar to pick up the token. |
|
Seeker’s Token 98
|
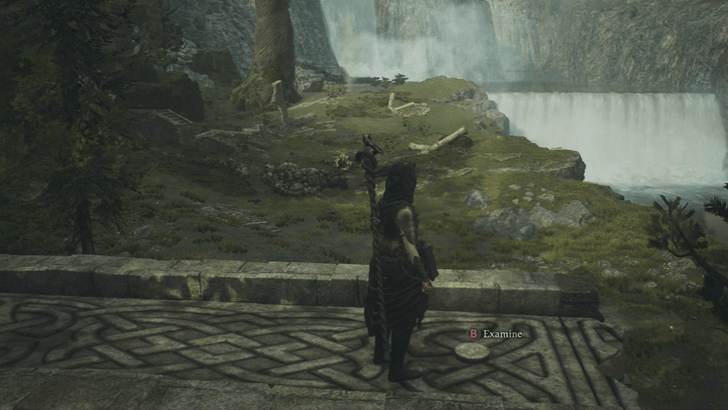 Location: Above the broken stone staircase. |
|
Seeker’s Token 99
|
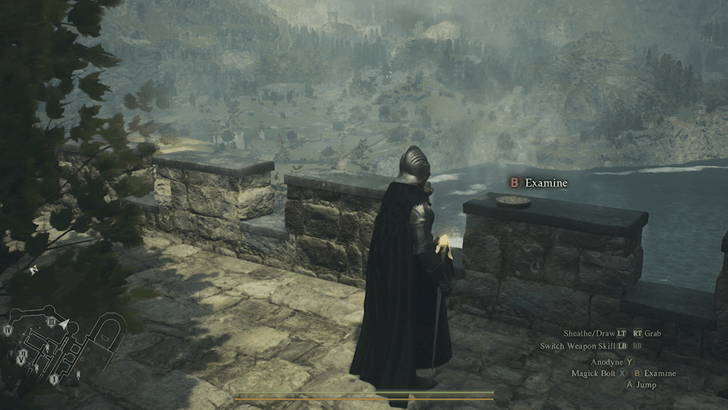 Location: From the area with crops, climb the wall battlements to find the Token. |
|
Seeker’s Token 100
|
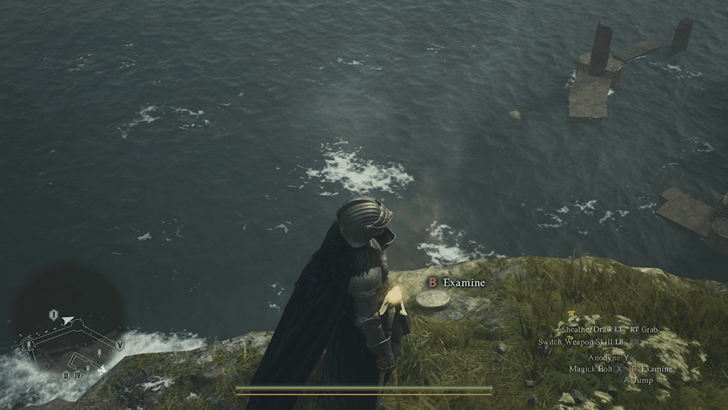 Location: Climb the castle walls, then jump down towards the cliffs outside. Token can be picked up by the cliff overlooking the water. |
|
Seeker’s Token 101
|
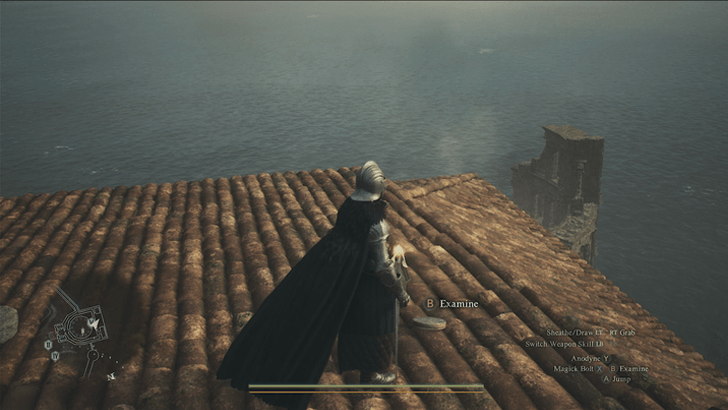 Location: From the castle walls, jump to the Vernworth Hall Roof using Levitate to reach the Token. |
|
Seeker’s Token 102
|
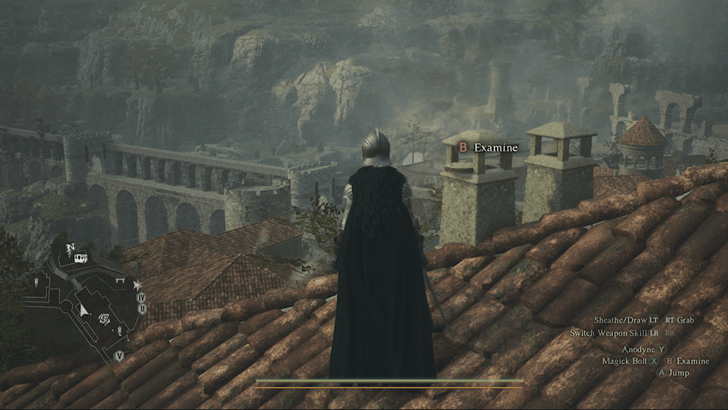 Location: Jump from roof to roof from the Vernworth Hall to reach the Token on the roof of Rose Chateau Bordelrie. |
|
Seeker’s Token 103
|
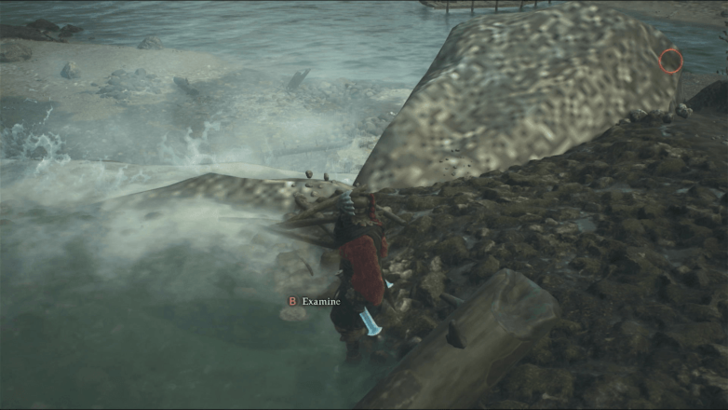 Location: By the riverside north of the campsite. Token can be found just before the waterfall. |
|
Seeker’s Token 104
|
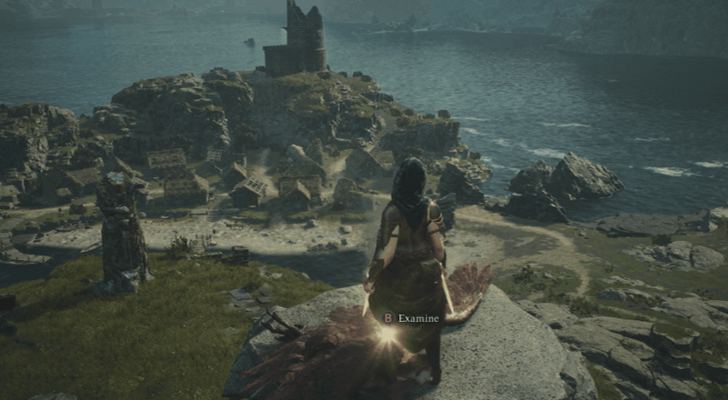 Location: Climb the cliff face then jump onto the top of the stone pillar to reach the token. |
|
Seeker’s Token 105
|
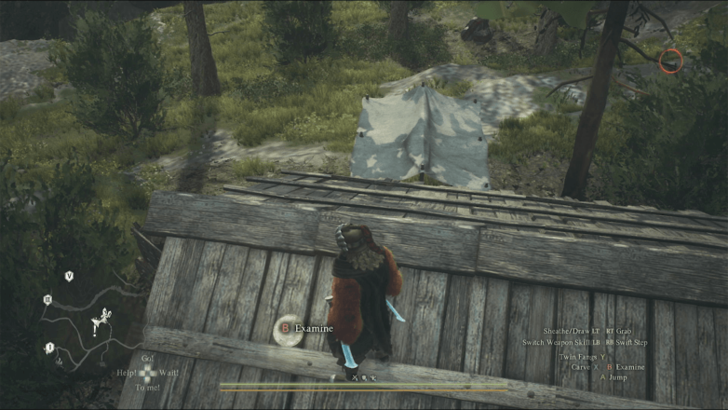 Location: Jump on top of the cart, then onto the tent, then finally onto the roof of the wooden structure to reach the token. |
|
Seeker’s Token 106
|
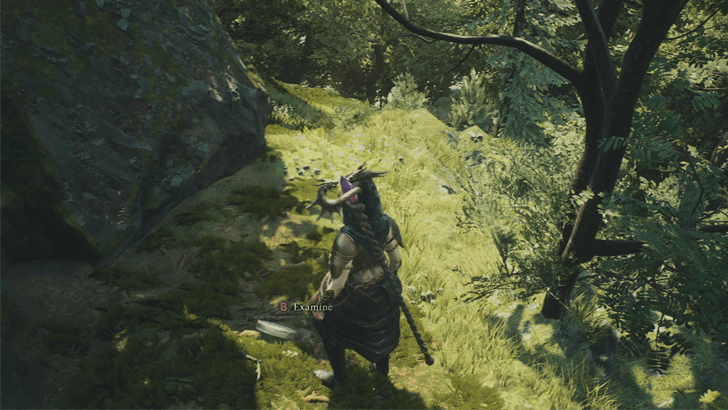 Location: Token can be found by the cliff face, beside a small tree. |
|
Seeker’s Token 107
|
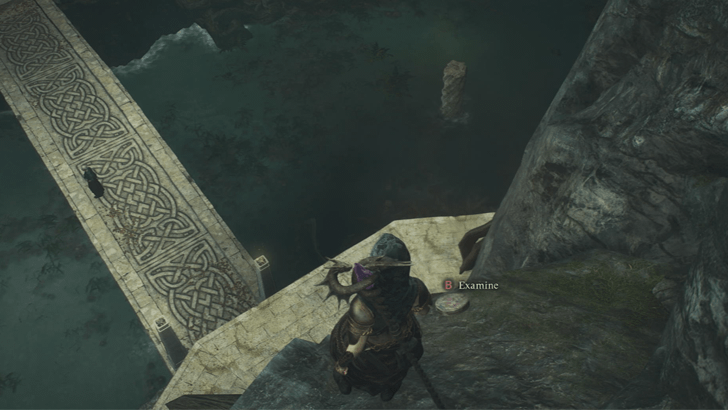 Location: Climb the cliff face using Levitate to grab cliff ledges. Token can be found above Eldart’s Apothecary. |
|
Seeker’s Token 108
|
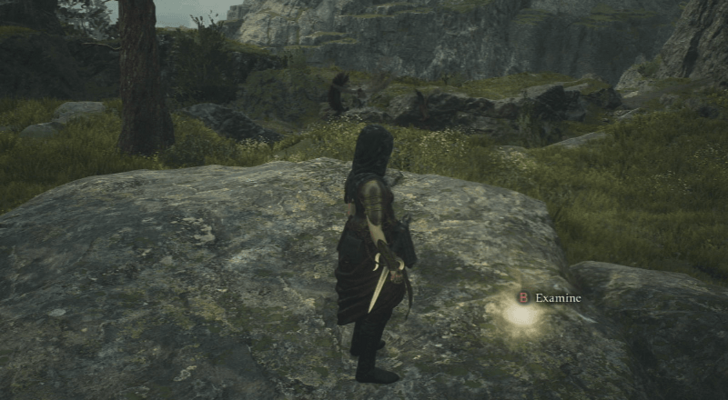 Location: Can be found above some rocks by heading south from the path. |
|
Seeker’s Token 109
|
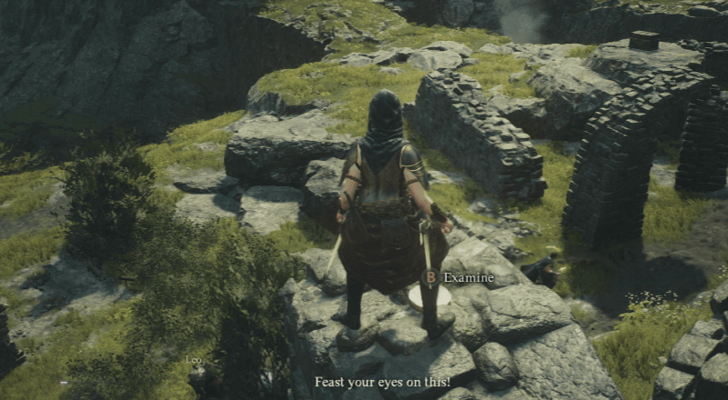 Location: Can be found above the broken Stone Wall. |
|
Seeker’s Token 111
|
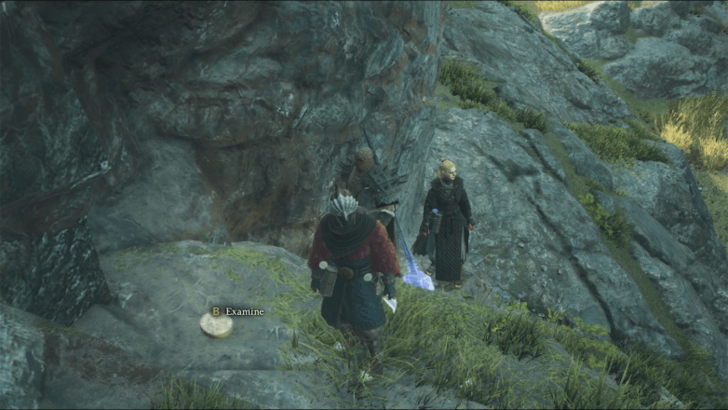 Location: Can be found on a small corner by a cliff. |
|
Seeker’s Token 112
|
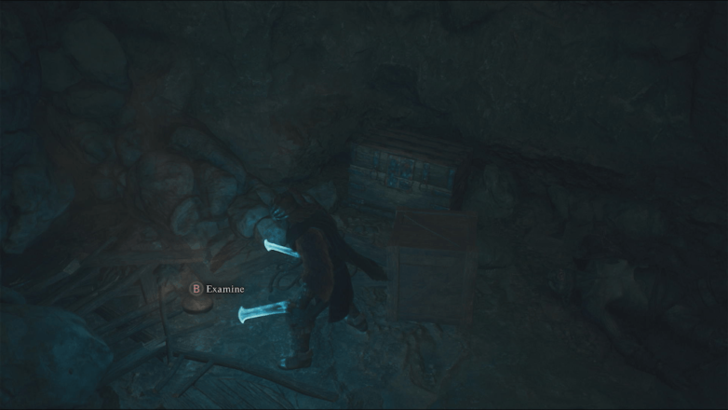 Location: Token can be found inside the first floor of Guerco Cave. Follow the bridge on the right-hand side upon entering to find the room with the coin. |
|
Seeker’s Token 113
|
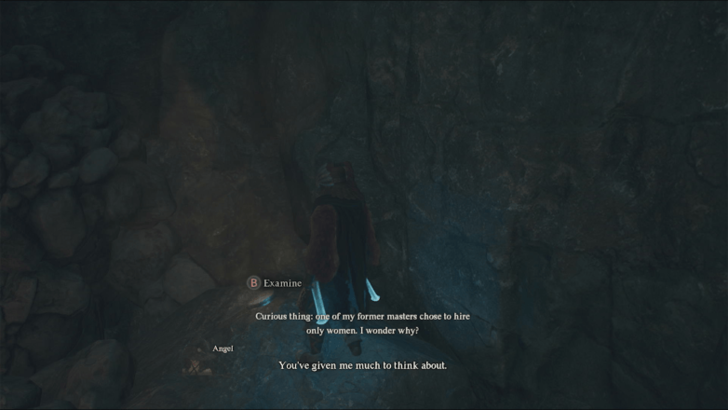 Location: From the area with two bridges, drop down and follow the left-hand wall to find the token above some rocks. |
|
Seeker’s Token 114
|
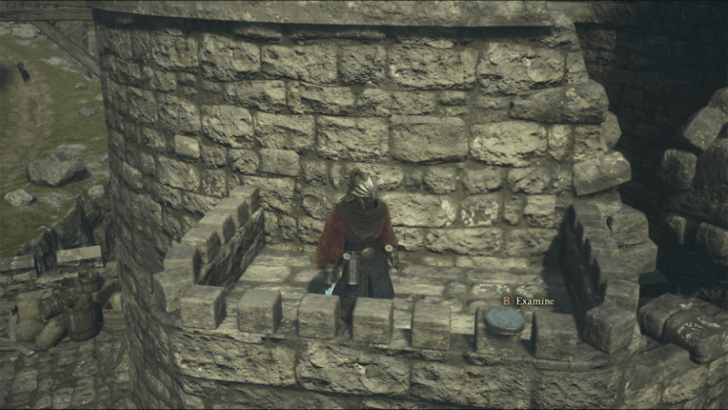 Location: Climb the tower, and use Levitate to reach the outside part of the tower to find the Token. |
|
Seeker’s Token 115
|
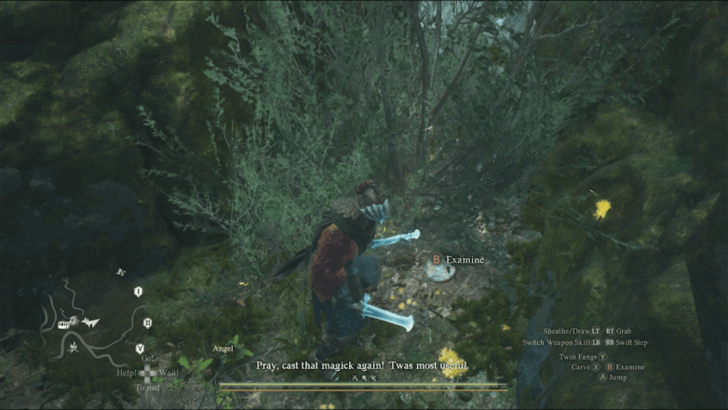 Location: Can be found behind a large rock at the end of the path. |
|
Seeker’s Token 116
|
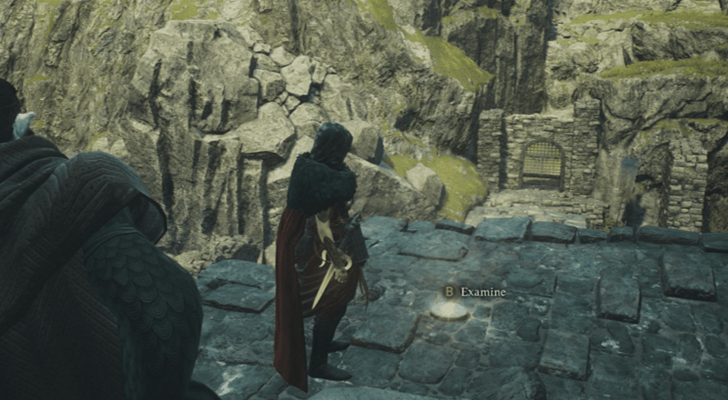 Location: Can be found by the ruins before the gate. |
|
Seeker’s Token 117
|
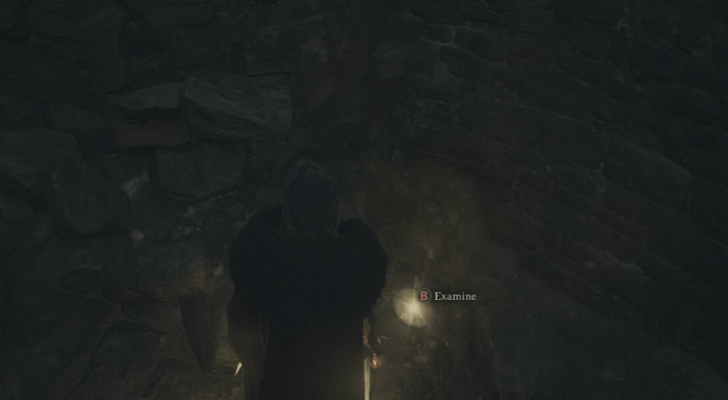 Location: Climb the stone ruins, then onto the cliff. Token can be found by some rubble in one of the broken stone towers. |
|
Seeker’s Token 118
|
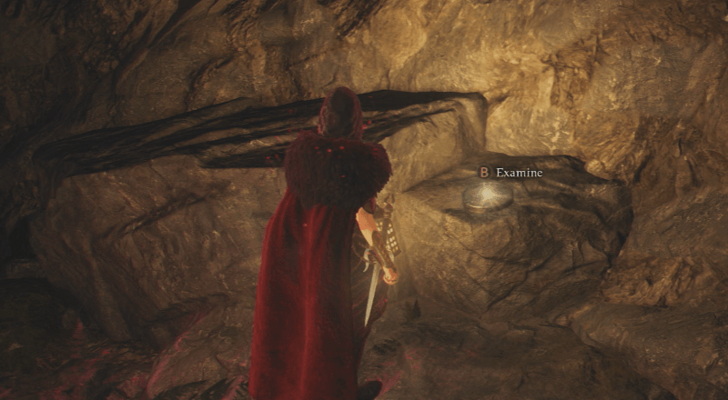 Location: Can be found on a rock at the end of the Rock Wall Berme cave. |
|
Seeker’s Token 119
|
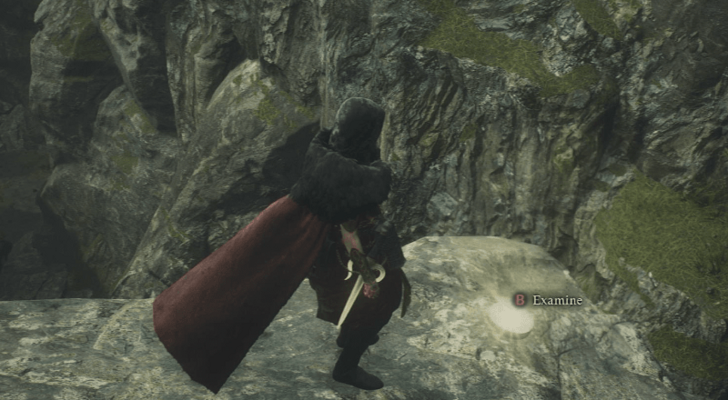 Location: On the cliff’s edge by the road. |
|
Seeker’s Token 120
|
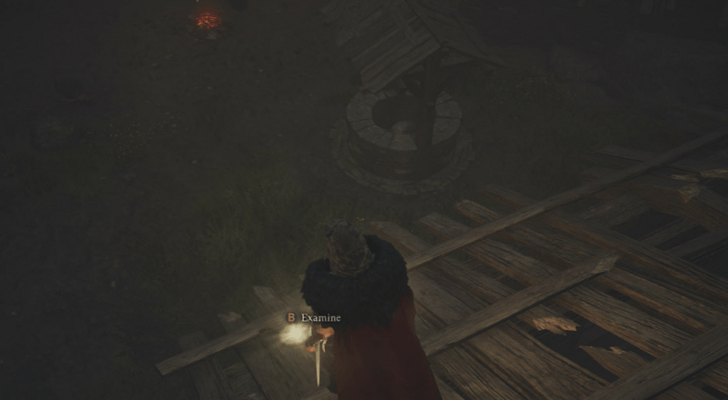 Location: Can be found on the roof of the house closest to the well. Climb the rocks nearby to reach the roof via Levitate or jumping. |
|
Seeker’s Token 121
|
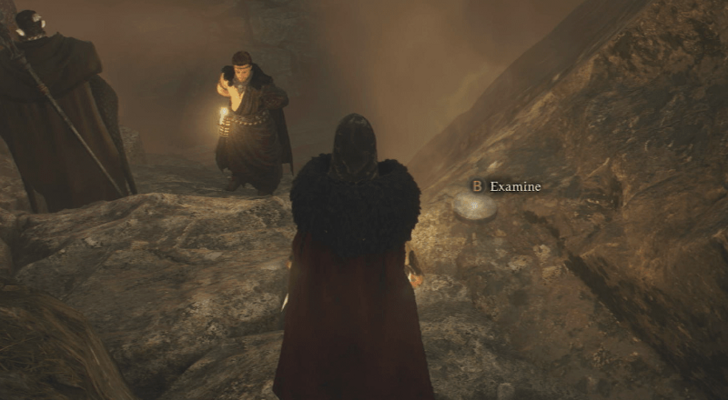 Location: Can be found by some rocks near the broken pillar. |
|
Seeker’s Token 122
|
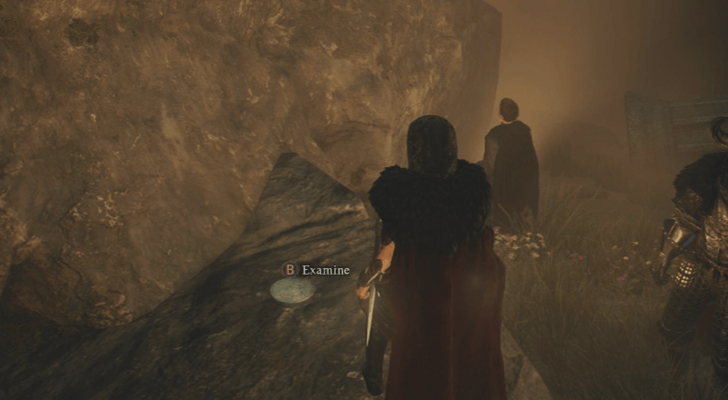 Location: Can be found in a corner, near the fallen stone pillar. |
|
Seeker’s Token 123
|
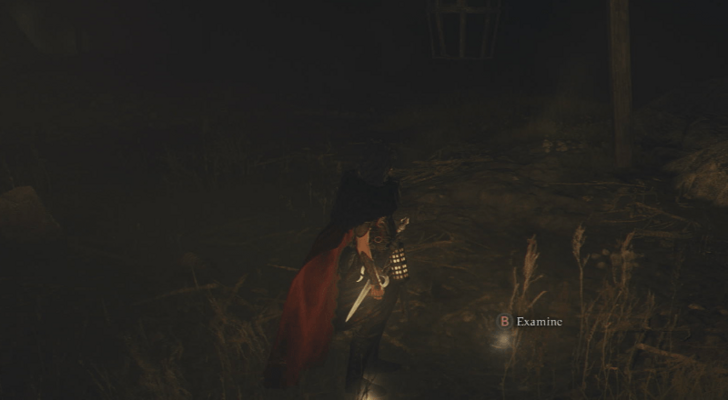 Location: Can be found on the ground in Illdoer’s Resting Place. |
|
Seeker’s Token 124
|
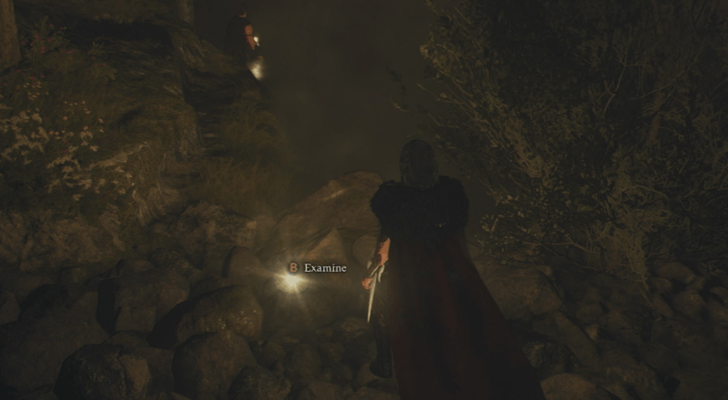 Location: Head south from the Strange Corridor until you come across two trees. The Token can be found on the ground by one of the trees. |
|
Seeker’s Token 125
|
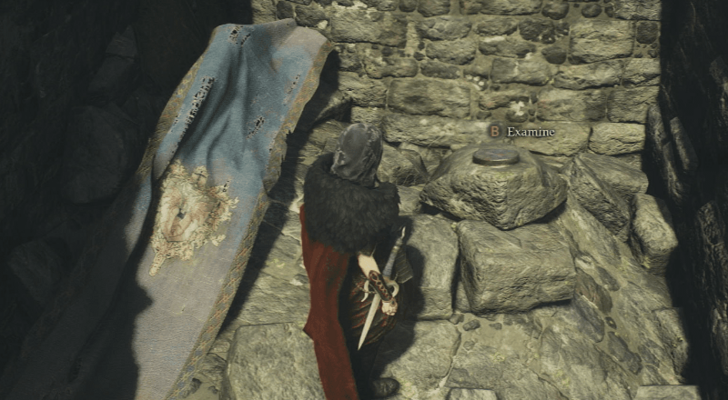 Location: Can be found in a small corridor by the southwest corner of the Ancient Battleground. |
|
Seeker’s Token 126
|
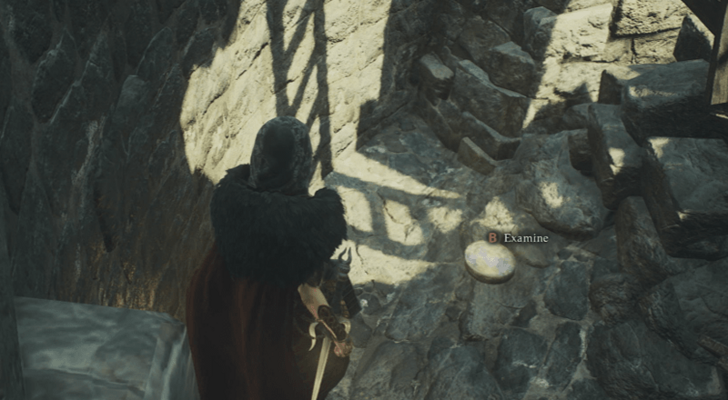 Location: Can be found at the base of the southeast tower in the Ancient Battleground. |
|
Seeker’s Token 127
|
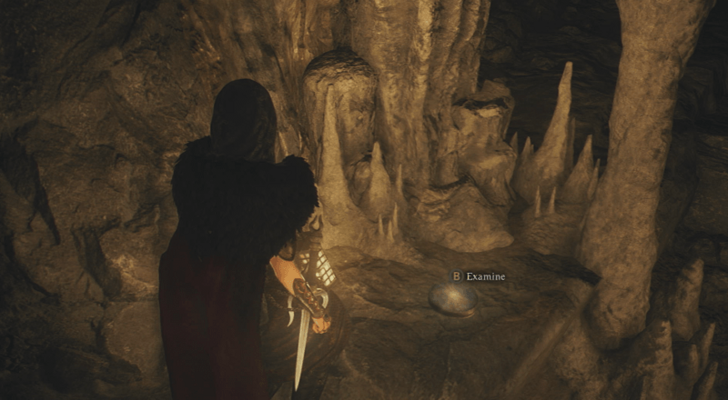 Location: Follow the right-hand side wall of the Worldsend Cavern until you reach the third room. Token can be found above some steps. |
|
Seeker’s Token 128
|
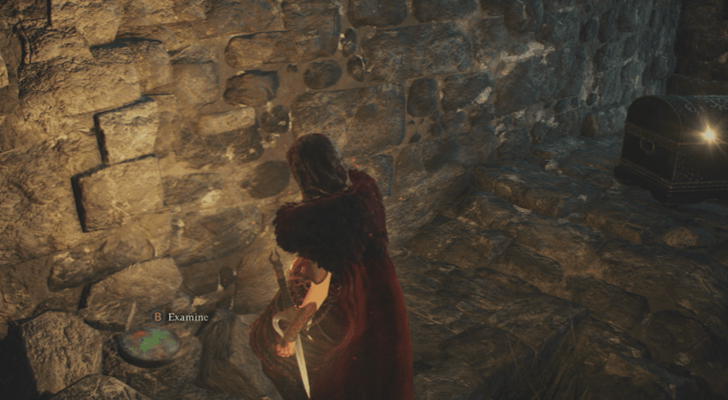 Location: From the Ancient Battleground, place a boulder on the catapult multiple times to reveal a hidden room. Enter the room to find a chest and the Seeker’s Token. |
|
Seeker’s Token 129
|
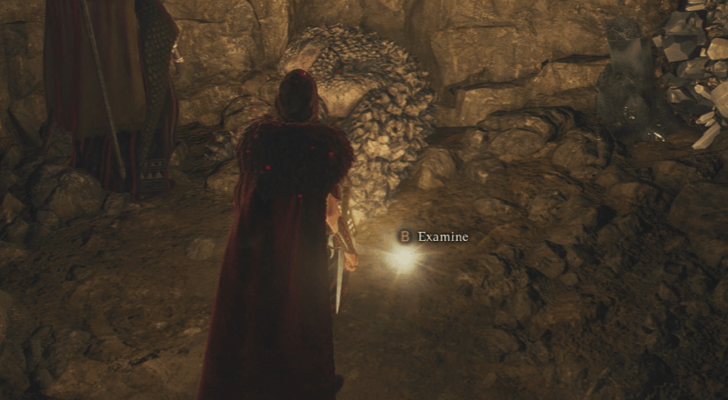 Location: Can be found at the end of the Windworn Gully. |
|
Seeker’s Token 130
|
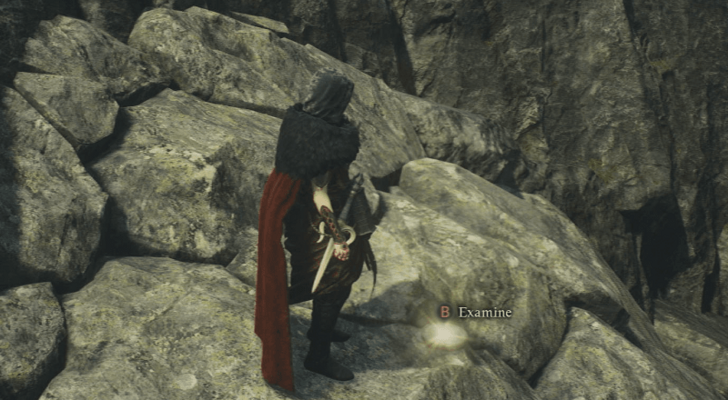 Location: Atop a pile of rocks to the west of the path. |
|
Seeker’s Token 131
|
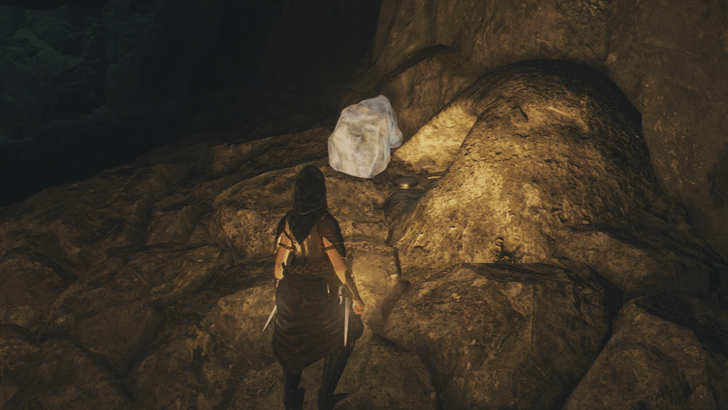 Location: Inside the tunnel, resting on a pile of rocks. |
|
Seeker’s Token 132
|
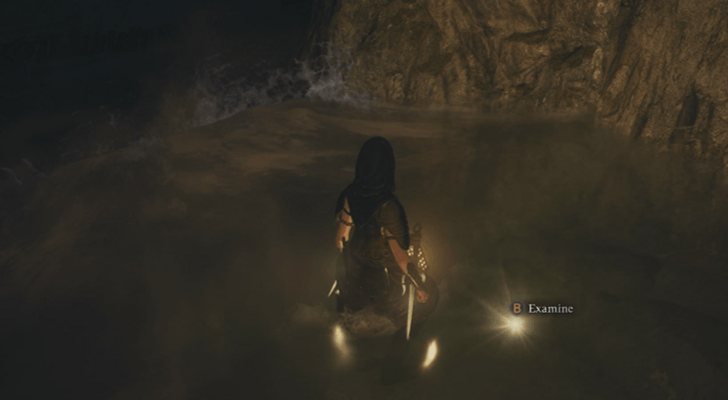 Location: Can be found at the top of the waterfall. |
|
Seeker’s Token 133
|
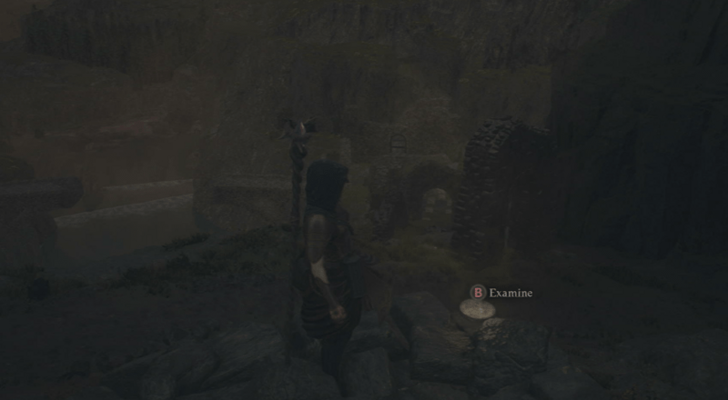 Location: From the cliff, use Levitate to reach the top of the broken stone arch. The Token can be picked up atop the extended part of the wall. |
|
Seeker’s Token 134
|
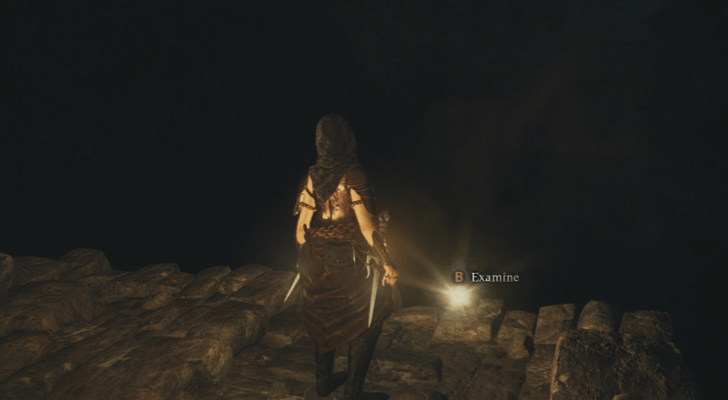 Location: Can be found at the edge of the Broken Bridge. |
|
Seeker’s Token 135
|
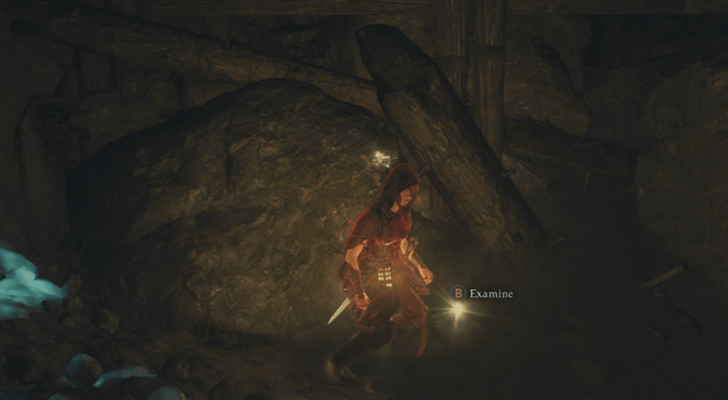 Location: Token can be found under the wooden bridge. |
|
Seeker’s Token 136
|
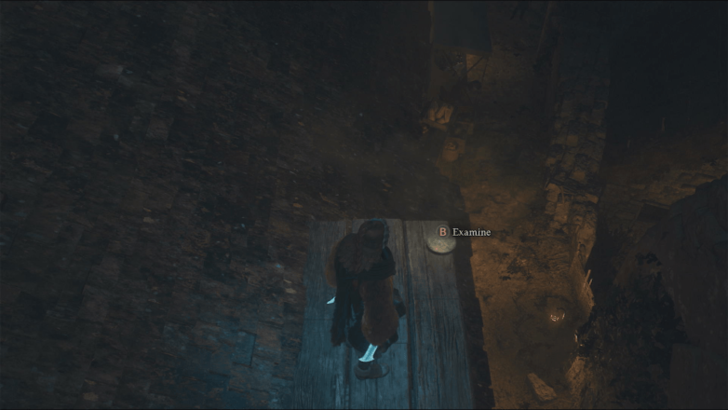 Location: Can be found on the roof of the house north of Celeste’s Smithy. |
|
Seeker’s Token 137
|
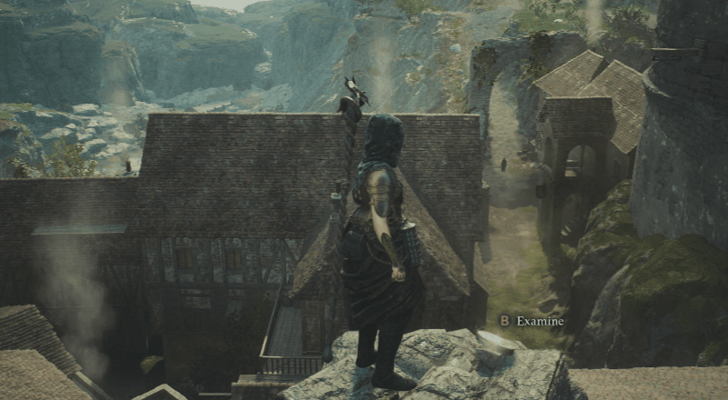 Location: On top of the Arch in Checkpoint Rest Town. |
|
Seeker’s Token 138
|
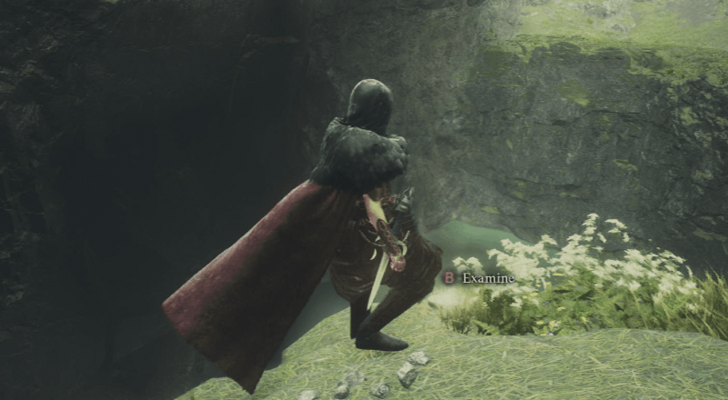 Location: Can be found on a cliff edge behind the statue and tree. |
|
Seeker’s Token 139
|
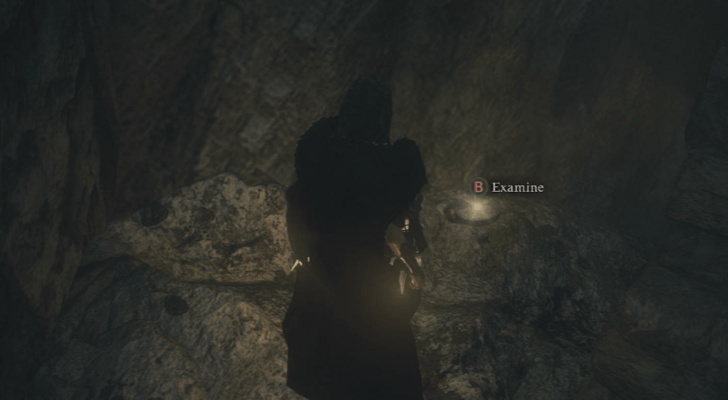 Location: Behind a wall of the ruins, close to the cliff face. |
|
Seeker’s Token 140
|
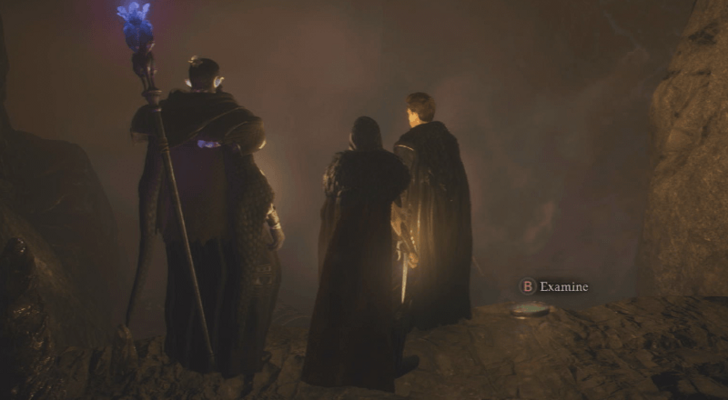 Location: On the edge of the ledge, just before the flowing water. |
|
Seeker’s Token 141
|
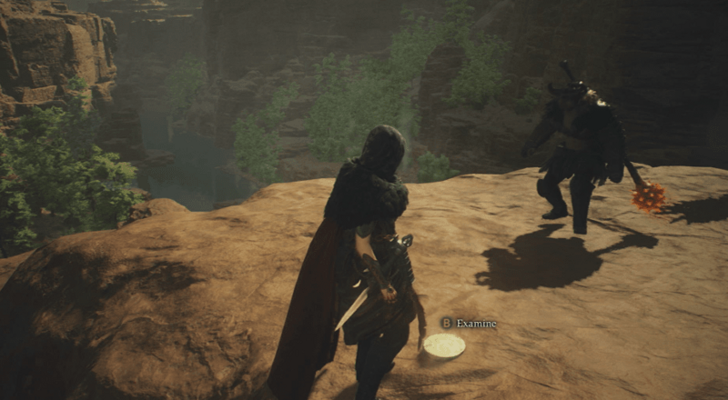 Location: Can be found on a cliff just past the waterfall. |
|
Seeker’s Token 142
|
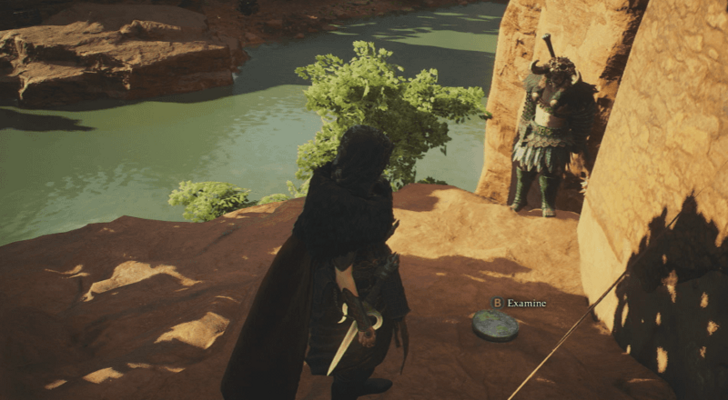 Location: On a rock just before reaching the river. |
|
Seeker’s Token 143
|
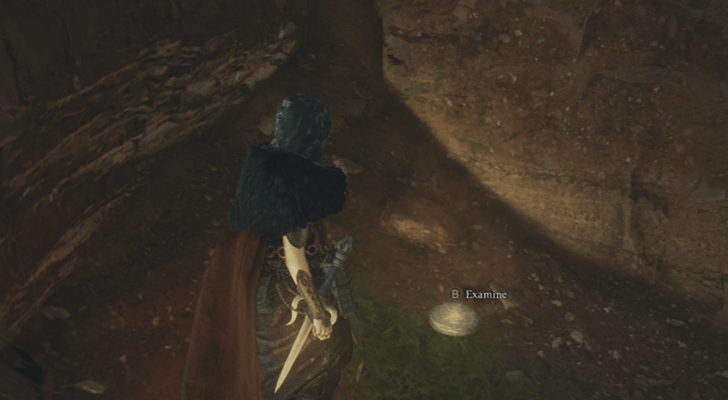 Location: Can be found in a small nook just east of the Forgotten Riftstone. |
|
Seeker’s Token 144
|
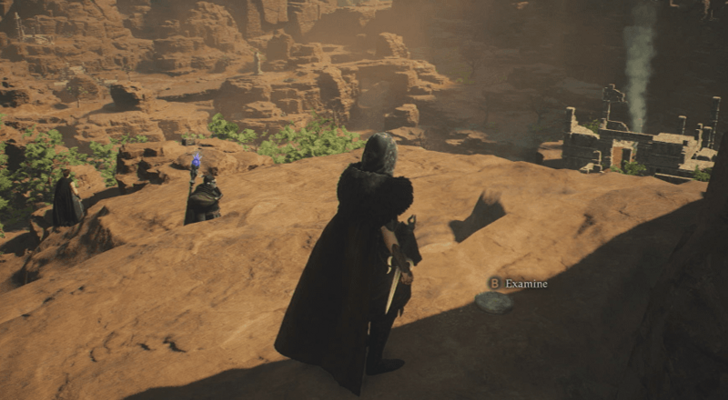 Location: Atop the large rock formation. |
|
Seeker’s Token 145
|
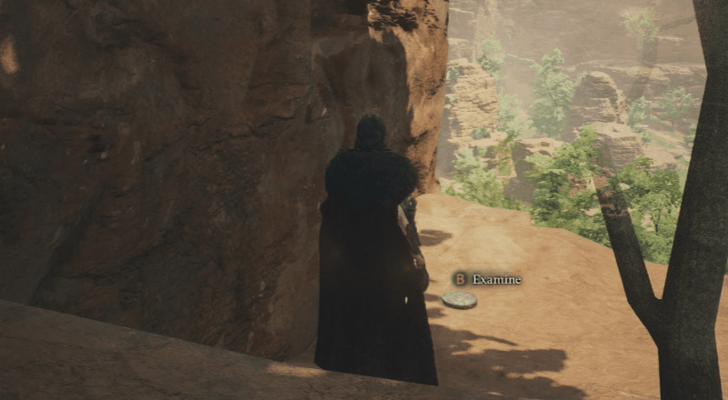 Location: From Rocky Crevasse campsite, walk along the cliff's edge heading east. |
|
Seeker’s Token 146
|
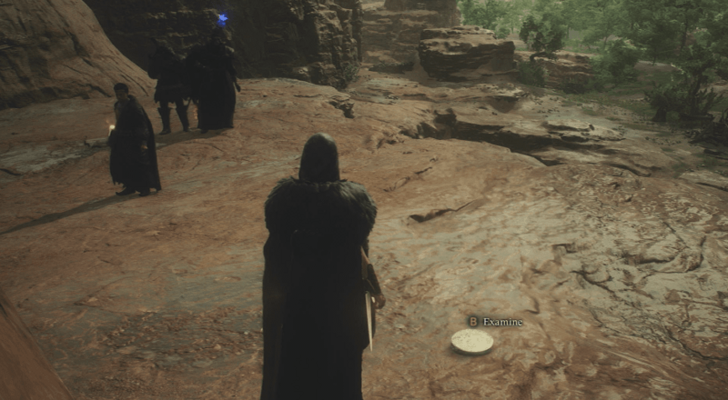 Location: On a cliff above the Chimera nest. |
|
Seeker’s Token 147
|
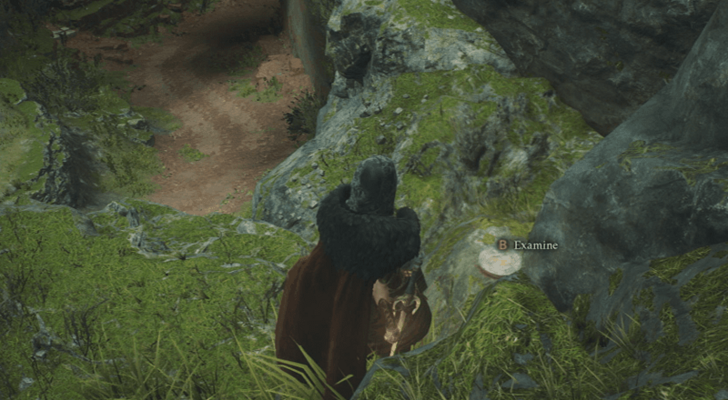 Location: Scale the cliff, then pick up the coin located just above the Golden Trove Beetle. |
|
Seeker’s Token 148
|
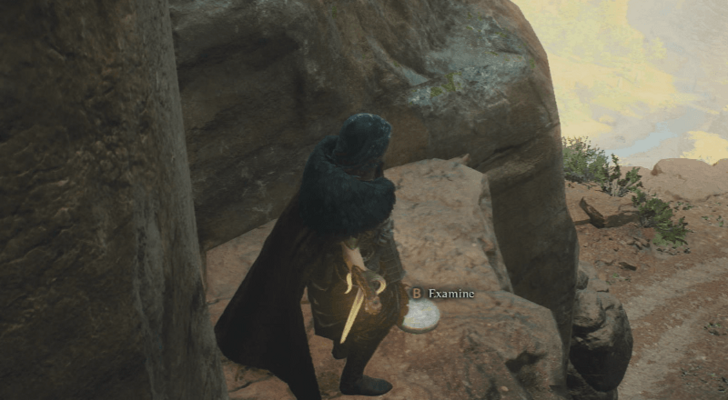 Location: Climb the ruins then onto the cliff to reach the Token. |
|
Seeker’s Token 149
|
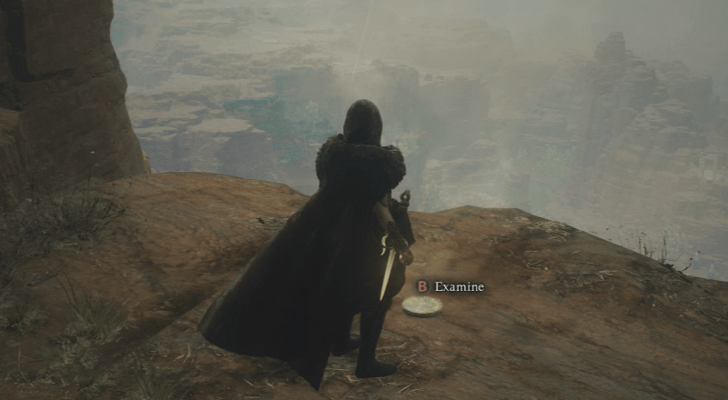 Location: Continue along the cliff face from Token 148 to reach this Token. |
|
Seeker’s Token 150
|
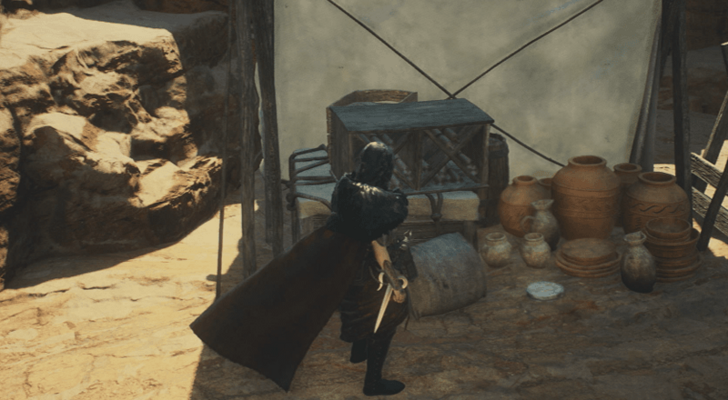 Location: Inside a tent near the Stone Statue. |
|
Seeker’s Token 151
|
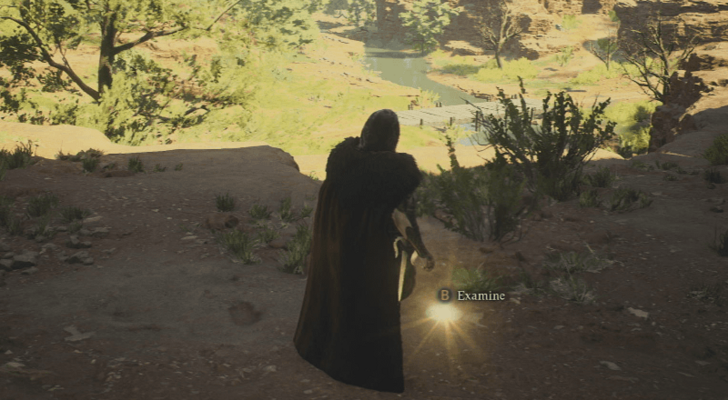 Location: On the ground, by the corpses. |
|
Seeker’s Token 152
|
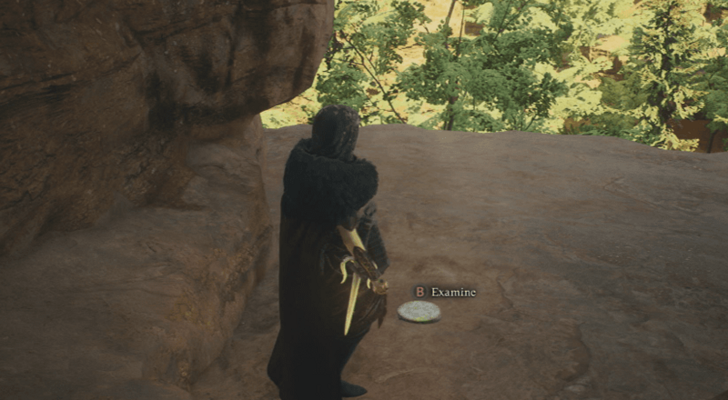 Location: On a cliff across the river from the road. |
|
Seeker’s Token 153
|
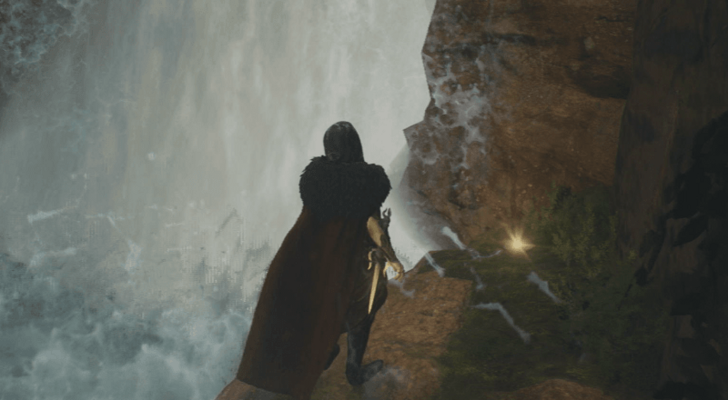 Location: Follow the west path at the crossroad. The coin can be found at the end of the path, by the ledge. |
|
Seeker’s Token 155
|
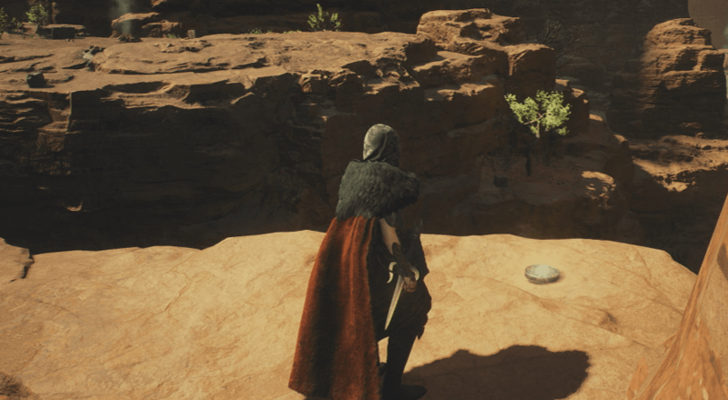 Location: On a cliff edge just past the ruins with a chest. |
|
Seeker’s Token 156
|
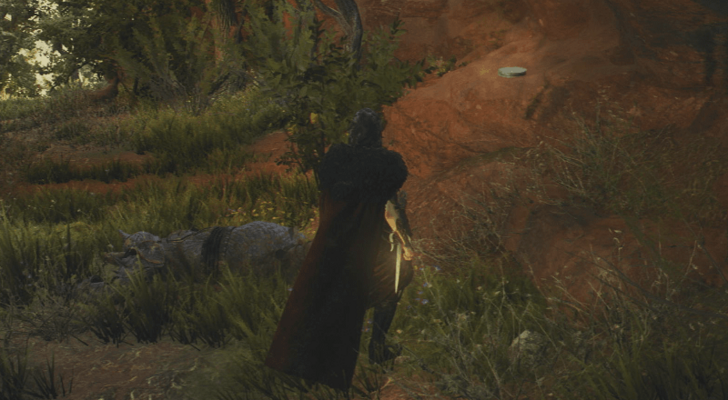 Location: Atop a rock west of the path. |
|
Seeker’s Token 157
|
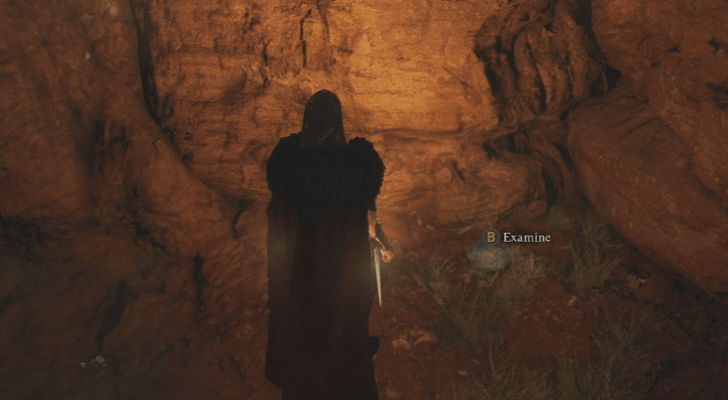 Location: Break the rocks blocking the water flow to reveal a hidden cave with the Token inside. |
|
Seeker’s Token 163
|
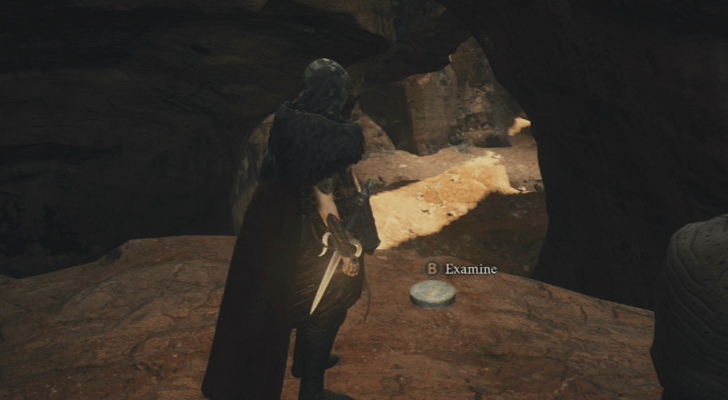 Location: On a ledge by the base of the waterfall. |
|
Seeker’s Token 164
|
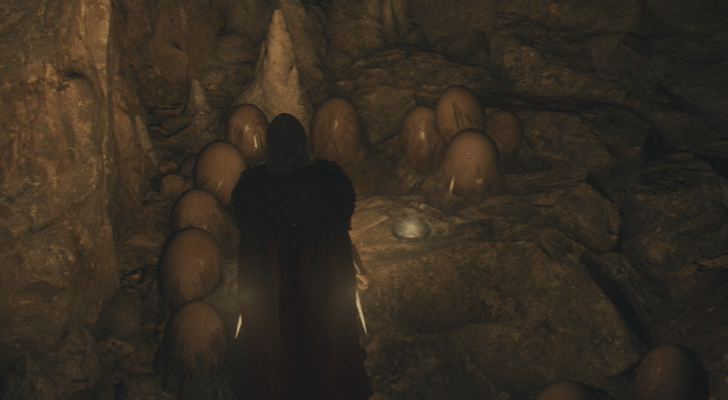 Location: Upon entering Darkbeasts' Den, follow the wall on your left to find the Token. |
|
Seeker’s Token 165
|
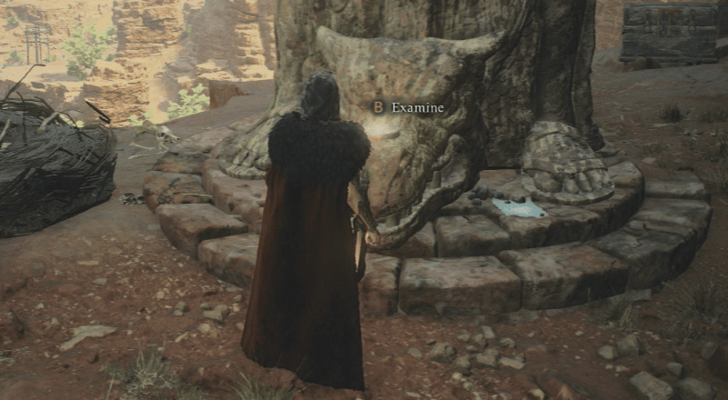 Location: At the base of the statue. |
|
Seeker’s Token 166
|
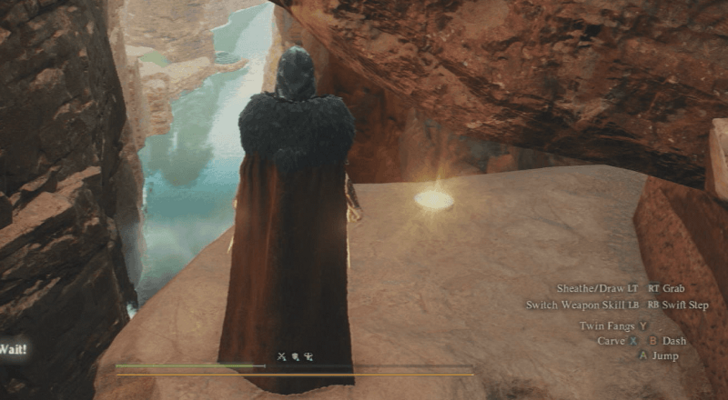 Location: Under the stone bridge near the chest. |
|
Seeker’s Token 167
|
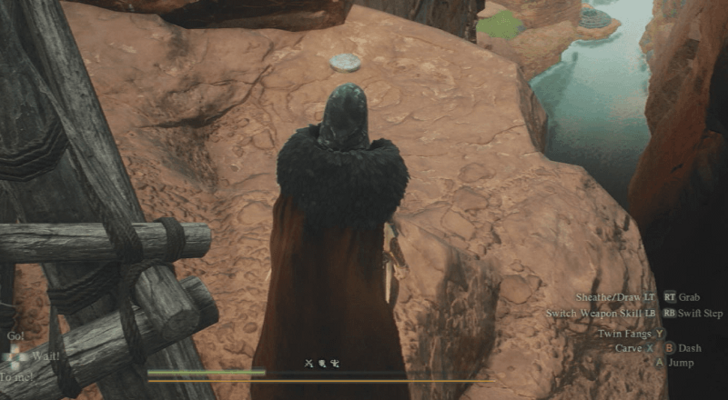 Location: At the end of the cliff, just past the wooden structure. |
|
Seeker’s Token 168
|
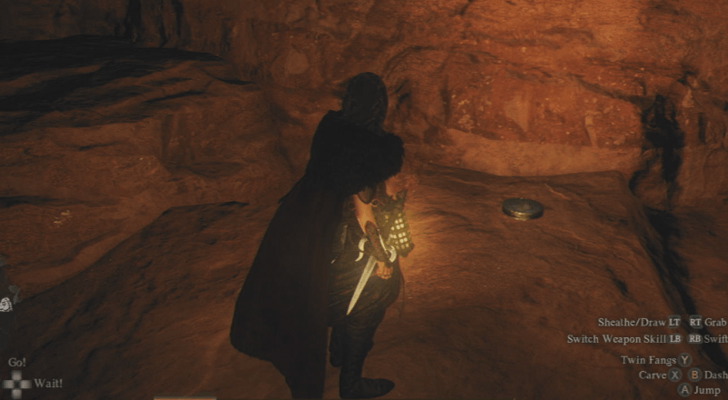 Location: On a cliff above the Bandit Hideout. |
|
Seeker’s Token 169
|
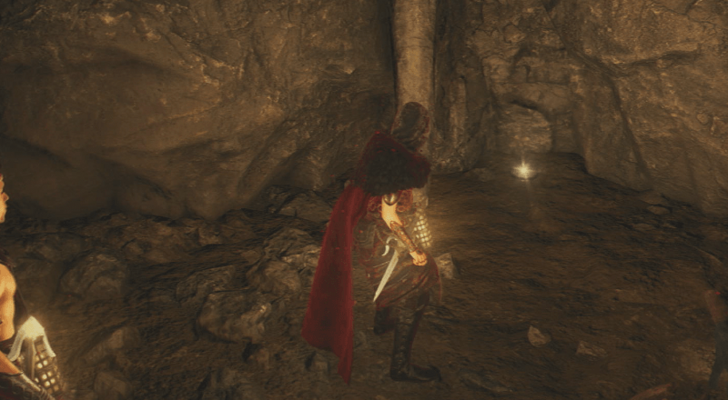 Location: On a corner near the broken tent. |
|
Seeker’s Token 178
|
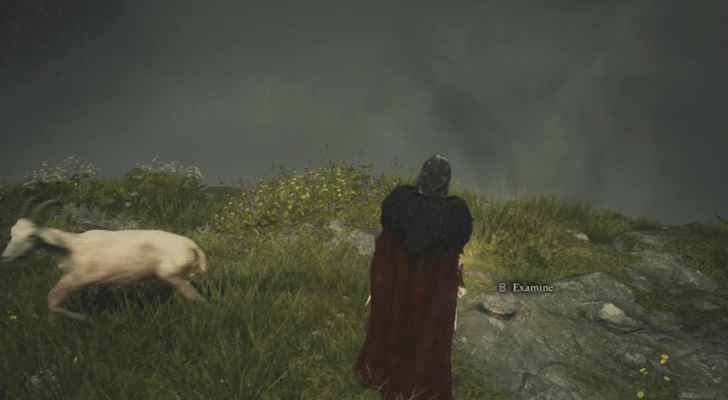 Location: From Rock Wall Berme, scale the cliff then jump to the other ledge to reach the token just upon entering Misty Marshes. |
|
Seeker’s Token 179
|
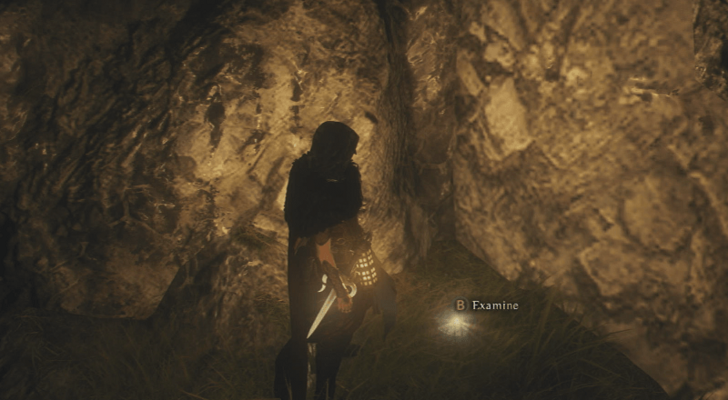 Location: On a cliff above the Waterfall. |
|
Seeker’s Token 180
|
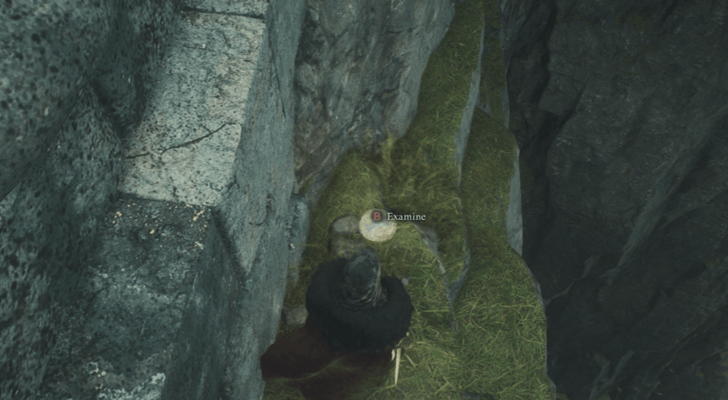 Location: Can be found behind the Sphinx Altar. |
|
Seeker’s Token 181
|
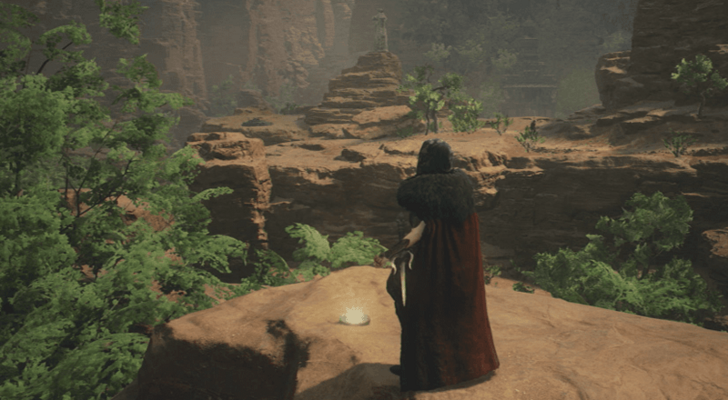 Location: Climb the stacked rocks to reach the token above. |
|
Seeker’s Token 182
|
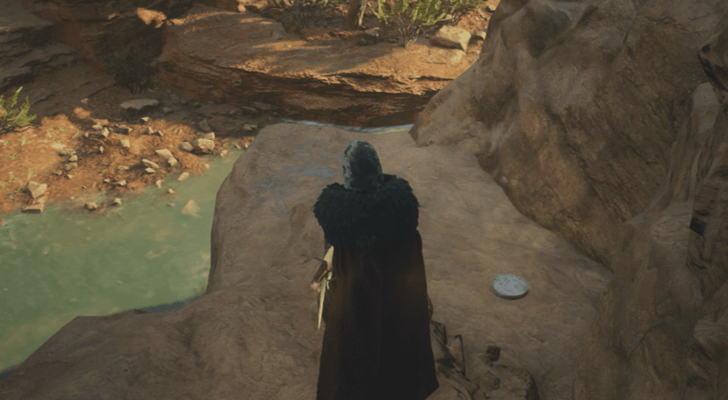 Location: On a small cliff beside the River. |
|
Seeker’s Token 184
|
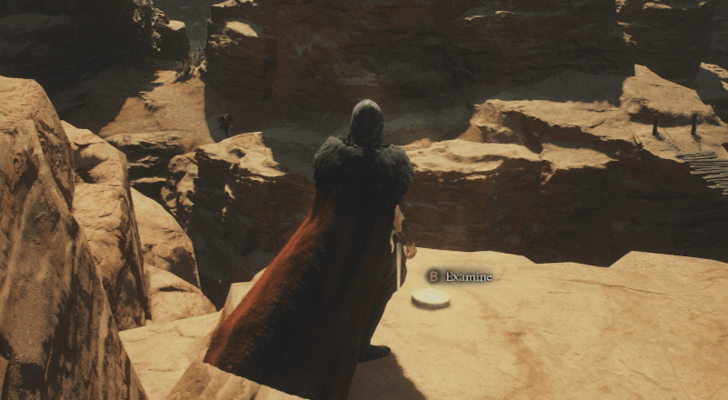 Location: On a cliff near the Forgotten Ruins, close to a chest. |
|
Seeker’s Token 185
|
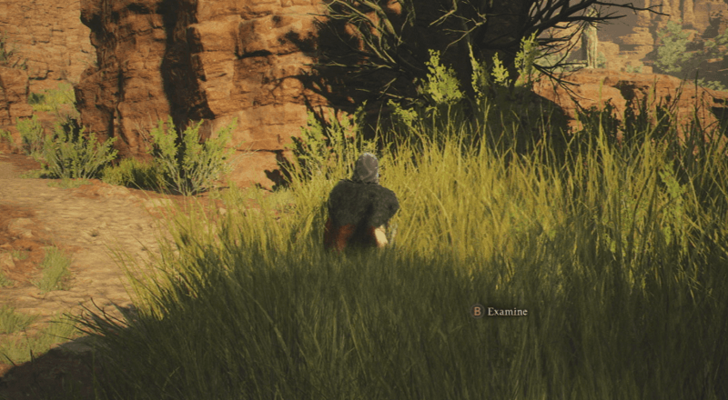 Location: Token can be found hidden in the tall grass. |
|
Seeker’s Token 186
|
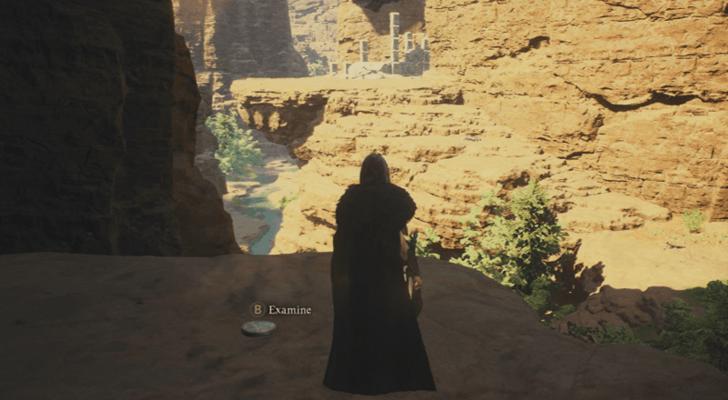 Location: Climb the ledges to find the token. |
|
Seeker’s Token 188
|
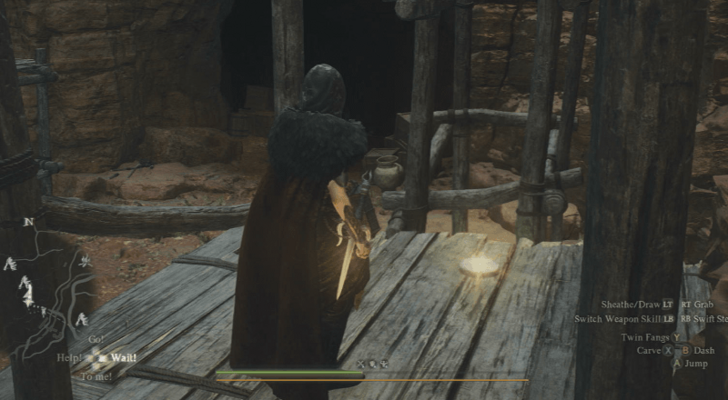 Location: On the second level of the wooden scaffolding south of Sealed Mining Shaft. |
|
Seeker’s Token 189
|
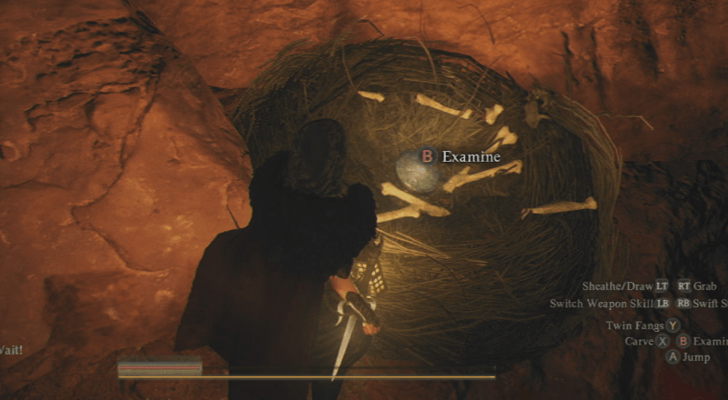 Location: In a Harpy Nest on a cliff. |
|
Seeker’s Token 195
|
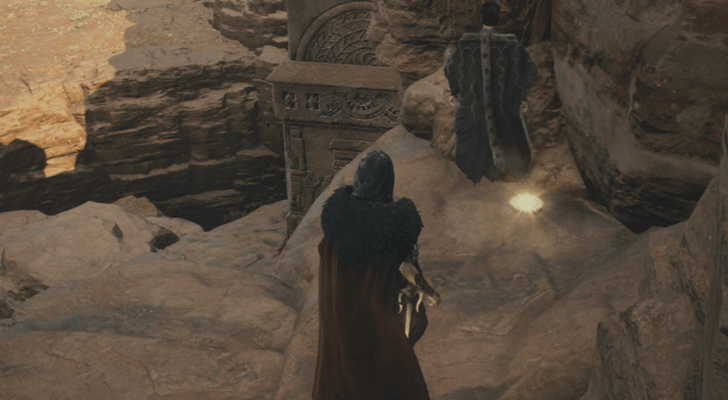 Location: Atop the cliff behind the lift. |
|
Seeker’s Token 196
|
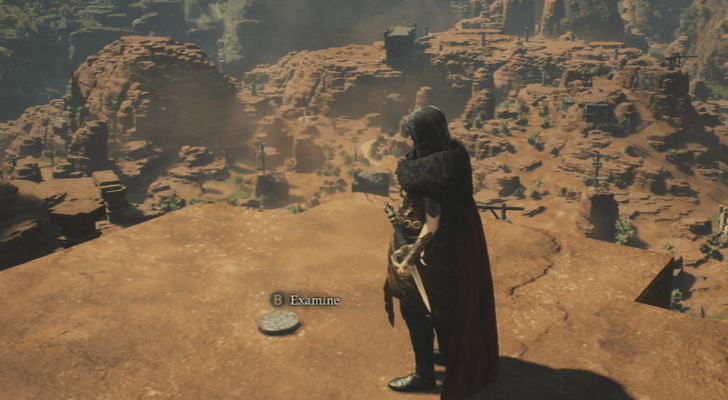 Location: On top of the pillars with carvings. |
|
Seeker’s Token 197
|
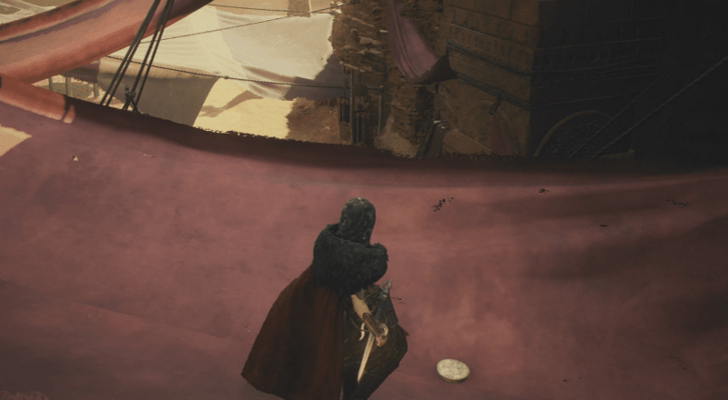 Location: Jump on top the cloth awnings above the Market. |
|
Seeker’s Token 198
|
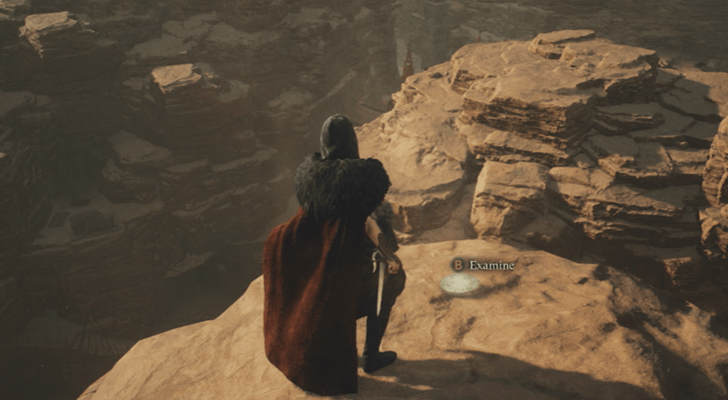 Location: On a cliff ledge above the houses. |
|
Seeker’s Token 199
|
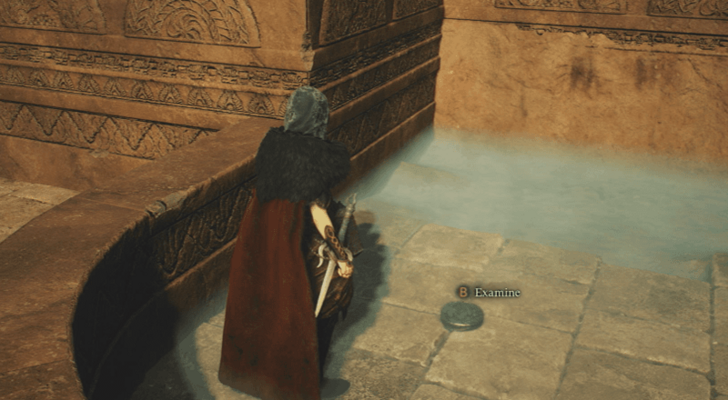 Location: In the water pool. |
|
Seeker’s Token 200
|
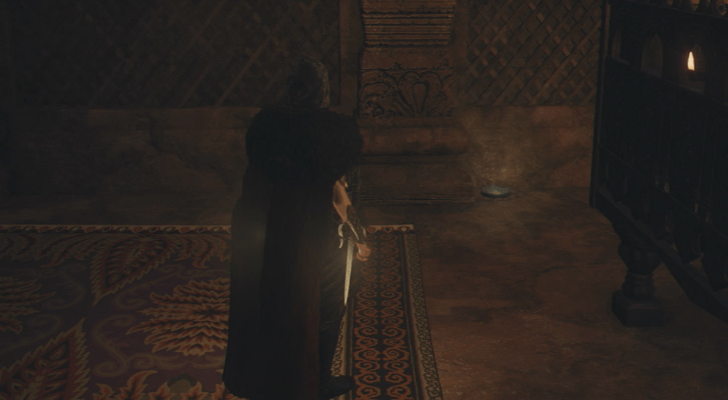 Location: In the audience chamber in Flamebearer Palace. |
|
Seeker’s Token 201
|
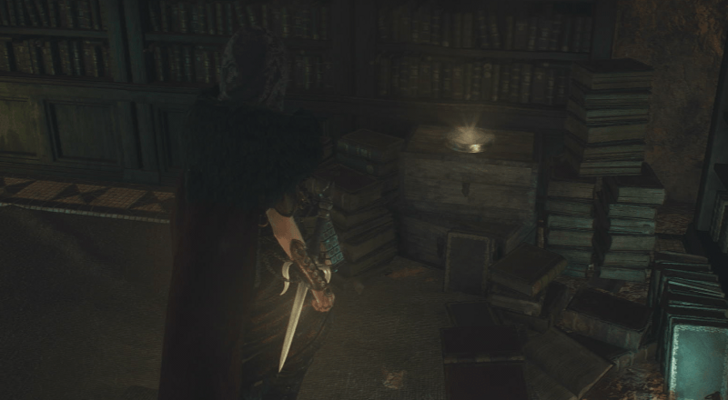 Location: Inside the History Chamber in Flamebearer Palace. |
|
Seeker’s Token 202
|
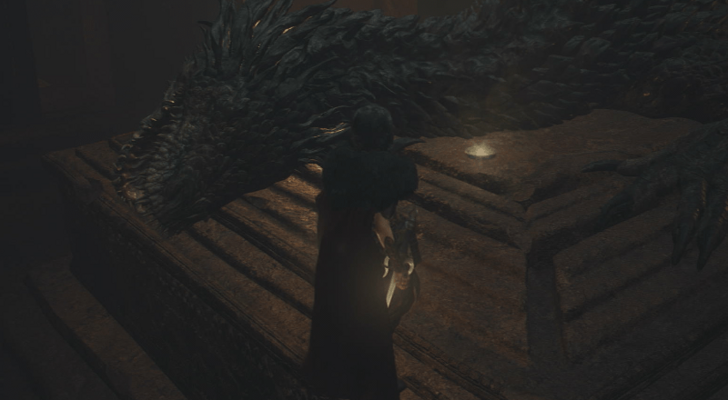 Location: Can be found beside the Dragon's Head in the Laboratorium. |
|
Seeker’s Token 203
|
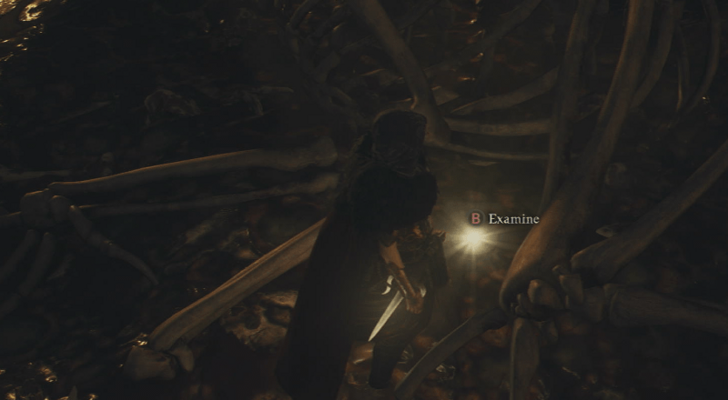 Location: Can be found next to the corpse in the center of the circular room in the Laboratorium. |
|
Seeker’s Token 204
|
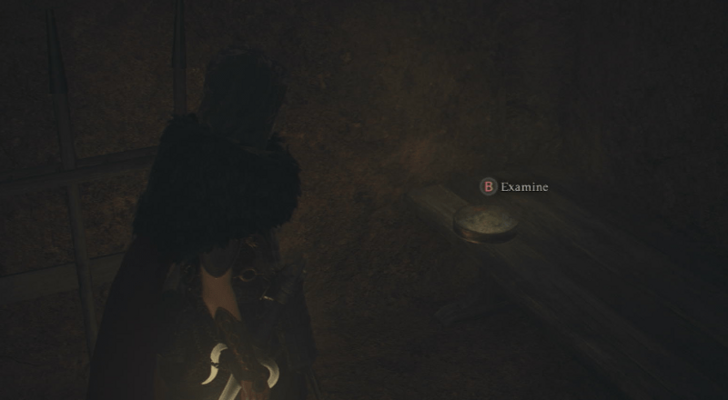 Location: Inside the Locked Cell in the Laboratorium. |
|
Seeker’s Token 206
|
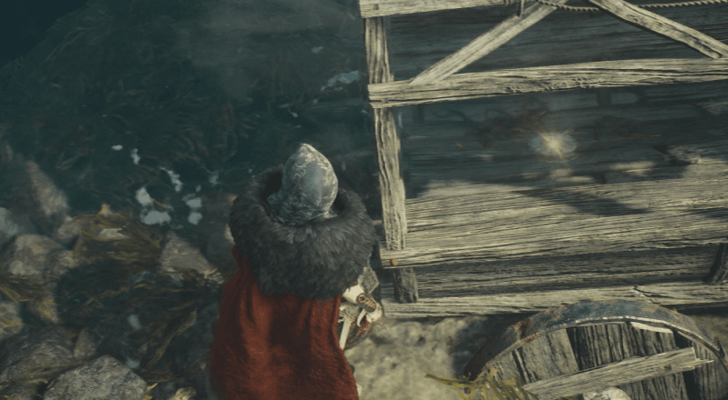 Location: Inside the submerged cart on the beach. |
|
Seeker’s Token 207
|
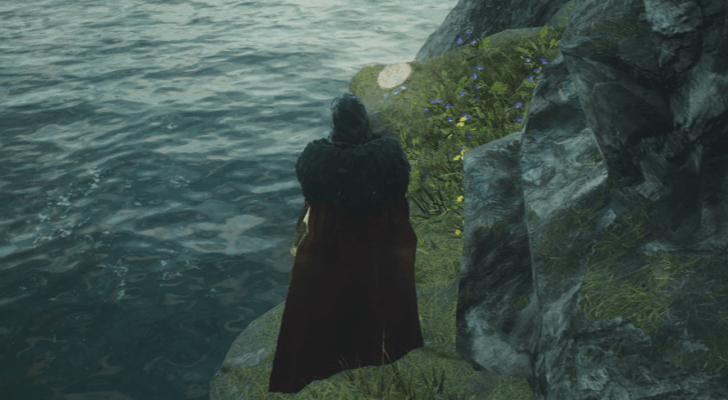 Location: On a ledge northeast of the Riftstone. |
|
Seeker's Token 235
|
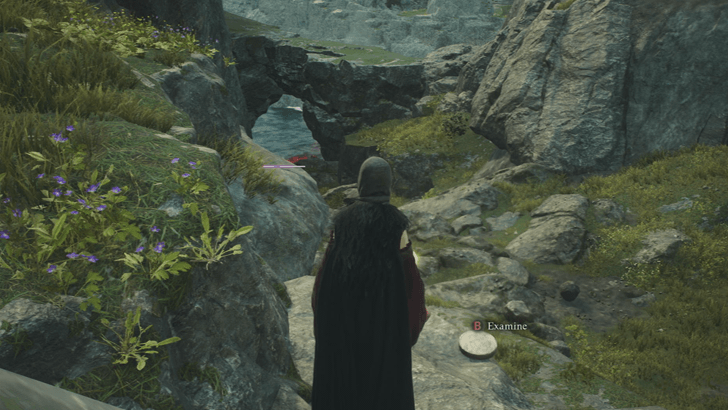 Location: Can be found on the edge of a cliff. |
|
Seeker's Token 238
|
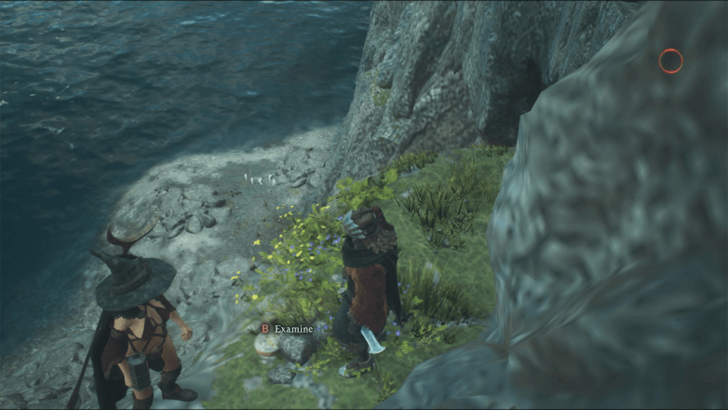 Location: On a cliff above Guerco Cavern. Token can be found behind the chest. |
Seeker's Token Rewards
| Rewards | Tokens | Description |
|---|---|---|
 Ferrystone |
1 | A stone that can instantly spirit the user back to the location of a set Portcrystal. |
 Ring of Vehemence |
5 | A ring imbued with power. The wearer's attacks are more likely to stagger and knock down foes. |
 Ring of Triumph |
15 | A ring imbued with power. Slightly boosts maximum Health, maximum Stamina, and the maximum amount of weight that the wearer can carry. |
 Dowsing Spikes |
30 | Daggers with hilts meant to recall snakes on the hunt. They emit a glow whenever treasure is near. |
 Twilight Star |
50 | A simple metal circlet. Adorned with a small jewel over the brow that resembles a faintly twinkling star. |
 Ring of Profusion |
70 | A ring imbued with power. Moderately increases the maximum amount of weight that the wearer can carry. |
 Champion's Mantle |
90 | A mantle that exudes self-assured majesty. Makes any triumph seem a foregone conclusion. |
 Eternal Bond |
120 | A ring that brims with mystic light. Grants the wearer a more companionable air. When offered as a gift, it deepens the bond between giver and receiver. |
 Charming Corset |
150 | A garment of thin cloth that hugs the wearer's frame, drawing lightly over the waist and hips to flattering effect. |
 Legion's Might |
180 | A staff crowned with a small piece of an Arisen's heart. Pawns who equip it revive of their own accord when rendered immobile. |
 Ring of Endeavor |
220 | A ring bearing a mysterious power that invigorates the spirit. Slightly boosts discipline gained from defeating foes. |
What are Seeker's Tokens?
 Exchange at Guild Halls for RewardsFound in Remote or Picturesque LocationsUnlocks The Collector Achievement |
Exchange at Guild Halls for Rewards

Seeker's Tokens can be exchanged at guild halls and inns for various equipment with stat-boosting effects. These equipment can aid a great deal in battle and exploration so keep an eye out for tokens out in the world.
Found in Remote or Picturesque Locations
Seeker's Tokens can be found in chests or by examining objects out in the world map. Search every nook and cranny for every notable spot in order to discover these hard-to-find tokens.
Unlocks The Collector Achievement
Upon collecting 80 Seeker's Tokens, you will unlock "The Collector" achievement, so avid trophy-hunters will want to look out for these collectibles.
Trophy Guide and List of Achievements
Dragon's Dogma 2 Related Guides
 Dragon's Dogma 2 Wiki Top
 Looking for Great Games! |
Is Dragon's Dogma 2 one of your favorite games? Answer our Best Games Survey and share your unique voice with Game8's readers! |
|---|
Recommended Guides
Dragon's Dogma 2 Wiki
| Dark Arisen DLC Guides | |
|---|---|
 Dark Arisen DLC |
 Lost Rites |
| Dragon's Dogma 2 Wiki Contents | |
 Walkthrough |
 Quests |
 Vocation |
 Tips and Tricks |
 Weapons |
 Armors |
 Interactive Map |
 Romance |
 Character Creator |
 Pawns |
 Items |
 Augments |
 Monsters |
 NPCs |
 Weapon Skills |
 Core Skills |
 Trophies and Achievements |
 Choices |
 Collectibles |
 News and Game Info |
 Updates and Patch Notes |
 Bugs and Errors |
Comment



Author

Dragon's Dogma 2 (DD2) Dark Arisen Walkthrough & Guides Wiki
All Seeker's Token Locations

Rankings
- We could not find the message board you were looking for.
Gaming News





Popular Games

Genshin Impact Walkthrough & Guides Wiki
Fire Emblem: Fortune's Weave (FEFW) Walkthrough & Guides Wiki
Aniimo Walkthrough & Guides Wiki
Wuthering Waves Walkthrough & Guides Wiki
Dragon's Dogma 2 (DD2) Dark Arisen Walkthrough & Guides Wiki
Umamusume: Pretty Derby Walkthrough & Guides Wiki
Honkai: Star Rail Walkthrough & Guides Wiki
Zenless Zone Zero Walkthrough & Guides Wiki
Pokemon TCG Pocket (PTCGP) Strategies & Guides Wiki
AION 2 Walkthrough & Guides Wiki









Recommended Games
Fire Emblem Heroes (FEH) Walkthrough & Guides Wiki
Where Winds Meet Walkthrough & Guides Wiki
Diablo 4: Lord of Hatred Walkthrough & Guides Wiki
Super Smash Bros. Ultimate Walkthrough & Guides Wiki
Persona 3 Reload Walkthrough & Guides Wiki
The Legend of Zelda: Tears of the Kingdom Walkthrough & Guides Wiki
Elden Ring Walkthrough & Guides Wiki
Pokemon Brilliant Diamond and Shining Pearl (BDSP) Walkthrough & Guides Wiki
Cyberpunk 2077: Ultimate Edition Walkthrough & Guides Wiki
Monster Hunter World Walkthrough & Guides Wiki










All rights reserved
©CAPCOM CO., LTD. ALL RIGHTS RESERVED.
The copyrights of videos of games used in our content and other intellectual property rights belong to the provider of the game.
The contents we provide on this site were created personally by members of the Game8 editorial department.
We refuse the right to reuse or repost content taken without our permission such as data or images to other sites.