
Beginner's Guide: Tips and Tricks to Get Started

This is a beginner's guide to Dragon's Dogma 2 (DD2). Learn valuable things to know before you get started, as well as 23 tips and tricks for beginner and advanced players!
15 Beginner Tips to Dragon's Dogma 2
- Character Size Matters
- Choose the Right Vocation for Your Playstyle
- Customize your Pawns
- Hire the Best Pawns
- Be Wary of Dragonsplague
- Fast Travel More
- Manage Your Item Weight
- Collect Golden Trove Beetles
- Combine Items Frequently
- Use Rotten Food as Lantern Oil
- Combat Consumes Stamina
- Side Quests are Affected by Passage of Time
- Pass the Time on Benches For Free
- Revive Yourself and NPCs with Wakestones
- Exclamation Points Are Points of Interest
Click on a tip to jump to its section!
Character Size Matters
| Height | ||
|---|---|---|
| Feature | Tall | Short |
| Stamina Regen | ▼ | ▲ |
| Running Speed | ▲ | ▼ |
| Weight | ||
| Feature | Heavy | Light |
| Carrying Capacity | ▲ | ▼ |
Body size and shape play a huge role in Dragon's Dogma 2. Smaller characters have better stamina economy, while bigger and taller characters will regenerate stamina at a much slower pace.
Larger characters will also have a higher max encumbrance, which means they'll be able to carry more items in their inventory.
An underrated factor about size is how it affects enemy target priority. Smaller characters have a lower profile, making them less likely to be targeted or grabbed by large monsters. Conversely, taller characters are easier targets, drawing more attention and grabs from bosses like Cyclopes and Drakes.
Best Height and Weight
You Can Change Appearance Later On

Your character's appearance is not permanent and can be changed later on as soon as you obtain a Book of Metamorphosis. This book can be bought from Guild Vendors for 500 RC.
Once you have the book, take it to a Barber Shop, which is commonly found in major towns. You can choose to modify your character's appearance, including height if you wish to change your character's size.
How to Get and Use Art of Metamorphosis
Choose the Right Vocation for Your Playsyle
At the start of the game, your Arisen can choose between four (4) starter vocations, each with a different playstyle:
| Starter Vocation | Playstyle |
|---|---|
 Fighter |
 Fighters are aggressive melee warriors specializing in the use of their shield skills. A good mix of offense and defense, but maintains an aggressive playstyle. |
 Mage |
 Mage is a great support vocation, capable of healing party members and applying buffs, such as dealing and applying elemental powers on the battlefield. The main caveat is that you kind of rely on your pawns early on, but you do have great mobility. |
 Thief |
 |
 Archer |
 The Archer specializes in range attacks with their bow, usually at a safe distance. Being able to craft, buy, and use specialty arrows for the right situation. |
Changing Vocations at Vocation Guilds
Feel free to choose any of the starting Vocations at the beginning of the game that appeals the most to you, as you can change this later at any Vocation Guild, so don't feel too pressured to choose the Vocation that suits your playstyle.
Changing to another starting Vocation would cost you 100 DCP.
Best Starter Vocation
Customize Your Pawns
Choosing your Main Pawn

Main Pawns are support characters that will assist you in combat. You can choose your main Pawn's Vocation early on, so try to pick one that complements your play style for a well-balanced party.
As an example, if you're playing range characters like Archer or Mage, it would be best to pick Fighter for your Pawn so that they can tank enemy hits and draw aggro away from you while you fire your arrows or spells from afar.
Pawns System Explained
Your Pawn Team
Picking the right party is as important as choosing the right vocation, as DD2 can be punishing for unprepared solo travelers. You can round out your group with up to three companions total: your own aforementioned Main Pawn and two additional hired pawns.
To give yourself the best chance in combat, aim for a well-rounded composition rather than stacking identical classes:
- The Healer/Support: You should always have at least one Mage in your active party to handle vital healing, cure blights, and apply weapon elemental boons/affinity.
- The Tank: A Fighter equipped with a shield-summon skill is invaluable for drawing enemy aggro, keeping heavy pressure off vulnerable ranged characters or spellcasters.
- Range & Utility: An Archer is exceptionally useful for picking off annoying flying enemies that would otherwise stay out of melee reach.
Best Party and Team Composition
Hire the Best Pawns
Checking Quest Knowledge
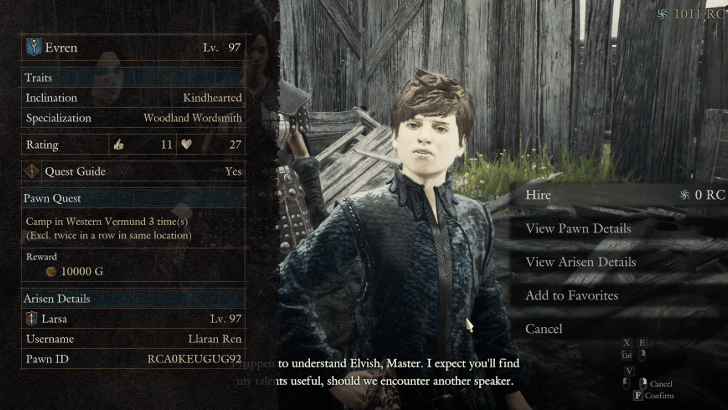
Pawns often possess vital hints or step-by-step guidance for active quests. Check your quest log for blue or orange icons indicating which pawn holds knowledge of your current objective, and use the Go
command to let them lead the way if you get stuck.
Specializations & Inclinations
Pay attention to a pawn's inclination and specialization.
Passive perks like Logistician for inventory management or Forager for highlighting rare map materials.
Tailoring these traits to your party's needs makes exploration much smoother, which boosts your team's potential.
Using a Friend's Pawn
Whenever possible, hire pawns created by your friends. This acts as a pseudo-trade system, allowing you to send items back and forth, and resting at an inn will automatically update their level and gear from their creator's world.
This method is also completely free, as it costs 0 RC to hire their Pawns. The only requirement is that you need to have them on your friends list.
Be Wary of Dragonsplague

Dragonsplague is a terrible illness that infects pawns as they travel between worlds in Dragon's Dogma 2. This is usually obtained by fighting Drakes and can spread simply by being in the same party with a pawn that has one.
The Arisen is at least the only one immune to this sickness. If left untreated, an infected pawn will eventually trigger a devastating calamity that slaughters the entire population of whichever town you rest in.
Dragonsplague Key Signs:
- Glowing red eyes that occasionally flash or pulse.
- Insubordination and talking back when given commands.
- Clutching their head as if suffering from severe headaches.
How to Cure Dragonsplague:
- Main Pawn: Use Dragonsbaulk Draught or throw them into deep water to let the Brine consume them, then resummon them at a Riftstone.
- Hired Pawns: Dismiss them from your party.
The Dragonsbaulk Draught is a valuable specialized potion purchased from Ibrahim's Scrap Store for 10,000 gold or crafted with a Wyrmslife Crystal and an Allheal Elixir.
This will allowing you to instantly cure an infected pawn of Dragonsplague without having to resort to dimissing or drowning.
Fast Travel Options
| Location | Available Fast Travel Points |
|---|---|
| Melve | ・1 Portcrystal ・1 Oxcart Station Route: Melve - Vernworth |
| Vernworth | ・1 Portcrystal ・ 2 Oxcart Stations Routes: Vernworth - Checkpoint , Vernworth - Melve |
| Harve Village | ・1 Portcrystal |
| Checkpoint Rest Town | ・1 Portcrystal ・ 2 Oxcart Stations Routes: Checkpoint Rest Town - Verworth , Checkpoint Rest Town - Bakbattahl |
| Bakbattahl | ・1 Portcrystal ・ 1 Oxcart Station Route: Bakbattahl - Checkpoint |
| Volcanic Island Camp | ・1 Portcrystal |
Portcrystals and Oxcarts are the main fast travel methods in Dragon's Dogma 2. Portcrystals are fixed points within a fast travel network, though you also get portable Portcrystals through quests or exploration. These portable Portcrystals allow you to add your own fast travel points anywhere in the world. Ferrystones are consumed to use Portcrystals.
Oxcarts serve as an alternative traveling method for local transit between major settlements. Keep in mind that carts can be ambushed by monsters out on the road, so just be ready to fight some enemies along the way.
Eternal Ferrystone
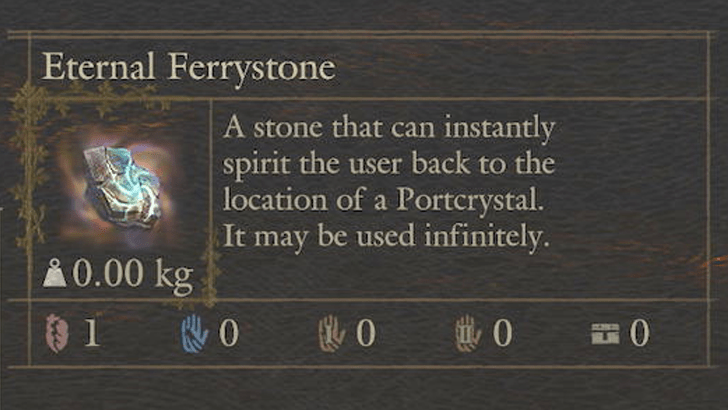
The Eternal Ferrystone is a game-changing addition, which completely removes the scarcity of fast travel. Unlike standard, consumable Ferrystones that deplete upon use, the Eternal version allows you to teleport as often as you like. It is automatically added to your inventory or acquired during Captain Brant's early-game quests, making long-distance backtracking stress-free.
Once obtaining it, you could actually sell all Ferrystones, as both are functionally the same.
How to Get the Eternal Ferrystone
Manage Your Item Weight
Watch Your Load

Encumbrance is one of the most critical systems in the game. Being over-encumbered doesn't just slow down your movement speed—it also causes you to burn through your stamina much faster, making both exploration and combat significantly harder.
Always be on a lookout when you reach around Heavy status on your weight. the sweet spot is usually in Average.
How to Increase Weight Limit
Distributing Weight to Pawns
If you find yourself weighed down by crafting materials and loot gathered from the open world, don't carry everything yourself. You can easily distribute items by opening your inventory, selecting an item, and choosing to give it to one of your pawns.
One of the best items to give to your Main Pawn is the Camping Kit. The camping kit is one of the heaviest items to carry around, so be sure to always pack one on your main pawn.
What Happens to Items of Dismissed Pawns?
Always Deposit at an Inn
Whenever you are back in a town, make it a habit to deposit excess items and equipment at the Inn. It's one of the best ways to lighten your load.
If possible, only carry what you need in an expedition. A lot of special items weigh a lot more when stacked. You can usually just bring 1 of each item and stash the rest for more weight efficiency.
All Inn Locations
Collect Golden Trove Beetles

There is one way to increase your carrying capacity, and it's by consuming Trove Beetles. If you see a shining, yellow beetle stuck on a tree trunk during your adventures, do not forget to get them! . This is especially useful as you'll be picking up a lot of things while exploring.
It is also easier to spot Golden Trove Beetles at night as they glow brightly against the dark of night but be careful as nights tend to be a lot more dangerous in the world of Dragon's Dogma.
All Golden Trove Beetle Locations
Combine Items Frequently

All food items in Dragon's Dogma 2 will expire in your inventory or storage as time passes. To preserve food, combine items into their dried version using the combine menu.
Dried food items will never expire and are the best way to carry food if you're going on a long exploration quest. Doing this will also help with your carrying load.
This essentially replaces the Airtight Flask item from Dragon's Dogma 1, as the item does not make a return in DD2.
How to Combine Items
Use Rotten Food as Lantern Oil

If you find yourself with a mountain of rotten food items in your storage, do not throw them away! They can be used as a material to craft Lantern Oils which you can use to top up your lantern if it is low on fuel.
Lantern Oil Location and Effect
Combat Consumes Stamina
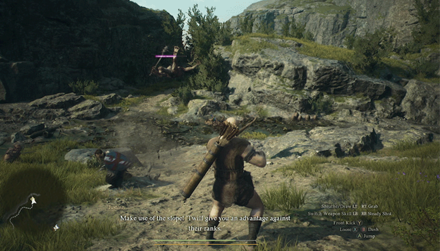
Combat is tied to the stamina gauge, but is only affected by certain offensive abilities, such as activating weapon skills, casting out spells, using core skills, and climbing onto a monster.
Light and heavy attacks consume minimal stamina compared to weapon skills and spells, so you can use them more freely.
Side Quests are Affected by Passage of Time

Some quests are affected by the passage of time and will progress or resolve even without the involvement of the player. This means that you'll risk being unable to act promptly if you take on multiple quests at once.
Failing quests may lead to undesirable consequences in your playthrough, so be mindful of your current quests when taking on new ones.
Pass The Time on Benches For Free
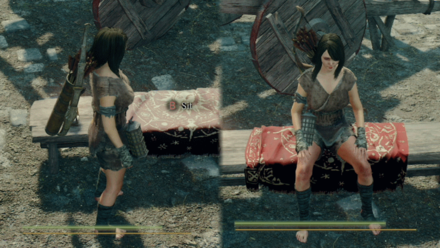
You might think that resting at campsites and inns is the only way to pass time but all Arisens can look for benches where they can pass time for free. This is especially useful when your quests are time-locked and you do not have money to rest inside inns.
Revive Yourself and NPCs with Wakestones

If you accidentally find yourself fatally wounded in battle or have failed to protect a certain individual during a quest, you can use Wakestones to revive them.
Use an Eternal Wakestone to Revive Multiple NPCs
A much more potent version of a wakestone, called the Eternal Wakestone, is also present in the game. Its effect is wide-range and can revive multiple dead NPCs in your vicinity. This is especially useful if you find that all townspeople are dead due to Dragonsplague.
Can't Find the Body? They Are Most Likely in the Morgue

If a dead NPC is left at a certain spot for too long, the undertaker will take it to the morgue so check on their bodies if you aim to revive them. The morgue is mostly found in major towns and is denoted by a coffin icon on the map.
Exclamation Points Are Points of Interest

When near any point of interest, like cable cars and ladders, your pawn will usually inform you that it may take you to an important treasure. This will then be shown in your minimap as an exclamation point (!) to denote the location of the said point of interest! Try to explore that area to get valuable loot or progress through an area.
8 Advanced Tips and Tricks for Dragon's Dogma 2
List of Tips
- Mitigate Fall Damage by Landing Directly on the Pawn
- Make Sure to Climb Large Enemies
- Translate Elvish With Pawns
- Always Aim For Finisher Hits
- Duplicate Items At the Scrap Store
- You Can Find Destructible Hazards That Lead to Hidden Areas
- You Can Command Pawns to Open Unreachable Treasure Chests
- Destroying a Bridge Kills Enemies On It
Mitigate Fall Damage by Landing Directly on the Pawn

Landing directly on a Pawn will cushion your fall and completely mitigate any fall damage. However, do note that they won't catch you if you fall from a fatal height.
Make Sure to Climb Large Enemies
Larger monsters can be climbed onto to reach and attack their weak spots. Breaking their weak spots will also possibly drop bonus items and materials.
Some Vocations can use weapon skills while mounted on monsters, like the Thief being able to use Powder Charge to plant an explosive on their backs.
As a bonus tip, if you see a large monster wobbling and hopping on one foot, you can grab its leg to push it and topple it over the ground.
You can even grab aerial enemies to take flight

The Grab mechanic even allows you to latch onto aerial enemies such as a Harpy and slightly control the direction of where they're flying to. This is useful if you want to get to a high vantage spot as an Archer or Mage.
Grabbing Enemies Should Be a Habit
| Grab Control Key | |
|---|---|
 Xbox |
 PlayStation |
Grabbing also has other niche uses such as grabbing smaller enemies, Pawns, or objects and then throwing them at your opponents to damage them. You can even throw them at aerial enemies if you're not using a range Vocation, like Fighter and Thief.
Another trick you can do is to throw enemies at melee Pawns to perform a special combo that should deal decent damage them. If you're feeling creative, you can even throw a barrel of oil onto an enemy and then use a fire attack to set them ablaze.
Translate Elvish With Pawns

During your adventures, you might encounter NPCs that speak in a very peculiar language. The subtitles aren't helping either as they are written in an unintelligible language. These characters are speaking in Elvish.
To understand them, you have to get a pawn that has the Woodland Wordsmith specialization with the easiest way is to hire one from a Riftstone.
How to Learn Elvish: Woodland Wordsmith Specialization
Always Aim For Finisher Hits

| Finisher Hit Key | |
|---|---|
 Xbox |
 PlayStation |
Always try to execute a strong, finisher hit that deals a significant amount of damage. You can usually only do this when an enemy is down or when an enemy is stunned using skills. A strong, finisher hit is done by pressing the △ button for PS5 and the Y button for XBOX.
Duplicate Items at the Scrap Store

In Dragon's Dogma 2, there is a store in Checkpoint Rest Town that allows you to create a forgery of an item, which essentially duplicates it. Though some important items do not carry over their effect when duplicated, this is especially useful when giving items as gifts, as most NPCs do not check gifts for authenticity. It's the thought that counts, right?
You Can Find Destructible Hazards That Lead to Hidden Areas

There are hidden areas in the game blocked behind destructible environmental hazards such as caves blocked by piles of rubble or water spouts that open up areas. You can grab and throw a large boulder at these interactable hazards to open them up and unlock a new area to explore. Be careful though! You can get hurt if you're close while breaking the hazards!
Locked Doors or Gates
Some doors, such as blocked dungeon gates, have wooden planks that are breakable seemingly from the other side. These, however, are puzzles in and of themselves and would require you to figure out a solution.
Here are ways that these wooden locks can be broken:
- Find openings or passageways within the immediate area that would likely lead you to the door.
- You can shoot an arrow at the board (Archer), through the door if there's a big enough opening.
- An alternative entrance could be around.
- Enemies from the other end could break the lock.
You Can Command Pawns to Open Unreachable Treasure Chests

Pawns with certain Vocations can navigate to unreachable places that contain treasure chests. Like the Mage Vocation, you can command them to levitate to cross a gap and collect a treasure chest waiting on the other side.
Destroying a Bridge Kills Enemies On It
One of the best ways to kill large mobs of enemies is to lure them onto bridges and then destroy the bridge so they fall to their deaths. This is particularly useful if you find yourself low on health and will need a quick way to take out all those enemies chasing after you.
Note that bridges take time to repair, so assess whether the disadvantage of not being able to use the bridge outweighs the need to survive.
All Tips and Tricks Guides
Dragon's Dogma 2 Related Guides
 Dragon's Dogma 2 Wiki Top
 Looking for Great Games! |
Is Dragon's Dogma 2 one of your favorite games? Answer our Best Games Survey and share your unique voice with Game8's readers! |
|---|
Dragon's Dogma 2 Guides
| Dark Arisen DLC Guides | |
|---|---|
 Dark Arisen DLC |
 Lost Rites |
 Dark Arisen Review |
- |
| Dragon's Dogma 2 Wiki Contents | |
 Walkthrough |
 Quests |
 Vocation |
 Tips and Tricks |
 Weapons |
 Armors |
 Interactive Map |
 Romance |
 Character Creator |
 Pawns |
 Items |
 Augments |
 Monsters |
 NPCs |
 Weapon Skills |
 Core Skills |
 Trophies and Achievements |
 Choices |
 Collectibles |
 News and Game Info |
 Updates and Patch Notes |
 Bugs and Errors |
Recommended Guides
Comment



Author

Dragon's Dogma 2 (DD2) Dark Arisen Walkthrough & Guides Wiki
Beginner's Guide: Tips and Tricks to Get Started

Rankings
- We could not find the message board you were looking for.
Gaming News





Popular Games

Genshin Impact Walkthrough & Guides Wiki
Fire Emblem: Fortune's Weave (FEFW) Walkthrough & Guides Wiki
Aniimo Walkthrough & Guides Wiki
Wuthering Waves Walkthrough & Guides Wiki
Dragon's Dogma 2 (DD2) Dark Arisen Walkthrough & Guides Wiki
Umamusume: Pretty Derby Walkthrough & Guides Wiki
Honkai: Star Rail Walkthrough & Guides Wiki
Zenless Zone Zero Walkthrough & Guides Wiki
Pokemon TCG Pocket (PTCGP) Strategies & Guides Wiki
AION 2 Walkthrough & Guides Wiki









Recommended Games
Fire Emblem Heroes (FEH) Walkthrough & Guides Wiki
Where Winds Meet Walkthrough & Guides Wiki
Diablo 4: Lord of Hatred Walkthrough & Guides Wiki
Super Smash Bros. Ultimate Walkthrough & Guides Wiki
Persona 3 Reload Walkthrough & Guides Wiki
The Legend of Zelda: Tears of the Kingdom Walkthrough & Guides Wiki
Elden Ring Walkthrough & Guides Wiki
Pokemon Brilliant Diamond and Shining Pearl (BDSP) Walkthrough & Guides Wiki
Cyberpunk 2077: Ultimate Edition Walkthrough & Guides Wiki
Monster Hunter World Walkthrough & Guides Wiki










All rights reserved
©CAPCOM CO., LTD. ALL RIGHTS RESERVED.
The copyrights of videos of games used in our content and other intellectual property rights belong to the provider of the game.
The contents we provide on this site were created personally by members of the Game8 editorial department.
We refuse the right to reuse or repost content taken without our permission such as data or images to other sites.