
Test Area Interactive Map and Locations
✪ Check Game8 Endfield Twitter for daily tips!
★ Exclusive: Endfield's Connection to Arknights
✰ Version 1.6 is out! | Yuanyuan's Blazing Stoves
├ P1: Si (Builds / Teams / Banner)
├ P2: Argent Flow (Builds / Banner)
└ Rerun: Tangtang (Builds | Teams | Banner)

Test Area is an area in the Wuling Region in Arknights: Endfield. See an interactive map and 100% guide for Test Area, how to reach and unlock the area, and map locations for all collectibles and items in this guide!
Test Area Interactive Map
| ・Pins checked off the map will reflect in the list below. ・Use the upper dropdown menu to select the Region. Then, use the lower dropdown menu to swap between Areas within that Region. ・To suggest map pins, simply click anywhere on the map. Please list down as much information as you can including reward data or acquisition methods. For images, uploading a full rectangular screenshot with a resolution of at least 728 x 410 pixels will be highly appreciated. ・Farmable map pins now reset automatically when items are ready for regathering. Select the Asia or US/EU server region for accurate timing.NEW ┗ This is a new feature, so we are looking for feedback from our users. Please leave a comment to let us know what you think! We encourage users to Sign Up and Log In to save your progress with the map. |
Wuling Interactive Map and Locations
Test Area 100% Exploration Guide
| All Collectibles in Test Area | |
|---|---|
 Aurylene
 Chest
 Repair Logic
 Protocol Datalogger
 Facility Repair Robot
 Ore Farming Spots
 Rare Growths
Test Area Aurylene Locations
| ✔️ | Overworld View | How to Get |
|---|---|---|
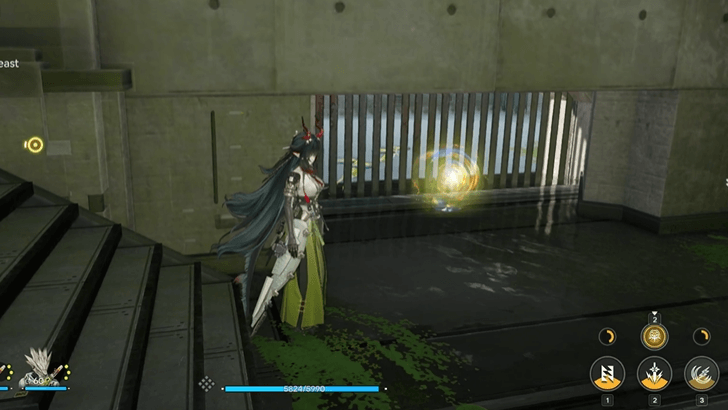 |
Slightly northwest of the TP Point near Type-C Auxiliary Pillar Area 1, in a small corner by the stairs. | |
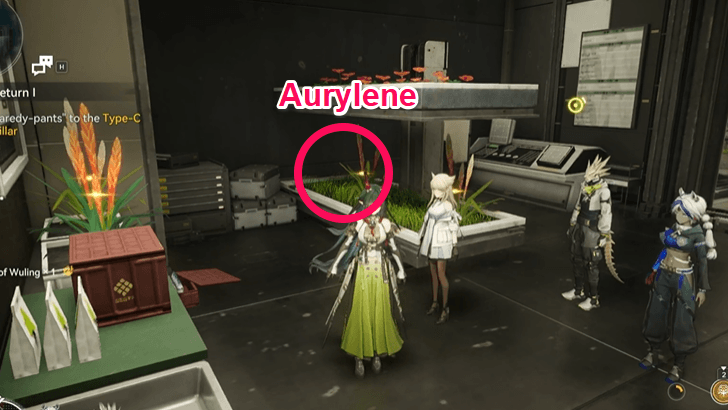 |
North of Eco Specimen Room near the Yazhen plants. | |
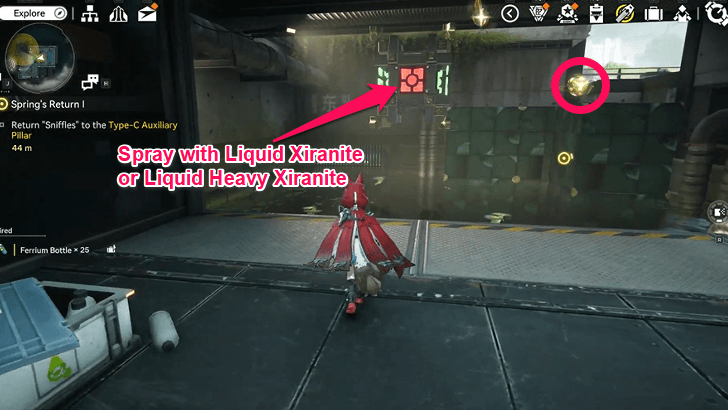 |
Found floating above the Xiranite blocks, northwest of the Material Preparation Room. Spray the red side of the floating block with Liquid Xiranite or Liquid Heavy Xiranite to make a path for you to reach the Aurylene. | |
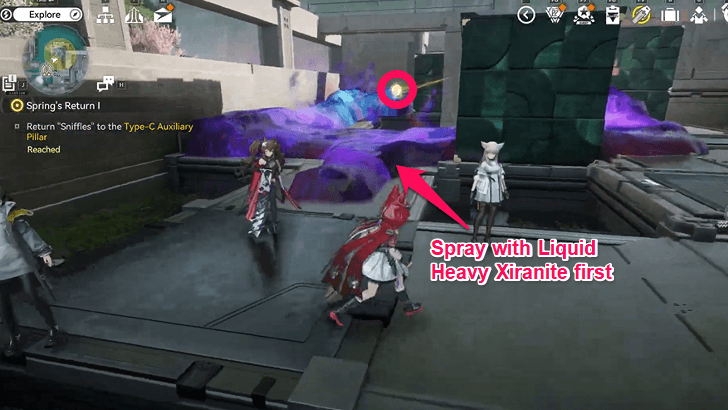 |
Found looping around the northwest area of Type-C Auxiliary Pillar Area 3, clear the Superactive Blight first to safely get the Aurylene. | |
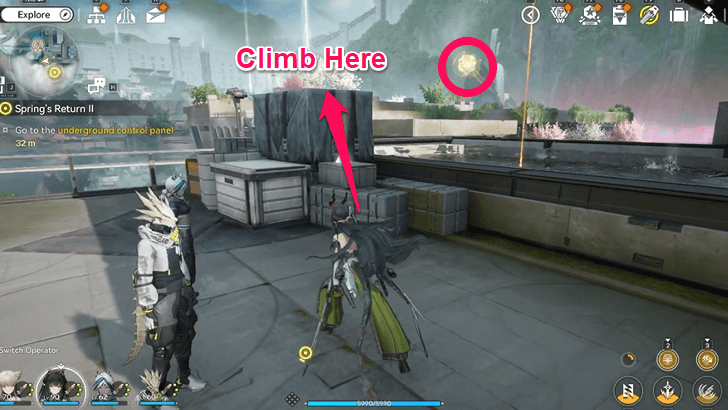 |
West of the Auxiliary Pillar in Area 3. Jump on top of the containers and either jump to reach the Aurylene, or wait for it to loop towards your position. | |
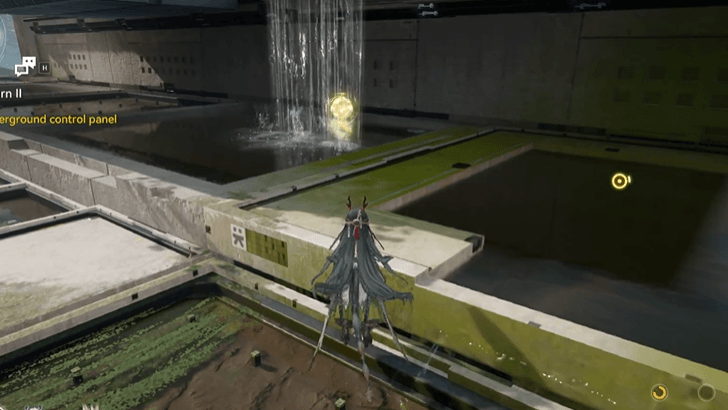 |
Behind a stream of falling water slightly northeast of the TP Point in the Meridian Grid Area. | |
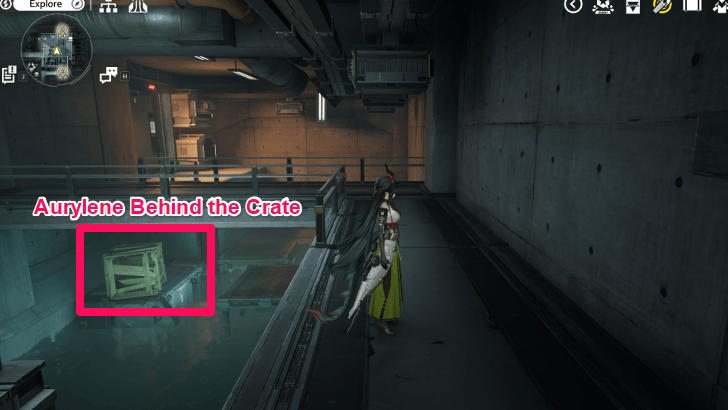 |
Found hiding behind a crate beneath the platform in the Testing Zone. Jump down to the lower platforms nearby and jump towards the Aurylene's platform. | |
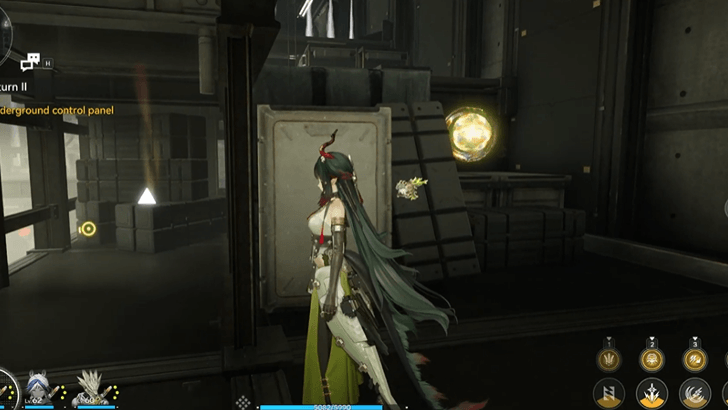 |
By the eastern side of the Testing Zone, chase the Aurylene until you reach the highest platform in the room. | |
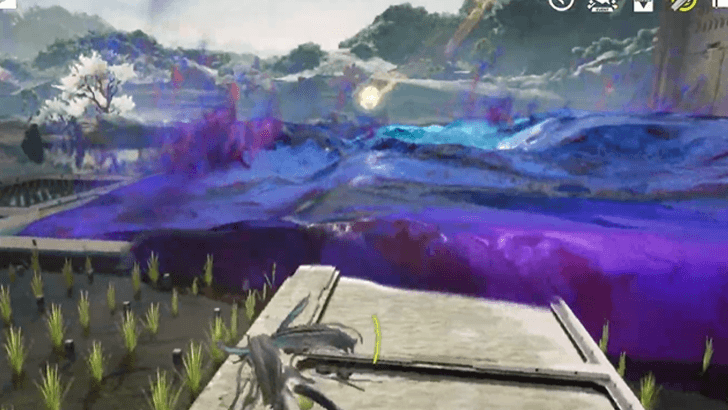 |
East of the Integrated R&D Area, chase the Aurylene as it flies down further east to the area full of Superactive Blight. Spray the Blight first before capturing the Aurylene. | |
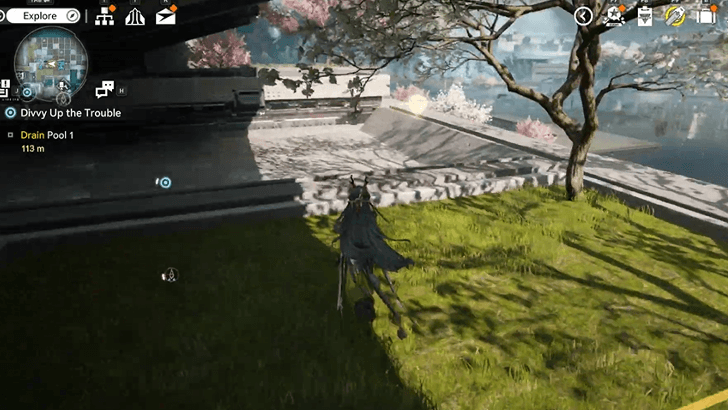 |
Looping around the west area of the Meridian Grid Area. You can either head west from the Meridian Grid Area TP Point , or jump down from the farming area above to find the Aurylene. | |
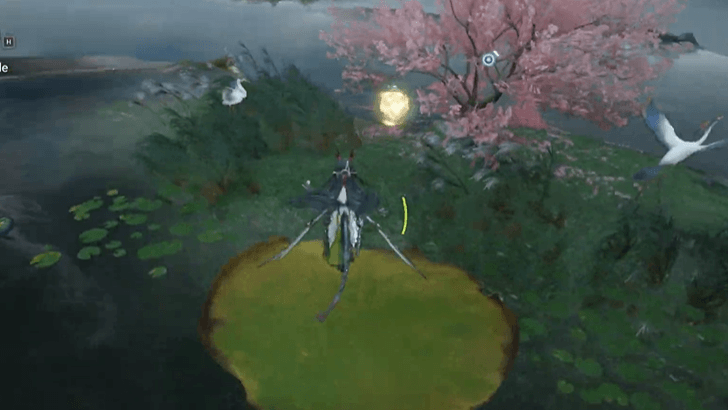 |
Found on the small area northeast of the TP Point in the Type-C Auxiliary Pillar Area 1, jump across lily pads to get to the area. | |
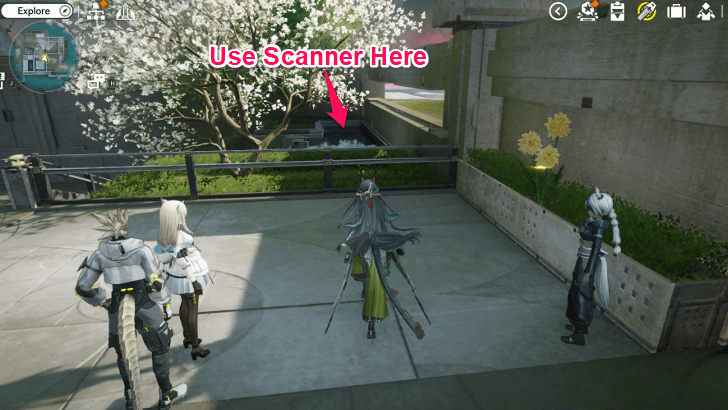 |
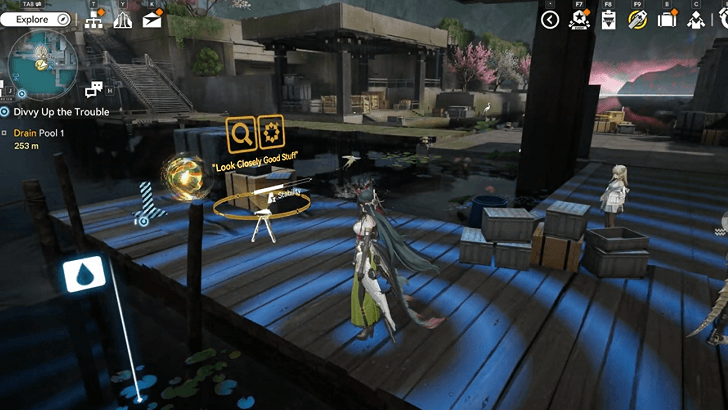
Head north from the Type-C Auxilliary Pillar in Area 2 and jump over the railing on the right side. Use the Scanner tool to find the Aurylene on the water. | |
 |
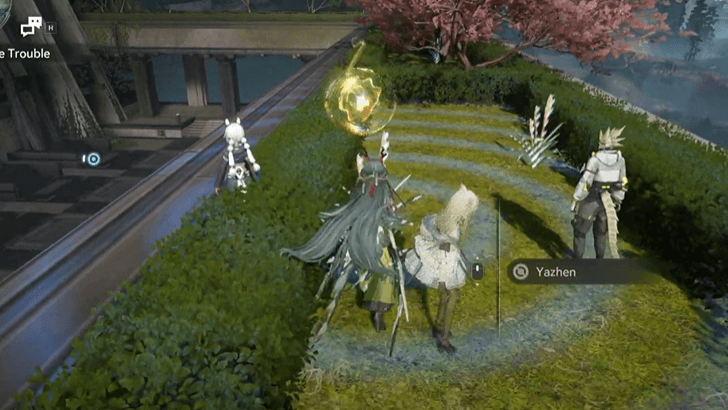
From the TP Point nearest to the Type-C Auxiliary Pillar Area 3, clear the Superactive Blight within the area, then use the Scanner tool by the wooden dock to find the Aurylene. | |
 |
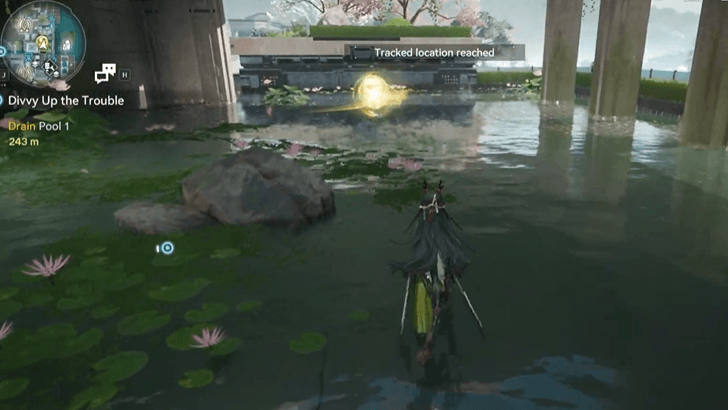
Found floating around the top of the Water Treatment Sector building. | |
 |
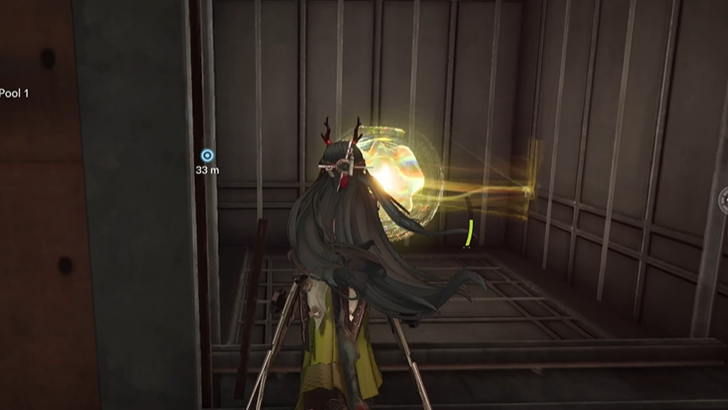
Found by the pond to the southeast of the Meridian Grid Area TP Point. | |
 |
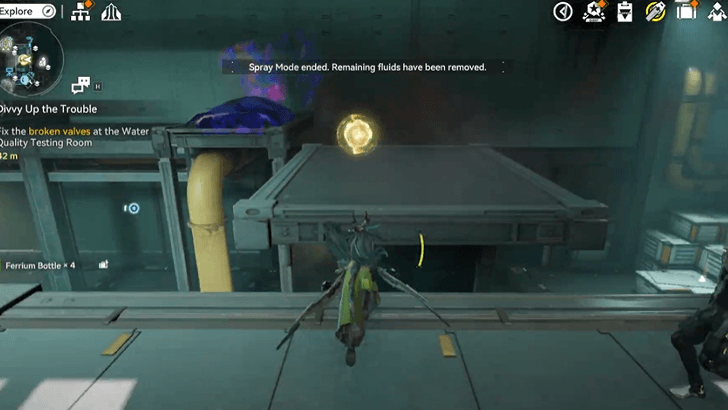
Found in a corner in the Pool 1 Inspection Zone. Clear the sewage pool during the Divvy Up the Trouble Exploration Mission to have access to this part of the area. | |
 |
Found at the center of the northeast area of the Testing Zone Sanctum. Follow the Aurylene and clear the Superactive Blight to reach it. |
There are a total of 17 Aurylenes found in Test Area.
Test Area Chest Locations
| ✔️ | Overworld View | How to Get |
|---|---|---|
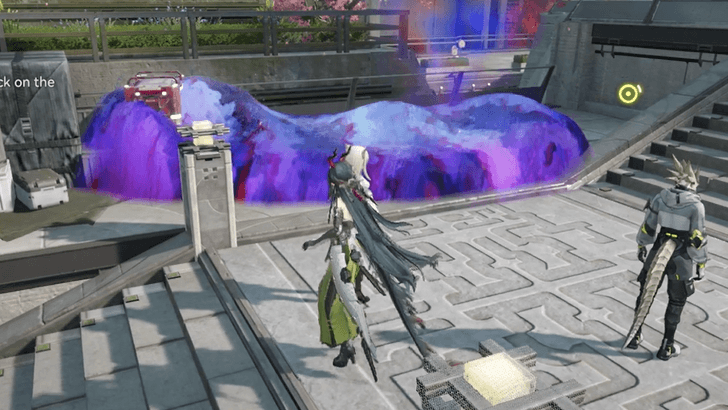 |
Slightly northeast of the Type-C Auxiliary Pillar Area 1 TP Point. Clear the Superactive Blight with Liquid Heavy Xiranite first to access the chest. | |
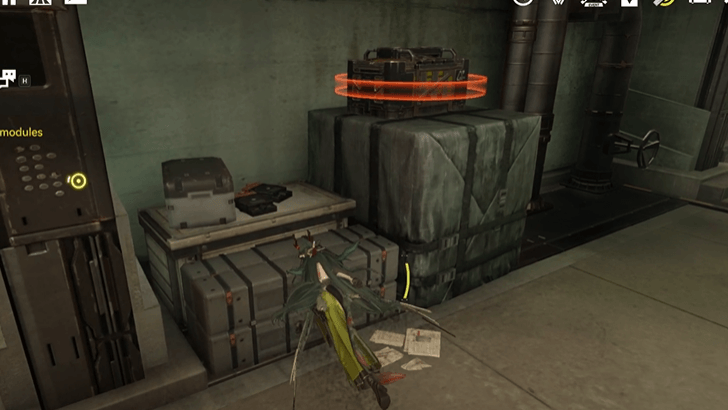 |
Locked chest in a lower room east of Type-C Auxiliary Pillar Area 1. | |
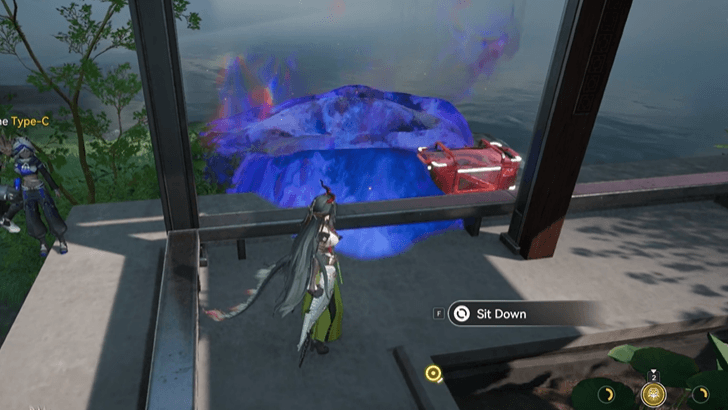 |
Northeast of the Type-C Auxiliary Pillar Area 1 by the bench. Clear the Superactive Blight with Liquid Heavy Xiranite first to unlock the chest. | |
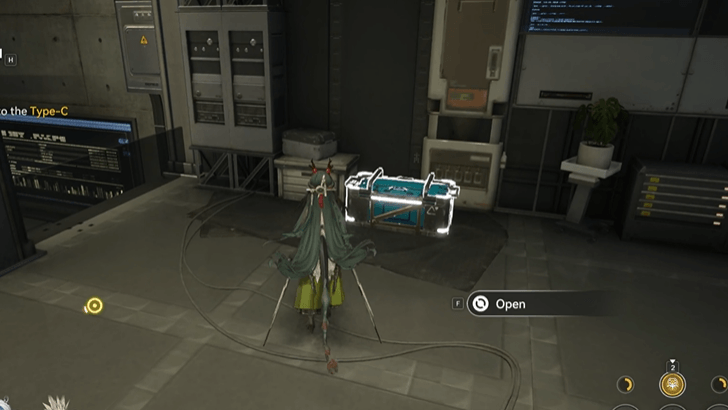 |
North side of the Data Monitoring Office in Type-C Auxiliary Pillar Area 1. Clear the Superactive Blight with Liquid Heavy Xiranite first to find the chest. | |
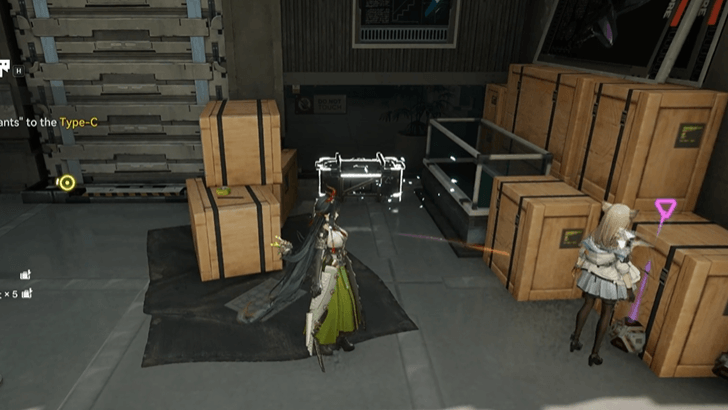 |
North of Type-C Auxiliary Pillar Area 2, behind a wooden crate. Destroy the crate to reach the chest. | |
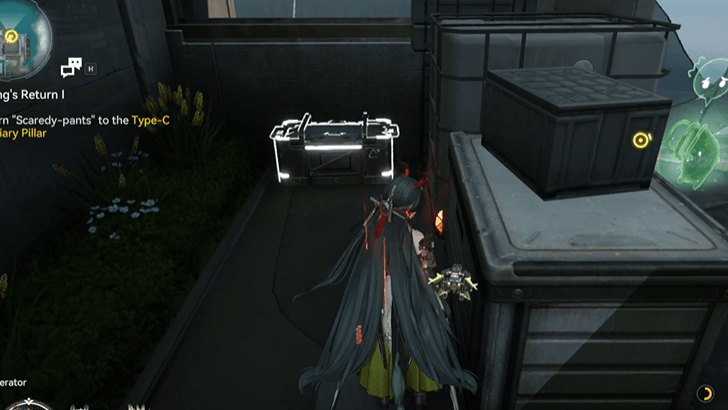 |
Found in a corner behind boxes just north of Type-C Auxiliary Pillar Area 2. | |
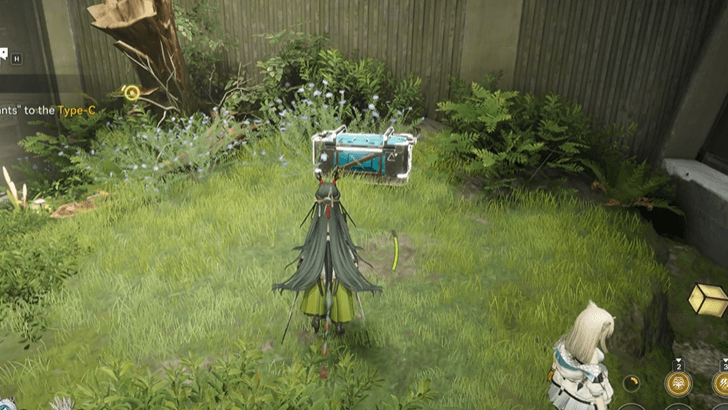 |
In the south area of the Eco Specimen Room, on top of the land near a broken tree trunk. | |
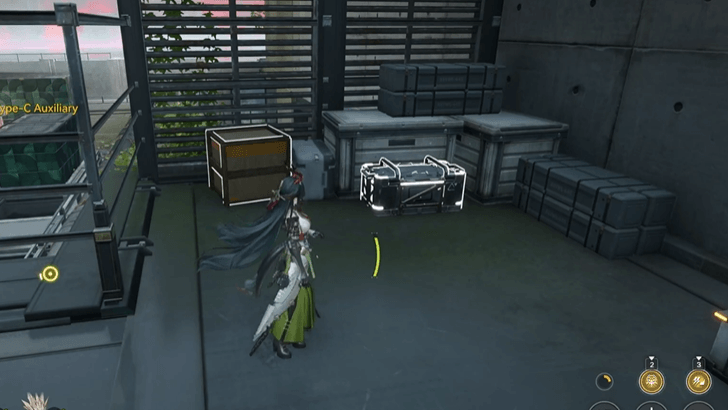 |
To the east of the TP Point in the Type-C Auxiliary Pillar Area 3, in a corner near boxes and crates. | |
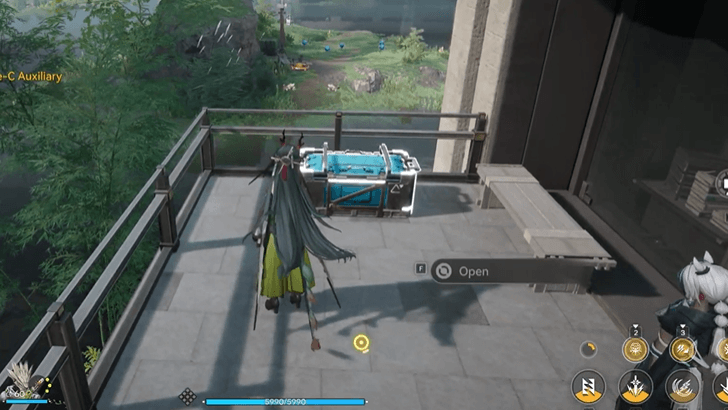 |
Found by the east side of the Type-C Auxiliary Pillar Area 3, by the balcony just outside of the Prototype R&D Room. | |
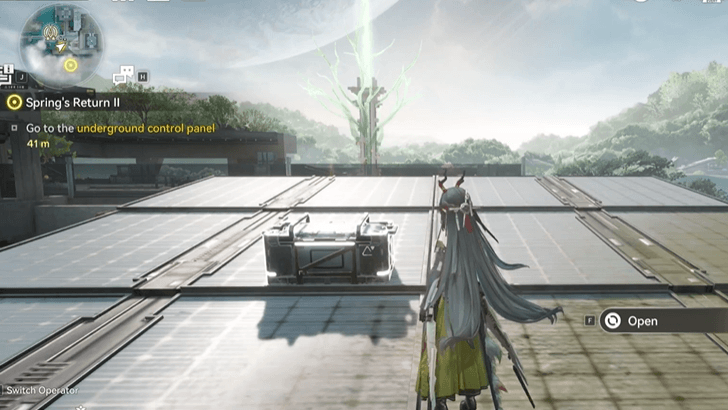 |
Located west of the Auxiliary Pillar in Area 3, jump over the glass railing to reach the other roof to find the chest on top of solar panels. You can also take the rope near the Aurylene below. | |
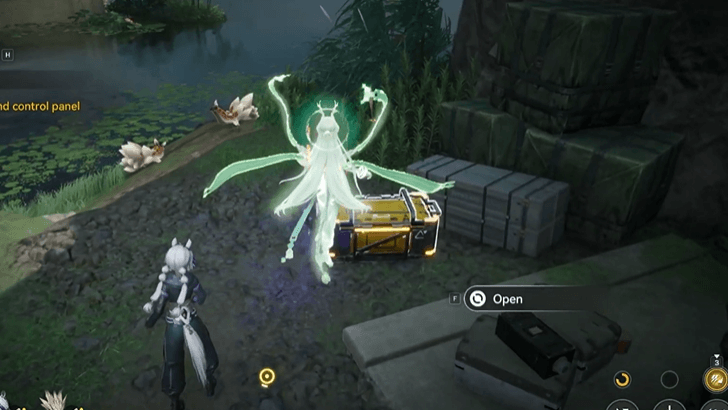 |
On the area northeast of the Meridian Grid Area, defeat the group of enemies first to unlock the chest. | |
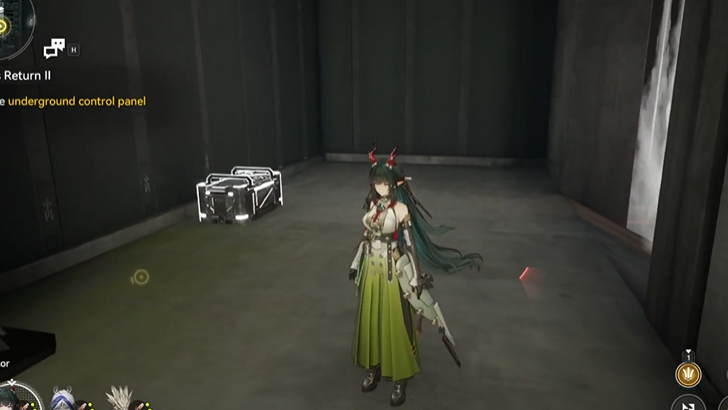 |
Inside the northeast room of the Testing Zone area, near the room full of slugs. | |
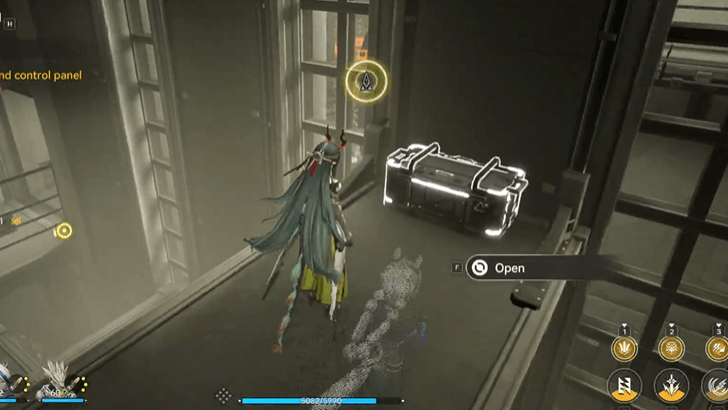 |
Slightly northeast of the Testing Zone TP Point, head up the highest platform to find the chest at the end. | |
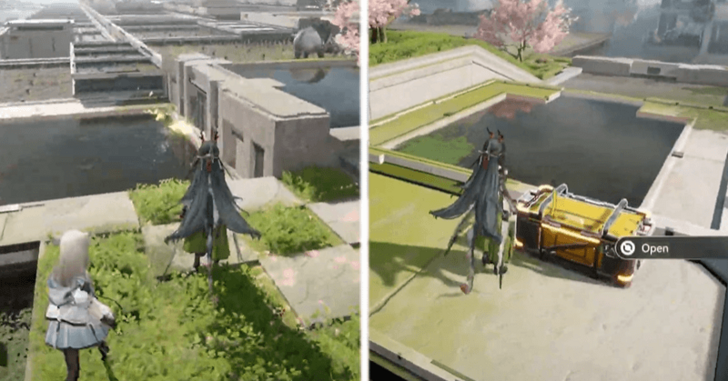 |
Follow the butterflies found to the west of the Meridian Grid Area to unlock the chest. | |
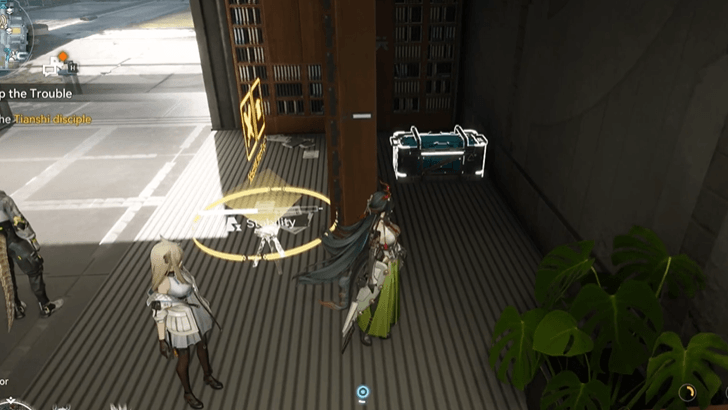 |
Inside the building east of the Integrated R&D Area, attack the shelf to make it disappear to find the chest behind it. | |
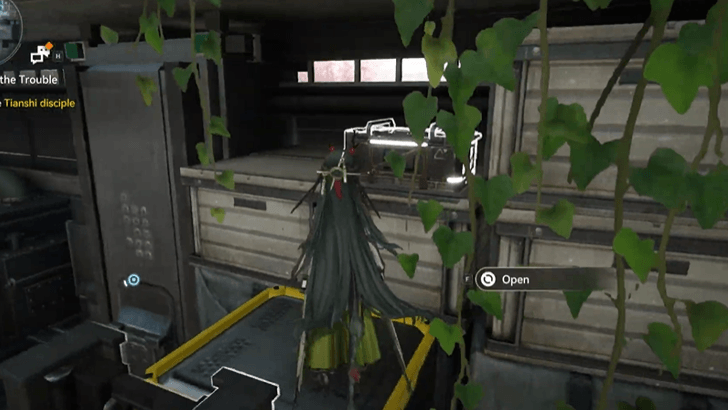 |
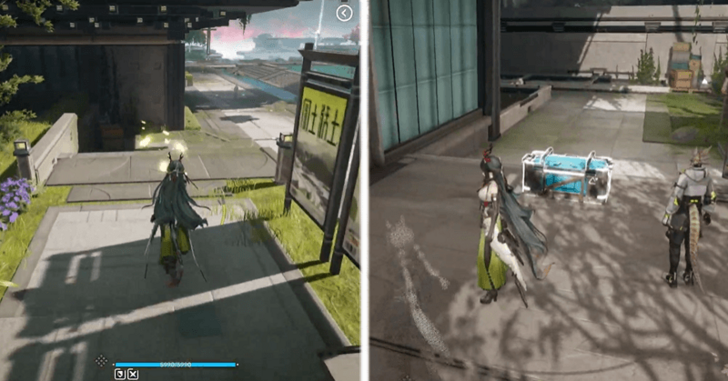
Found on top of containers by the southeast side of the Integrated R&D Area. Interact with the forklift and jump on the containers beside it to reach the chest. | |
 |
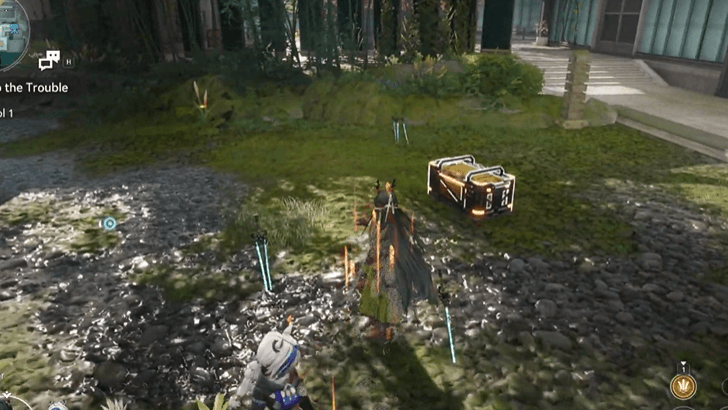
Follow the butterflies found southwest of the Integrated R&D Area to unlock the chest. | |
 |
Handle the crisis of the Energy Alluvium by the corner southwest of the Integrated R&D Area to get the chest. | |
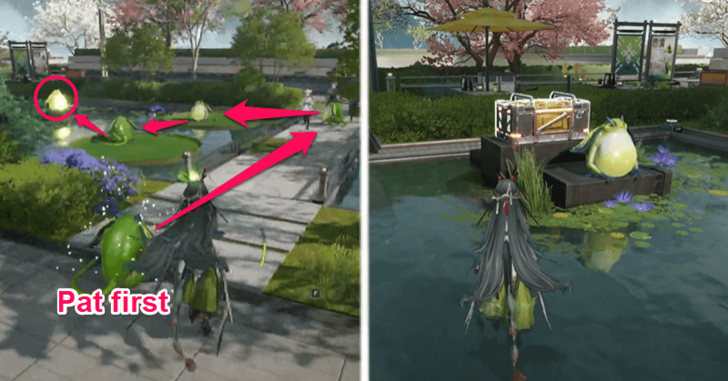 |
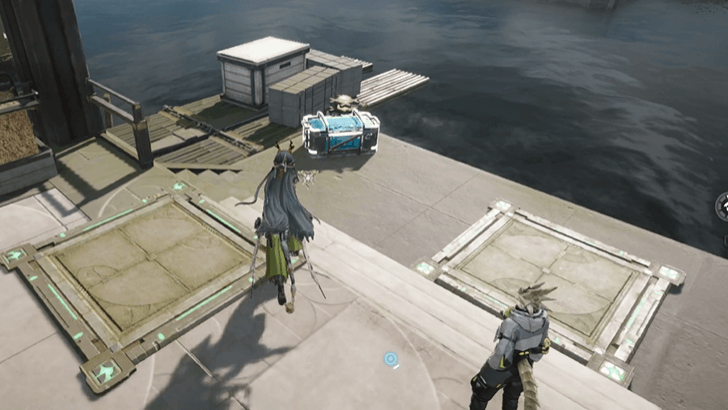
Solve the frog puzzle by moving the north frog on top of the rock twice, and moving the south frog on top of another rock twice. Pat the first frog once all frogs are in the right | |
 |
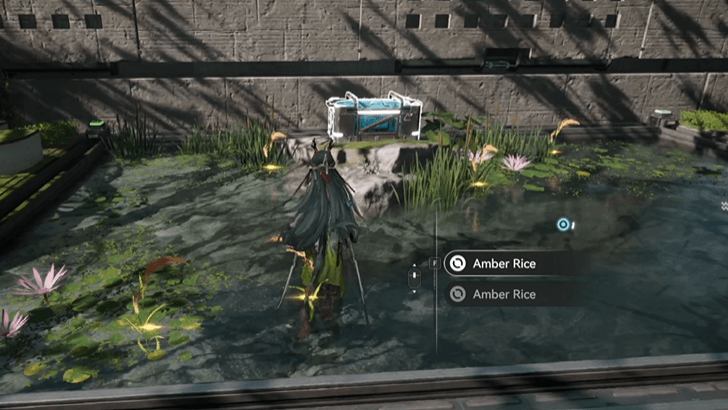
Northwest of the TP Point in the Type-C Auxiliary Pillar Area 3. Solve the pressure plate puzzle by doing plunge attacks on the pressure plates in the correct order. | |
 |
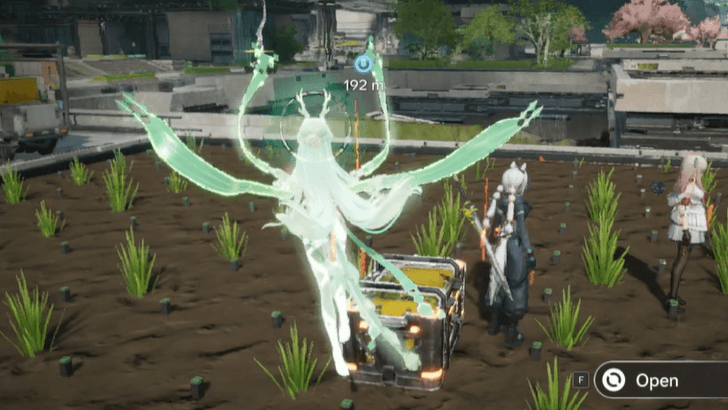
Unlock the chest by solving the pressure plate puzzle. Perform plunging attacks on the pressure plates in the correct order. | |
 |
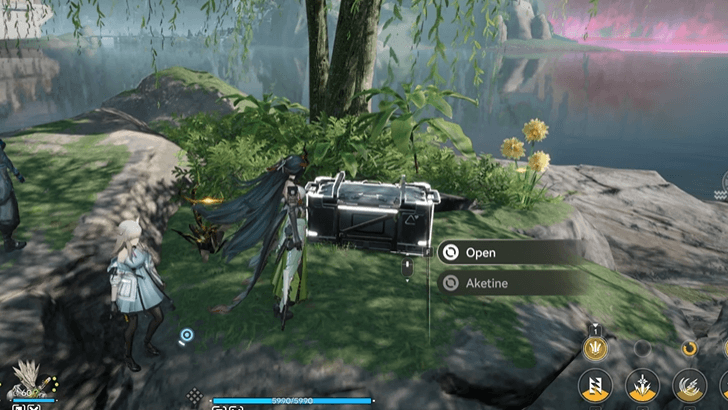
Handle the Energy Alluvium crisis found southwest of the TP Point in the Meridian Grid Area to unlock the chest. | |
 |
In the northernmost part of the Type-C Auxiliary Pillar Area 1, on top of the rocks. | |
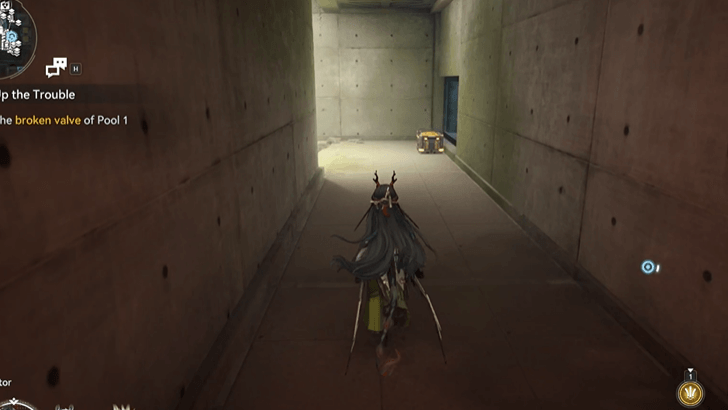 |
Found in the Pool 1 Inspection Zone after jumping on pipes to reach the room. Clear the sewage pool during the Divvy Up the Trouble Exploration Mission to have access to this part of the area. | |
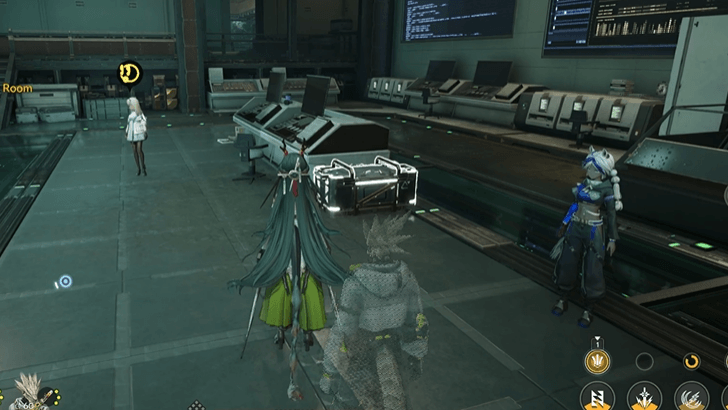 |
Found in the northwest room of the Testing Zone after clearing the Superactive Blight. The area is accessible during the Divvy Up the Trouble Exploration Mission. | |
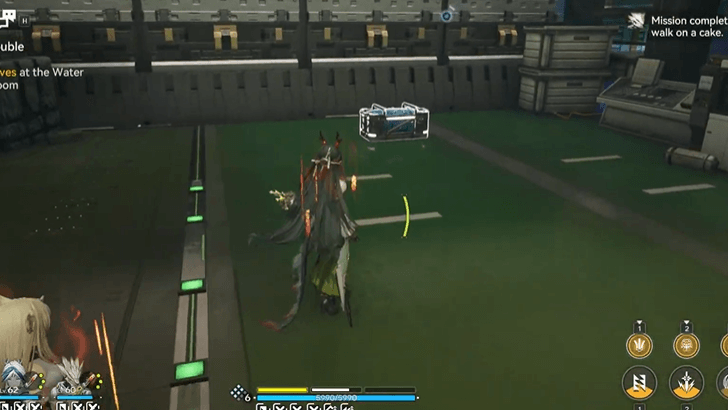 |
Locked chest found in the northeast room of the Testing Zone Sanctum area. Defeat the group of enemy slugs to unlock the chest. The area is first accessible during the Divvy Up the Trouble quest | |
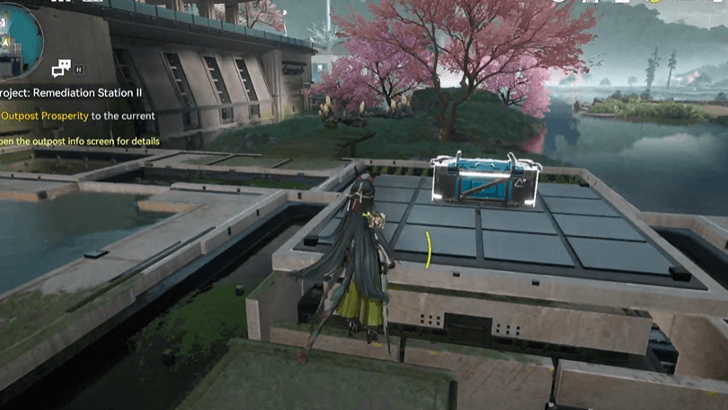 |
Head northeast from the TP Point south of the Integrated R&D Area. Unlock the chest after completing the pressure plate puzzle | |
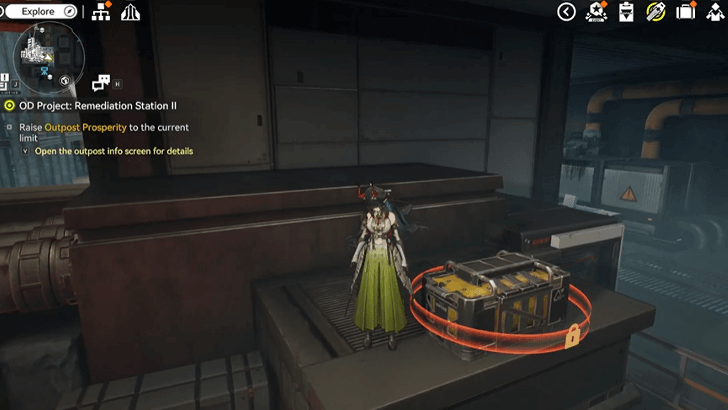 |
Sealed chest found underneath the second Sewage Pool west of the Integrated R&D Area. You can access the area after pumping out the Sewage. | |
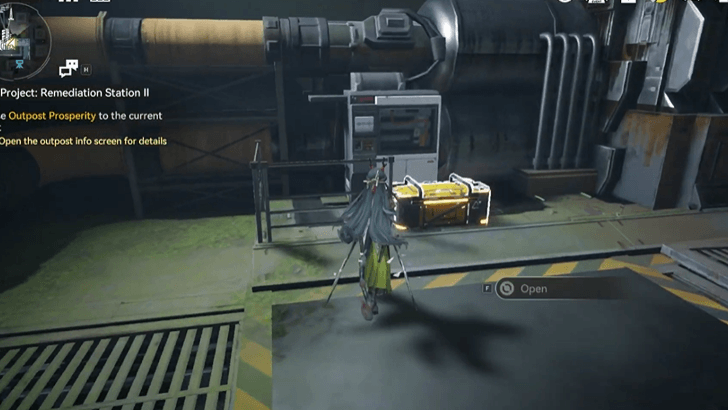 |
Found beneath the second Sewage Pool west of the Integrated R&D Area. Pump out the sewage and connect it to an Inlet and wait for it to completely clear out. | |
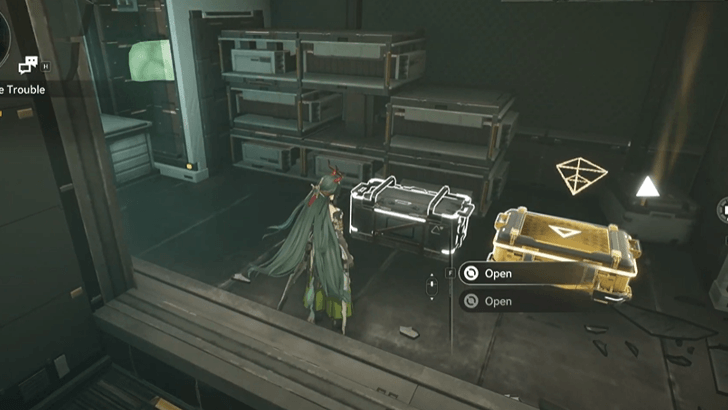 |
In the east room of the Testing Zone Sanctum, after fixing the broken valves. You can access the area during the Divvy Up the Trouble mission. | |
|
|
In the east room of the Testing Zone Sanctum, after fixing the broken valves. You can access the area during the Divvy Up the Trouble mission. | |
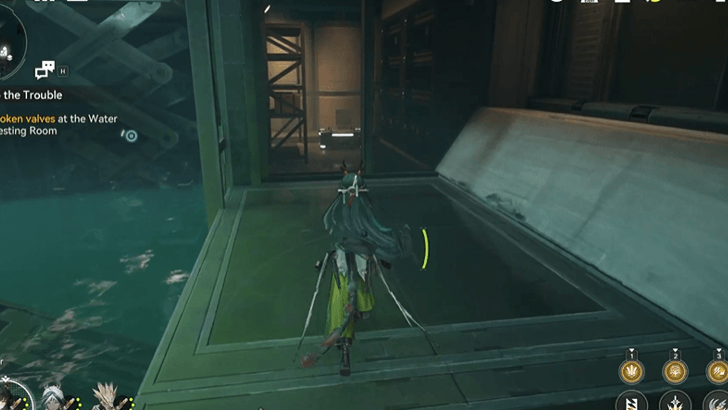 |
In the northeast corner of the Testing Zone Sanctum inside a small room. The area is first accessible during the Divvy Up the Trouble quest. |
There are a total of 32 Treasure Chests found in Test Area.
Test Area Repair Logic Locations
| ✔️ | Overworld View | How to Get |
|---|---|---|
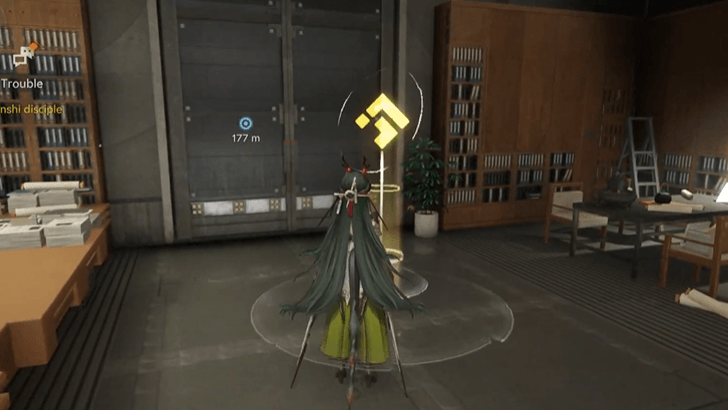 |
Found inside the building east of the Integrated R&D Area. |
There is a total of 1 Repair Logic found in Test Area.
Test Area Protocol Datalogger Locations
| ✔️ | Overworld View | How to Get |
|---|---|---|
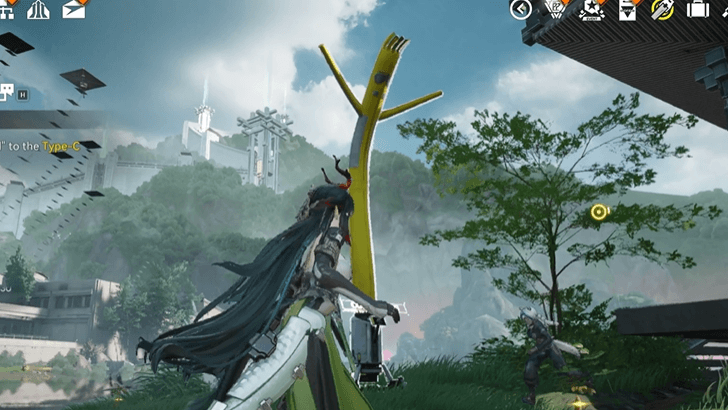 |
Northeast of the Type-C Auxiliary Pillar Area 1, near the covered area with a chest. | |
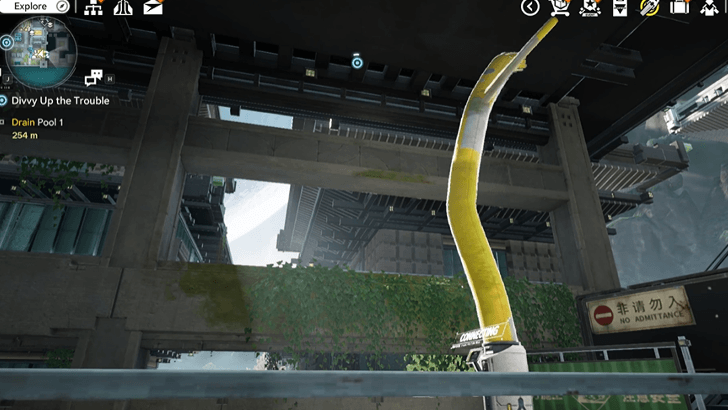 |
To the east of the TP Point south of the Integrated R&D Area near the Rare Growths spot. |
There are a total of 2 Protocol Dataloggers found in Test Area.
Test Area Facility Repair Robot Locations
| Done? | Location | Solution |
|---|---|---|
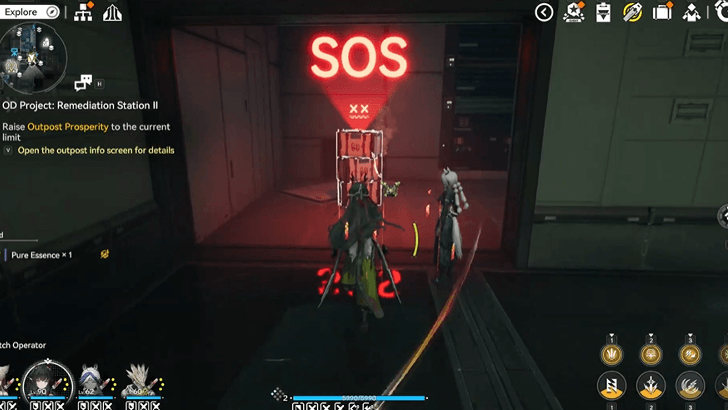 |
Found in the room below the last 2 chests, guarded by 2 slugs. Accessible during the Divvy Up the Trouble quest.
▶ Solution ▶ Solution 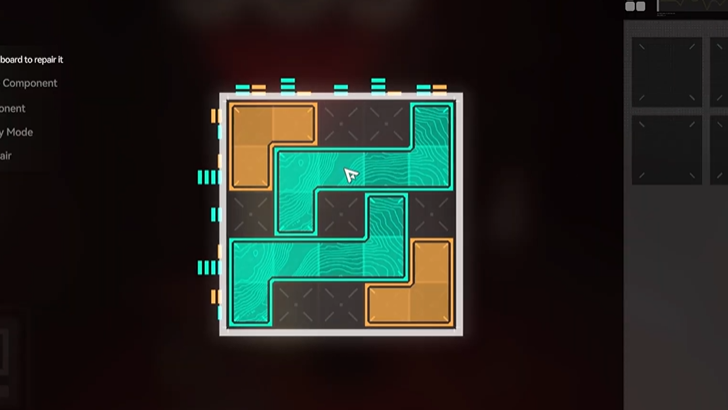 |
|
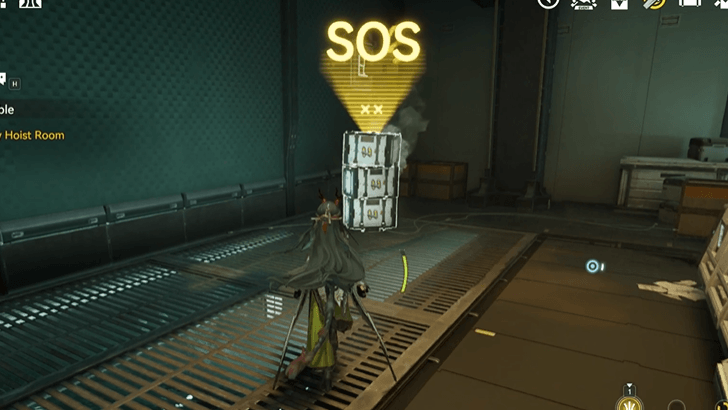 |
In the northwest room of the Testing Zone, which is accessible during the Divvy Up the Trouble Exploration Mission.
▶ Solution ▶ Solution 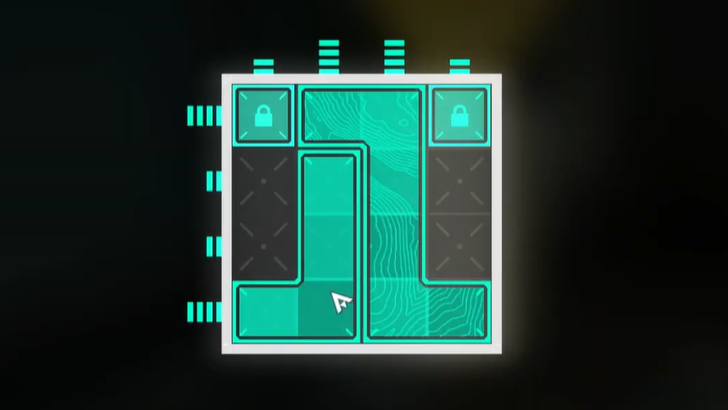 |
|
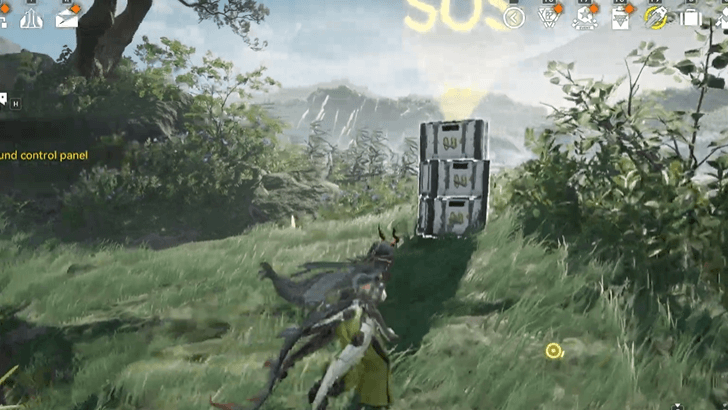 |
Found on the separated area northeast of the Meridian Grid Area.
▶ Solution ▶ Solution 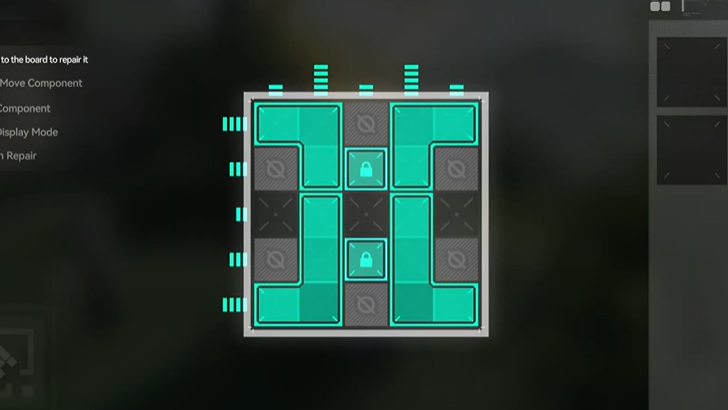 |
There are a total of 3 Facility Repair Robots found in Test Area.
Test Area Ore Farming Locations
| ✔️ | Overworld View | How to Get |
|---|---|---|
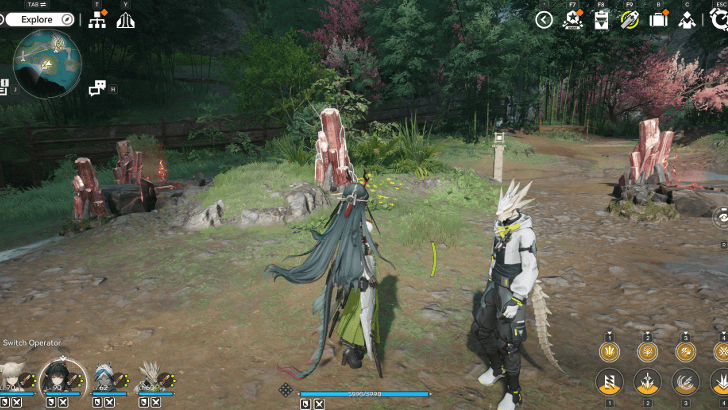 |
Head southwest of the Area 1 TP Point to find Cuprium mineral beds. | |
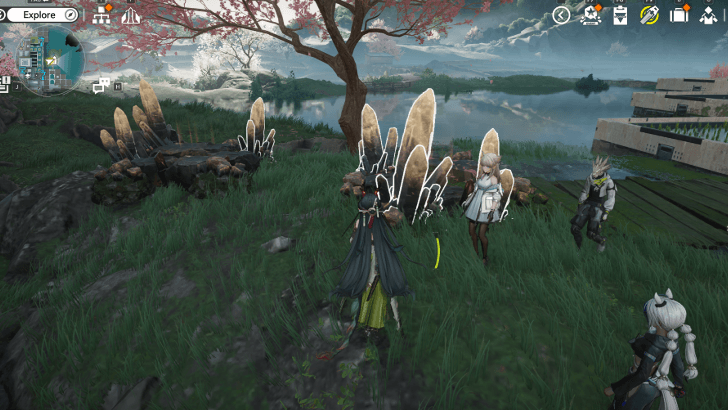 |
Located at the easternmost area of the Integrated R&D Area. |
There are a total of 2 Ore Farming spots found in Test Area.
Test Area Rare Growth Locations
| ✔️ | Overworld View | How to Get |
|---|---|---|
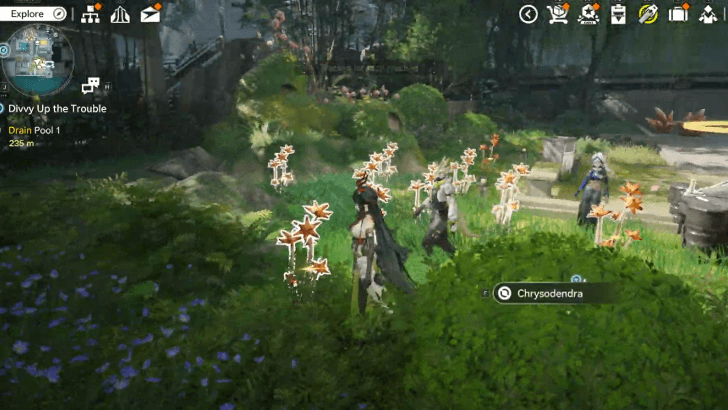 |
Head east from the south TP Point in the Integrated R&D Area. | |
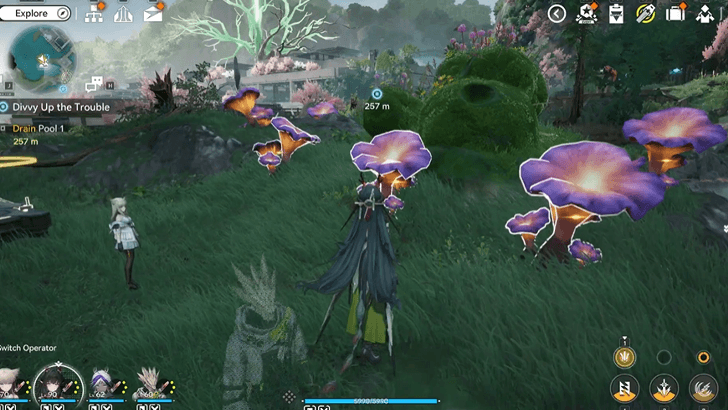 |
Found northwest of the Area 1 TP Point. |
There are a total of 2 Rare Growth spots found in Test Area.
How to Unlock Test Area Location
Progress Spring's Return I
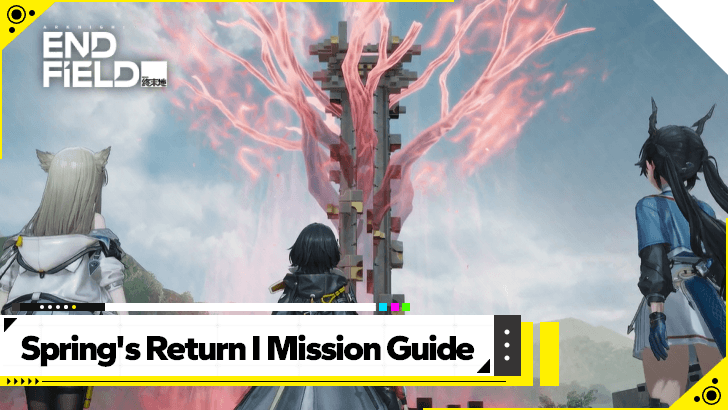
Test Area is unlocked during the events of the Side Mission, Spring's Return I.
Note that players must first complete the Where Friendship Was Made main mission to start the quest.
Spring's Return I Mission Guide
All Missions in Test Area
Side Mission in Test Area
| Quest Name |
|---|
| Spring's Return I |
| Spring's Return II |
| Spring's Return III |
Exploration Mission in Test Area
| Quest Name |
|---|
| Divvy Up the Trouble |
Arknights: Endfield Related Guides
All Region Guides
All Map Guides
Comment




Test Area Interactive Map and Locations

Premium Articles
Rankings
- We could not find the message board you were looking for.

Gaming News




Popular Games

Genshin Impact Walkthrough & Guides Wiki
Fire Emblem: Fortune's Weave (FEFW) Walkthrough & Guides Wiki
Aniimo Walkthrough & Guides Wiki
Wuthering Waves Walkthrough & Guides Wiki
Dragon's Dogma 2 (DD2) Dark Arisen Walkthrough & Guides Wiki
Umamusume: Pretty Derby Walkthrough & Guides Wiki
Honkai: Star Rail Walkthrough & Guides Wiki
Zenless Zone Zero Walkthrough & Guides Wiki
Pokemon TCG Pocket (PTCGP) Strategies & Guides Wiki
AION 2 Walkthrough & Guides Wiki










Recommended Games
Fire Emblem Heroes (FEH) Walkthrough & Guides Wiki
Where Winds Meet Walkthrough & Guides Wiki
Diablo 4: Lord of Hatred Walkthrough & Guides Wiki
Super Smash Bros. Ultimate Walkthrough & Guides Wiki
Persona 3 Reload Walkthrough & Guides Wiki
The Legend of Zelda: Tears of the Kingdom Walkthrough & Guides Wiki
Elden Ring Walkthrough & Guides Wiki
Pokemon Brilliant Diamond and Shining Pearl (BDSP) Walkthrough & Guides Wiki
Cyberpunk 2077: Ultimate Edition Walkthrough & Guides Wiki
Monster Hunter World Walkthrough & Guides Wiki










All rights reserved
Copyright © 2022 - 2025 GRYPHLINE. All Rights Reserved.
The copyrights of videos of games used in our content and other intellectual property rights belong to the provider of the game.
The contents we provide on this site were created personally by members of the Game8 editorial department.
We refuse the right to reuse or repost content taken without our permission such as data or images to other sites.