
Catcher Best Build and Weapons
✪ Check Game8 Endfield Twitter for daily tips!
★ Exclusive: Endfield's Connection to Arknights
✰ Version 1.6 is out! | Yuanyuan's Blazing Stoves
├ P1: Si (Builds / Teams / Banner)
├ P2: Argent Flow (Builds / Banner)
└ Rerun: Tangtang (Builds | Teams | Banner)

Here are Catcher's best builds, weapons, and gears in Arknights: Endfield!
| Catcher Character Guides | ||
|---|---|---|
 Build Guide |
 Teams |
|
List of Contents
Catcher Character Overview
| Catcher's Overview | ||
|---|---|---|
|
Race: Perro Faction: Endfield Industries EN VA: Kevin Andrew Rivera JP VA: Ryuichi Kijima How to Get: Headhunt |
|
| Rarity | Element | Weapon |
 4-Star |
 Physical |
 Greatsword |
| Class | Main Att. | Sec. Att. |
 Defender |
 Strength |
 Will |
Rating: C Tier
| Overall Tier |

|
|---|
Catcher is a Physical Defender character that can mitigate damage through his Combo Skill's shield and Battle Skill's Protection. However, for the shield to apply, you'll need to be at low HP.
He can also apply Weaken and provide Vulnerable stacks for Physical teams. Overall, apart from the debuffs he can provide, the requirement to access his sustain option is hard to meet and is pretty bad compared to other Sustain options.
How Would You Rate Catcher?
Failed to submit your score. Please try again.
Submitting will update your vote
| Score Rating Instructions | |
|---|---|
| 1 | The Score Rating tool lets you participate in rating how well a character does in the game. To use it, you'll need to login or sign up first to the site. |
| 2 | Once you login, you can add a score using the slider to rank the character from 1 to 10, in increments of 1. (e.g. You can give a score rating of 7/10) |
| 3 | After deciding on a score, indicated as the blue number above the slider, click on "Submit Score!". ▶ This rating will be used in computing for the displayed Community Score, which is the average of all the votes, shown as a rating over 10 and a star rating. |
| 3 | Each user may have only one vote at a time. If you wish to change your score, simply change your rating and click on "Submit Score!" again. This will automatically update the Community Score in real time! |
| 4 | To see how others rated the character, you may click on the ▼ Score Distribution button below the tool. |
Stats
| HP | ATK | STR | AGI | INT | WIL | |
|---|---|---|---|---|---|---|
| Lv. 1 | 500 | 30 | 21 | 9 | 8 | 11 |
Catcher Best Builds
Due to the several restrictions on his support capabilities and a low payoff, Catcher's build will instead focus on his personal damage by increasing his Strength, Will, and Attack stats.
Endgame DPS Build
| Best Weapon | Essence Priority | ||||||||||
|---|---|---|---|---|---|---|---|---|---|---|---|
 Exemplar |
1. Attack Boost
Attack Boost Attack +39.0%
2. Main Attribute Boost
Main Attribute Boost Main Attribute +132
3. Suppression
Suppression Physical DMG Dealt +28.0% When the wielder's battle skill hits an enemy, the wielder gains Physical DMG Dealt +28.0% for 30s. Max stacks for the same name: 3. Duration of each stack is counted separately. Effect only triggers once every 0.1s. |
||||||||||
| Best Gears | |||||||||||
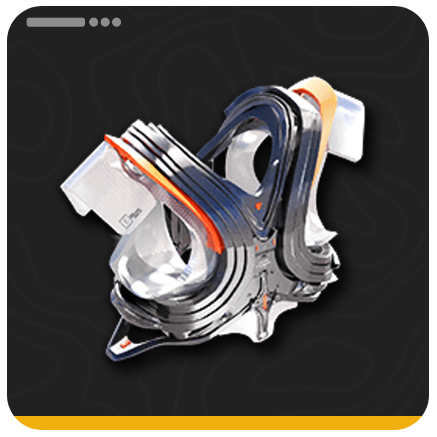 Aethertech Plating Aethertech Plating Defense +56 Strength +87 Will +58 DMG Bonus vs. Staggered +20.7% |
 Swordmancer TAC Gloves Swordmancer TAC Gloves Defense +42 Strength +65 Will +43 Physical DMG Bonus +19.2% |
||||||||||
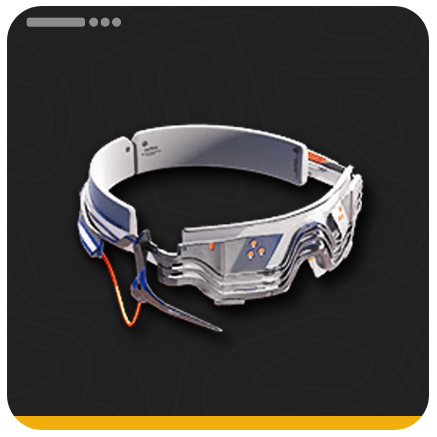 Aethertech Analysis Band Aethertech Analysis Band Defense +21 Strength +32 Will +21 Physical DMG Bonus +23% |
||||||||||
As a DPS, Catcher's best build is the Aethertech set with the Exemplar weapon. He can stack Aethertech's set effect and Exemplar's Suppression skill with his Battle Skill, and will be especially spammable during aggressive fights due to its SP Return mechanic.
This build will reward players who can parry well using his Battle Skill to stack the Physical DMG buffs during the fight.
Best Early Game Build
| Best Weapon | Essence Priority | ||||||||||
|---|---|---|---|---|---|---|---|---|---|---|---|
 OBJ Heavy Burden |
1. Strength Boost
Strength Boost Strength +124
2. Efficacy
Efficacy Secondary Attribute +14.0% When the wielder applies Knocked Down or Weakened, DEF +50.4% for 15s. Effects of the same name cannot stack.
3. HP Boost
HP Boost Max HP +62.4% |
||||||||||
| Best Gears | |||||||||||
 Armored MSGR Jacket Armored MSGR Jacket Defense +28 Strength +44 Agility +29 HP +10.5% |
 Miner Gauntlets T1 Miner Gauntlets T1 Defense +21 Strength +36 Will +24 Attack +9.5% |
||||||||||
 Armored MSGR Gyro Armored MSGR Gyro Defense +10 Strength +21 Attack +10.5% |
||||||||||
Catcher's early game build is the Armored MSGR set with the OBJ Heavy Burden weapon. This build gives him a lot of Strength and Will, some damage reduction, and some ATK.
OBJ Heavy Burden increases his HP, as well as his DEF, whenever he uses his Ultimate. The DEF increase gives more value for his shields since it scales with DEF.
All Arknights: Endfield Builds
Catcher Best Weapons
| Rank | Best Weapons | Essence Priority |
|---|---|---|
| 1st |
Exemplar
|
1. Attack Boost
Attack Boost Attack +39.0%
2. Main Attribute Boost
Main Attribute Boost Main Attribute +132
3. Suppression
Suppression Physical DMG Dealt +28.0% When the wielder's battle skill hits an enemy, the wielder gains Physical DMG Dealt +28.0% for 30s. Max stacks for the same name: 3. Duration of each stack is counted separately. Effect only triggers once every 0.1s. |
| 2nd |
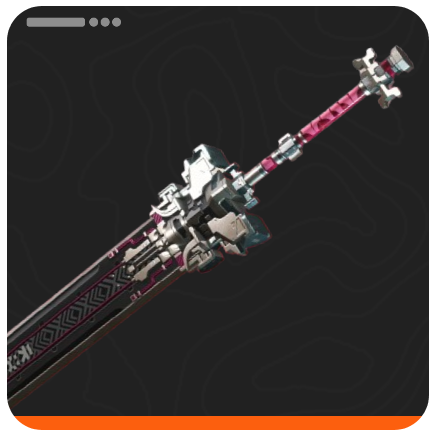 Amaranthine Tassel |
1. Attack Boost
Attack Boost Attack +39.0%
2. Strength Boost
Strength Boost Strength +156
3. Combative
Combative Physical DMG Dealt +44.8%. When the wielder applies Physical Susceptibility, the wielder gains Arts Intensity +84 for 20s. When the wielder applies Crush, the wielder gains Physical DMG Dealt +(25.2% + (8.4% x Max number of Vulnerability stacks consumed from one enemy)) for 30s. The two effects apply separately and do not stack with themselves. |
| 3rd |
 Sundered Prince |
1. Strength Boost
Strength Boost Strength +156
2. Crusher
Crusher When the wielder performs a Final Strike on the enemy, ATK +28.0% for 8s. If the wielder is also the controlled operator, Final Strike deals Stagger +33.6% to the enemy. Effects of the same name cannot stack.
3. Critical Rate Boost
Critical Rate Boost Critical Rate +19.5% |
| 4th |
OBJ Heavy Burden
|
1. Strength Boost
Strength Boost Strength +124
2. Efficacy
Efficacy Secondary Attribute +14.0% When the wielder applies Knocked Down or Weakened, DEF +50.4% for 15s. Effects of the same name cannot stack.
3. HP Boost
HP Boost Max HP +62.4% |
Exemplar is Catcher's best weapon as a DPS. His Battle skill can stack its Suppression Skill, providing him a 40% Physical DMG Bonus at max stacks and Potential 0.
Amaranthine Tassel is a close second, but he is unable to trigger its Combative Skill's Arts Intensity and Physical DMG buffs as he can neither apply Physical Susceptibility nor trigger Crush. Sundered Prince is a strong alternative as well, but requires him to be the controlled Operator to maximize its Crusher skill.
OBJ Heavy Burden will be his low-rarity and F2P Option primarily for its Strength Boost. Its Efficacy skill can increase his Defense and Will stats as well, which can significantly increase his Combo Skill's shield that other weapon options cannot do.
Catcher Best Gear
Endgame DPS Gear and Gear Set
| Best Armor | Best Gloves |
|---|---|
|
Aethertech Plating Aethertech Plating Defense +56 Strength +87 Will +58 DMG Bonus vs. Staggered +20.7% |
Swordmancer TAC Gloves Swordmancer TAC Gloves Defense +42 Strength +65 Will +43 Physical DMG Bonus +19.2% |
| Best Kit I | Best Kit II |
|
Aethertech Analysis Band Aethertech Analysis Band Defense +21 Strength +32 Will +21 Physical DMG Bonus +23% |
Aethertech Analysis Band Aethertech Analysis Band Defense +21 Strength +32 Will +21 Physical DMG Bonus +23% |
| Gear Set | |
Aethertech:
Wearer's ATK +8%
After the wearer applies Vulnerability, the wearer gains Physical DMG +8% for 15s. This effect can reach 4 stacks. If the target already has 4 stack(s) of Vulnerability, the wearer gains an additional Physical DMG +16% for 10s. This effect cannot stack.
|
|
Catcher's best DPS gear set is the Aethertech set with a Swordmancer TAC Gloves off-piece. This build can significantly improve his Strength, Will, and Physical DMG stats, and Catcher's Battle Skill can easily trigger its set effect to gain an additional 48% Physical DMG Bonus at maximum stacks.
Swordmancer TAC Gloves is used as the off-piece for its matching attributes and a boost in his Physical DMG.
Best Early Gear Set for Catcher
| Best Armor | Best Gloves |
|---|---|
|
Armored MSGR Jacket Armored MSGR Jacket Defense +28 Strength +44 Agility +29 HP +10.5% |
Miner Gauntlets T1 Miner Gauntlets T1 Defense +21 Strength +36 Will +24 Attack +9.5% |
| Best Kit I | Best Kit II |
|
Armored MSGR Gyro Armored MSGR Gyro Defense +10 Strength +21 Attack +10.5% |
Armored MSGR Gyro Armored MSGR Gyro Defense +10 Strength +21 Attack +10.5% |
| Gear Set | |
Armored MSGR:
Wearer's Strength +50
When the wearer's HP is below 50%, the wearer gains 30% DMG Reduction against all types of DMG.
|
|
Catcher's best early game gear is the Armored MSGR set. The entire set provides a lot of Strength and Will, his primary and secondary stats, respectively. It also gives him damage reduction when he's low on HP. The Gyros increase his ATK, which is a decent boost in damage.
Miner Gauntlets T1 is used as the off-piece for its boosts to his ATK, Strength, and Will stats.
Best Gear and Gear Sets for Each Character
How to Play Catcher
As a Teammate
| Teammate Gameplay Guide |
|---|
|
|

Use Battle Skill To Protect Allies
Catcher's Battle Skill, Rigid Interdiction, allows him to apply Protection to nearby allies while returning some SP. If an ally or Catcher gets hit while his shield is up, he will retaliate and inflict a stack of Vulnerability.
Combo Skill Applies Shields
Catcher's Combo Skill triggers when an enemy charges up or when an ally's goes below 40% HP. It will grants shields to the ally and Catcher himself.
Use Ultimate To Apply Weaken
Lastly, use Catcher's Ultimate to deal some damage, apply Vulnerability, and inflict Weaken onto the enemy. Weaken lowers the damage the affected enemy deals.
Catcher Skill and Talent Priority
Skills Priority
| Priority | Skill | Explanation |
|---|---|---|
| 1 |  Basic Attack |
Used frequently as a DPS, especially as a soloist. Prioritize its damage first. |
| 2 |  Ultimate |
Features the strongest multiplier in his kit. Prioritize this second. |
| 3 |  Combo Skill |
Will greatly improve his survivability when leveled. Prioritize this third to increase its shield value as a DPS, but can be prioritized first as a Support. |
| 4 |  Battle Skill |
Will primarily be used for its Protection buff to mitigate damage, which does not scale with level. Can be leveled last. |
Talents Priority
| Priority | Talent | Explanation |
|---|---|---|
| 1 | Comprehensive Mindset | Gives Catcher more damage on his Ultimate. Unlock this first as a DPS. |
| 2 | Resilient Defense | Improves his shield by adding a Defense scaling on his Will stat. Unlock this second. |
Catcher Skills
Combat Skills
Basic Attack - Basic Tactics
| Attack | Description |
|---|---|
| Basic Attack | An attack with up to 4 sequences that deals Physical DMG. As the controlled operator, Final Strike also deals 22 Stagger. |
| Dive Attack | Basic attack performed in mid-air becomes a dive attack that deals Physical DMG to nearby enemies. |
| Finisher Attack | Basic attack performed near a Staggered enemy becomes a finisher that deals massive Physical DMG and recovers some SP. |
| Stat | Effect |
|---|---|
| BATK SEQ 1 Multiplier | 35% |
| BATK SEQ 2 Multiplier | 39% |
| BATK SEQ 3 Multiplier | 54% |
| BATK SEQ 4 Multiplier | 71% |
| Dive ATK Multiplier | 80% |
| Finisher ATK Multiplier | 400% |
Battle Skill - Rigid Interdiction
| Skill | Details | |
|---|---|---|
| Rigid Interdiction | Description: Raises a shield that can block attacks, grants Protection to self and nearby operators, and immediately returns some SP. When attacked while the said shield is raised, perform a retaliation bash that deals Physical DMG and applies 1 stack of Vulnerability to the attacking enemy. | |
| Cost | 100 | |
| Cooldown | - | |
| Stat | Effect |
|---|---|
| Damage Multiplier | 178% |
| Stagger | 20 |
| Protection | 90% |
| SP Return | 30 |
Combo Skill - Timely Supression
| Skill | Details | |
|---|---|---|
| Timely Supression |
Description: A powerful downward punch that deals Physical DMG to the enemy, while granting shields to self and another teammate (controlled operator prioritized). DEF can further increase Shield points.
Trigger: When an enemy starts charging up a skill, or when the controlled operator is attacked and falls below 40% HP. |
|
| Cost | - | |
| Cooldown | 35 | |
| Stat | Effect |
|---|---|
| SEQ1 Damage Multiplier | 25% |
| SEQ2 Damage Multiplier | 100% |
| Stagger | 10 |
| Base Shield | 360 |
| Shield Increase per Defense | 2.25 |
| Shield Duration (s) | 10 |
Ultimate - Textbook Assault
| Skill | Details | |
|---|---|---|
| Textbook Assault | Description: Swings the greatsword to perform 2 consecutive slashes to deal Physical DMG and apply Weaken, followed by a powerful downward slam that deals massive Physical DMG and applies Knock Down to all enemies within the area of effect. | |
| Cost | 80 | |
| Cooldown | 15 | |
| Stat | Effect |
|---|---|
| SEQ1 Damage Multiplier | 89% |
| SEQ1 Stagger Multiplier | 5 |
| SEQ2 Damage Multiplier | 120% |
| SEQ2 Stagger | 5 |
| SEQ3 Damage Multiplier | 178% |
| SEQ3 Stagger | 10 |
| Weakness Effect | 20% |
| Weakness Duration (s) | 8 |
Attribute Increases
| Attribute Increase | Effects |
|---|---|
| Forged |
Lv. 1: Operator Strength +10
Lv. 2: Operator Strength +15 Lv. 3: Operator Strength +15 Lv. 4: Operator Strength +20 |
Talents
| Talent | Effects |
|---|---|
| Resilient Defense |
Lv. 1: For every 10 Will, +1.0 DEF.
Lv. 2: For every 10 Will, +1.2 DEF. |
| Comprehensive Mindset |
Lv. 1: UItimate: Textbook Assault improved: Final hit creates 2 shockwave(s), each dealing 30% ATK as Physical DMG.
Lv. 2: UItimate: Textbook Assault improved: Final hit creates 3 shockwave(s), each dealing 45% ATK as Physical DMG. |
Catcher Base Skills
| Infra Skill | Description |
|---|---|
| Silent Caretaker | α: Assign to Control Nexus to grant all operators' Mood Regen +8%
β: Assign to Control Nexus to grant all operators' Mood Regen +12% |
| Grounded Approach | α: Assign to Growth Chamber to slow Mood Drop of all operators in it by 14%
β: Assign to Growth Chamber to slow Mood Drop of all operators in it by 18% |
Catcher Potentials
All Potential Effects
| Level | Potential |
|---|---|
| 1 | Multi-layered Readiness Battle skill Rigid Interdiction and ultimate Textbook Assault improved: After hitting the enemy, deals another strike that deals (300 + DEFx5.0) of Physical DMG. |
| 2 | Bonus Spec Training DEF +20, Will +10. |
| 3 | Unwavering Post Combo skill Timely Suppression improved: Shield duration +5s. |
| 4 | Compensated Suffering Ultimate Textbook Assault improved: Ultimate Energy cost -10%. |
| 5 | Choice Without Regrets Battle skill Rigid Interdiction improved: hitting an enemy while the shield is active returns 10 SP. |
》To increase a Character's Potential Level, get duplicates of them by pulling from banners they're available in!
Catcher Upgrade Materials
Total Promotion Materials
| Materials Needed | Total |
|---|---|
| x3 | |
| x5 | |
| x5 | |
| x8 | |
| x33 | |
| x60 | |
| x20 | |
| x152,200 |
 Tachyon Screening Lattice
| Lvl. | Character Promotion Materials |
|---|---|
| 20 ➔ 40 |  Pink Bolete x3  Protodisk x8  T-Creds x1,600 |
| Outfitting 1 | T-Creds x1,600 |
| 40 ➔ 60 |  Red Bolete x5 Protodisk x25 T-Creds x6,500 |
| Outfitting 2 | T-Creds x6,500 |
| 60 ➔ 80 |  Ruby Bolete x5  Protoset x24 T-Creds x18,000 |
| Outfitting 3 | T-Creds x18,000 |
| 80 ➔ 90 |  Bloodcap x8 Protoset x36 T-Creds x100,000 |
Total Skill Materials
| Materials Needed | Total |
|---|---|
| x12 | |
| x16 | |
| x16 | |
| x84 | |
| x328 | |
| x472 | |
| x116 | |
| x688,800 |
 Metadiastima Photoemission Tube
| Lvl. | Character Promotion Materials |
|---|---|
| 1 ➔ 2 |  Protoprism x6  Kalkodendra x1 T-Creds x1,000 |
| 2 ➔ 3 | Protoprism x12 Kalkodendra x2 T-Creds x2,700 |
| 3 ➔ 4 | Protoprism x16 Chrysodendra x1 T-Creds x3,200 |
| 4 ➔ 5 | Protoprism x21 Chrysodendra x1 T-Creds x4,200 |
| 5 ➔ 6 | Protoprism x27 Chrysodendra x2 T-Creds x5,400 |
| 6 ➔ 7 |  Protohedron x6  Vitrodendra x1 T-Creds x8,200 |
| 7 ➔ 8 | Protohedron x8 Vitrodendra x1 T-Creds x10,500 |
| 8 ➔ 9 | Protohedron x15 Vitrodendra x2 T-Creds x18,000 |
| Mastery 1 | Basic Tactics Protohedron x15 False Aggela x3 T-Creds x24,000 Rigid Interdiction Protohedron x15 False Aggela x3 T-Creds x24,000Timely Supression Protohedron x15 False Aggela x3 T-Creds x24,000Textbook Assault Protohedron x15 False Aggela x3 T-Creds x24,000 | Mastery 2 | Basic Tactics Protohedron x24 False Aggela x6 T-Creds x30,000 Rigid Interdiction Protohedron x24 False Aggela x6 T-Creds x30,000Timely Supression Protohedron x24 False Aggela x6 T-Creds x30,000Textbook Assault Protohedron x24 False Aggela x6 T-Creds x30,000 |
| Mastery 3 | Basic Tactics Protohedron x50 False Aggela x12 T-Creds x65,000 Rigid Interdiction Protohedron x50 False Aggela x12 T-Creds x65,000Timely Supression Protohedron x50 False Aggela x12 T-Creds x65,000Textbook Assault Protohedron x50 False Aggela x12 T-Creds x65,000 |
 Mark of Perseverance
 D96 Steel Sample 4
Total Talent Materials
| Materials Needed | Total |
|---|---|
| x133 | |
| x90 | |
| x98,400 |
| Lvl. | Character Promotion Materials |
|---|---|
| Forged Lv.1 | Protoprism x5 T-Creds x1,000 |
| Forged Lv.2 | Protoprism x10 T-Creds x1,800 |
| Forged Lv.3 | Protohedron x10 T-Creds x6,000 |
| Forged Lv.4 | Protohedron x20 T-Creds x12,000 |
| Resilient Defense Lv.1 | Protoprism x12 T-Creds x2,400 |
| Resilient Defense Lv.2 | Protoprism x40 T-Creds x8,600 |
| Comprehensive Mindset Lv.1 | Protoprism x48 T-Creds x10,000 |
| Comprehensive Mindset Lv.2 | Protohedron x28 T-Creds x24,000 |
| Silent Caretaker Lv.1 | Protoprism x6 T-Creds x1,600 |
| Silent Caretaker Lv.2 | Protohedron x12 T-Creds x8,000 |
| Grounded Approach Lv.1 | Protoprism x12 T-Creds x3,000 |
| Grounded Approach Lv.2 | Protohedron x20 T-Creds x20,000 |
How to Get Catcher
Pull in Headhunting Banners
 Basic Headhunting |
 New Horizons |
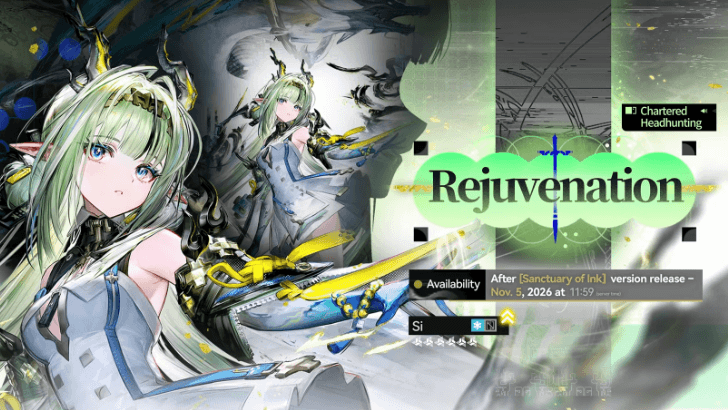 Rejuvenation |
Catcher can be obtained by pulling on Headhunting Banners.
All Current and Upcoming Banners
Additional Info for Catcher
Voice Actor
| Voice Actor & Notable Roles | |
|---|---|
| EN | Kevin Andrew Rivera • Oboro Namisaki (Witch Watch) • Manjiro (Dandadan) • Aonuma (Mission: Yozakura Family) |
| JP | Ryuichi Kijima • Mitsuki (Boruto) • Azur (Fire Emblem Heroes) • Lenka Utsugi (God Eater) |
Best Gifts
| Favorites | |
|---|---|
| Alternatives |
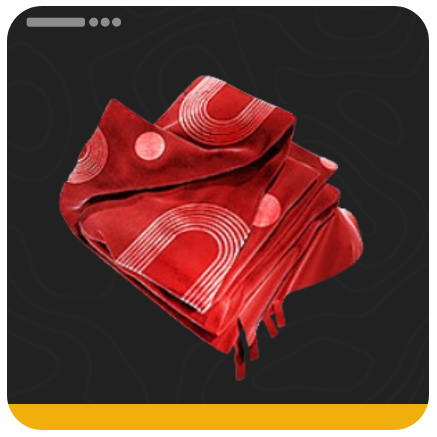 Simonch Shawl
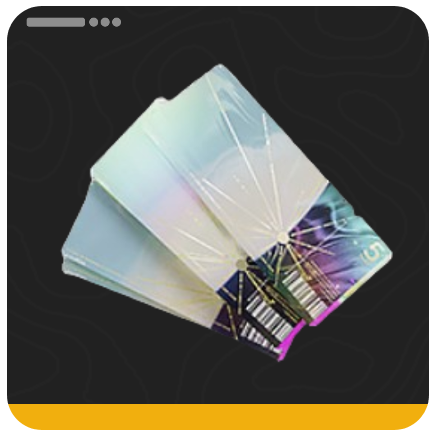 Surfing Festival Ticket
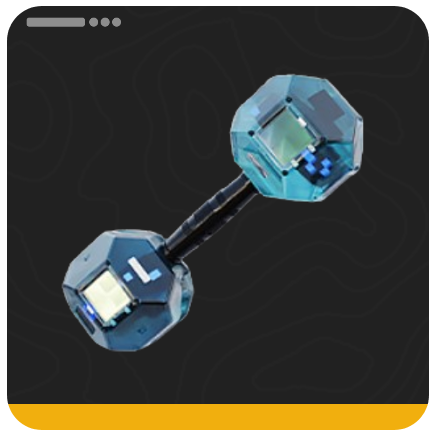 Yinglung Dumbbells
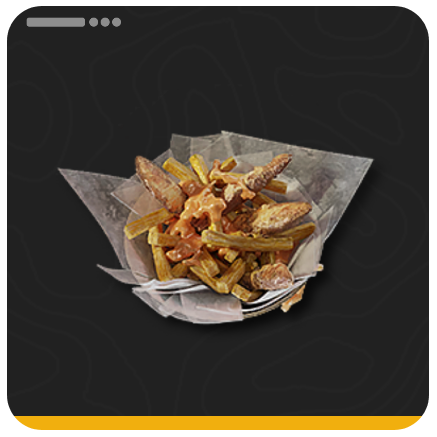 Fin-n-Chips
 Eureka Teabox
 Scrimshaw of the Pack
 Myrkwood Berry Preserve
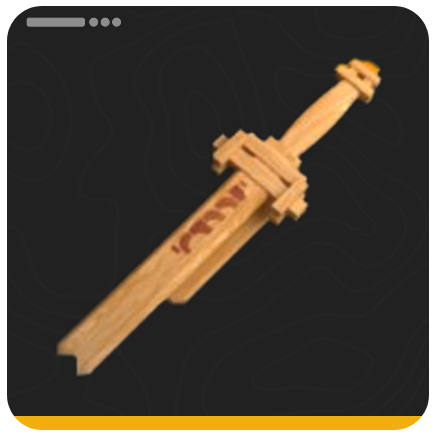 Wooden Sword
Member of the Endfield Industries' Op Team Z7

Catcher is responsible for cover and logistical support as a member of Operation Team Z7 in Endfield. Despite being the youngest on the team, he surpasses his peers in maturity as he can seamlessly work with everyone.
With him and his trusty shield around, the team will always feel safe in their work.
Arknights: Endfield Related Guides

Other Character Guides
| Other Character Lists | |
|---|---|
| Upcoming Characters | Returning Characters |
| Free Characters | All Voice Actors |
| List of Factions | - |
Character List By Type
| Characters by Rarity | |||||
|---|---|---|---|---|---|
| ★★★★★★ 6-Stars |
★★★★★ 5-Stars |
★★★★ 4-Stars |
|||
| Characters by Gender | |||||
 Male Characters |
 Female Characters |
||||
| Characters by Element | |||||
| Physical |
 Heat |
 Cryo |
|||
 Electric |
 Nature |
||||
| Characters by Role | |||||
 Vanguard |
 Striker |
 Guard |
|||
| Defender |
 Caster |
 Supporter |
|||
| Characters by Weapon | |||||
 Sword |
Greatsword |
 Polearm |
|||
 Handcannon |
 Arts Unit |
||||
| Characters by Race | |||||
| Anasa | Anaty | Caprinae | |||
| Cautus | Feline | Kuranta | |||
| Kylin | Liberi | Lung | |||
| Lupo | Perro | Phidia | |||
| Sankta | Sarkaz | Savra | |||
| Ursus | Vouivre | Vulpo | |||
All Playable Characters (Operators)
 Si (Build | Teams) |
 Typhoeus (Build | Teams) |
 Liino (Build | Teams) |
 Arcane (Build | Teams) |
 Camille (Build | Teams) |
 Mi Fu (Build | Teams) |
 Zhuang Fangyi (Build | Teams) |
 Rossi (Build | Teams) |
 Tangtang (Build | Teams) |
 Yvonne (Build | Teams) |
 Gilberta (Build | Teams) |
 Laevatain (Build | Teams) |
 Ardelia (Build | Teams) |
 Ember (Build | Teams) |
 Endministrator (Build | Teams) |
 Last Rite (Build | Teams) |
 Lifeng (Build | Teams) |
Pogranichnik (Build | Teams) |
 Alesh (Build | Teams) |
 Arclight (Build | Teams) |
 Avywenna (Build | Teams) |
 Chen Qianyu (Build | Teams) |
 Da Pan (Build | Teams) |
 Perlica (Build | Teams) |
 Purrchena (Build | Teams) |
 Snowshine (Build | Teams) |
 Wulfgard (Build | Teams) |
 Xaihi (Build | Teams) |
 Akekuri (Build | Teams) |
 Antal (Build | Teams) |
| Catcher (Build | Teams) |
 Estella (Build | Teams) |
 Fluorite (Build | Teams) |
All Upcoming Characters (Operators)
 Argent Flow |
 Kay |
All Non-Playable Characters
 Lycia |
 M3 |
 Nefarith |
 Ardashir |
 Andre |
Comment




Catcher Best Build and Weapons

Premium Articles
Rankings
- We could not find the message board you were looking for.

Gaming News





Popular Games

Genshin Impact Walkthrough & Guides Wiki
Fire Emblem: Fortune's Weave (FEFW) Walkthrough & Guides Wiki
Aniimo Walkthrough & Guides Wiki
Wuthering Waves Walkthrough & Guides Wiki
Dragon's Dogma 2 (DD2) Dark Arisen Walkthrough & Guides Wiki
Umamusume: Pretty Derby Walkthrough & Guides Wiki
Honkai: Star Rail Walkthrough & Guides Wiki
Zenless Zone Zero Walkthrough & Guides Wiki
Pokemon TCG Pocket (PTCGP) Strategies & Guides Wiki
AION 2 Walkthrough & Guides Wiki










Recommended Games
Fire Emblem Heroes (FEH) Walkthrough & Guides Wiki
Where Winds Meet Walkthrough & Guides Wiki
Diablo 4: Lord of Hatred Walkthrough & Guides Wiki
Super Smash Bros. Ultimate Walkthrough & Guides Wiki
Persona 3 Reload Walkthrough & Guides Wiki
The Legend of Zelda: Tears of the Kingdom Walkthrough & Guides Wiki
Elden Ring Walkthrough & Guides Wiki
Pokemon Brilliant Diamond and Shining Pearl (BDSP) Walkthrough & Guides Wiki
Cyberpunk 2077: Ultimate Edition Walkthrough & Guides Wiki
Monster Hunter World Walkthrough & Guides Wiki










All rights reserved
Copyright © 2022 - 2025 GRYPHLINE. All Rights Reserved.
The copyrights of videos of games used in our content and other intellectual property rights belong to the provider of the game.
The contents we provide on this site were created personally by members of the Game8 editorial department.
We refuse the right to reuse or repost content taken without our permission such as data or images to other sites.