
Fording the River Stage 4 Guide
✪ Check Game8 Endfield Twitter for daily tips!
★ Exclusive: Endfield's Connection to Arknights
✰ Version 1.6 is out! | Yuanyuan's Blazing Stoves
├ P1: Si (Builds / Teams / Banner)
├ P2: Argent Flow (Builds / Banner)
└ Rerun: Tangtang (Builds | Teams | Banner)
Fording the River is the fourth stage of Grotto Survey in Delver of the Cryptic for Arknights: Endfield. See a walkthrough of Fording the River and all of its rewards here!
List of Contents
Fording the River Walkthrough
Fording the River Guide
| Step | Walkthrough |
|---|---|
| 1 |
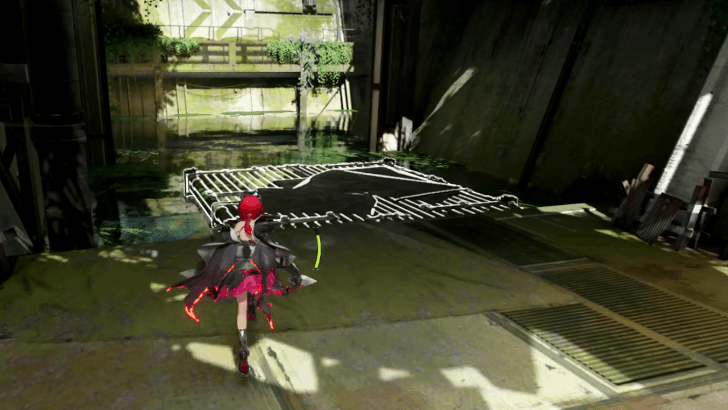 Get on the raft near your starting location and interact with it to float your way towards the next location. |
| 2 |
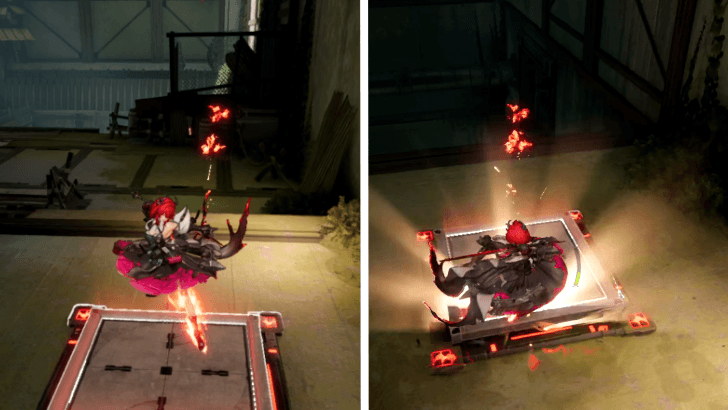 Once the raft stops, rappel up using the nearby rope to a higher platform. From there, there are two Pressure Switches on the floor. Perform a jump attack on both of them to raise the water level. Afterwards, get on the raft to go to the next location. |
| 3 |
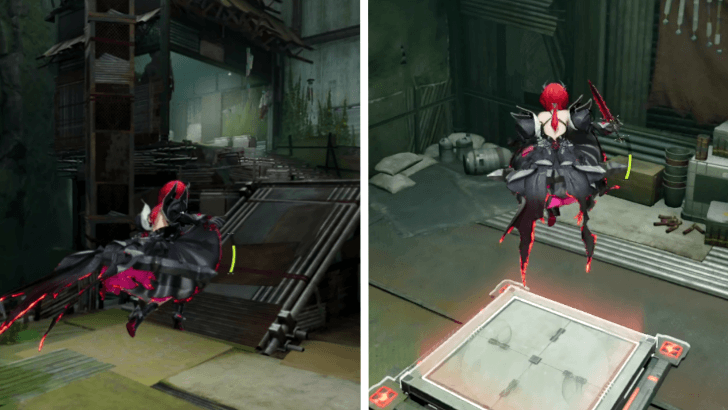 Once you reach the next location, go up the platform. Do a plunge attack on the Pressure Switch to raise the water level again. |
| 4 |
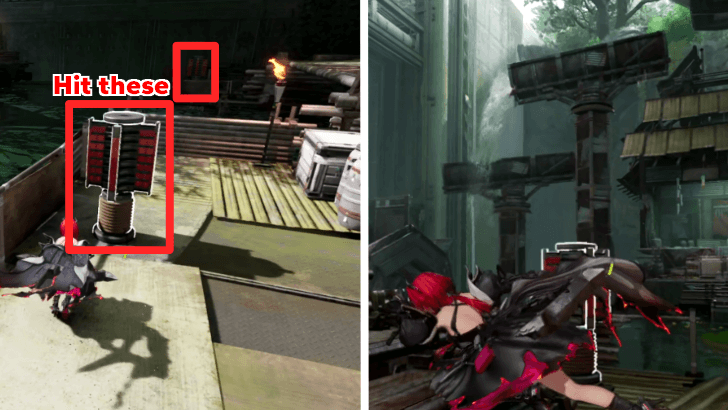 Go to the next platform with the help of the lilypads raised with the water level. There are two canal mechanisms that control the flow of water from earlier. Hit them a couple of times so that the flow of water is directed to the nearby waterwheel, which will then lower the barricade. |
| 5 |
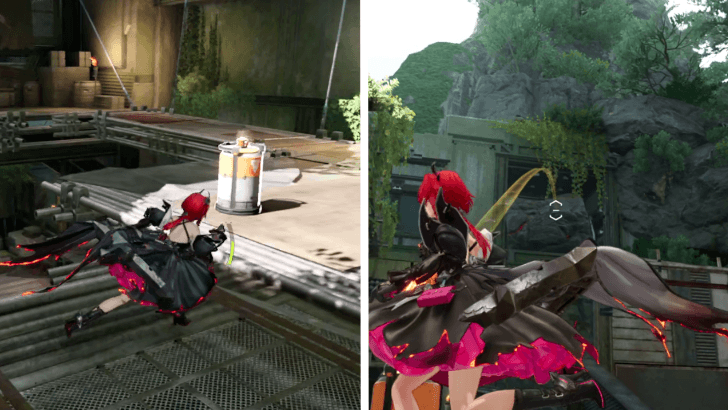 Go on the raft to the next location, following the path and rappelling upwards. From there, go to the Pressure Switch and turn it on with a dive attack. This will reveal that water flow is being blocked by some breakable debris. |
| 6 |
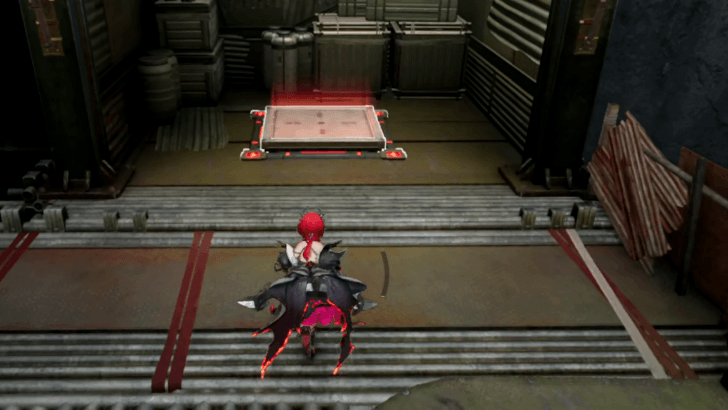 Go in the other direction from where you came in Step 5; there is a Barrel of Originium you can use to make Industrial Explosives. Interact with it, and toss one at the debris to free the flow, let it move the waterwheel beneath it, and raise the water level. |
| 7 |
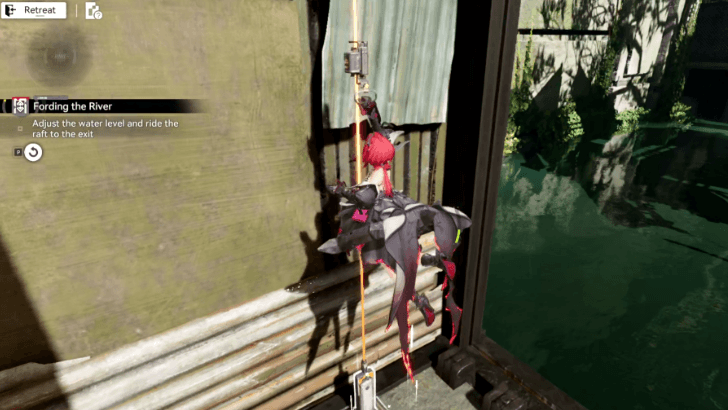 With the water level up, get on the raft again to go to the next location. Rappel upwards, and there is a switch at the upper level. |
| 8 |
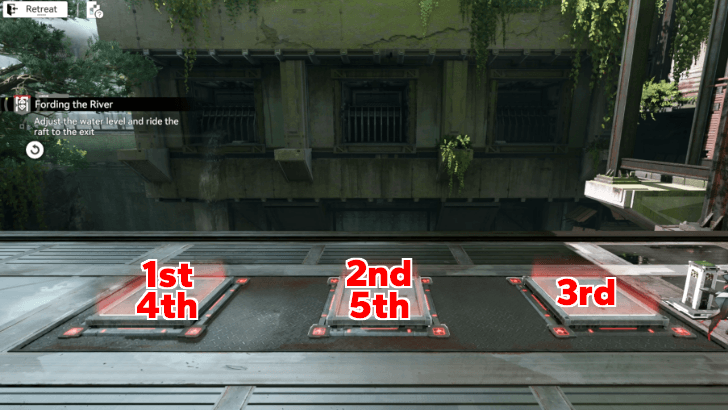 Interact with it to reveal a Pressure Switch puzzle, where you must activate the switches in the same order it demonstrates first. Doing it correctly will cause the water to rise again, and the raft can be found by following the path to the left. |
| 9 |
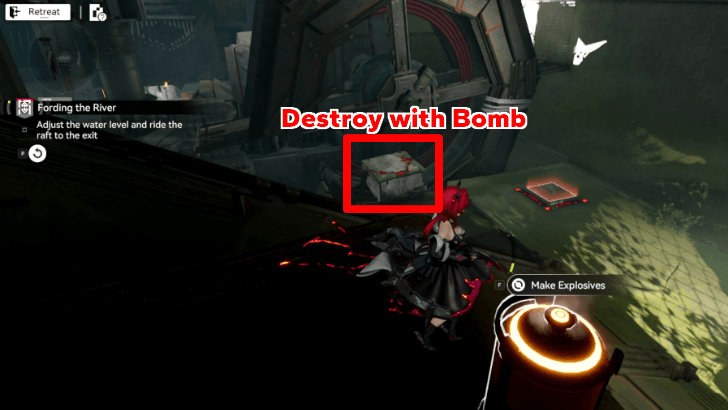 Ride the raft to the next location, and rappel upwards. Go past the waterwheel first and go up the ramp, which has its top blocked by an electric gate. While on the ramp, interact with the Barrel of Originium to throw a bomb at a breakable rock at the bottom of the waterwheel. |
| 10 |
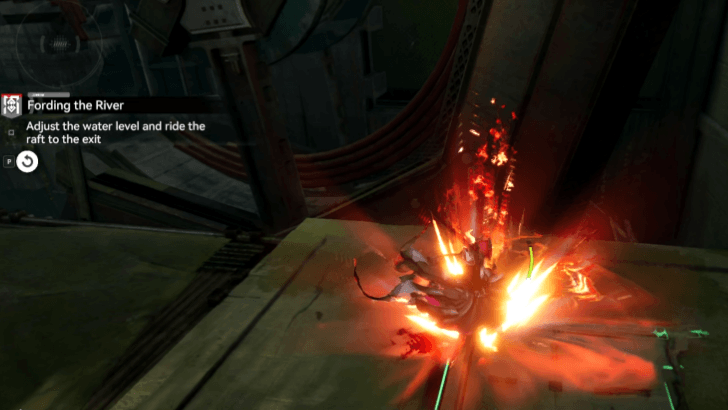 After breaking the boulder, go down to the Pressure Switch and activate it with a dive attack. This will not only turn on the giant waterwheel but also reveal the power source of the electric gate from Step 9. |
| 11 |
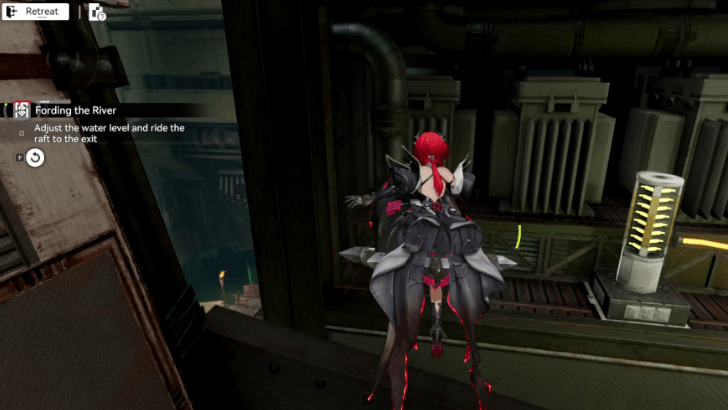 Get on the moving waterwheel and time your jump to reach the small area where the power source is. Once there, hit it once to turn off the gate, then continue down the path as normal. |
| 12 |
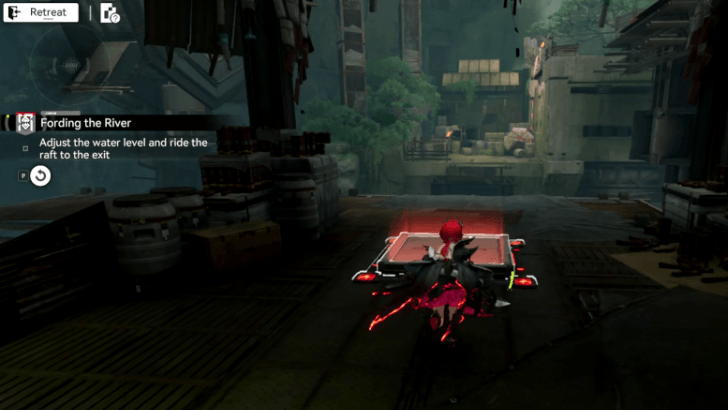 Shortly after going through the gate, there is another Pressure Plate. Switch it on with a dive attack, causing the water level to rise again and turning the raft and lily pads into a way forward. Cross the water using them, then rappel upward. |
| 13 |
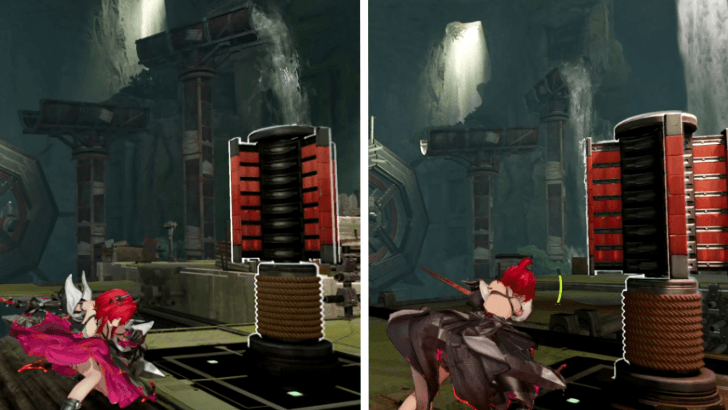 After rappelling upwards, two canal mechanisms are found in the area. The idea is to hit them so that the water flowing from the two canals will flow towards the waterwheel for it to move. |
| 14 |
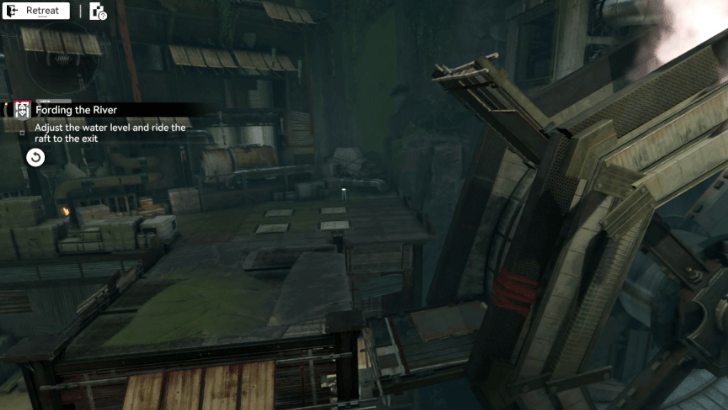 Now that the waterwheel moves, try to get on one of the moving platforms to reach the next area. Make sure to time your jump, as the waterwheel moves quite fast for its size. |
| 15 |
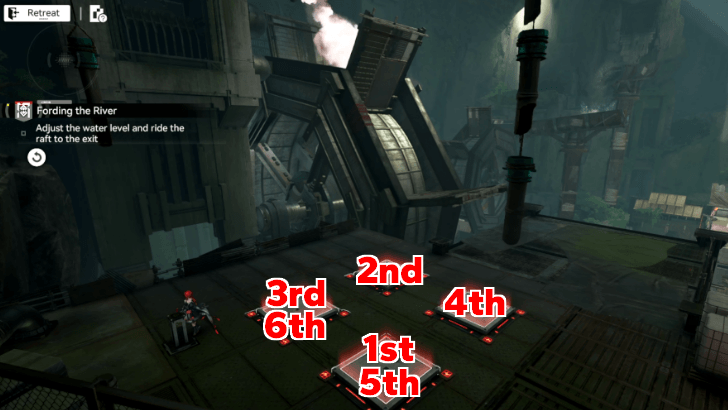 After reaching the area from the waterwheel, interact with the nearby switch to reveal the second Pressure Plate puzzle. Activate the switches in the same order as demonstrated. Doing it correctly will cause the water level to rise, along with the raft. |
| 16 |
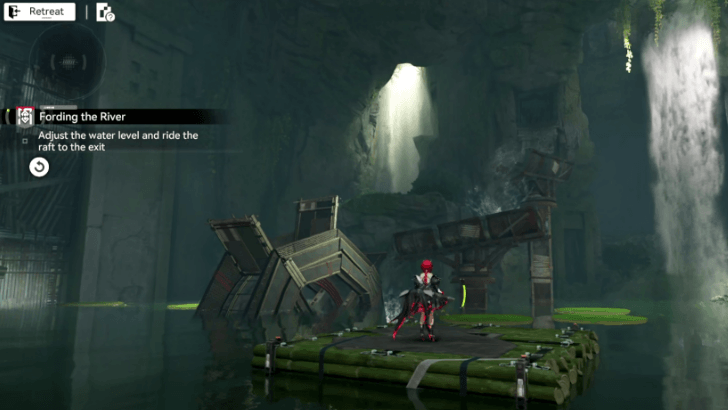 Ride the raft one more time, and the water level will automatically rise. Once outside, interact with the Protocol Space exit to finish the challenge! |
Fording the River Crate Locations
| No. | Chest Locations |
|---|---|
| 1 |
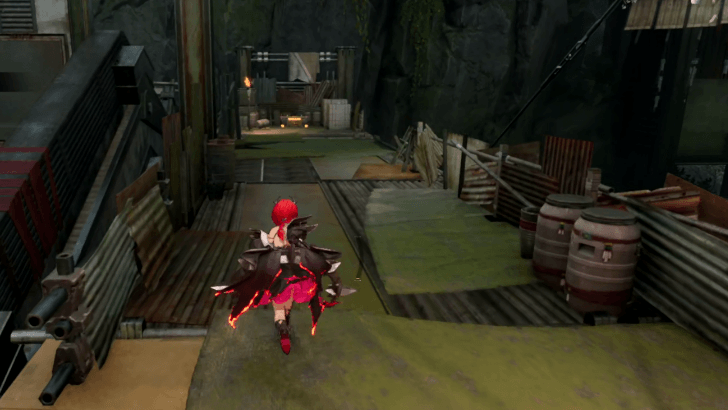 The first Crate can be found in the same area as Steps 3 and 4. Go past the path beyond the Barrel of Originium, and follow it to the end to reach the Crate. |
| 2 |
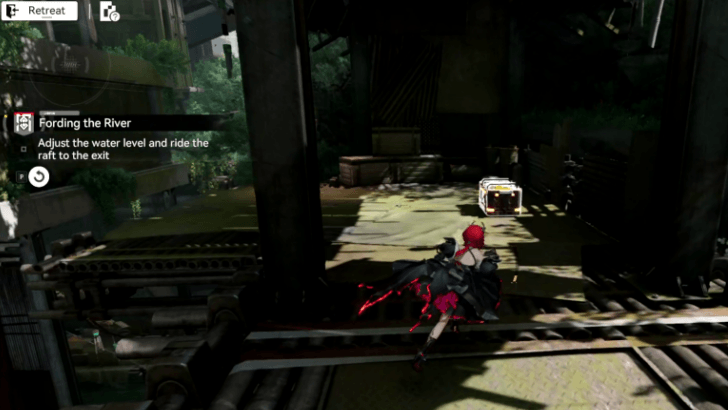 The second Crate is found in the same area as Step 7. It can be found near the area where you go to the raft by jumping on lily pads. |
| 3 |
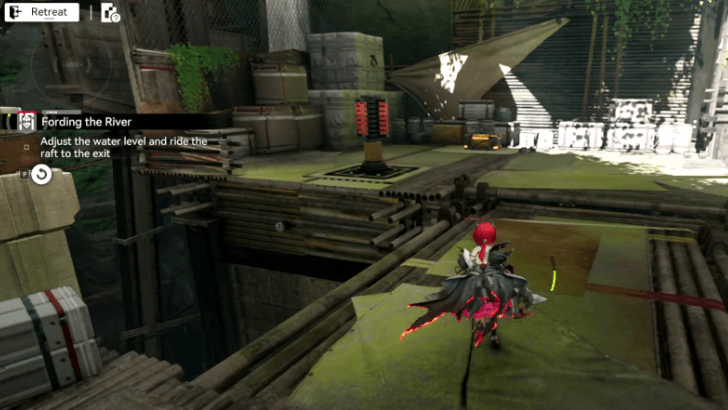 The third Crate can be found near one of the canal mechanisms found in Step 13. Simply approach it to claim the rewards. |
Fording the River Rewards
Total Completion Rewards
| Clear Rewards |
 Oroberyl
x200  T-Creds
x20,000  Protohedron
x6 |
|---|---|
| Crate Rewards |
T-Creds
x9,000 Protohedron
x3 Arms INSP Kit
x21 |
 Advanced Cognitive Carrier
 Mark of Perseverance
 Arms INSP Set
 Elementary Cognitive Carrier
Fording the River Rewards Information
Stage 4 of Grotto Survey

Wheels and Bridges is the fourth stage of the Grotto Survey stage in the Delver of the Cryptic permanent game mode, in which you are tasked to complete puzzles that involve critical thinking.
Fording the River Details
 |
|
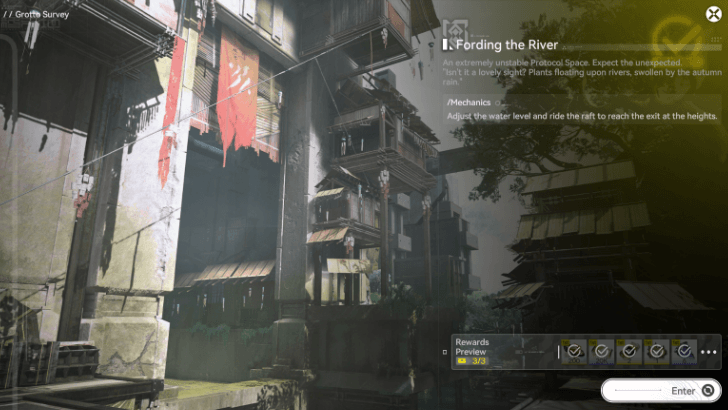
| Mechanics | Adjust the water level and ride the raft to reach the exit. |
|---|---|
| Bonus Goal | Open Storage Crates x3 |
Arknights: Endfield Related Guides
Delver of the Cryptic Series
 Cryptic First Revealed |
 Grotto Survey |
 Artful Realm of Six Cardinals |
 Fade Beyond the Painting |
Artful Realm of Six Cardinals Stage Guides
 A Jaunt in the Miasma (Stage 1) |
 A Bridge Too Invisible (Stage 2) |
 Pillar Driver (Stage 3) |
 Escape from Kiddyland (Stage 4) |
 Spherical Orbit (Stage 5) |
 Xiranflow Rapids (Stage 6) |
Comment
 Anonymous 3 months
BLESS YOU MAY YOUR FOOD ALWAYS BE WARM AND YOUR PILLOW ALWAYS COLD



Fording the River Stage 4 Guide

Premium Articles
Rankings

Gaming News





Popular Games

Genshin Impact Walkthrough & Guides Wiki
Fire Emblem: Fortune's Weave (FEFW) Walkthrough & Guides Wiki
Aniimo Walkthrough & Guides Wiki
Wuthering Waves Walkthrough & Guides Wiki
Dragon's Dogma 2 (DD2) Dark Arisen Walkthrough & Guides Wiki
Umamusume: Pretty Derby Walkthrough & Guides Wiki
Honkai: Star Rail Walkthrough & Guides Wiki
Zenless Zone Zero Walkthrough & Guides Wiki
Pokemon TCG Pocket (PTCGP) Strategies & Guides Wiki
AION 2 Walkthrough & Guides Wiki










Recommended Games
Fire Emblem Heroes (FEH) Walkthrough & Guides Wiki
Where Winds Meet Walkthrough & Guides Wiki
Diablo 4: Lord of Hatred Walkthrough & Guides Wiki
Super Smash Bros. Ultimate Walkthrough & Guides Wiki
Persona 3 Reload Walkthrough & Guides Wiki
The Legend of Zelda: Tears of the Kingdom Walkthrough & Guides Wiki
Elden Ring Walkthrough & Guides Wiki
Pokemon Brilliant Diamond and Shining Pearl (BDSP) Walkthrough & Guides Wiki
Cyberpunk 2077: Ultimate Edition Walkthrough & Guides Wiki
Monster Hunter World Walkthrough & Guides Wiki










All rights reserved
Copyright © 2022 - 2025 GRYPHLINE. All Rights Reserved.
The copyrights of videos of games used in our content and other intellectual property rights belong to the provider of the game.
The contents we provide on this site were created personally by members of the Game8 editorial department.
We refuse the right to reuse or repost content taken without our permission such as data or images to other sites.
ts hard asf who the hell thought this was a good idea