
Pioneers Quest Guide
Travelers, participate in Game8's Version 7.1 Survey!
◆ Hot: 7.2 Livestream & Codes, 7.1 Tier List
◆ Builds: Vesna, Vodyanitsa, Skirk, Escoffier
◆ 7.1: Snowball Fight, 2026 Anniversary
◆ Future: Version 7.2, Mitya, Valeriy
Pioneers is the first subquest of the Moon Gazing quest chain in Genshin Impact Luna VIII. See how to look for Eggie within the ruins, find a way to activate the energy mechanisms, follow the black Kuuhenki, and go to the lunar shuttle in this guide!
Pioneers Quest Location
Go to Dunanna Pit in Nod-Krai
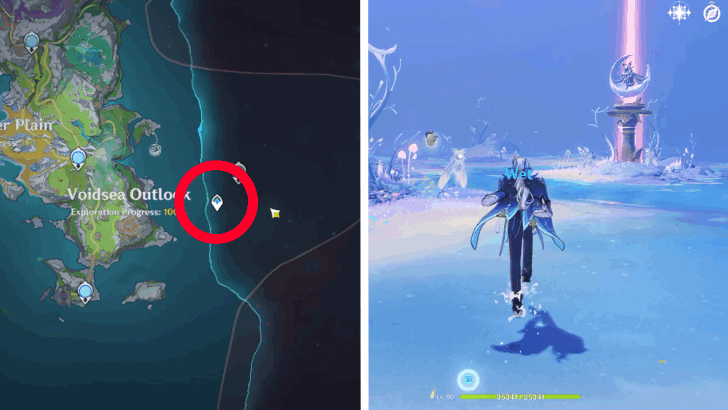
Pioneers World Quest is located at Dunanna Pit, in the northeast part of Nod-Krai. A teleport waypoint at the east side of Voidsea Outlook can be used to go to the quest location.
Voidsea Outlook is the island on the north side of Nod-Krai, where you will find Nicole's House.
Nod-Krai Map Guide and How to Unlock
How to Unlock Pioneers
Approach the Statue of Seven at Dunanna Pit
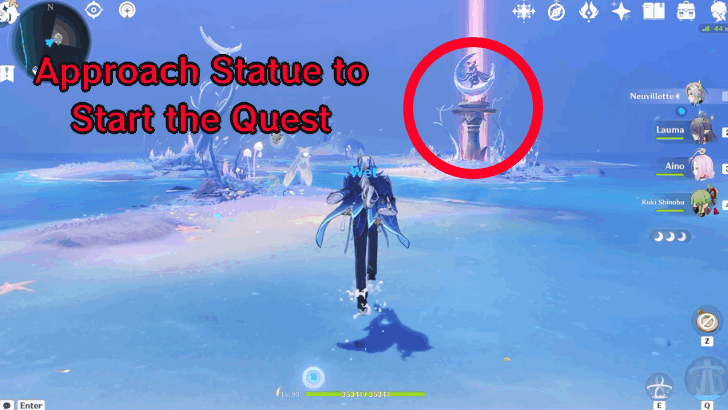
Pioneers World Quest automatically unlocks after approaching the Statue of Seven at Dunanna Pit. A short cutscene will occur where the Traveler and Paimon sees Columbina walking from afar.
Complete the Prerequisites

The Prologue - Act 3: The Song of the Dragon and Freedom is the only pre-requisite quest that needs to be completed to unlock the Pioneers World Quest and the entire Moon Gazing Quest Chain.
Act 3 - The Song of the Dragon and Freedom
Pioneers Walkthrough
Follow Columbina
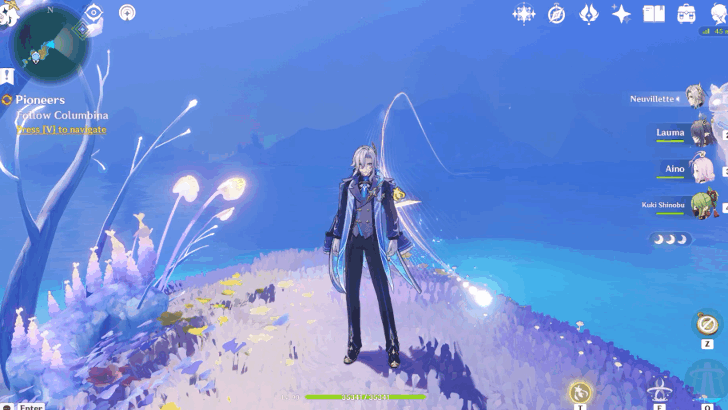
After seeing Columbina from a distance, you and Paimon decide to follow her towards the end of the small hill. Upon catching up to her, she continuously walks toward the sea and to the island from afar.
After the short cutscene, continue following her by using the Highway of Light that was made by the Kuuhenki nearby.
Look For Traces of Columbina
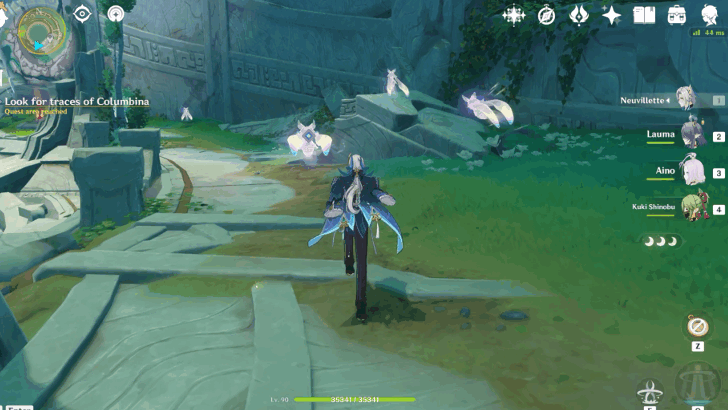
The Highway of Light will take you to the Dunana Forward Station. Follow the Kuuhenkis at the middle of the island to look for Columbina.
Once you reach the pool area, head towards the right side to keep following the Kuuhenki.
Pass Through the Entrance
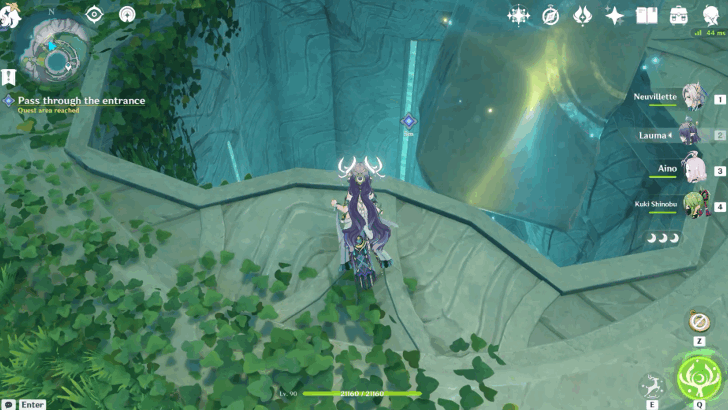
Once you reach the pit with floating rocks, jump down below the pit to pass through the entrance. Additionally, the floating rocks can be moved by pushing them with your character.
Explore the Underground Ruins
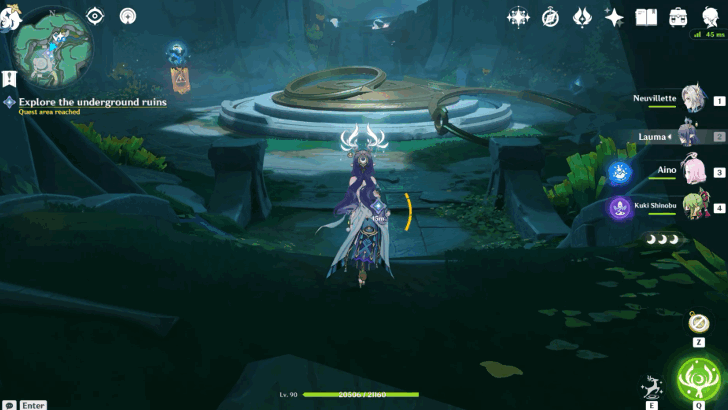
Continue walking down the cave and into the middle of the ruins until you reach the huge room with a circular platform in the middle.
Head to the Generator Room
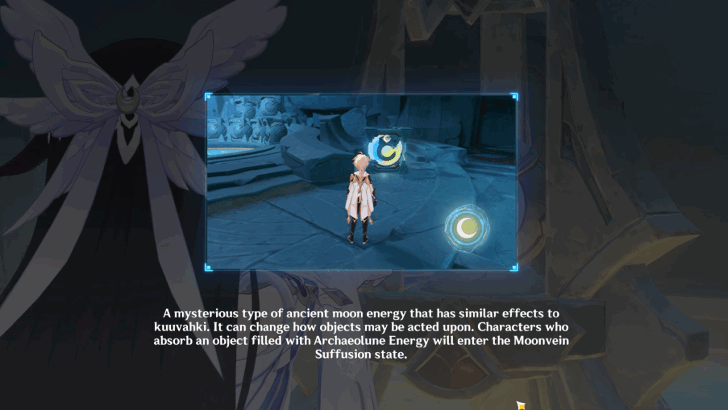
Head to the southwest side of the ruins to find the generator room and fix the mechanisms. After reaching the room, a short cutscene will occur, during which Columbina will grant you access to Archaeolune Energy.
This Archaeolune Energy allows you to borrow powers from the Moon Pearls or the glowing blue and yellow spheres around the area. You can use it to shoot an orb or Ripple that explodes, which applies zero gravity to the area around it.
Find a Way to Activate the Energy Mechanisms
Gather Archaeolune Energy power from the Moon Pearls or glowing blue and yellow balls nearby to activate the Energy Mechanisms. You can press the button that will prompt beside the Elemental Skill button to get the Archaeolune Energy power.
Once you have the powers, hold the aim button or charged attack button to shoot a Ripple. Once you the Ripple is in the air, click the same button again to activate the mechanism.
How to Activate the Energy Mechanisms Walkthrough
| How to Activate the Energy Mechanisms | |
|---|---|
| 1 | Shoot the tall mechanism at the end of the generator room to activate the power source through the pipe. |
| 2 | Shoot the ball that is blocking the pipe's flow. Then, stand on one end of the pipe to make it level again. |
| 3 | Lastly, return to the room with the huge circular platform in the middle, and choose the Frost Moon option. Selecting the other two options will not progress the quest objective. |
Follow the Black Kuuhenki
Chase after the black Kuuhenki that ran away to the southeast part of the underground area. You can follow the path that opened in front of you after the short cutscene. You will need to use Archaeolune Energy powers to avoid obstacles while following the black Kuuhenki.
How to Follow the Black Kuuhenki
| Follow the Black Kuuhenki Walkthrough | |
|---|---|
| 1 | After the black Kuuhenki was revealed to be Columbina in disguise, you need to follow it through the underground passage that opened in front of you. At the end of the path, you will need to ride the elevator that will take you deeper underground. |
| 2 | Move forward and ride the other elevator at the end of the hallway to keep following the black Kuuhenki. Once at the top, you will need to move quickly into the first room. |
| 2 | In the first room, gather Archaeolune Energy from the Moon Pearls near the water. Then, aim it at the tall mechanism near the circular door. After completing that, head for the door, and avoid getting hit by the red laser, which will return you to the starting point. |
| 3 | In the second room, activate the Gravity Simulation at the mechanism near the water to active zero gravity. During this state your jump is higher, so you can reach taller places much easier. When you reach the platform on the top, deactivate the Gravity Simulation to open the door. |
Defeat the Guards
At the end of chasing the black Kuuhenki, a Precursor's Secret Source Matrix of Overseer Network elite enemy will spawn in the middle of the room. Defeat it to confront the black Kuuhenki once and for all.
Go to the Lunar Shuttle
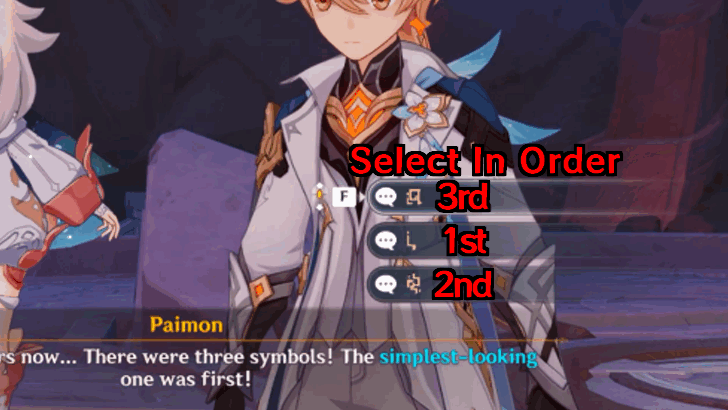
| Symbol | Dialogue Option |
|---|---|
| Simplest-Looking | Second Option |
| Super Complicated | Third Option |
| Last Symbol | First Option |
Choose the correct order of the three symbols so you can go to the Lunar Shuttle. The simplest-looking one is the second option. The super complicated shape is the third option. Then, the last symbol would be the first option.
Not choosing the correct symbols in order would result into repeating the whole cutscene over and over again. Completing the three symbols unlocks the elevator behind you, which will take you down to the Lunar Shuttle.
Search the Lunar Shuttle
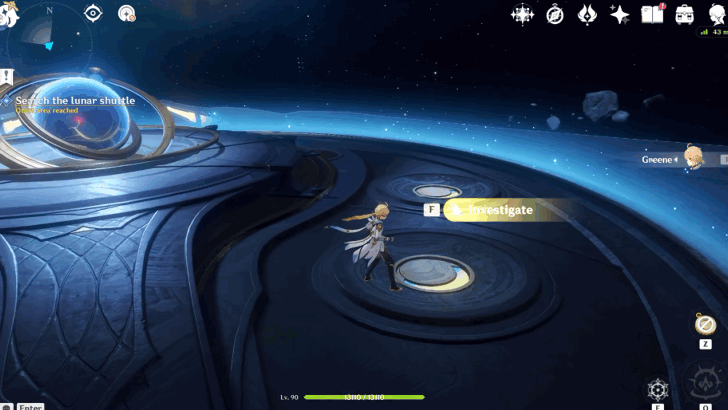
Once inside the spaceship, interact with the first circle on the right side to get a communication device for the black Kuuhenki.
After talking to it, it will show you the destinations that you can go to at the Frost Moon. Rotate the globe until you find the Ungien's Circle. Selecting the other options will not progress the quest.
Find a Way to Return to the Surface
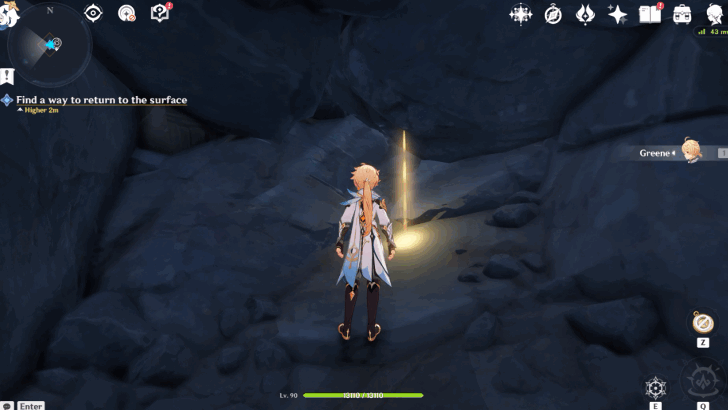
After interacting with the glowing marker near the rock, turn around and gather Archaeolune Energy from the spheres behind. Once you do, aim at the rock to make it float away.
Head to the Underground Space
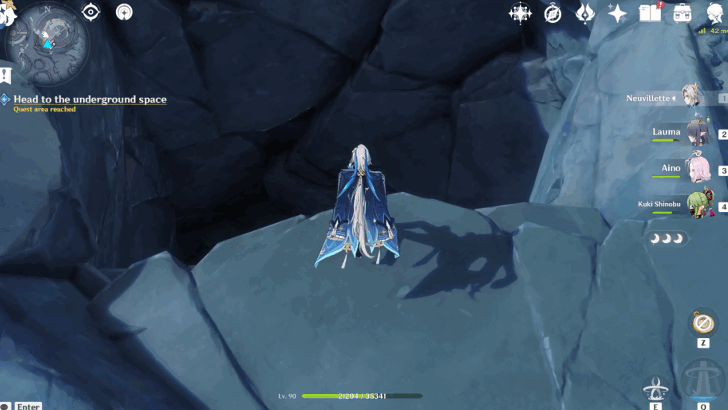
Head over to the pit where Eggie, or black Kuuhenki, has landed. Once you reach it, head down to the underground to try and find it.
Look for Eggie Within the Ruins
After going to the underground, you will need to complete three Ancient Moon Pearl Power Station puzzles where Eggie landed its escape pod.
The Power Station puzzles are located in three connected rooms. After completing each one, it leads you to the next puzzle room. The puzzle is solved by pushing an Ancient Moon Pearl, or a glowing blue and yellow sphere, into an empty slot of the Power Station.
How to Look For Eggie Within the Ruins
First Power Station Puzzle
| How to Look for Eggie Within the Ruins | |
|---|---|
| 1 | Interact with the Terminal to load the entire underground map and light up the whole place. |
| 2 | Interact with small mechanism nearby to deactivate the barrier and release the spheres. |
| 3 | Push one of the spheres into the mechanism with the round platform. Once the sphere is close to the mechanism, it will pull it in to make it stay in place. Once that's done, go through the door that just opened and into the next room for the next puzzle. |
| 4 | Go through the unlocked door and follow the stairs downward until you reach a room with an elevated platform in the middle and a conveyor belt on the right side. |
Second Power Station Puzzle
| Second Moon Pearl Power Station Puzzle | |
|---|---|
| 1 | At the second room, push the Moon Pearl on the main platform into one of the empty slot of the Power Station puzzle. |
| 2 | Head down below to the lower platform to get another Moon Pearl for the other empty slot. |
| 3 | Push a Moon Pearl into the Launcher. Then, interact with the Launcher to shoot it over to the upper platform. You may also launch yourself by going to the middle of the Launcher. |
| 4 | Push the Moon Pearl into the empty slot of the Power Station. Then, interact with the small mechanism at the middle of the platform to open the next door. Afterward, go through the unlocked door, and into the next puzzle room. |
Third Power Station Puzzle
| How to Look for Eggie Within the Ruins | |
|---|---|
| 1 | On the way to the third room, you can ignore the other platforms and head straight forward to the next puzzle room. The other platforms are irrelevant to finding Eggie. However, on the second to the last platform, a Large Geo Slime will spawn from the huge crate. Defeating it will unlock the chest on the same platform. |
| 2 | At the entrance to the third room, gather the Archaeolune Energy from the moving mechanism to free the Moon Pearl its holding. Then, push the Moon Pearl to the empty slot at the opposite end of the door. |
| 3 | Defeat the Precursor's Secret Source Matrix of Overseer Network that is in the empty slot of the Power Station puzzle. |
| 4 | Locate one Moon Pearl around the room. There should be one near the empty slot, where you defeated the elite enemy. Then, push it into the mechanism. Note that you cannot push a Moon Pearl that has been lifted by the moving mechanisms. You need to locate one that has not been moved, and push it to the empty slot as fast as you can. |
| 5 | Push the small mechanism in the middle of the platform. Then, head over to the unlocked door, and up the stairs to where Eggie is being held captive. |
Activate the Entrance Terminal
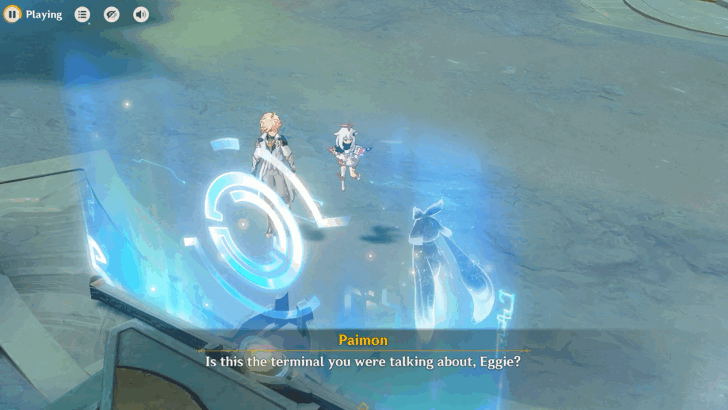
Once you rescue Eggie, accompany it to the entrance Terminal, which is the same terminal you used to load the entire underground map before.
Return to the Surface
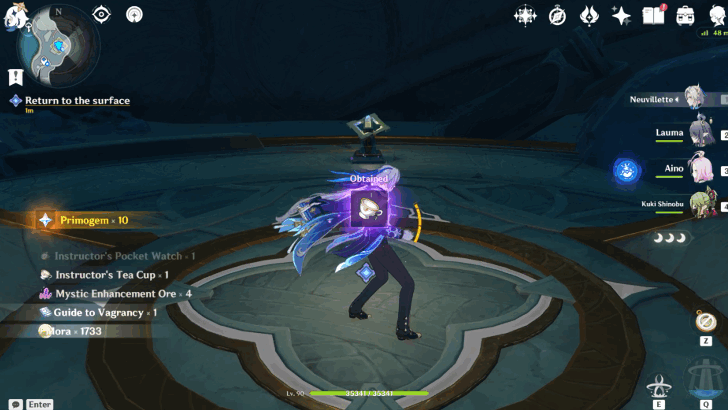
With the Terminal now active, you can return to the surface by the use of the elevator behind the Terminal.
Search for Other Energy Generation Stations
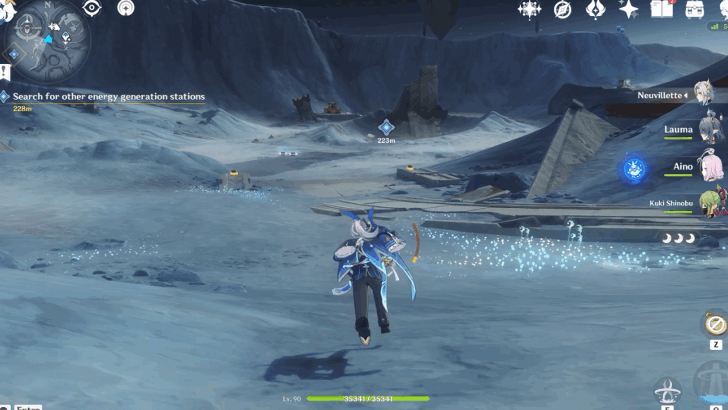
Head over to the southwest area of the map, to search the other Energy Generation Stations. Upon reaching the second station, you will need to defeat two Frostnight Scion elite enemies.
Go to the Top to Adjust the Signal Locator
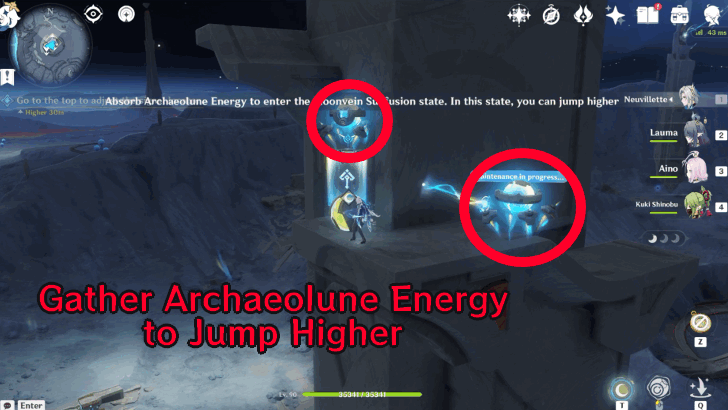
Use the launcher to boost yourself up in the sky and reach the signal locator on the top. You need gather Archaeolune Energy from the spheres in each platform and use it to make yourself jump higher. You need to repeat this at each platform until you reach the top.
Head for The Eye of Ibni-Belum
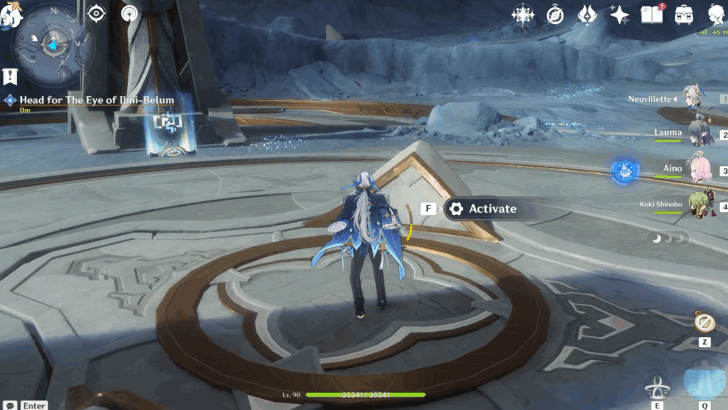
Go to the elevator at the middle of the map to reach The Eye of Ibni-Belum and gather info for Eggie to process.
Pioneers Quest Information
Part of the Moon Gazing Quest Chain
The Pioneers World Quest is the first subquest of the Moon Gazing Quest Chain in the Frost Moon.
Pioneers Rewards
Total Quest Rewards
| Total Quest Rewards |
 Primogem x80 |
 Mora x66,000 |
|---|---|---|
 Hero's Wit x4 |
||

Genshin Impact Related Guides

Other Moon Gazing Quest Guides
| Moon Gazing World Quest Guides | ||
|---|---|---|
| Moon Gazing | Pioneers | Visitors From the Stars |
| Project Moongazer | ||
Comment




Pioneers Quest Guide

Premium Articles


Rankings
- We could not find the message board you were looking for.
Gaming News





Popular Games

Genshin Impact Walkthrough & Guides Wiki
Fire Emblem: Fortune's Weave (FEFW) Walkthrough & Guides Wiki
Aniimo Walkthrough & Guides Wiki
Wuthering Waves Walkthrough & Guides Wiki
Dragon's Dogma 2 (DD2) Dark Arisen Walkthrough & Guides Wiki
Umamusume: Pretty Derby Walkthrough & Guides Wiki
Honkai: Star Rail Walkthrough & Guides Wiki
Zenless Zone Zero Walkthrough & Guides Wiki
Pokemon TCG Pocket (PTCGP) Strategies & Guides Wiki
AION 2 Walkthrough & Guides Wiki









Recommended Games
Where Winds Meet Walkthrough & Guides Wiki
Fire Emblem Heroes (FEH) Walkthrough & Guides Wiki
Diablo 4: Lord of Hatred Walkthrough & Guides Wiki
Super Smash Bros. Ultimate Walkthrough & Guides Wiki
Persona 3 Reload Walkthrough & Guides Wiki
The Legend of Zelda: Tears of the Kingdom Walkthrough & Guides Wiki
Elden Ring Walkthrough & Guides Wiki
Pokemon Brilliant Diamond and Shining Pearl (BDSP) Walkthrough & Guides Wiki
Cyberpunk 2077: Ultimate Edition Walkthrough & Guides Wiki
Monster Hunter World Walkthrough & Guides Wiki










All rights reserved
Copyright© 2012-2024 HoYoverse — COGNOSPHERE. All Rights Reserved.
The copyrights of videos of games used in our content and other intellectual property rights belong to the provider of the game.
The contents we provide on this site were created personally by members of the Game8 editorial department.
We refuse the right to reuse or repost content taken without our permission such as data or images to other sites.