
Arlecchino Best Builds and Teams
Travelers, participate in Game8's Version 7.1 Survey!
◆ Hot: 7.2 Livestream & Codes, 7.1 Tier List
◆ Builds: Vesna, Vodyanitsa, Skirk, Escoffier
◆ 7.1: Snowball Fight, 2026 Anniversary
◆ Future: Version 7.2, Mitya, Valeriy

Arlecchino is a 5-star Pyro Polearm user in Genshin Impact that best functions as a Bond of Life Pyro DPS! See Arlecchino's best builds, artifacts and weapons, team comps, and other information about her here!
| Arlecchino's Character Guides | |||
|---|---|---|---|
 Build Guide |
 Lore |
 Special Dish |
|
List of Contents
Arlecchino Rating and Info
Character Information
| Arlecchino | ||
|---|---|---|
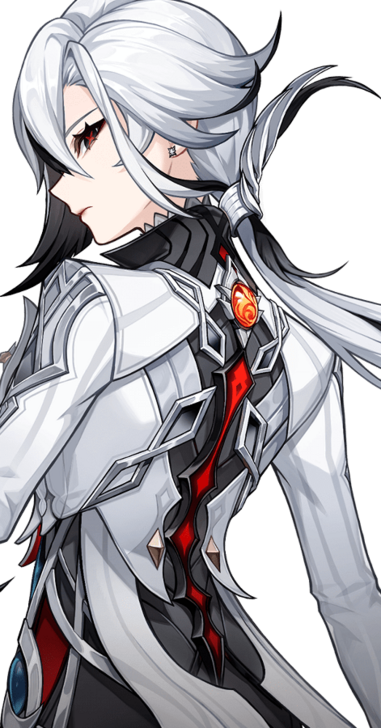 |
Rating |

|
| Rarity | ||
| Element | ||
| Weapon | ||
| Voice Actors |
Erin Yvette (EN)
Mori Nanako (JP) |
|
 Pyro
 Polearm
Tier List Rankings
| Main DPS | Sub-DPS | Support | Exploration |
|---|---|---|---|
|
|
- | - |

|
Tier Rating
|
As a Main DPS Arlecchino suffers from the same issue as Neuvillette where her best teams have fallen off due to the meta changing but has even less synergy with the current Nod-Krai roster due to there being no dedicated elemental augments that are Pyro-based, unlike Bloom and Electro-Charged receiving Lunar-Bloom and Lunar-Charged. With that in mind, her current damage playstyle of small consistent strikes, along with needing hyperinvestment into her teams to keep her on par with the other top-tier characters have facilitated a need to reassess Arlecchino's place in this frontloaded damage meta, which already takes her away from her niche. |
How Would You Rate Arlecchino?
Failed to submit your score. Please try again.
Submitting will update your vote
Arlecchino's Stats
| Stat | Base Value |
|---|---|
| HP | 2646 |
| ATK | 69 |
| DEF | 154 |
| CRIT DMG% | 50% |
| Stat | Max Value |
|---|---|
| HP | 13103 |
| ATK | 342 |
| DEF | 765 |
| CRIT DMG% | 88.40% |
Base Stat Calculations
 | Stats indicated above are obtained from Arlecchino's base values. These numbers also exclude the character's equipped weapon, artifacts, talents, or other passive effects that are not innate to the character. |
|---|---|
 | All characters start with 5% CRIT Rate, 50% CRIT DMG, 100% Energy Recharge, 0 Elemental Mastery, 0% Healing Bonus, and 0% Elemental DMG bonus before any additional stats are applied. The table above includes such values. |
 | The Level 20 stats indicated for this character are calculated before their first ascension. |
Arlecchino's Ascension and Talent Material Summary
| All Ascension Materials Needed |
|---|
 Mora
×420,000  Rainbow Rose
×168 |
| All Talent Materials Needed |
Mora
×4,957,500 Guide to Order
×63  Fading Candle
×18 |
 Agnidus Agate Sliver
 Agnidus Agate Fragment
 Agnidus Agate Chunk
 Agnidus Agate Gemstone
 Fragment of a Golden Melody
 Crown of Insight
Arlecchino Strengths and Weaknesses
| Strengths | |||
|---|---|---|---|
|
• Bond of Life allows an artificial way of tracking her infusion. • Is self-sufficient and thus players can opt to pair her with a team of 3 buffers or with a shielder. • Insanely high raw scalings and abundant buffs built into her kit allow for easy building. • Intuitively simple combos allow for consistent DPS with minimal downtime. • Charged Attack can be used for exploration purposes, although it costs stamina. |
|||
| Weaknesses | |||
|
• Because she can only be healed by herself, her playstyle leans heavily towards being high-risk without a shielder. • Combo-centric playstyle requires her to either have C1 or some form of interruption resistance, or else she suffers a DPS loss. |
Arlecchino Best Builds
| Build Summary |
|---|
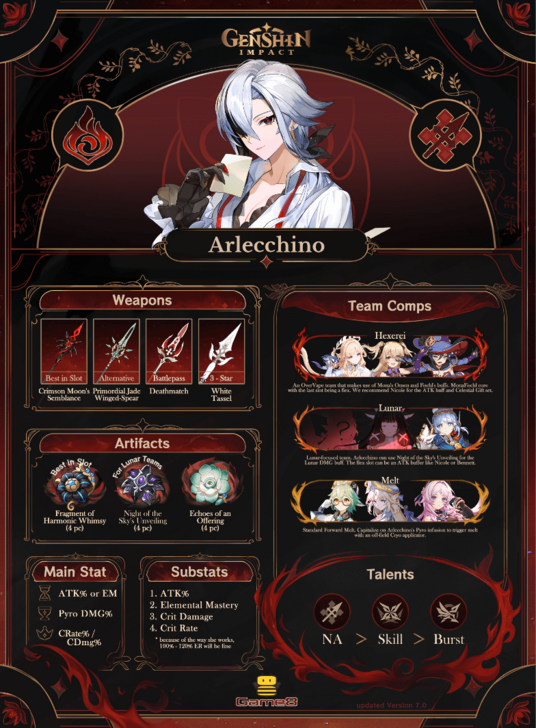 See full image |
Arlecchino DPS Build
| Best Weapon | Alternative Weapons | |||
|---|---|---|---|---|
 Crimson Moon's Semblance Crimson Moon's Semblance Base ATK: 674 Bonus Stat: CRIT Rate 22.1% Skill Effect: Grants a Bond of Life equal to 25% of Max HP when a Charged Attack hits an opponent. This effect can be triggered up to once every 14s. In addition, when the equipping character has a Bond of Life, they gain a 12% DMG Bonus; if the value of the Bond of Life is greater than or equal to 30% of Max HP, then gain an additional 24% DMG Bonus. |
 Staff of Homa Staff of Homa Base ATK: 608 Bonus Stat: CRIT DMG 66.2% Skill Effect: HP increased by 20%. Additionally, provides an ATK Bonus based on 0.8% of the wielder’s Max HP. When the wielder's HP is less than 50%, this ATK Bonus is increased by an additional 1% of Max HP.  Primordial Jade Winged-Spear Primordial Jade Winged-Spear Base ATK: 674 Bonus Stat: CRIT Rate 22.1% Skill Effect: On hit, increases ATK by 3.2% for 6s. Max 7 stacks. This effect can only occur once every 0.3s. While in possession of the maximum possible stacks, DMG dealt is increased by 12%.  Deathmatch Deathmatch Base ATK: 454 Bonus Stat: CRIT Rate 36.8% Skill Effect: If there are at least 2 enemies nearby, ATK and DEF is increased by 16%. If there are less than 2 enemies nearby, ATK is increased by 24%.  White Tassel White Tassel Base ATK: 401 Bonus Stat: CRIT Rate 23.4% Skill Effect: Increases Normal Attack DMG by 24%.  Blackcliff Pole Blackcliff Pole Base ATK: 510 Bonus Stat: CRIT DMG 55.1% Skill Effect: After defeating an enemy, ATK is increased by 12% for 30s. This effect has a maximum of 3 stacks, and the duration of each stack is independent of the others. |
|||
| Best Artifact | Artifact Stats | |||
 Fragment of Harmonic Whimsy Fragment of Harmonic Whimsy 2-PC: ATK +18% x44-PC: When the value of a Bond of Life increases or decreases, this character deals 18% increased DMG for 6s. Max 3 stacks. |
 Sands: ATK%  Goblet: Pyro DMG Bonus  Circlet: CRIT Rate or CRIT DMG Artifact Sub Stats 1. CRIT Rate 2. CRIT DMG 3. Energy Recharge 4. ATK% |
|||
| For Lunar Teams Artifacts | ||||
 Night of the Sky's Unveiling Night of the Sky's Unveiling 2-PC: Elemental Mastery +80 x44-PC: When nearby party members trigger Lunar Reactions, if the equipping character is on the field, gain the Gleaming Moon: Intent effect for 4s: Increases CRIT Rate by 15%/30% when the party's Moonsign is Nascent/Ascendant Gleam. All party members' Lunar Reaction DMG is increased by 10% for each different Gleaming Moon effect that party members have. Effects from Gleaming Moon cannot stack. |
||||
| General Team Comps | ||||
  
Overload example team with Arlecchino. This is also an example of a Hexerei team. |
  
Lunar team variant that Arlecchino can use. Arlecchino can use Night Sky here. |
|||
With Arlecchino's kit revolving around the use of Bond of Life, her main equipment consists of Crimson Moon's Semblance and Fragment of Harmonic Whimsy, which both increase her damage when Bond of Life is present.
Despite that, she is still built as a typical ATK DPS, and can make use of most ATK-based weapons and sets if her Best-in-Slots are not available.
Arlecchino Goal Stat Values
| Stat | Goal Value |
|---|---|
| ATK | 2,000 or above |
| CRIT Rate | 70 ~ 80% |
| CRIT DMG | 160% or above |
Arlecchino values as much ATK and CRIT in her stats as much as possible, with an emphasis on CRIT Rate in order for her to deal increased damage with her Pyro-infused Normal Attacks.
ATK and CRIT DMG are then to be taken as far as you can go with them, with her ATK benefitting the most at 2,000 and her CRIT DMG being at 160% and above if possible.
Arlecchino Talent Priority
| 1st | 2nd | 3rd |
|---|---|---|
| Normal Attack | Elemental Skill | Elemental Burst |
Arlecchino's kit revolves around empowering her Normal Attacks to deal more damage, so it should be prioritized first.
Her Elemental Skill and Elemental Burst can be leveled up together next, with more priority on the Elemental Skill due to its frequent use.
Arlecchino Best Weapons
Bond of Life or CRIT Polearms are Best
Crimson Moon's Semblance is Arlecchino's overall best weapon as it sports a hefty Base ATK, provides CRIT Rate, gives her a Bond of Life percentage, and buffs her based on her Bond of Life percentage.
Otherwise, Staff of Homa, Primordial Jade Winged-Spear, Deathmatch, and even the F2P White Tassel all come in as decent choices, serving as general stat-sticks that balance out Arlecchino's stats.
Best Polearms for Arlecchino
| Best Weapons for Arlecchino | |
|---|---|
| Best-in-Slot | Crimson Moon's Semblance Crimson Moon's Semblance Base ATK: 674 Bonus Stat: CRIT Rate 22.1% Skill Effect: Grants a Bond of Life equal to 25% of Max HP when a Charged Attack hits an opponent. This effect can be triggered up to once every 14s. In addition, when the equipping character has a Bond of Life, they gain a 12% DMG Bonus; if the value of the Bond of Life is greater than or equal to 30% of Max HP, then gain an additional 24% DMG Bonus. |
| Gives Arlecchino another source of Bond of Life, and a near-unconditional 24% DMG boost due to how easily she racks up Bond of Life, making this her Best-in-Slot by a large margin. | |
| High CRIT | Staff of Homa Staff of Homa Base ATK: 608 Bonus Stat: CRIT DMG 66.2% Skill Effect: HP increased by 20%. Additionally, provides an ATK Bonus based on 0.8% of the wielder’s Max HP. When the wielder's HP is less than 50%, this ATK Bonus is increased by an additional 1% of Max HP. |
| High-performing alternative that sees use in both its high base ATK and high CRIT DMG passive, with Arlecchino highly valuing both. | |
| Generalist | Primordial Jade Winged-Spear Primordial Jade Winged-Spear Base ATK: 674 Bonus Stat: CRIT Rate 22.1% Skill Effect: On hit, increases ATK by 3.2% for 6s. Max 7 stacks. This effect can only occur once every 0.3s. While in possession of the maximum possible stacks, DMG dealt is increased by 12%. |
| Good general purpose weapon for its ATK and CRIT Rate stat bonuses, making it a baseline weapon that works for everyone, Arlecchino included., which Arlecchino welcomes. Typically only used when it's already in your account, and should not actively be sought after if better options are available. |
|
| Battlepass | Deathmatch Deathmatch Base ATK: 454 Bonus Stat: CRIT Rate 36.8% Skill Effect: If there are at least 2 enemies nearby, ATK and DEF is increased by 16%. If there are less than 2 enemies nearby, ATK is increased by 24%. |
| The battlepass option that provides CRIT Rate and some damage bonuses when facing off multiple opponents. Usually this will be the case for Arlecchino, and she can make use of this weapon fully, though it will hinder her in the long run due to its low base ATK. |
|
| F2P | White Tassel White Tassel Base ATK: 401 Bonus Stat: CRIT Rate 23.4% Skill Effect: Increases Normal Attack DMG by 24%. |
| Arlecchino's F2P option which gives a surprising amount of mileage due to how it is completely synergistic to Arlecchino's main source of damage, offering CRIT Rate and a specific 48% buff to Normal Attack DMG at R5. Unlike most weapons, this one is found from exploration, and should be sought after if you lack a better weapon for Arlecchino. |
|
All Recommended Weapons for Arlecchino
| Recommended Weapons | How to Get |
|---|---|
| Gacha | |
| Gacha | |
| Gacha | |
| Gacha | |
| Gacha | |
| Battle Pass | |
| Battle Pass | |
| Starglitter Exchange | |
| Chests | |
| Crafted | |
| Chests | |
 Sacrificer's Staff
 Staff of the Scarlet Sands
 Ballad of the Fjords
 Prototype Starglitter
 Halberd
Arlecchino Best Artifacts
Fragment of Harmonic Whimsy for Bond of Life
Arlecchino's Best-in-Slot Artifact Set is no doubt the Fragment of Harmonic Whimsy, as the passive gives her a near-unconditional 54% DMG increase due to how often her Bond of Life fluctuates, making it her best choice.
Alternatively, players can opt for other 4-piece sets such as Echoes of An Offering, or Gladiator's Finale, and still make plentiful use of Arlecchino's potential if the right substats are raised.
Best Artifacts for Arlecchino
| Best Artifact Sets for Arlecchino | |
|---|---|
| Best-in-Slot | Fragment of Harmonic Whimsy Fragment of Harmonic Whimsy 2-PC: ATK +18% 4-PC: When the value of a Bond of Life increases or decreases, this character deals 18% increased DMG for 6s. Max 3 stacks. |
| Fragment pretty much gives Arlecchino a 54% DMG bonus to all her attacks since its effects will always be active if Arlecchino is played properly. No other set comes close to matching the effectiveness of this, making this Arlecchino's Best-in-Slot. |
|
| 1st Alt |  Echoes of an Offering Echoes of an Offering 2-PC: ATK +18%. 4-PC: When Normal Attacks hit opponents, there is a 36% chance that it will trigger Valley Rite, which will increase Normal Attack DMG by 70% of ATK. This effect will be dispelled 0.05s after a Normal Attack deals DMG. If a Normal Attack fails to trigger Valley Rite, the odds of it triggering the next time will increase by 20%. This trigger can occur once every 0.2s. |
| In the event that Fragment is not yet available, Echoes of an Offering can suffice since its passive specifically improves Normal Attack DMG, which is the majority or even all of Arlecchino's damage. | |
| 2nd Alt |  Gladiator's Finale Gladiator's Finale 2-PC: ATK +18%. 4-PC: If the wielder of this artifact set uses a Sword, Claymore or Polearm, increases their Normal Attack DMG by 35%. |
| Gladiator's Finale is often used as the general option when specialized sets are not yet available. It provides a constant 35% increase to Normal Attack DMG without any conditionals, making it a great choice if you do not wish to specialize Arlecchino in any way. | |
| 4-Star Alt |  Martial Artist Martial Artist 2-PC: Increases Normal Attack and Charged Attack DMG by 15%. 4-PC: After using Elemental Skill, increases Normal Attack and Charged Attack DMG by 25% for 8s. |
| Provides a similar buff to Gladiator's Finale, but lacks the ATK bonus that the other sets have, and keeps a majority of the buffs within an 8s conditional. | |
Arlecchino Artifact Stat Priority
| Stat Priority | ||
|---|---|---|
|
|
|
| Substats: CRIT Rate > CRIT DMG > ATK > Energy Recharge |
||
| Summary: • Arlecchino wants to stack as much ATK as possible, but keep it balanced with her CRIT. ATK requirements can be lowered if she is paired with appropriate buffers. • CRIT Rate is favored over CRIT DMG for consistency since Arlecchino attacks often. |
||
List of Artifacts and Set Bonuses
Arlecchino Best Team Comps
Arlecchino Teams and Building
Arlecchino functions as a Pyro DPS that can slot into a variety of teams, so long as they can provide buffs for her, or help enable elemental reactions like Vaporize, Melt, and Overload.
It should be noted that pure healers will not synergize well with Arlecchino since she cannot heal from them due to her unique Bond of Life interactions.
Arlecchino DPS Teams
| Arlecchino Pyro DPS Teams | |||
|---|---|---|---|
|
Arlecchino
|
Bennett
Nicole
|
 Yelan  Citlali
Fischl  Emilie  Kazuha |
 Xilonen  Escoffier
Chevreuse  Thoma  Xiangling |
|
Team Summary Arlecchino has access to multiple team compositions such as Vaporize, Melt, Overload, Burning, and Mono-Pyro. All she requires in these teams are elemental reaction-enablers to boost her own DMG, and some form of buffing to improve her DMG, or sustain options like interruption resistance to keep her attacks going at a steady pace. Alternate Teammates If Arlecchino's team has one member with Hexerei: Secret Rite, she can trade Bennett for Nicole instead to unlock Nicole's Hexerei buffs for her team, most notably found in the full-unlock for Celestial Gift's effects. This is most notable in Overload, where Fischl is a core member. |
|||
Arlecchino F2P Teams
| Arlecchino Pyro DPS F2P Teams | |||
|---|---|---|---|
|
Arlecchino
|
Bennett
|
 Xingqiu  Rosaria  Collei
Xiangling |
 Candace  Diona  Sucrose |
|
Team Summary These are a similar set of teams for Arlecchino, but made to be more F2P-friendly. Bring Xingqiu and Candace for a Vaporize team, Rosaria and Diona for Melt, Collei and Sucrose for Burn, or Xiangling and Sucrose for Mono-Pyro. Overload F2P Variant Overload is primarily composed of 4-star units already, so it is not listed here since the team comp is relatively the same as the one in her premium team list. |
|||
Arlecchino-Varesa Dual Teams
| Arlecchino-Varesa Dual Teams | |||
|---|---|---|---|
|
Arlecchino
|
 Varesa |
 Iansan |
Chevreuse
|
|
Team Summary This dual dps team archetype is an offshoot of both of their Overload teams. It primarily make use of Arlecchino's Blood-Debt Due wait time by using Varesa to do her combos. Varesa is the one to keep Iansan's Kinetic Energy at a certain level before switching to Arlecchino to do frontload damage. |
|||
Arlecchino-Varesa Rotation
| Combos for Arle-Varesa Team |
|---|
| Elemental Skill (Arlecchino) → Normal Attack (Varesa) → Elemental Burst then Skill (Chevreuse) → Elemental Burst then Skill (Iansan) → E-N-P-AQ x2 (Varesa) → Absorb Due then N3D x3 (Arlecchino) |
E = Elemental Skill
N= Normal Attack
P = Plunging Attack
AQ = Alterrnate Elemental Burst
D = Dash
Notable Teammates
| Character | Explanation |
|---|---|
|
Bennett
|
Support While Arlecchino cannot benefit from Bennett's healing, she benefits greatly from Bennett's ATK buffs, significantly increasing Arlecchino's damage. |
|
Chevreuse
|
Support Premier go-to Overload support, enabling most of its proficient damage. Turns Arlecchino into a potent Pyro Overload unit. |
|
Citlali
|
Support Citlali lowers Pyro and Hydro RES, which powers up Arlecchino's vaporize teams, and also offers shielding which works greatly for Arlecchino's comfort. |
|
Escoffier
|
Sub-DPS Despite not making full use of her A4 passive, Escoffier is a great addition in Arlecchino Melt teams for her ability to consistently apply Cryo with her Elemental Skill. Best paired alongside Citlali. |
|
Varesa
|
Main DPS Varesa can be slotted in a Dual DPS team, alongside Arlecchino. Varesa is a great way to make use of Arlecchino's downtime. |
|
Kazuha
|
Sub-DPS/Support Kazuha will mostly be swirling Pyro, which grants Arlecchino a sizable increase to elemental DMG. |
|
Fischl
|
Sub-DPS Fischl functions as a secondary DPS for Overload teams with Arlecchino and Chevreuse, and can keep up with Arlecchino's Pyro strikes. |
|
Xilonen
|
Support Xilonen RES shreds opponents, allowing Arlecchino to deal more damage. However, she cannot take advantage of Xilonen's healing. |
 Zhongli |
Support Provides a hefty shield, damage RES shred, and interruption resistance, allowing Arlecchino's kit to truly shine. |
|
Sucrose
|
Support In reaction teams, Sucrose can increase the team's Elemental Mastery and swirl elements around, making Arlecchino's reaction strikes deal more damage. |
|
Xiangling
|
Sub-DPS Xiangling provides a secondary source of Pyro DMG for Arlecchino teams, and doubles the team's damage output by pulling her own weight. |
|
Thoma
|
Support Shielder Support that resets his shield through Normal Attacks, which is where most of Arlecchino's damage comes from. |
|
Yelan
|
Sub-DPS Yelan offers an Elemental DMG Bonus to Arlecchino while enabling Vaporize for her due to her Hydro Application's frequency. |
|
Xingqiu
|
Sub-DPS Xingqiu fills a similar role to Yelan but trades the Elemental DMG Bonus for damage reduction. |
|
Candace
|
Sub-DPS Candace can be a good pair as her C6 allows her to apply consistent AoE Hydro application, making Arlecchino's vaporize not wasted on a single target. Moreover, her NA buffs are highly appreciated. That being said, she only becomes viable at C6. |
|
Emilie
|
Sub-DPS Emilie piggybacks off Arlecchino's Pyro application in order to maintain Burn and boost her own damage, serving as a secondary DPS specializing in Burn. |
 Nahida |
Sub-DPS Nahida is able to hold her own with Elemental Mastery buffs, her own personal Dendro DMG, and strong Dendro Application, making her a good option for Arlecchino's Burn teams. |
Arlecchino Constellations
| Ignis Purgatorius |
|---|
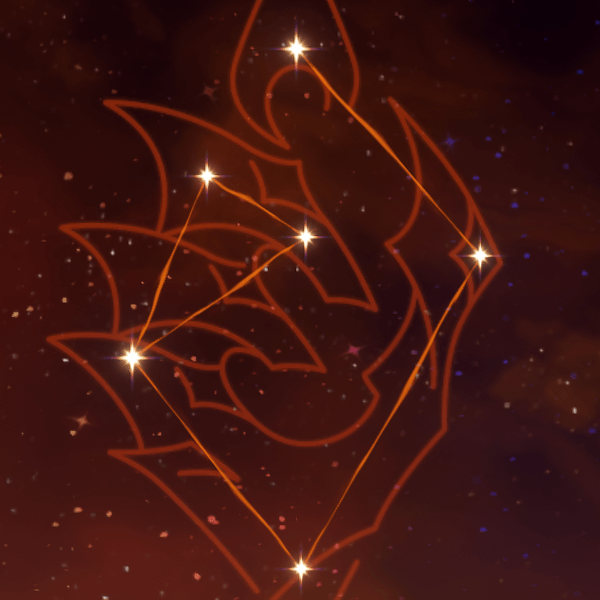 |
Constellation and Effects
| Arlecchino's Constellations | |
|---|---|
| C1 |
"All Reprisals and Arrears, Mine to Bear..." Masque of the Red Death is further enhanced, the value of the increase is 120%. Additionally, Arlecchino's interruption resistance is increased when she performs Normal Attacks while affected by the Masque of the Red Death. |
| C2 |
"All Rewards and Retribution, Mine to Bestow..." Blood-Debt Directives are now already Blood-Debt Due when first applied. When Arlecchino absorbs such a Due, she unleashes Balemoon Bloodfire in front of her, dealing 900% of her ATK as AoE Pyro DMG and increasing her All Elemental Res and Physical RES by 20% for 15s. This effect can trigger once every 10s. You must first unlock the Passive Talent ''Agony Alone May Be Repaid.'' |
| C3 |
"You Shall Become a New Member of Our Family..." Increases the Level of Normal Attack: Invitation to a Beheading by 3. Maximum upgrade level is 15. |
| C4 |
"You Shall Love and Protect Each Other Henceforth..." When Arlecchino successfully absorbs a Blood-Debt Directive, Balemoon Rising's CD will decrease by 2s and 15 Energy will be restored to her. This effect can occur once every 10s. |
| C5 |
"For Alone, We Are as Good as Dead..." Increases the Level of Balemoon Rising by 3. Maximum upgrade level is 15. |
| C6 |
"From This Day On, We Shall Delight in New Life Together." The DMG of Balemoon Rising is increased by Arlecchino's ATK multiplied by 700% of Arlecchino's current Bond of Life percentage. For 20s after Arlecchino uses All is Ash, both her Normal Attacks and Elemental Burst gain 10% CRIT Rate and 70% CRIT DMG. This effect can be triggered up to once every 15s. |
Best Constellation Rating and Explanation
| Rating | Constellation Effect / Merits | |
|---|---|---|
| C1 | ★★★ |
• Provides resistance to interruption, allowing you to swap out shielders for more offensive options. • Increases Normal Attack passive's damage, becoming an unconditional buff to her already formidable Normal Attack scalings. |
| C2 | ★★☆ |
• Allows Arlecchino to always max out her Bond of Life percentage when consuming Blood Debts in combat due to them immediately being in the Blood-Debt Due state. • Provides Nuke potential when consuming Blood-Debts. |
| C6 | ★★★ |
• Gives even more damage potential to Arlecchino's Normal Attacks due to the CRIT Rate and CRIT DMG increases. • Turns Arlecchino's Elemental Burst from a regular on-field reset into a capable Nuke. |
How to Play Arlecchino
Bond of Life Mechanics
Arlecchino's abilities center around the Bond of Life mechanic. This mechanic is seen on certain weapons and Fatui Operatives, which normally functions to cripple a player's ability to heal themselves until it is cleared.
However, unlike other characters, Arlecchino is actually empowered by Bond of Life and uses this as currency to strengthen her attacks.
Arlecchino's Rotations
Basic All-In Combo
| Sample All-In Rotation | Elemental Skill → Charged Attack → Gain Pyro Infusion → Normal Attack → Elemental Burst → Repeat |
|---|
This combo maximizes Arlecchino's All-In potential and paves the way for her to spend as much time on-field as possible.
Using her Elemental Burst early allows her to consume the Blood-Debt immediately and refresh her Elemental Skill.
Blood-Debt Due All-In Combo
| Sample Directive Rotation | Elemental Skill → Switch to Supports and use their abilities → Switch back to Arlecchino → Charged Attack → Gain Pyro Infusion → Normal Attack → Elemental Burst → Repeat |
|---|
This combo is similar to her all-in combo but allows her Blood-Debt Directive to turn into Blood-Debt Dues by letting her Elemental Skill simmer on opponents.
This allows Arlecchino to reap the maximum possible Bond of Life amount by the time that she gets on-field.
3x Normal Attack Dash Combo
| N3D | Normal Attack x3 → Dash |
|---|
This combo allows you to deal more frequent damage while also utilizing the i-frames when dashing. We recommend doing this combo for its basic use. Be mindful of your stamina bar since constantly dashing will deplete it faster than you can recover.
Normal Attack
| Normal Attack: Invitation to a Beheading |
|---|
| Performs up to 6 consecutive spear strikes.
Charge Attack Consumes a fixed amount of Stamina, dashing toward a nearby opponent and cleaving once. Hold Attack: Continuously holding this button will cause Arlecchino to consume Stamina and engage in up to 5s of high-speed movement. Masque of the Red Death When Arlecchino has a Bond of Life equal to or greater than 30% of her Max HP, she will enter the Masque of the Red Death" state, where her Normal, Charged, and Plunging Attacks will be converted to deal Pyro DMG. |
| Attribute | Effect (Lvl 1) |
|---|---|
| Masque of the Red Death Increase | 120.4% |
| 1-Hit DMG | 47.5% |
| 2-Hit DMG | 52.1% |
| 3-Hit DMG | 65.4% |
| 4-Hit DMG | 37.1% + 37.1% |
| 5-Hit DMG | 70% |
| 6-Hit DMG | 85.4% |
| Charged Attack DMG | 90.8% |
| Charged Attack Stamina Cost | 25 |
| High-Speed Movement Stamina Cost | 40/s |
| Plunge DMG | 63.9% |
| Low/High Plunge DMG | 127.8%/159.7% |
Bread and Butter
Each of Arlecchino's attacks uses her current Bond of Life amount to buff her strikes, as well as reducing her own Elemental Skill cooldown.
Use this mechanic to overwhelm opponents with deadly Pyro attacks while weaving Skill usage in-between strikes!
Bond of Life Pyro Infusion
While in her empowered state from Bond of Life, all of Arlecchino's Normal Attacks will be converted to Pyro and cannot be overridden by any means.
Mark For Death
Arlecchino's skill marks an opponent that gives her a set amount of Bond of Life when she consumes the mark by either absorbing it or killing the enemy.
Use this to fuel Arlecchino and ensure that your attacks remain buffed and pyro-infused!
Explaining Blood-Debts Directives and Dues
Blood-Debt Directives and Blood-Debt Dues are the marks that appear on opponents after Arlecchino uses her Elemental Skill.
Consuming these Blood-Debts with either Charged Attacks or her Elemental Burst will apply a portion of Bond of Life to Arlecchino. These serve as fuel for her empowered attacks, and is consumed whenever she strikes.
Burst DMG, Bond of Life Clear, and Healing
Arlecchino's Burst allows her to absorb any marks within her Burst radius, dealing large Burst damage, healing herself for a portion of her HP, and resetting her Elemental Skill cooldown.
To make use of this, weave it into her normal combo to keep her topped up and allow you to extend her on-field time!
Passive Talent 1
| Agony Alone May be Repaid |
|---|
| Blood-Debt Directives: ·Arlecchino will be granted a Bond of Life worth 130% of her Max HP when an opponent to which she herself applied a Directive is defeated. ·5s after a Directive is applied, it will be upgraded to a Blood-Debt Due. When absorbed, it will instead grant Arlecchino a Bond of Life worth 130%. A Bond of Life created in the aforementioned ways cannot exceed the original limit on the value of Bonds of Life obtained through All Is Ash. |
Allows her Teammates to Defeat Blood-Debt Enemies
With this, Arlecchino can start every fight with her Elemental Skill before changing to her supports to run their combos.
If the target dies before she comes back on-field, she will claim the Blood-Debt Due, and if she comes back on-field and absorbs the mark, she also gains the Blood-Debt Due charge.
Passive Talent 2
| Strength Alone Can Defend |
|---|
| Alecchino gains 1% All Elemental and Physical RES for every 100 ATK she has in excess of 1,000. The maximum RES increase she can gain this way is 20% |
Allows Arlecchino to Forego a Support
This addition to her Elemental and Physical RES lets Arlecchino be a one-person army if needed, and allows her to uniquely run three buffer supports as she can make use of all of them without much trouble.
Passive Talent 3
| The Balemoon Alone May Know |
|---|
| While in combat, Arlecchino gains a 40% Pyro DMG Bonus and can only be healed through Balemoon Rising |
Feast or Famine
By restricting Arlecchino's healing to only herself, players have to micromanage her Bond of Life stacks to determine when she needs it for healing and when she needs it for damage.
Arlecchino Ascension and Talent Materials
Arlecchino Ascension Materials
Below are the ascension materials needed for Arlecchino:
| Lv.20→Lv.40 |
Mora
×20000Rainbow Rose
×3 |
|---|---|
| Lv.40→Lv.50 |
Mora
×40000Rainbow Rose
×10 |
| Lv.50→Lv.60 |
Mora
×60000Rainbow Rose
×20 |
| Lv.60→Lv.70 |
Mora
×80000Rainbow Rose
×30 |
| Lv.70→Lv.80 |
Mora
×100000Rainbow Rose
×45 |
| Lv.80→Lv.90 |
Mora
×120000Rainbow Rose
×60 |
Arlecchino Talent Level-Up Materials
Below are the talent materials needed for Arlecchino:
| Daily Domain Drops | Enemy Drops | Weekly Boss Drops |
|---|---|---|
Wed/Sat/Sun Teachings of Order |
Fatui Recruit's Insignia |
The Knave Boss Challenge Reward Fading Candle
|
|
Guide to Order
|
 Sergeant's Insignia |
|
 Philosophies of Order |
 Lieutenant's Insignia |
How to Get Arlecchino
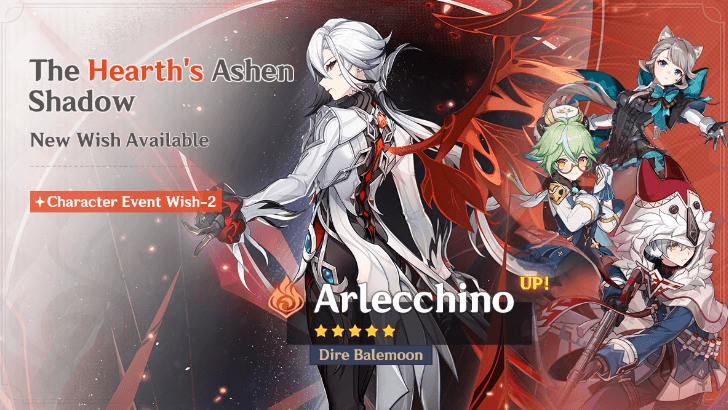
Pull From Arlecchino's Banner
|
|
| Banner Status | Inactive |
|---|---|
Arlecchino was available in her own rerun banner during Phase 1 of Version 7.0, which will run from August 12, 2026 to September 1, 2026. She ran alongside Odette's release banner!
In addition, the 4-stars Alyosha, Sucrose, and Lynette received rate-ups during this banner period.
Related Wish Guides
| Click to view a Banner Guide! | ||
|---|---|---|
| Arlecchino Banner |
 Wish Sim |
 All Wishes |
Arlecchino In-Game Information
Arlecchino Character Profile
| Nation | Snezhnaya |
|---|---|
| Title | Dire Balemoon |
| Vision | |
| Gender | Female |
| Race | Human |
| Height | Tall Girl |
| Faction | Fatui |
| Constellation | Ignis Purgatorius |
| Birthday | August 22 |
| Special Dish | Hearthfire's Trail |
| Story Quest |
Chapter: Ignis Purgatorius Act 1: When the Hearth-Flame Goes Out |
Arlecchino Voicelines
Thoughts About Arlecchino
| Character | In-Game Thoughts |
|---|---|
|
Columbina
|
The House of the Hearth is home to many children, and it can get quite noisy. The first time I heard them call Arlecchino "Father," I thought it was a rule that had to be followed there. So, the next time she passed by, I used that title as well. That's when I learned just how quiet the House of the Hearth could become. |
 Freminet |
About “Father” Tears: “Father” doesn't like it when children cry. “Father” says tears are the product of emotion and weakness. So when “Father” scolds me, I hold it in until I'm underwater, where no one can hear me cry. At least I have the Romaritime Flowers to keep me company. Teaching: When I was little, I was taught that we should be ready to give our lives for our family. But when "Father" took control, this philosophy changed. "Father" said that every one of us is important, and we have to value our own lives, be our strongest selves, and stand on our own two feet in this world... But actually, all of that's much harder than just following orders. |
 Furina |
About The Knave The Knave? Wh-Who's that? Oh... Uh, I'd already forgotten about her... Keeping such a terrible figure like her in your mind will only give you nightmares. |
 Lynette |
About “Father” Oh, how ''Father'' expresses love... well, not everyone can accept it. But it is only because of "Father" that home... can be called home. |
 Lyney |
About “Father” Family: "Father" gave us a family, raised us, and told each of us what we should work towards. In turn, what I can do is very simple... Remain loyal, and protect our home. King: Ours is a kingdom consisting only of children, and “Father” is our king. No king rules forever, of course, and I know that one day I will be chosen as “Father's” successor... But that also terrifies me... Please don't mention this to anyone, especially my sister and Freminet. |
 Navia |
She is a formidable but caring leader, and definitely comes across like a master of the house. But she's still a Fatui Harbinger, and that means she must have a more ruthless side. So don't worry - while I'll still always appreciate what she did for Poisson, I'm not about to let my guard down around her completely. |
 Sandrone |
Arlecchino is a woman of her word. She acts decisively, and you can trust her to get things done. Purely from a professional standpoint, it would be nice if all my colleagues could try to emulate her. |
 Tartaglia |
About The Knave Look, I've got nothing against people who have their own agendas — I myself joined the Fatui to get more experience in combat. But I don't like her at all. If she stood to benefit from betraying others, she'd turn against the Tsaritsa in a heartbeat. There isn't a sane bone in her body. |
 Wanderer |
About The Knave A wolf in sheep's clothing. To exert a higher level of control over people, she puts on a graceful and cordial front. Most of those who have seen her true, crazy self... have gone poof. |
Arlecchino's Thoughts About Others
| Character | In-Game Thoughts |
|---|---|
 Capitano |
About The Captain He is very powerful, and that power comes with a high level of responsibility. However, I believe him to be someone worthy of respect independent of the power he holds. |
|
Columbina
|
About Damselette She is a very special Harbinger. Pose her a question, and the answer you receive will be entirely unpredictable, if she sees fit to give a proper answer at all. Regardless, any answer you do receive is sure to be an interesting one. |
 Dottore |
About The Doctor When I first took over the House of the Hearth, he proposed a number of plans for us to work together. He wanted me to send any "rejects" to him. He planned to experiment on them and then share the results with me. I heard that he and the previous Knave had quite the professional rapport in that regard. All I can say is that, if he weren't one of my fellow Harbingers, I would have expedited their happy, little reunion long ago. |
|
Freminet
|
About Freminet Freminet has a complex mind and often hides his emotions. He blames himself for things that aren't his doing and allows them to eat away at his conscience. I would imagine the other children might find it difficult to understand his manner of thinking, but you seem to share a similar delicate sensibility — perhaps you two would make good friends. |
|
Furina
|
About Furina I asked Lyney to deliver an assortment of cakes for her theater troupe to enjoy during teatime. The children made the cakes themselves as a gesture to express the support and enthusiasm of her "audience." I do hope she enjoys them. |
 La Signora |
About The Fair Lady She and Pierro were the first Harbingers I became acquainted with. Her prideful attitude when she first visited the House of the Hearth failed to earn her many friends among the children. Subsequent visits were accompanied by gifts and the stately claim that "those who dislike me shall receive none." The children quickly learned how to play pretend, and she in turn basked in their attention, superficial though it may have been. I imagine she quite enjoyed being surrounded by children, perhaps due to the persistent loneliness that plagued her... I found her sacrifice to be a great shame. May she be reunited with her lover in death. |
|
Lynette
|
About Lynette Lynette's uniquely calm personality is also her strength, and I believe she is more than clever enough to recognize that. She is an irreplaceable part of that little team of three, and I would imagine that role brings her much joy. As her "Father," my duty is merely to give her the space to put those talents to good use. |
|
Lyney
|
About Lyney Clervie once asked me what a real home looks like, but I had no answer for her. How could any of us know the answer when the House of the Hearth is made up entirely of people who never had a place to call home. By killing Crucabena, I was able to assume the identity of Father and rebuild the House under a new set of rules. Still, I'm well aware that, even with these efforts, the House is far from that ideal. As for what a real home truly looks like, I suppose that question is best put to the side for now... Perhaps one day, Lyney will be able to give me a new answer. |
 Neuvillette |
About Neuvillette Monsieur Neuvillette intentionally maintains a certain "distance" in professional and private settings. Many say this makes him cold and unfeeling, but I believe the truth is just the opposite. In order for all beings to be treated equally under the law, a certain level of emotional distance is expected. Maintaining that kind of indifference is, in itself, a demonstration of kindness. |
 Pantalone |
About Regrator I won't deny that he is a capable and imaginative individual, but he lacks "clarity." He can formulate grand plans and manipulate the economy with ease, yet at the same time, he allows his actions to be governed by the vengeance and hatred locked in the depths of his heart. Rational people often believe themselves capable of controlling their emotions, but I believe that confidence is their greatest weakness. |
 Pierro |
About The Jester As the original Harbinger, much about him remains a mystery. Upon our first meeting, he recognized my background with ease, yet to this day, I know little about him. |
 Pulcinella |
About The Rooster The Rooster holds little love for me, and the feeling is mutual. He is an acceptable mayor, I suppose... perhaps even an exceptional one. He has an uncanny ability to make great gains at a small price, which has earned him substantial acclaim throughout his political circles. However "small" the price may be, if it continues to come at the expense of my organization, sooner or later... Hmph. |
|
Sandrone
|
About Marionette Research: I have little interest in her. She is extremely... passionate about her research and does not appear in public often. In fact, many of our officers have yet to see her at all. Compared to, let's say, someone who would go so far as to create segments of themselves to better wander across the land, I suppose you could say she is at the other end of the extreme. Return: After experiencing so much in Nod-Krai together, I've come to realize my previous assessment was unfair. She's a reliable comrade and'a reassuring companion. On the eve of another harsh winter, every additional pair of hands is welcome, so I'm glad that Sandrone has returned. Her presence provides comfort to the children. |
|
Tartaglia
|
About Childe Objectively speaking, his personality is ill-suited to that of a Harbinger. He often tries to think the best of others... and finds himself used by them as a result. Of course, he is very talented. With time, I'm sure he'll come into his own. I see no need to judge him too early. |
 Tsaritsa |
About Tsaritsa When I was imprisoned, it was the Tsaritsa who pardoned me and gave me the title of Harbinger. I could sense she was a person of true sincerity and compassion, unlike all those pompous hypocrites with their posturing and rhetoric. Yet... It's difficult to say whether her compassion alone is enough to melt the ice and snow that permeates her land. All I can say is this... If we are forced to be at odds one day, I will raise my weapon against her without hesitation, because that is the greatest level of respect I am able to bestow. |
Arlecchino Release Date
| Genshin Impact Version 4.6 | |
|---|---|
 |
|
| Release Date | April 24, 2024 |
Arlecchino made her official debut as a playable character on Phase 1 of Version 4.6, which started on April 24, 2024.
Genshin Impact Related Guides

All Characters and Voice Actors
List of All Characters
| Characters by Element | |||
|---|---|---|---|
 Pyro |
 Anemo |
 Electro |
 Hydro |
 Dendro |
 Geo |
 Cryo |
|
Playable Characters
 Chasca
 Faruzan
 Heizou
 Ifa
 Jahoda
 Jean
 Lan Yan
 Mizuki
 Prune
 Sayu
 Traveler (Anemo)
 Varka
 Venti
 Vesna
 Xianyun
 Xiao
 Aloy
 Ayaka
 Charlotte
 Chongyun
 Eula
 Ganyu
 Kaeya
 Layla
 Lohen
 Mika
 Odette
 Qiqi
 Shenhe
 Skirk
 Traveler (Cryo)
 Wriothesley
 Alhaitham
 Baizhu
 Kaveh
 Kinich
 Kirara
 Lauma
 Nefer
 Tighnari
 Traveler (Dendro)
 Yaoyao
 Alyosha
 Beidou
 Clorinde
 Cyno
 Dori
 Flins
 Keqing
 Lisa
 Ororon
 Raiden
 Razor
 Sara
 Sethos
 Shinobu
 Traveler (Electro)
 Yae Miko
 Albedo
 Chiori
 Gorou
 Illuga
 Itto
 Kachina
 Linnea
 Ningguang
 Noelle
 Traveler (Geo)
 Yun Jin
 Zibai
 Aino
 Ayato
 Barbara
 Dahlia
 Kokomi
 Mona
 Mualani
 Nilou
 Sigewinne
 Traveler (Hydro)
 Vodyanitsa
 Amber
 Dehya
 Diluc
 Durin
 Gaming
 Hu Tao
 Klee
 Mavuika
 Traveler (Pyro)
 Xinyan
 Yanfei
 Yoimiya
Upcoming Characters
| All Upcoming Characters |
 Alice |
Capitano
|
 Dainsleif |
 Danica |
|---|---|---|---|
|
Dottore
|
 Mitya |
 Noy |
Pantalone
|
|
Pierro
|
Pulcinella
|
 Rerir |
Tsaritsa
|
 Valeriy |
|||
Character Lists
| Characters by Rarity | |
|---|---|
| 5-Star Characters | 4-Star Characters |
| Free Characters | |
| Characters by Weapon Used | |
| Sword Users | Claymore Users |
| Polearm Users | Bow Users |
| Catalyst Users | |
| Characters by Role | |
| Main DPS Characters | Sub DPS Characters |
| Support Characters | Healers |
| Shield Characters | Buff Providers |
| Best for Exploration | Local Specialty Passives |
| Double Reward Passives | |
| Characters by Gender | |
| Male Characters | Female Characters |
| Short Male Characters | Short Female Characters |
| Medium Male Characters | Medium Female Characters |
| Tall Male Characters | Tall Female Characters |
| Characters by Height | |
| Short Characters | Medium Characters |
| Tall Characters | |
| Characters by Region | |
| Mondstadt Characters | Liyue Characters |
| Inazuma Characters | Sumeru Characters |
| Fontaine Characters | Natlan Characters |
| Nod-Krai Characters | Snezhnaya Characters |
Comment
 Anonymous about 1 month
well i was guessing mona to be there in top teams ???




Arlecchino Best Builds and Teams

Premium Articles

Rankings
- We could not find the message board you were looking for.
Gaming News





Popular Games

Genshin Impact Walkthrough & Guides Wiki
Fire Emblem: Fortune's Weave (FEFW) Walkthrough & Guides Wiki
Aniimo Walkthrough & Guides Wiki
Wuthering Waves Walkthrough & Guides Wiki
Dragon's Dogma 2 (DD2) Dark Arisen Walkthrough & Guides Wiki
Umamusume: Pretty Derby Walkthrough & Guides Wiki
Honkai: Star Rail Walkthrough & Guides Wiki
Zenless Zone Zero Walkthrough & Guides Wiki
Pokemon TCG Pocket (PTCGP) Strategies & Guides Wiki
AION 2 Walkthrough & Guides Wiki









Recommended Games
Where Winds Meet Walkthrough & Guides Wiki
Fire Emblem Heroes (FEH) Walkthrough & Guides Wiki
Diablo 4: Lord of Hatred Walkthrough & Guides Wiki
Super Smash Bros. Ultimate Walkthrough & Guides Wiki
Persona 3 Reload Walkthrough & Guides Wiki
The Legend of Zelda: Tears of the Kingdom Walkthrough & Guides Wiki
Elden Ring Walkthrough & Guides Wiki
Pokemon Brilliant Diamond and Shining Pearl (BDSP) Walkthrough & Guides Wiki
Cyberpunk 2077: Ultimate Edition Walkthrough & Guides Wiki
Monster Hunter World Walkthrough & Guides Wiki










All rights reserved
Copyright© 2012-2024 HoYoverse — COGNOSPHERE. All Rights Reserved.
The copyrights of videos of games used in our content and other intellectual property rights belong to the provider of the game.
The contents we provide on this site were created personally by members of the Game8 editorial department.
We refuse the right to reuse or repost content taken without our permission such as data or images to other sites.
would you suck it?