
Spiral Abyss Floor 11 Guide for Version 7.1 (October 2026)
Travelers, participate in Game8's Version 7.1 Survey!
◆ Hot: 7.2 Livestream & Codes, 7.1 Tier List
◆ Builds: Vesna, Vodyanitsa, Skirk, Escoffier
◆ 7.1: Snowball Fight, 2026 Anniversary
◆ Future: Version 7.2, Mitya, Valeriy
Spiral Abyss Floor 11 is the second to the last floor of the Spiral Abyss domain in Genshin Impact. Check out Spiral Abyss Floor 11 in Version 7.1 (October 2026), the best teams and characters, chamber enemies and guides, and the rewards here!
Floor 11 Basic Information
Floor 11 Information and Rewards
| Ley Line Disorder |
• All party members gain a 60% Anemo DMG Bonus. • All party members gain a 60% Cryo DMG Bonus. |
|---|---|
| Enemy Level | Lv. 88 - Lv. 92 |
| Star Bounty (All 9★) |
 Mora
x60,000  Primogem
x200 |
| Rewards |
 Domain Reliquary - Tier I
 Domain Reliquary - Tier II
Blessing of the Abyssal Moon: Stardread Moon
| Blessing Effect | |
|---|---|
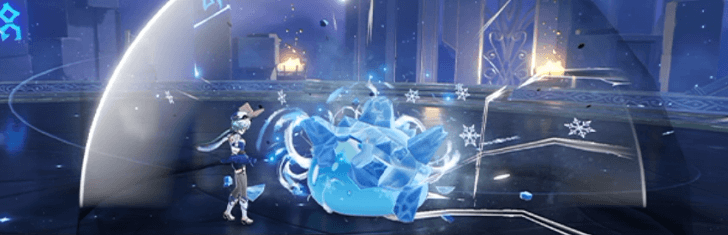 When a character triggers a Superconduct, Stellar-Conduct, Cryo Swirl, Stellar Swirl, Frozen, or Shatter reaction on an opponent, or deals Stellar-Conduct or Stellar Swirl DMG to an opponent, a shockwave will be unleashed at the opponent's position, dealing True DMG. This effect can be triggered once every 2s. |
|
| Blessing Reset | 2026/11/16 4:00 (Server Time) |
Floor 11 Recommended Teams
Best Team Comps For Floor 11
First Half
| Stellar-Swirl | |||
|---|---|---|---|
 Cryo |
 Anemo |
Any | Any |
| Anemo DPS | |||
|
Anemo
|
Anemo
|
Any | Any |
For the first half, the chambers incentivize the usage of Anemo characters and attacks, even more so with Stellar-Swirl reactions to satisfy the Blessing Effect.
Second Half
| Freeze | |||
|---|---|---|---|
|
Cryo
|
 Hydro |
Any | Any |
| Stellar-Conduct | |||
|
Cryo
|
 Electro |
Any | Any |
You can use almost any team for the second half, but teams like Freeze and Stellar-Conduct are more advantageous due to the Ley Line Disorders.
For the most part, these teams can clear Floor 11 with ease, but Chamber 1 might need you to have one slot for a grouper or taunter. For the first half of Chamber 2 and 3, you might need a healer to remove the effects of the Radiant Cocoon caused by the Radiant Beasts.
Best Characters to Use
First Half
| Sample Teams | |||
|---|---|---|---|
 Vesna |
 Odette |
 Traveler (Cryo) |
 Vodyanitsa |
 Mizuki |
Traveler (Cryo)
|
 Qiqi |
 Sucrose |
 Xiao |
 Furina |
 Faruzan |
 Xianyun |
Second Half
| Sample Teams | |||
|---|---|---|---|
 Sandrone |
 Yae Miko |
Odette
|
 Alyosha |
 Wriothesley |
Odette
|
Yae Miko
|
 Diona |
 Skirk |
Furina
|
Vodyanitsa
|
 Escoffier |
Floor 11 - Chamber 1 Guide
Chamber Information
| Challenge |
Defeat 24 Opponents Defeat 24 Opponents |
||||
|---|---|---|---|---|---|
| Goal |
★ Target defense progress greater than 20%. ★ Target defense progress greater than 40%. ★ Target defense progress greater than 60%. |
||||
Floor 11 - Chamber 1 First Half
Floor 11-1-1 Enemies
 Oprichniki Grenadier
 Oprichniki Line Trooper
 Close Combat Storm Landcruiser
 Force Recon Scout Landcruiser
 Close Combat Scout Landcruiser
 Force Recon Ground Effect Landcruiser
Floor 11-1-1 Strategy
This floor consists of 8 waves of 3 enemies each that spawn clockwise around the Monolith. They can all be cleared out easily, and each wave should be cleared at the same time to prevent any stragglers from hitting the Monolith in case you prematurely move onto the next wave.
Immediately attack the enemies as soon as they spawn to draw their attention to you instead of the Monolith. As much as possible, you want to make sure they do not damage the Monolith in this half at all.
Floor 11 - Chamber 1 Second Half
Floor 11-1-2 Enemies
| Second Half Enemies | |
|---|---|
 Large Hydro Slime
x24 |
Floor 11-1-2 Strategy
This is the same principle as the first half's chamber, but is more challenging, as its more difficult to draw the attention of the Slimes. This chamber is meant to be cleared with a Freeze comp team, but it can also be done with a Stellar-Conduct team.
Namely, you need a grouper to keep the Slimes away from the Monolith, or a taunter to keep their aggro onto you. This is then paired with a unit with a consistent Cryo applicator to freeze all the Hydro Slimes in place or a strong AoE potential to deal group damage.
Floor 11 - Chamber 2 Guide
Chamber Information
| Challenge |
Defeat 3 Opponents Defeat 4 Opponents |
||||
|---|---|---|---|---|---|
| Goal |
★Remaining challenge time longer than 60 sec. ★Remaining challenge time longer than 180 sec. ★Remaining challenge time longer than 300 sec. |
||||
Floor 11 - Chamber 2 First Half
Floor 11-2-1 Enemies
| First Half Enemies | |
|---|---|
 Hydro Hilichurl Rogue
x2 |
 Radiant Bladehorn
x1 |
Floor 11-2-1 Strategy
Spawns two Hydro Hilichurl Rogues, then a Radiant Bladehorn. The Hydro Hilichurl Rogues can be countered by defeating its Hydro Slime summon.
The Radiant Bladehorn can be defeated by using a healer to heal you back to full HP to remove the effects of its Radiant Cocoon. Do note that while affected by the Radiant Cocoon, all characters cannot deal Crit attacks until healed back to full HP.
Floor 11 - Chamber 2 Second Half
Floor 11-2-2 Enemies
| Second Half Enemies | |
|---|---|
 Rockfond Rifthound |
 Thundercraven Rifthound |
Floor 11-2-2 Strategy
Spawns two waves of two Rifthounds. Brute force through each with any element and use a healer to counter its corrosion attacks.
Floor 11 - Chamber 3 Guide
Chamber Information
| Challenge |
Defeat 3 Opponents Defeat 1 Opponent |
||||
|---|---|---|---|---|---|
| Goal |
★Remaining challenge time longer than 180 sec. ★Remaining challenge time longer than 300 sec. ★Remaining challenge time longer than 420 sec. |
||||
Floor 11 - Chamber 3 First Half
Floor 11-3-1 Enemies
| First Half Enemies | |
|---|---|
 Oprichniki Thunderblitz Gvardiya
x1 |
 Oprichniki Fireblade Shock Trooper
x1 |
 Radiant Antelope
x1 |
|
Floor 11-3-1 Strategy
Spawns one Oprichniki Thunderblitz Gvardiya, then a Oprichniki Fireblade Shock Trooper, and a Radiant Antelope in the last wave. All three can be brute forced, but be careful against the Radiant Antelope due to its Radiant Cocoon.
Floor 11 - Chamber 3 Second Half
Floor 11-3-2 Enemies
| Second Half Enemies | |
|---|---|
 Millennial Pearl Seahorse
x1 |
Floor 11-3-2 Strategy
The Millennial Pearl Seahorse's has a Xenomare Pearl on its chest, which is kind of an Electro shield, where it draws all its powers. It can be removed quickly by using Cryo attacks or a Stellar-Conduct reaction, which is fairly easy to do as the target is already affected by Electro.
After the Xenomare Pearl is removed, the Seahorse is weakened, and can be bursted with a flurry of attacks.
Floor 11 Clear Rewards
Chamber's Bounty
| Chamber 1 |
Mora
x30,000 Hero's Wit
x2 |
|---|---|
| Chamber 2 |
Mora
x30,000 Hero's Wit
x2 |
| Chamber 3 |
Mora
x30,000 Hero's Wit
x2 |
 Adventurer's Experience
 Mystic Enhancement Ore
The Chamber's Bounty is the set of rewards you receive simply for clearing a Chamber for the first time. This can only be received once.
Star's Bounty
| 3★ |
Mora
x15,000 Primogem
x50 |
|---|---|
| 6★ |
Mora
x20,000 Primogem
x50 |
| 9★ |
Mora
x25,000 Primogem
x100 |
The Star's Bounty can only be received if you clear the star requirements displayed during the challenge. Each Chamber has 3 stars each with 1 prize for every 3 earned. These can also only be received once.
Genshin Impact Related Guides
Spiral Abyss Guides
Spiral Abyss Floor Guides
| Spiral Abyss Floors | |||
|---|---|---|---|
 Floor 1 |
 Floor 2 |
 Floor 3 |
 Floor 4 |
 Floor 5 |
 Floor 6 |
 Floor 7 |
 Floor 8 |
 Floor 9 |
 Floor 10 |
 Floor 11 |
 Floor 12 |
Comment
 Anonymous 9 days
I used Flins, Columbina, Ororon, and Vodyanitsa for the second part.




Spiral Abyss Floor 11 Guide for Version 7.1 (October 2026)

Premium Articles

Rankings
Gaming News


Popular Games

Genshin Impact Walkthrough & Guides Wiki
Fire Emblem: Fortune's Weave (FEFW) Walkthrough & Guides Wiki
Aniimo Walkthrough & Guides Wiki
Wuthering Waves Walkthrough & Guides Wiki
Dragon's Dogma 2 (DD2) Dark Arisen Walkthrough & Guides Wiki
Umamusume: Pretty Derby Walkthrough & Guides Wiki
Honkai: Star Rail Walkthrough & Guides Wiki
Zenless Zone Zero Walkthrough & Guides Wiki
Pokemon TCG Pocket (PTCGP) Strategies & Guides Wiki
AION 2 Walkthrough & Guides Wiki









Recommended Games
Where Winds Meet Walkthrough & Guides Wiki
Fire Emblem Heroes (FEH) Walkthrough & Guides Wiki
Diablo 4: Lord of Hatred Walkthrough & Guides Wiki
Super Smash Bros. Ultimate Walkthrough & Guides Wiki
Persona 3 Reload Walkthrough & Guides Wiki
The Legend of Zelda: Tears of the Kingdom Walkthrough & Guides Wiki
Elden Ring Walkthrough & Guides Wiki
Pokemon Brilliant Diamond and Shining Pearl (BDSP) Walkthrough & Guides Wiki
Cyberpunk 2077: Ultimate Edition Walkthrough & Guides Wiki
Monster Hunter World Walkthrough & Guides Wiki










All rights reserved
Copyright© 2012-2024 HoYoverse — COGNOSPHERE. All Rights Reserved.
The copyrights of videos of games used in our content and other intellectual property rights belong to the provider of the game.
The contents we provide on this site were created personally by members of the Game8 editorial department.
We refuse the right to reuse or repost content taken without our permission such as data or images to other sites.
i used vesna team and skirk team btw not p2w took me a long time but it was very easy to clear, recommend setup! party consists of: vesna, odette, cryo traveller, vodyanitsa. Skirk setup is: skirk, furina, shenhe and columbina just to apply hydro, i dont have escoffier yet. although ik that there are better in slots, i just use columbina because she is built.