
Spiral Abyss Floor 12 Guide for Version 7.1 (October 2026)
Travelers, participate in Game8's Version 7.1 Survey!
◆ Hot: 7.2 Livestream & Codes, 7.1 Tier List
◆ Builds: Vesna, Vodyanitsa, Skirk, Escoffier
◆ 7.1: Snowball Fight, 2026 Anniversary
◆ Future: Version 7.2, Mitya, Valeriy

Spiral Abyss Floor 12 is the final floor of the Spiral Abyss domain in Genshin Impact. Check out Spiral Abyss Floor 12 in Version 7.1 (October 2026), the best teams and characters, chamber enemies, guides, and the rewards here!
Floor 12 Basic Information
Floor 12 Information and Rewards
| Ley Line Disorder |
・First Half: Characters' Stellar Glimmer reaction DMG increased by 75%. ・Second Half: All party members gain a 75% Cryo DMG Bonus. |
|---|---|
| Enemy Level | Lv. 95 - Lv. 100 |
| Star Bounty (All 9★) |
 Mora
x60,000  Primogem
x200 |
| Rewards |
 Domain Reliquary - Tier I
 Domain Reliquary - Tier II
Blessing of the Abyssal Moon: Stardread Moon
| Blessing Effect | |
|---|---|
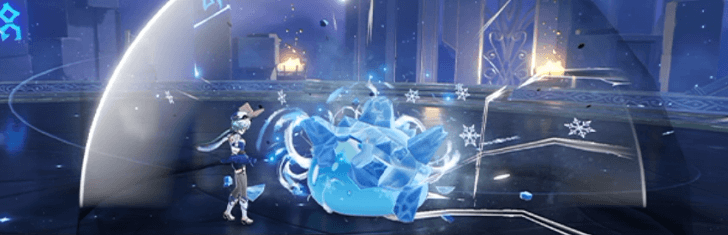 When a character triggers a Superconduct, Stellar-Conduct, Cryo Swirl, Stellar Swirl, Frozen, or Shatter reaction on an opponent, or deals Stellar-Conduct or Stellar Swirl DMG to an opponent, a shockwave will be unleashed at the opponent's position, dealing True DMG. This effect can be triggered once every 2s. |
|
| Blessing Reset | 2026/11/16 4:00 (Server Time) |
Floor 12 Recommended Teams
Best Team Comps For Floor 12
First Half
| Stellar Glimmer | |||
|---|---|---|---|
| Stellar Linchpin | Anemo or Cryo or Electro | Healer | Any |
Because of the first half's enemy lineup and the Leyline Disorder, Stellar-Glimmer teams in general are especially strong for this Chamber. Make sure to bring a healer for Chamber 2's Radiant Moonfly.
Second Half
| Cryo Core | |||
|---|---|---|---|
 Cryo |
Cryo
|
Any | Any |
Most Cryo core teams can work well for this half due to the increase in Cryo DMG, and so teams like Freeze, Melt, or Stellar-Conduct can work well for this.
Best Characters to Use
First Half
| Sample Teams | |||
|---|---|---|---|
 Vesna |
 Odette |
 Vodyanitsa |
 Faruzan |
 Sandrone |
Odette
|
 Alyosha |
 Yae Miko |
 Mizuki |
Odette
|
 Traveler (Cryo) |
 Sucrose |
Second Half
| Sample Teams | |||
|---|---|---|---|
 Skirk |
 Escoffier |
 Furina |
Vodyanitsa
|
 Lohen |
Escoffier
|
 Mona |
Vodyanitsa
|
|
Sandrone
|
Odette
|
Alyosha
|
Yae Miko
|
Floor 12 - Chamber 1 Guide
Chamber Information
| Challenge |
Defeat 1 Opponent Defeat 3 Opponents |
||||
|---|---|---|---|---|---|
| Goal |
★Remaining challenge time longer than 180 sec. ★Remaining challenge time longer than 300 sec. ★Remaining challenge time longer than 420 sec. |
||||
Floor 12 - Chamber 1 First Half
Floor 12-1-1 Enemies
| Wave 1 | |
|---|---|
 Furiosa |
|
Floor 12-1-1 Strategy
Furiosa's entire attacks rely on her roots being on the field for more than a few seconds, so target them with your attacks as they spawn. Afterwards, she becomes more of a damage check, allowing you to burn through her HP over time.
Floor 12 - Chamber 1 Second Half
Floor 12-1-2 Enemies
| Wave 1 | |
|---|---|
 Iniquitous Baptist
- Caller of Flood, Flame, and Fulmination |
|
| Wave 2 | |
 Shadowy Husk: Standard Bearer
x1 |
 Shadowy Husk: Defender
x1 |
Floor 12-1-2 Strategy
The Iniquitous Baptist spawns with an Electro, Hydro, then Pyro Shield in that order. A Freeze or Stellar-Conduct team counters these elements completely, so make sure you at least have the presence of Cryo and another element in your team to break the shields.
During the third shield's downtime, try your best to finish him off before he resets the shield rotation. As for the two Shadowy Husks, aim for the Defender since the Standard Bearer will stick to you.
Floor 12 - Chamber 2 Guide
Chamber Information
| Challenge |
Defeat 1 Opponent Defeat 1 Opponent |
||||
|---|---|---|---|---|---|
| Goal |
★Remaining challenge time longer than 180 sec. ★Remaining challenge time longer than 300 sec. ★Remaining challenge time longer than 420 sec. |
||||
Floor 12 - Chamber 2 First Half
Floor 12-2-1 Enemies
| Wave 1 | |
|---|---|
 Radiant Moonfly |
|
Floor 12-2-1 Strategy
The Radiant Moonfly can be beaten with almost any element, but it requires you to have a healer to counter its Radiant Cocoon.
After its first instance of Radiant Cocoon has been countered, you will likely have enough time to defeat it before it summons a new one.
Floor 12 - Chamber 2 Second Half
Floor 12-2-2 Enemies
| Wave 1 | |
|---|---|
 Hiljetta |
|
Floor 12-2-2 Strategy
Hiljetta will attempt to summon Battle Armor midway into the fight, which is countered by Freeze or Overload reactions. You will likely have Freeze for this occasion, so make sure to try and lock her down in place.
If she gains her Battle Armor, you will need to brute force through the fight, which requires more effort but is entirely possible.
Floor 12 - Chamber 3 Guide
Chamber Information
| Challenge |
Defeat 1 Opponent Defeat 1 Opponent |
||||
|---|---|---|---|---|---|
| Goal |
★Remaining challenge time longer than 180 sec. ★Remaining challenge time longer than 300 sec. ★Remaining challenge time longer than 420 sec. |
||||
Floor 12 - Chamber 3 First Half
Floor 12-3-1 Enemies
| Wave 1 |
|---|
 Chimeric Winged Lion |
Floor 12-3-1 Strategy
It is imperative that you break the Chimeric Winged Lion's initial Electro Shield, so start with using all your Elemental attacks to break down the shield. Once it's down, the Chimeric Winged Lion will attempt to fly around and reposition.
If you are in a position to hit them while they are in the air, do so. If not, prepare to move to the edges of the arena where it will be, and stand next to it to avoid the lasers it will fire. During this time, you should be damaging it since it will turn into a DPS check afterwards.
Floor 12 - Chamber 3 Second Half
Floor 12-3-2 Enemies
| Wave 1 |
|---|
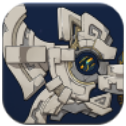 Secret Source Automaton: Overseer Device |
Floor 12-3-2 Strategy
One thing to note about the Overseer Device is that its Flow Momentum generation is slowed by the frequency of Cryo attacks and not their damage.
This means that so long as you have consistent Cryo application, you can prevent it from gaining additional resistances with Flow Momentum, and you can focus on damaging it down.
Floor 12 Clear Rewards
Chamber's Bounty
| Chamber 1 |
Mora
x25,000 Hero's Wit
x2 |
|---|---|
| Chamber 2 |
Mora
x25,000 Hero's Wit
x2 |
| Chamber 3 |
Mora
x25,000 Hero's Wit
x2 |
 Adventurer's Experience
 Mystic Enhancement Ore
The Chamber's Bounty is the set of rewards you receive simply for clearing a Chamber for the first time. This can only be received once.
Star's Bounty
| 3★ |
Mora
x15,000 Primogem
x50 |
|---|---|
| 6★ |
Mora
x20,000 Primogem
x50 |
| 9★ |
Mora
x25,000 Primogem
x100 |
The Star's Bounty can only be received if you clear the star requirements displayed during the challenge. Each Chamber has 3 stars each with 1 prize for every 3 earned. These can also only be received once.
Genshin Impact Related Guides
Spiral Abyss Guides

Spiral Abyss Floor Guides
| Spiral Abyss Floors | |||
|---|---|---|---|
 Floor 1 |
 Floor 2 |
 Floor 3 |
 Floor 4 |
 Floor 5 |
 Floor 6 |
 Floor 7 |
 Floor 8 |
 Floor 9 |
 Floor 10 |
 Floor 11 |
 Floor 12 |
Comment
 Anonymous about 1 month
not everyone wants to use/play with lunar characters dingbat




Spiral Abyss Floor 12 Guide for Version 7.1 (October 2026)

Premium Articles

Rankings
- We could not find the message board you were looking for.
Gaming News



Popular Games

Genshin Impact Walkthrough & Guides Wiki
Fire Emblem: Fortune's Weave (FEFW) Walkthrough & Guides Wiki
Aniimo Walkthrough & Guides Wiki
Wuthering Waves Walkthrough & Guides Wiki
Dragon's Dogma 2 (DD2) Dark Arisen Walkthrough & Guides Wiki
Umamusume: Pretty Derby Walkthrough & Guides Wiki
Honkai: Star Rail Walkthrough & Guides Wiki
Zenless Zone Zero Walkthrough & Guides Wiki
Pokemon TCG Pocket (PTCGP) Strategies & Guides Wiki
AION 2 Walkthrough & Guides Wiki









Recommended Games
Where Winds Meet Walkthrough & Guides Wiki
Fire Emblem Heroes (FEH) Walkthrough & Guides Wiki
Diablo 4: Lord of Hatred Walkthrough & Guides Wiki
Super Smash Bros. Ultimate Walkthrough & Guides Wiki
Persona 3 Reload Walkthrough & Guides Wiki
The Legend of Zelda: Tears of the Kingdom Walkthrough & Guides Wiki
Elden Ring Walkthrough & Guides Wiki
Pokemon Brilliant Diamond and Shining Pearl (BDSP) Walkthrough & Guides Wiki
Cyberpunk 2077: Ultimate Edition Walkthrough & Guides Wiki
Monster Hunter World Walkthrough & Guides Wiki










All rights reserved
Copyright© 2012-2024 HoYoverse — COGNOSPHERE. All Rights Reserved.
The copyrights of videos of games used in our content and other intellectual property rights belong to the provider of the game.
The contents we provide on this site were created personally by members of the Game8 editorial department.
We refuse the right to reuse or repost content taken without our permission such as data or images to other sites.
How can I thank Game8 enough for recommending Odette in both the first and second halves?