
7.1 Tier List and the Best Characters as of October 2026
Travelers, participate in Game8's Version 7.1 Survey!
◆ Hot: 7.2 Livestream & Codes, 7.1 Tier List
◆ Builds: Vesna, Vodyanitsa, Skirk, Escoffier
◆ 7.1: Snowball Fight, 2026 Anniversary
◆ Future: Version 7.2, Mitya, Valeriy
This is a Genshin Impact Tier List for Version 7.1 as of October 2026. We rate the best 5-Star and 4-Star characters, the best Main DPS, Sub-DPS, and Support characters, and a C0 rating for each character. We update this guide daily, so check out the latest changes with the 7.1 Tier List!
| Tier List Guides | ||
|---|---|---|
 Character Tier List |
 Best Builds |
 Weapon Tier List |
 Tier List Maker |
 Reroll Tier List |
 Best Team Comp |
List of Contents
Genshin Impact Tier List for Version 7.1
 |
Travelers can now check out our latest Version 7.1 Survey! |
|---|---|
 |
The State of Meta: Stellar-Swirl and 7.1 Banner Breakdown Premium Articles are now available for reading here! |
| Main DPS | Sub-DPS | Support | |
|---|---|---|---|
 |           |       |      |
 |   |     |       |
 |      |        |      |
 |     |          |             |
 |            |         |      |
 |           |      |         |
 |        |      |     |
| Main DPS | Sub-DPS | Support | |
|---|---|---|---|
|  |  |   |
|    | |   |
| |    | |
| |    |      |
|    |         |        |
|     |   |    |
|       |     |   |
| Main DPS | Sub-DPS | Support | |
|---|---|---|---|
|             |      |         |
|        |     |      |
|          |      |     |
|      |   |    |
|     |      |  |
|   |   |    |
| |  | |
Tier list has been updated this September 23, 2026 after the Phase 1 release of Version 7.1.
Version 7.1 Tier List Changes
7.1 Phase 1 Post-Release Changes (September 23, 2026)
| Name | Tier Updates |
|---|---|
|
Vesna
|
 Main DPS NEW Vesna is a highly mobile and highly potent Stellar-Swirl unit, reminiscent of Zibai's gameplay and performance, and is the meta dedicated DPS for Stellar-Swirl but with more accessible supports. With an easy-to-use yet powerful kit, she no doubt solidifies herself in SS as one of the easier-accessibility DPS units in the game. Specifically, Vesna surpasses Zibai not just in power, but also in accessibility due having allies like Qiqi, the Cryo Traveler, and Faruzan in her side of the court for starters, and allies like Odette and Vodyanitsa for more premium usage. While this is not unique to just Vesna, and you can achieve similar effects with other Stellar-Swirl units like Mizuki, the ceiling for Vesna remains higher and is worth investing in if you already have the supports required for a working Vesna team. Now it brings us to her true downside of not exactly being revolutionary at baseline strength due to Mizuki at C2 achieving similar effects. There is the point that Vesna is simply flashier to play and more effective in AoE scenarios, but Mizuki is essentially free and accessible at any time. Vesna herself is so powerful that a large chunk of her damage and effectiveness has to come from the allies present, which is a coin flip on whether or not most people will have these allies in the first place. |
|
Vodyanitsa
|
 SupportNEW Vodyanitsa is in a special state for her release. Being released alongside Vesna would give the impression that she is an ally made for use alongside her, yet Vodya's kit disrupts the entire process of Stellar-Swirl, which is supposedly the selling point for Vesna. What Vodyanitsa does to great effect, however, is being able to serve as another pillar for Freeze teams, which have been forgotten once again since Nod-Krai's runtime. On paper, Vodyanitsa is simple to build, only needing to stack HP on her to reap her full benefits, and functions as a mix of Kokomi and Escoffier without the CRIT debuff of the former and the personal damage of the latter. She makes up for this by having her Elemental Skill both heal allies and shred Cryo and Hydro RES from opponents, with this specific passive making her one of Freeze's strongest supports. Vodyanitsa is still able to operate in Stellar-Swirl teams due to decreasing enemy Anemo RES when she interacts with a Stellar-Vortex in play, but since she normally disrupts the flow of the reaction, only dedicated allies with built-in Stellar-Swirl kits like Vesna can fully utilize her. Since Vodyanitsa is not tied to the Stellar reaction identity that Snezhnaya is going for, she is expected to outlive most of the Stellar characters, though her uses will be considered niche since she is tied down to the Freeze hierarchy. |
|
Mizuki
|
 Main DPS The baseline for Mizuki has increased to C2 due to her more accessible nature from the 7.1 anniversary and the free Constellation from the To Temper Thyself event. She is considered on-par with Vesna C0 on her release despite Mizuki being released a year earlier, and has scaled exceptionally well with the growth of Stellar-Swirl, able to surpass even the likes of Zibai in her current best teams. For this reason, Mizuki is raised to SS to reflect her scaling power as not just a Stellar-Swirl unit, but a standard character soaring high beyond what was expected of them. |
|
Skirk
|
 Main DPS With Vodyanitsa's release, Skirk gains a much needed buff in the form of having another enemy debuffer alongside Escoffier, essentially increasing Skirk's own damage by a sizable margin when both Escoffier and Vodyanitsa are in the same party. |
|
Lohen
|
 Main DPS Similar to Skirk, Lohen gets a small bump in power with the release of Vodyanitsa, cementing her as one of his best allies for Freeze, alongside making Freeze a more viable team comp for Lohen. |
|
Ayaka
|
 Main DPS Ayaka gets an increase to her power due to the release of Vodyanitsa who indirectly buffs her by decreasing enemy Cryo and Hydro RES, which is desperately needed in Ayaka's teams. |
|
Faruzan
|
Support
Faruzan gains value due to the prominence of both Vesna and Mizuki and the overall presence of the Stellar-Swirl comp, which Faruzan contributes to by shredding enemy Anemo RES, and increasing the CRIT DMG of her Anemo allies when she is at C6. |
See the list of all changes here
Tier List Criteria and Notes
Tier List Overview Criteria
As we theorize and test characters, they are not treated as a singular unit but as a core member in their best team comp. In other words, characters should not be judged in isolation. Here you can check the summary of explanations for each tier:
|
SS Tier (Tier 0) |
Characters that stand out as one of the strongest units in their intended team comps, who also have the edge of potentially staying relevant for long periods of time, and are actively in the forefront of supported characters as new ones are released. Main DPS: The sheer damage potential ensures that their longevity can be maintained, not to mention their great ease of use and comfortability to defeat enemies. They greatly utilize existing and any potential future support units as they are able to be inserted in the best team comps within their respective elements. They are the best utilizers of the current best Sub-DPS and Supports and can dominate endgame with ease. Sub DPS: Characters who are the best Elemental Applicators and teammates in several top-tier team comps, all while having good damage of their own. Support: Universal buffer supports whose utility are essential to increase most top-tier team comps' overall damage and comfort, and sustain supports who offer the best talents to prevent your party from ever being wiped out while still having good offensive utility of their own. |
|---|---|
|
S Tier (Tier 0.5) |
Characters that reach their peak strength with the recommended amount of investment, especially with acquiring allies that serve to bring them up to par with more competitive options. There's only small room for improvement and they ensure that you can beat any content with ease. These are all the best characters in their respective elements, but not quite as broken as the characters in the SS-Tier. Main DPS: The starting point of the best characters at the recommended level of investment. They can match up against the best characters in the highest tier but need a little bit more investment in their weapons, constellations, or other equipment. Sub DPS: Characters with superb damage, or are often the core applicators for some relevant team comps in the game. There may be certain alternatives who are able to work better in a particular team comp. Support: Offer one of the best buffs or sustain in their own particular niche, but are less accessible if put to other team comps. |
 A+ Tier (Tier 1) |
Characters who can only become strong with maximum investment on all aspects (artifacts, weapons, team comps, constellations) to achieve similar performance as the other characters in the upper tiers. This is the cut-off point for the strongest characters in their respective roles. Main DPS: Requires max investment on both their own and all three of their other teammates to be able to match up against characters in the upper tiers. Sub DPS: Good Elemental Applicators or damage dealers up until a point, who specifically shine in their own team comps. They are also often used in some niche or specialized team comps. Support: Offer specialized buffs or sustain, but have certain limitations in their own kits that prevent them from being more universal. |
|
A Tier (Tier 1.5) |
Characters with solid performance in their respective roles. They shine in specific team compositions, but not so much on their own. Main DPS: Characters who require max investment, but may still not be enough to compete against the best DPS in the game due to limitations on their kit, stats, or talent scalings, and get no sufficient help from current meta units. Sub DPS: Decent Elemental Application and damage on their respective team comps, but are not entirely required on such parties. Support: Characters who are good at their intended role, but see minimal usage from the top-tier team comps versus the other characters in the higher tiers. |
|
B Tier (Tier 2) |
Characters who can do the job for their respective role, but can be replaced quickly due to mere lack of good numbers from their talents or stats, or are stunted by their own cooldowns and energy requirement. Main DPS: Damage scaling is lower in comparison, but are able to do their job in the right team comp. More often than not, it's better to pick characters who can trigger better reactions. Sub DPS: Offer some manner of application and damage, but are stunted by their own scalings or rate of application. Support: Characters who can offer sustain or buffs and are decent at doing it. However, better alternatives exist, which are easier or more efficient to use in the long run. |
|
C Tier (Tier 3) |
Characters with limited combat utility. You can use these characters if you are truly dedicated, but there are more convenient options than these. Main DPS: Damage scaling is low enough to the point where you might have difficulty clearing some content. Sub DPS: Extremely niche and only offers an advantage over a limited use case and at limited moments. Support: Characters that have some manner of support, but are outright replaced with mediocre characters that are more accessible or useful in a given team comp. |
|
D Tier (Tier 4) |
Characters that are fundamentally limited in almost all areas of their kit. You can use these characters if you don't have anyone else, but we recommend replacing them with a better character for that role. Main DPS: Damage scaling is very low to be able to keep up, even against elite mobs. Sub DPS: Offers no real edge in terms of damage and application against characters in all other tiers. Support: Characters that can offer some manner of support, but has great difficulty in doing so. |
Role Breakdown
| Role | Function |
|---|---|
| Main DPS |
・The main damage dealer of the party, which is often the hypercarry, the on-field driver, or the trigger for Elemental Reactions. ・Damage dealt is mostly from the character being on-field for an extended period of time, often being the final character in your team's rotations. |
| Sub DPS |
・Providers of off-field damage and utility via Elemental Application. These characters focus on helping the Main DPS trigger reactions by setting up the necessary elements, while also dealing damage of their own. ・Characters with Talents that stay on the field even after being switched out. ・Characters with damaging talents that are meant for quick-swap teams. |
| Support |
・Provides support in the form of buffs, shields, heals, or crowd control via the use of their Elemental Skills, Burst or Passive Talents, and are primarily used off-field. ・Have Talents capable for elemental application, not necessarily for dealing damage. |
Tier List by Constellations
|
Constellation levels listed in the Main Tier List are considered the ideal level for that character's role. It is important to note that characters are evaluated in comparison with other characters in the current meta, and as such, may affect their rankings in all tier lists. For example: • Xingqiu's C6 is considered his optimal constellation and is thus ranked on that power level. • Hu Tao and Wriothesley C1 open up new playstyles and combat rotations, and so it may be considered as the better starting point before they are assessed on their power level. |
On Changes to the Tier List
Changes to the tier list are delicate and periodical, and we understand that any changes made to a tier can be drastic and require explanations. Below, you can find four scenarios within a patch's life cycle and our plan of action when it occurs:
| Scenario | Notes |
|---|---|
| A new character releases: Preliminary Rankings | Expect preliminary rankings for a character when they first release. These will not be their final rankings in the version and will always be subject to change. As we'll need time to test their kit out, we urge our readers to treat the rankings on their first week as tentative. These will now be denoted with aNEW symbol. |
| A character's banner will soon end: Final Rankings | Around a week before the new character's banner ends, we will be finalizing our thoughts about the character's tier. While we refer to this as the final ranking, characters released in the future may affect previous characters' overall performances. Those characters will be subjected to change as well. |
| Meta Shifts | Shifts to the combat system like new mechanics or the release of a powerful support character can shake up our tier list. A concrete example of this was Dendro shaking up the meta when it first released, resulting in characters like Shinobu, Keqing, and Thoma, to rise up in rankings. |
| Fixes | Feedback that explains in detail why a character may or may not be in the correct tiering can be reconsidered for deliberation. |
Which Character Do You Think Is the Best?
Polls have been reset for Version 7.1.
With the coming of our newest characters, some of them introduced new mechanics that spiced up the current combat system! What do you think so far about the newest characters? Feel free to discuss in the comments section below!
Version 7.0 Poll Results
 1st |
 Arlecchino
(567 Votes) |
|---|---|
 2nd |
 Odette
(201 Votes) |
 3rd |
 Sandrone
(182 Votes) |
Version 7.0 Release Date and Characters
Previous Versions Poll Results
| 1st | Arlecchino (581 Votes) | |
|---|---|---|
| 2nd | Sandrone (370 Votes) | |
| 3rd |  Nicole (294 Votes) | |
| 1st | Arlecchino (2,236 Votes) | |
| 2nd |  Skirk (1,886 Votes) | |
| 3rd |  Zibai (1,568 Votes) | |
| 1st |  Columbina (1,033 Votes) | |
| 2nd | Arlecchino (963 Votes) | |
| 3rd |  Furina (911 Votes) | |
| 1st | Columbina (1,033 Votes) | |
| 2nd | Arlecchino (963 Votes) | |
| 3rd | Furina (911 Votes) | |
| 1st | Columbina (111 Votes) | |
| 2nd | Arlecchino (67 Votes) | |
| 3rd |  Mavuika (46 Votes) | |
| 1st | Arlecchino (49 Votes) | |
| 2nd | Furina (39 Votes) | |
| 3rd | Mavuika (37 Votes) | |
| 1st | Arlecchino (153 Votes) | |
| 2nd | Furina (105 Votes) | |
| 3rd | Mavuika (99 Votes) | |
| 1st | Arlecchino (236 Votes) | |
| 2nd | Furina (221 Votes) | |
| 3rd | Mavuika (212 Votes) | |
| 1st | Mavuika (239 Votes) | |
| 2nd | Arlecchino (196 Votes) | |
| 3rd | Furina (129 Votes) | |
| 1st | Mavuika (382 Votes) | |
| 2nd | Arlecchino (361 Votes) | |
| 3rd | Skirk (310 Votes) | |
| 1st | Arlecchino (465 Votes) | |
| 2nd | Mavuika (414 Votes) | |
| 3rd |  Xilonen (372 Votes) | |
| 1st | Mavuika (299 Votes) | |
| 2nd | Arlecchino (289 Votes) | |
| 3rd | Xilonen (169 Votes) | |
| 1st | Arlecchino (591 Votes) | |
| 2nd | Mavuika (521 Votes) | |
| 3rd | Xilonen (442 Votes) | |
| 1st | Mavuika (658 Votes) | |
| 2nd | Arlecchino (549 Votes) | |
| 3rd | Xilonen (355 Votes) | |
| 1st | Arlecchino (646 Votes) | |
| 2nd | Xilonen (488 Votes) | |
| 3rd | Furina (470 Votes) | |
| 1st | Arlecchino (404 Votes) | |
| 2nd | Xilonen (250 Votes) | |
| 3rd | Furina (234 Votes) | |
| 1st | Arlecchino (1058 Votes) | |
| 2nd |  Raiden (552 Votes) | |
| 3rd | Furina (6.0 Votes) | |
| 1st | Arlecchino (922 Votes) | |
| 2nd | Furina (423 Votes) | |
| 3rd |  Clorinde (381 Votes) | |
| 1st | Arlecchino (1644 Votes) | |
| 2nd | Furina (561 Votes) | |
| 3rd | Clorinde (504 Votes) | |
| 1st | Arlecchino (1521 Votes) | |
| 2nd | Furina (456 Votes) | |
| 3rd | Raiden (352 Votes) | |
| 1st | Raiden (1440 votes) | |
| 2nd | Furina (1203 votes) | |
| 3rd |  Chiori (975 votes) | |
| 1st | Raiden (2056 votes) | |
| 2nd | Furina (1154 votes) | |
| 3rd |  Navia (980 votes) | |
| 1st | Furina (2760 votes) | |
| 2nd | Raiden (2404 votes) | |
| 3rd |  Nahida (1182 votes) | |
| 1st | Raiden (3510 votes) | |
| 2nd |  Neuvillette (2811 votes) | |
| 3rd |  Hu Tao (1366 votes) | |
| 1st | Raiden (1304 Votes) | |
| 2nd |  Yelan (986 Votes) | |
| 3rd | Nahida (944 Votes) | |
| 1st | Raiden (1017 Votes) | |
| 2nd |  Eula (440 Votes) | |
| 3rd |  Ayaka (438 Votes) | |
| 1st | Raiden (1441 Votes) | |
| 2nd | Ayaka (6.0 Votes) | |
| 3rd |  Alhaitham (519 Votes) | |
| 1st | Raiden (1619 Votes) | |
| 2nd | Nahida (804 Votes) | |
| 3rd |  Ayato (506 Votes) | |
| 1st | Raiden (2260 Votes) | |
| 2nd | Nahida (1016 Votes) | |
| 3rd | Alhaitham (898 Votes) | |
| 1st | Raiden (2555 Votes) | |
| 2nd | Alhaitham (1789 Votes) | |
| 3rd | Nahida (671 Votes) | |
| 1st | Raiden (2380 Votes) | |
| 2nd | Nahida (1420 Votes) | |
| 3rd |  Wanderer (1243 Votes) | |
| 1st | Nahida (2232 Votes) | |
| 2nd |  Kazuha (1173 Votes) | |
| 3rd | Raiden (982 Votes) |
Tier List Latest Updates
Change History
List of Past Changes
| Date | Tier Updates |
|---|---|
| 09/23/2026 |
• Vesna, Vodyanitsa added to the Tier List. • Mizuki promoted to SS-tier from S-tier in Main DPS. • Skirk, Lohen adjusted within S-Tier and A+ Tier in Main DPS respectively. • Ayaka promoted to A-tier from B-tier in Main DPS. • Faruzan promoted to S-tier from A-tier in Support. |
| 08/12/2026 |
• Odette, Alyosha, Cryo Traveler added to the Tier List. • A+ added to the Tier List to better classify units. • Sandrone promoted to SS-tier from S-tier in Main DPS. • Cyno, Wriothesley promoted to SS-tier from A-tier in Main DPS. • Mizuki promoted to S-tier from C-tier in Main DPS. • Mualani, Varesa, Chasca, Kinich, Lohen moved into A+ tier in Main DPS. • Neuvillette, Arlecchino, Klee, Venti demoted to A-tier in Main DPS. • All previous A-tier units moved to B-tier in Main DPS. • Yae Miko promoted to SS-tier from S-tier in Sub-DPS. • Durin, Nicole, Fischl demoted to S-tier from SS-tier in Sub-DPS. • Many characters adjusted within S-Tier until D-Tier to further emphasize baselines. |
| 07/01/2026 |
• Sandrone added to the Tier List. • Adjustments to Skirk, Wriothesley, and Yumemizuki Mizuki in their tiers for Main DPS. • Cyno promoted to A-tier from B-tier in Main DPS. • Yae Miko promoted to S-tier from A-tier in Sub DPS. • Qiqi promoted to S-tier from C-tier in Support. |
| 06/09/2026 | • Lohen added to the Tier List. |
| 05/20/2026 |
• Nicole, Prune introduced in the Tier List. • Varka promoted to SS-tier from S-tier for Main DPS. • Varesa demoted to S-tier from SS-tier in Main DPS. • Venti promoted to S-tier from A-tier in Main DPS and Sub-DPS. • Venti promoted to S-tier from A-tier in Main DPS. • Adjustments to Kinich in his tier for Main DPS. • Adjustments to Durin, Mavuika in their tier for Sub-DPS. • Raiden, Nilou, Shinobu demoted to A-tier from S-tier for Sub-DPS. • Xilonen demoted to S-tier from SS-tier for Support. • Xianyun, Baizhu, Zhongli demoted to A-tier from S-tier for Support. |
| 04/28/2026 | • Adjusted Illuga's position in all Tier Lists. |
| 04/08/2026 |
• Linnea introduced in the Tier List. • Adjustments to Zibai in her tier for Main DPS. • Ineffa promoted to SS-tier from S-tier for Support. |
| 02/25/2026 |
• Varka introduced in the Tier List. • Adjustments to Arlecchino, Mualani, and Neuvillette positions in their respective tier in Main DPS. |
| 02/03/2026 | • Zibai, Illuga introduced in the Tier List. |
| 01/14/2026 |
• Columbina introduced in the Tier List. • Yelan has been demoted from SS-tier to S-tier on her respective tier. • Adjustments to Nefer, Flins, and Skirk positions in their respective tiers in Main DPS. • Adjustments to Ineffa, Lauma, Furina, Escoffier, and Durin positions in their respective tiers in Sub-DPS. |
| 12/03/2025 |
• Durin and Jahoda introduced in the Tier List. • Fischl, Chevreuse, and Sucrose (Support) have been promoted to SS-tier after the Hexerei release. • Mona and Albedo have been promoted to S-tier after the Hexerei release. • Klee, Venti (Main DPS), and Razor have been promoted to A-tier after the Hexerei release. • Xiangling, Xingqiu, Kazuha, and Ororon have been demoted on their respective tiers. • Thoma, Ganyu, Collei, Pyro Traveler, Kokomi have been demoted from A-tier to B-tier in Sub-DPS due to lessening relevance. • Adjustments to Varesa, Flins, Nefer, Mualani, Arlecchino, Chasca, Kinich, Clorinde, Wanderer, Yoimiya, and Itto's positions in their respective tiers in Main DPS. • Adjustments to Yelan, Escoffier, Lauma, Ineffa, Mavuika, Raiden Shogun, Emilie, Chiori, Yae Miko, Aino, Sucrose, Rosaria, and Mona's positions in their respective tiers in Sub-DPS. • Adjustments to Xilonen, Bennett, Iansan, Citlali, Lauma, Zhongli, and Ineffa's positions in their respective tiers in Support. • Removed Zhongli Sub-DPS, Raiden Support, Venti Support in the tier list. |
| 11/03/2025 |
• Varesa, Flins, and Nefer moved to SS Tier from S Tier in the Main Tier List for Main DPS. • Neuvillette and Arlecchino adjusted in the Main Tier List from SS to S for Main DPS. |
| Date | Tier Updates |
|---|---|
| 9/30/2025 | • Added Flins and Aino C6 to the tier list. • Increased the rating of Ineffa in the Main Tier List from S to SS for Sub DPS. • Increased the rating of Aino in the Main Tier List from B to A for Sub DPS. • increased the rank order of Sucrose in the Main Tier List for Support due to Flins, Aino, and Ineffa's release. • Adjusted the C6 tier list to reflect more to current speedrun meta. • Fixed Ayato's C6 Sub-DPS rating which shouldn't exist anymore. |
| 9/10/2025 | • Added Lauma and Aino (C0 only) to the tier list. • Increased rating for the following characters: Nilou, Ineffa (Support), Kokomi (Sub-DPS), and Thoma (Sub-DPS). • Lowered rating for the following characters: Nahida (Sub-DPS and Support), Zhongli (Support), Hu Tao, Lyney, Ayaka, Wriothesley, Clorinde, Yae Miko, Chiori, Jean, Mona (Support), Tartaglia, Diluc, Ayato, Tighnari, Beidou (Sub-DPS), Keqing, Noelle (Main DPS), Sayu (Support), Mika, Freminet, and Ningguang. • Increased tier order on the same tier for the following characters: Skirk, Alhaitham, Sethos, Cyno, Ifa, Rosaria (Sub-DPS), Collei, Sucrose (both Sub-DPS and Support), and Chevreuse. • Dual Rating removed. • Removal or merging of their sub-roles for the following characters: Kokomi (Main DPS), Sucrose (Main DPS), Ayato (Sub-DPS). |
| 7/30/2025 | • Added Ineffa to the tier list. • Tier increased for Kaeya from C-tier to B-tier for Sub-DPS in the Main Tier List. • Tier increased for Kirara from B-tier to A-tier for Support in the Main Tier List. |
| 7/1/2025 | • Fixed Yelan's erroneous C6 placement. |
| 6/26/2025 | • Stygian Onslaught revamp to criteria and tier list now live. • Ayaka and Diluc now receives Dual Rating. • Skirk placed in the SS-tier due to Stygian Onslaught changes. • Tiering increased for Pyro Traveler in Sub-DPS. • Tiering decreased for Nilou, Wanderer, and Eula in their respective roles. • Rank order increased for Emilie, Chiori, and Gaming C6 on their respective roles. • Rank order decreased for Nahida on her respective roles. |
| 6/18/2025 | • Added Skirk and Dahlia to Main DPS and Support respectively. • Ayaka's ranking increased to S-tier. • Decreased Raiden Shogun's Main DPS ranking from S-tier to A-tier. • Mavuika and Chasca's tiers placed higher in their respective ranks. |
| 5/9/2025 | • Decreased Escoffier's ranking below Yelan after reconsidering Escoffier's universality issues. |
| 5/7/2025 | • Added Escoffier to Sub-DPS and Support, and Ifa to Main DPS tier lists. • Increased Ayaka's DPS ranking in the same tier. • Reduced Mizuki's Main DPS tier to C-tier. • Reverted Lan Yan's ranking to A tier. • Reduced Kokomi, Sara, and Yun Jin's tier by one level down. • Reduced Baizhu's Support ranking in the same tier. |
| 3/26/2025 | • Added Varesa and Iansan in the Main DPS and Support Tier Lists respectively. • Moved Gaming back to S tier due to new supports improving his overall performance. • Lowered Raiden Shogun's ranking to S tier in Sub DPS. |
| 2/28/2025 | • Adjusted Mavuika, Xilonen, and Gaming higher in their respective tiers. • Increased Mavuika's position in the C6 tier list. • Increased C0 Wriothesley from B to A tier in the C0 Tier List. • Moved down Kazuha and Nilou in their respective tiers. |
| 2/12/2025 | • Added Mizuki to the Main DPS and Support tier list. • Added Sucrose to the Main DPS tier list alongside Mizuki using similar playstyles. • Moved Lan Yan from A tier to S tier in Support. |
| 1/21/2025 | • Added Lan Yan to the tier list. • Moved Citlali from S tier to SS tier in Support. • Moved Ororon from A tier to S tier in Sub-DPS. • Moved Layla from B tier to A tier in Support. |
| 1/14/2025 | • Revamped the section order of the tier list and consolidated all tier changes within one table. • Finalized tiers for Mavuika and Pyro Traveler, with Citlali still being monitored. |
| 1/2/2025 | • Added Pyro Traveler to the tier list. • Added C6 Mavuika to the Support tier list due mainly for her C4 constellation upgrade which prevents her talent decay. • Adjusted Sethos' C0 Main DPS tier rank from C to B. • Fixed Gaming's C6 Main DPS tier rank from S to A. • Fixed Thoma's C6 Support tier rank from C to B. • Fixed Sara, Shinobu, Dori, Sethos, Freminet inconsistent C6 tier list rank positions. • Fixed Sara's C6 tier rank position. |
| 1/1/2025 | • Added Mavuika and Citlali to the tier list, with the Pyro Traveler pending. • Moved Alhaitham from SS tier to S tier in Main DPS. • Moved Gaming and Ayaka from SS tier to S tier in Main DPS. • Moved Kokomi and Baizhu from SS tier to S tier in Support. • Moved Chevreuse up in the order for Support tier list, her rankings remain the same. • Moved Faruzan from S tier to A tier in Support to match her best characters in the same tier. • Moved Gorou from A tier to B tier in Support to match his best characters in the same tier. • Adjusted Chevreuse's rank order higher in Support on the same tier. • Adjusted Xiao's rank order higher in Main DPS on the same tier. • Adjusted Sethos's rank order higher in Main DPS on the same tier. • Adjusted Navia and Chasca's rank order higher in Main DPS on the same tier. |
| 12/2/2024 | • Moved Chasca from A tier to S tier in Main DPS at C0. • Adjusts Chiori's optimal constellation from C0 to C1 in the Main Tier List, and reverted her C0 rating to A. • Moved Clorinde C6 from S tier to SS teir in Main DPS at C6. This was overlooked and we apologize for the wait. |
| 11/20/2024 | • Added Chasca and Ororon in the tier list. • Moved down Kachina's tier to C-tier in the Sub-DPS Main Tier List. • Navia removed from the Sub-DPS tier list. • Chiori moved up in S-tier in the Sub-DPS Main Tier List due to her performance increasing in value especially in other endgame content like Imaginarium Theater. • Fischl moved up in S-tier in the Sub-DPS C0 tier list. • Furina and Nahida's position has been switched in the Sub-DPS Main and C0 Tier List. • Mualani moved up in the C6 Tier List. • Fixed Lyney and Ayaka's positions in the C0 Main-DPS Tier List. • Fixed Ganyu and Mona's positions in the C0 Sub-DPS Tier List. |
| 10/9/2024 | • Added Xilonen to the Tier List. • Reduced Nahida and Furina's recommended constellations to C0. • Removed Kazuha from the Sub-DPS Tier List. |
| 9/20/2024 | • Fixed Mika's C6 ranking in the C6 Tier List. |
| 9/17/2024 | • Added Kinich to the tier list. • Increased Chevreuse C0 rank up to S tier in the Support C0 Tier List. |
| 8/28/2024 | • Added Mualani and Kachina to the tier list. • Moved Hu Tao down to S tier in the Main DPS Tier List and C6 Tier List. • Moved Clorinde up to S tier in the Main DPS Tier List. • Moved Dehya from C tier to B tier in the Support Tier List. |
| 8/13/2024 | • Updated all icons to feature the characters' names for better accessibility for newer players. • Changed Jean's optimal constellation from C4 to C0. |
| 8/6/2024 | • Added Emilie in the Sub-DPS Tier List. |
| 6/27/2024 | • Increased Sigewinne's overall ranking in the Tier List from C to B. • Increased Sigewinne C6's ranking in the C6 Tier List from B to A. |
| 6/25/2024 | • Added Sigewinne in the Support Tier List. • Reduced Dehya from C2 to C0 for Support. |
| 6/5/2024 | • Added Clorinde and Sethos in the Main DPS Main Tier List. • Moved Albedo to B tier in the Sub-DPS tier list. |
| 6/3/2024 | • Moved Arlecchino above Hu Tao in the Main DPS Main Tier List. • Moved Yoimiya from A to B tier in the Main DPS Main Tier List. • Moved Thoma from C to B tier in the Support Main Tier List. • Moved Xingqiu and Xiangling from SS to S tier in the Sub DPS C0 Tier List. |
| 4/24/2024 | • Added Arlecchino to the Tier List. • Constellation for Neuvillette and Xiao reduced to C0. • Moved Raiden, Navia, Lyney to S tier in the Main-DPS Main Tier List. • Moved Ayato, Tartaglia, Tighnari, Diluc, and Ganyu to A tier in the Main-DPS Main Tier List. • Moved Itto, Cyno, Keqing, Noelle, and Eula to B tier in the Main-DPS Main Tier List. • Moved Yanfei, Heizou, Klee, Kaveh, Ningguang, and Freminet to C tier in the Main-DPS Main Tier List. • Moved Razor and Fischl to D tier in the Main-DPS Main Tier List. • Removed Rosaria, Beidou, Kaeya, Chongyun, Fischl, and Nilou from the Main-DPS Main Tier List to further emphasize their recommended main roles. • Fixed Wriothesley's position in the Main Tier List. |
| 4/2/2024 | • Added Chiori and Xianyun to the C6 tier list for Main DPS. • Fixes Gaming's position in the C6 tier list for Main DPS. |
| 3/13/2024 | • Added Chiori in the tier lists. • Moved Albedo to A-Tier in the Sub-DPS tier list • Moved Nilou up in the Sub-DPS tier list • Moved Ayato to B-tier in the Sub-DPS tier list • Moved Kaeya and Dehya to C-tier in the Sub-DPS tier list • Moved Xinyan to D-tier in the Sub-DPS tier list • Removed Charlotte from the Sub-DPS tier list • Removed Kirara from the Sub-DPS tier list • Removed Chevreuse from the Sub-DPS tier list • Removed Layla from the Sub-DPS tier list • Removed Jean from the Sub-DPS tier list • Removed Candace from the Sub-DPS tier list • Removed Nahida from the Main-DPS tier list • Moved Raiden Shogun below Kazuha in the Sub DPS tier list • Increased Furina's overall support ranking • Adjusted Wriothesley and Navia's C6 tier list for Main DPS. |
| 2/4/2024 | • Added Gaming and Xianyun to the tier list • Moved Navia and Lyney to SS Tier in Main DPS • Moved Diluc to S Tier in Main DPS • Moved Xiao higher in A Tier Main DPS • Moved Itto down to A Tier Main DPS • Moved Furina up to SS tier in Sub-DPS, and changed her constellation to C2. • Moved Kirara down to B Tier Sub-DPS • Moved Baizhu up to SS Tier Support • Removed Support Raiden and Yanfei C4 • Moved Gorou, Venti, Diona, Yunjin, Sara down to A Tier Support • Moved Kirara, Mika, Layla down to B Tier Support • Moved Qiqi, Barbara, Electro Traveler, Thoma, Candace, and Dori down to C Tier Support • Moved Chongyun and Lisa to D Tier Support |
| 2/3/2024 | • Raiden reintroduced to Support Tier List. Initially we removed Raiden Shogun from the Support Tier List to follow through the ongoing simplification of the tier list, as most players who would play Raiden would focus more on her Main or Sub DPS capabilities (similar to Yelan as a Sub-DPS), but this change undervalued Raiden Shogun's support capabilities for her Energy Recharge and Burst buffs, and so we're quickly fixing her absence in this revamped support tier list. |
| 2/2/2024 | • Added Gaming and Xianyun to the tier list • Moved Navia and Lyney to SS Tier in Main DPS • Moved Diluc to S Tier in Main DPS • Moved Xiao higher in A Tier Main DPS • Moved Itto down to A Tier Main DPS • Moved Furina up to SS tier in Sub-DPS, and changed her constellation to C2. • Moved Kirara down to B Tier Sub-DPS • Moved Baizhu up to SS Tier Support • Removed Support Raiden and Yanfei C4 • Moved Gorou, Venti, Diona, Yunjin, Sara down to A Tier Support • Moved Kirara, Mika, Layla down to B Tier Support • Moved Qiqi, Barbara, Electro Traveler, Thoma, Candace, and Dori down to C Tier Support • Moved Chongyun and Lisa to D Tier Support |
| 1/11/2024 | • Added Chevreuse in the tier list. • Slightly adjusts S-tier Support Tier rankings based on current relevance. |
| 12/30/2023 | • Adjusts Ayaka's tier list from SS tier to S tier. • Adjusts Noelle's tiering from B tier to A tier in the Main Tier List and C6 tier list. • Fixes Klee, Diluc, Chongyun, Kaeya, and Beidou's tier positions in the C0 tier list. |
| 12/21/2023 | • Adjusts Navia higher than Lyney in the Main Tier and C0 Tier Lists. |
| 12/20/2023 | • Added Navia in the tier list. • Removed Yelan from the Main DPS in all tier lists except C6. |
| 12/4/2023 | • Removed Heizou from Sub DPS in all Tier Lists • Removed Traveler (Dendro) from Support in all Tier Lists • Removed Traveler (Anemo) from Support in all Tier Lists • Removed Klee from Support in all Tier Lists • Adjusts Yoimiya (Main DPS), Raiden (Sub DPS), and Furina (Sub DPS) tier positions • Fixes wrong or missing tiering in the C0 and C6 tier list for Xinyan, Shinobu, Kaeya, Lisa, Jean, and Zhongli. |
| 12/4/2023 | • Yanfei Main DPS C2 → C1 • Heizou Main DPS C2 → C6 • Kaveh Main DPS C1 → C6 • Xinyan Main DPS C2 → C6 • Shinobu Sub DPS C4 → C0 • Lynette Sub DPS C4 → C0 • Thoma Sub DPS C2 → C4 • Lisa Sub DPS C2 → C4 • Shinobu Support C2 → C0 • Layla Support C4 → C1 • Yaoyao Support C2 → C0 • Barbara Support C2 → C0 • Lisa Support C4 → C0 • Sayu Support C1 → C6 • Dehya Support C0 → C2 |
| 12/4/2023 | • Kaveh Main DPS B → C • Xingqiu Sub DPS S → SS • Xiangling Sub DPS S → SS • Shinobu Sub DPS A → S • Kaeya Sub DPS A → B • Dehya Sub DPS B → C • Dendro Traveler Sub DPS C → B • Shinobu Support B → A |
| 11/9/2023 | • Added Furina and Charlotte to the Tier List. • Removed C6 Ayato from Support Tier List. • Order of characters within the C6 SS Tier adjusted. |
| • Ganyu Main DPS C1 → C0 • Tighnari Main DPS C2 → C0 • Itto Main DPS C2 → C0 • Cyno Main DPS C2 → C0 • Eula Main DPS C1 → C0 • Yae Miko Sub-DPS C2 → C0 • Nilou Sub-DPS C2 → C0 • Geo Traveler Sub-DPS C4 →C6 • Shenhe Support C2 → C0 • Jean Support C2 → C4 | |
| • Tartaglia Main-DPS C6 → S • Tighnari Main-DPS C6 → S • Ganyu Main-DPS C6 → S • Kazuha Sub-DPS C6 → SS • Raiden Sub-DPS C6 → SS • Nilou Sub-DPS C6 → S • Rosaria Sub-DPS C6 → A • Sucrose Sub-DPS C6 → A • Shenhe Support C6 → SS • Mona Support C6 → S • Diona Support C6 → S • Yun Jin Support C6 → S • Gorou Support C6 → S • Jean Support C6 → S • Sucrose Support C6 → S • Faruzan Support C6 → S • Sara Support C6 → S | |
| 10/20/2023 | • Reverted our changes to Wanderer's tier list rankings increase except C6. • Fixed Alhaitham's position in the C6 Tier List. • Fixed Dendro Traveler's optimal constellation from C5 to C6. |
| 10/19/2023 | • Moved Wandere up to S Tier in all Tier Lists. • Increased Lyney's position within S-Tier in the Main Tier List. • Reduced Lyney and Ayato's optimal constellations to C0 in the Main Tier List. • Moved C6 Wanderer and Lyney to SS Tier in the C6 Tier List. |
| 10/17/2023 | • Added Wriothesley to the tier list. • Adjusted Neuvillette and Alhaitham to be higher in the order within the SS tier. |
| 10/2/2023 | • Adjusted Neuvillette's ranking to SS in the Tier List • Removed C6 Thoma from Main DPS in C6 Tier List. • Removed Yun Jin from Main DPS. • Removed Barbara from Main DPS. • Removed Ningguang from Support. • Removed Albedo from Support. • Removed Geo Traveler from Support. • Removed Yelan from Support. |
| 9/27/2023 | • Added Neuvillette to the Tier List • Adjusted Alhaitham's recommended constellation from C1 to C0 in the Main Tier List. |
| 9/6/2023 | • Adjusted Freminet's most impactful constellation to C6, and moved him to B Tier in the Main Tier List and C6 Tier List. |
| 9/5/2023 | • Added Freminet in the tier list. • Removed Candace and Baizhu from the Main DPS tier list. • Moved Dehya in the Main Tier List from C Tier to D Tier. |
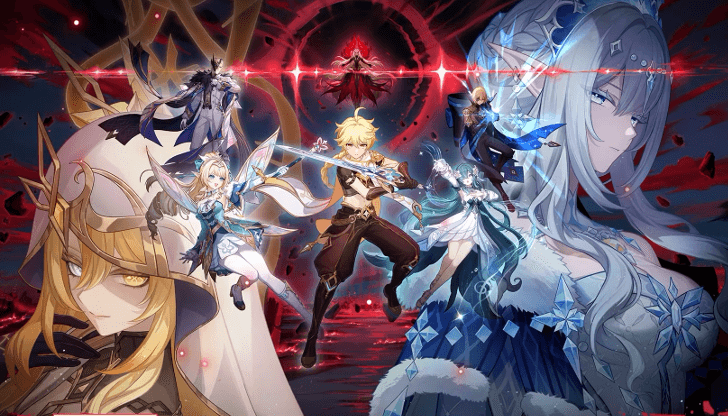
Featured Characters in Version 7.1
| Genshin Impact Version 7.1 | |
|---|---|
 |
|
| Phase 1 Date | September 23, 2026 |
Version 7.1 Featured Characters
| Character | Element | Weapon |
|---|---|---|
 Vesna
(5★) |
||
 Vodyanitsa
(5★) |
||
 Escoffier
(5★) |
||
| Skirk
(5★) |
||
 Faruzan
(4★) |
||
 Diona
(4★) |
||
 Chongyun
(4★) |
 Anemo
 Sword
 Hydro
 Catalyst
 Cryo
 Polearm
 Bow
 Claymore
Best DPS Characters in Genshin
| Jump to a Section | ||
|---|---|---|
 Best DPS |
 Best Sub DPS |
 Best Support |
SS Rank Main DPS Characters
| Character | Assumed Build | ||
|---|---|---|---|
| Sandrone |
Weapon | Artifact | |
 A Teaspoon of Transcendence |
|||
| ・Enables the Stellar-Conduct reaction for the team, as well as being a notable DPS unit due to the innately high powerscale potential of both Sandrone and the reaction she introduces. ・Notably synergizes with old characters that were touched up with the introduction of Stellar-Conduct. |
|||
| Vesna |
Weapon | Artifact | |
 Beyond the Chrysalis |
|||
| ・Enables and is built for Stellar-Swirl, giving her enhanced damage and being able to utilize almost all of her teammates more than most units. ・Gains ATK or Elemental Mastery depending on present members, making her effective regardless of team comp. |
|||
 Traveler (Cryo) |
Weapon | Artifact | |
| ・Solo-capable enabler and trigger for the Stellar reactions, which is currently considered the best in the game. ・Completely accessible without having to work for anything, making this one of their strongest selling points. ・Strong Cryo output due to their infused Normal Attacks. |
|||
 Wriothesley |
Weapon | Artifact | |
 Cashflow Supervision |
|||
| ・Good single-target focused Main DPS who specializes in triggering melt or freeze reactions in close-combat. ・Kit is incomplete without his C1. This constellation also fixes his anti-synergy with certain healers. ・Struggles against spread-out packs of mobs. |
|||
 Cyno |
Weapon | Artifact | |
 Staff of the Scarlet Sands |
|||
| ・Decent Electro hypercarry for Dendro reactions such as Aggravate and Hyperbloom. ・Requires his high-energy Elemental Burst to deal damage, and switching out ends it. ・Poor resistance to interruptions, which affects his recommended tempo for his rotations. |
|||
 Mizuki |
Weapon | Artifact | |
 Sunny Morning Sleep-In |
|||
| ・On-field Anemo driver for Swirl comps, who also buffs Swirl Damage dealt to opponents and can also sustain characters. ・Some off-field presence albeit limiting due to her Elemental Burst limitations. ・Cannot use her Normal Attacks while on her Elemental Skill. ・Great constellations as a Standard Character. |
|||
| Zibai |
Weapon | Artifact | |
 Lightbearing Moonshard |
|||
| ・Lunar-Crystallize DPS that deals a mix of sustained and frontloaded damage with her empowered Elemental Skill, along with an ease of use that lets her clear most endgame content quickly. ・Restricted to Geo and Hydro teammates. |
|||
| Mavuika |
Weapon | Artifact | |
 A Thousand Blazing Suns |
|||
| ・Absurdly high-scalings from her burst damage that can flex as either on-field, off-field or quick-swap. ・Strong in both Vaporize and Melt, which are the best reactions for damage as a Pyro character. ・Exploration ability combines most of the Natlan characters' strengths all in one character. |
|||
 Nefer |
Weapon | Artifact | |
 Reliquary of Truth |
|||
| ・Lunar-Bloom DPS that interacts with Bloom in a unique way, providing a consistent way to operate in Lunar-Bloom teams without dedicated Bloom triggers. ・When placed in a team that can activate Ascendant Gleam, gains access to Seeds of Deceit, which are specialized cores that increase Nefer's damage when consumed. ・Her current best teams are locked to Lunar-Bloom teammates like Lauma and Aino. This may be subject to change in the future, but is quite restrictive as of right now. |
|||
 Flins |
Weapon | Artifact | |
 Bloodsoaked Ruins |
|||
| ・Lunar-Charged on-field DPS who only requires a Hydro to function at his base, in which Aino is the free-to-play option. ・Burst-reliant DPS but it's mitigated by his low Special Burst cost, although he's also reliant on another Electro off-fielder for Energy for his optimal rotation. ・Not much choices in supports as he's locked to Lunar-Charged units, and Nod-Krai supports are still confined to a handful of characters, but future potential might change his course. |
|||
 Disenchantment in Deep Shadows
 Scarlet Proof
 Marechaussee Hunter
 Gilded Dreams
 Viridescent Venerer
 Night of the Sky's Unveiling
 Obsidian Codex
S Rank Main DPS Characters
| Character | Assumed Build | ||
|---|---|---|---|
| Skirk |
Weapon | Artifact | |
 Azurelight |
|||
| ・Dual Ranking of SS-tier with Escoffier, and S-tier without. Reliant to Escoffier to deal the damage required for a character released in 5.X. ・Extremely strong on her best teams in Freeze, but not without. ・Very fluid combat and easy-to-use controls, strong in the overworld while also having an Exploration quirk. |
|||
 Varka |
Weapon | Artifact | |
 Gest of the Mighty Wolf |
|||
| ・Elemental Skill-based DPS that wields both Anemo and another PHEC element at the same time, allowing him to cleave through opponents in Mono-Element teams. ・Contributes to Hexerei teams, meaning his damage with Hexerei allies increases greatly. |
|||
 Finale of the Deep Galleries
 A Day Carved from Rising Winds
A Rank Main DPS Characters
| Character | Assumed Build | ||
|---|---|---|---|
| Arlecchino |
Weapon | Artifact | |
 Crimson Moon's Semblance |
|||
| ・High raw Pyro damage even in non-Vaporize situations or Overloaded teams with Chevreuse. ・Normal Attacks are swift, have a wide AoE, while also having good damage to boot and simple to activate once you learn her rotations, which makes her viable in single target, AoE, and overworld content. ・Extremely high risk gameplay may be off-putting for some early-game players. |
|||
| Neuvillette |
Weapon | Artifact | |
 Tome of the Eternal Flow |
|||
| ・Outstanding and constant damage on his Charged Attack damage. ・Self-sufficiency lets him be a one-man army. ・C1 constellation removes his major weaknesses. |
|||
 Klee |
Weapon | Artifact | |
 Lost Prayer to the Sacred Winds |
|||
| ・Attacks primarily with Normal and Charged Attacks, cleaning up swaths of foes. ・Her clunky playstyle isn't for everyone and requires min-maxing her rotations to play optimally. |
|||
| Ayaka |
Weapon | Artifact | |
 Mistsplitter Reforged |
|||
| ・Infuses Cryo element in Normal and Charged Attacks after sprinting, which makes her infusion near-permanent. ・Elemental Burst has high scaling and its damage potential is her defining trait. With her best supports, she can rival the top-tier DPS, but needs high investment. |
|||
 Venti |
Weapon | Artifact | |
 The Daybreak Chronicles |
|||
| ・On Hexerei teams, Venti becomes an on-fielder powerhouse for Pure Anemo DMG mixed with Swirl. | |||
 Fragment of Harmonic Whimsy
 Blizzard Strayer
B Rank Main DPS Characters
| Character | Assumed Build | ||
|---|---|---|---|
| Clorinde |
Weapon | Artifact | |
 Absolution |
|||
| ・Flexible team-building and snappy playstyle with reliable self-healing in the Overworld. ・Personal damage dependent on the team you are building. ・No resistance to interruption at C0. |
|||
 Gaming |
Weapon | Artifact | |
 Serpent Spine |
|||
| ・Overperforming as a 4-star character at C6 with high plunging damage with his best teams. ・Reliant on his Elemental Burst to be used off-cooldown to deal damage. |
|||
 Razor |
Weapon | Artifact | |
|
A Thousand Blazing Suns
|
|||
| ・Elemental Burst enables consistent Superconduct coverage with his mix of Electro and Physical damage. ・On Hexerei teams, becomes one of the best Electro DMG dealers especially in Overloaded teams at C6. |
|||
| Navia |
Weapon | Artifact | |
 Verdict |
|||
| ・High frontloaded Elemental Skill damage that can instantly one-shot medium level opponents and chunk bosses per rotation. ・Her team allows high flexibility because she's not constricted by mono-Geo. ・Frontloaded damage has downsides when looking at damage over time. |
|||
| Alhaitham |
Weapon | Artifact | |
 Light of Foliar Incision |
|||
| ・Dendro application is superb to set up and trigger powerful reactions like Hyperbloom, Burgeon, and Spread. ・Good AoE coverage and overall team damage is top-tier. He also requires minimal investment. |
|||
 Lyney |
Weapon | Artifact | |
 The First Great Magic |
|||
| ・Passive talent greatly compensates the lack of Elemental Reactions in a Mono-Pyro team. ・High damage on both single target and AoE. ・Susceptible to interruptions. |
|||
| Hu Tao |
Weapon | Artifact | |
 Staff of Homa |
|||
| ・Deals large amounts of single-target Pyro DMG with her Elemental Skill and Charged Attacks. ・Elemental Skill infused Normal and Charged Attacks with Pyro and increase damage at the cost of sacrificing some of her HP. ・C1 lets you spam Charged Attacks without consuming Stamina. |
|||
 Xiao |
Weapon | Artifact | |
 Primordial Jade Winged-Spear |
|||
| ・Elemental Burst increases overall DPS at the cost of his HP. ・Normal Attacks and Elemental Skill set up high DMG combos. ・Requires supports for offensive and healing to perform optimally. |
|||
| Raiden |
Weapon | Artifact | |
 Engulfing Lightning |
|||
| ・Burst enables her to be on-field, which also deals obscene amounts of damage within 7 seconds. ・DEF ignore is an extremely powerful buff from her C2, which makes her a top-tier DPS that can obliterate her enemies within seconds. |
|||
 Tartaglia |
Weapon | Artifact | |
 Polar Star |
|||
| ・Riptide applies strong Hydro application especially against multiple opponents. ・Currently the best driver for Vaporize. |
|||
 Wanderer |
Weapon | Artifact | |
 Tulaytullah's Remembrance |
|||
| ・Normal Attacks have a wide AoE and can home in on enemies. ・Requires proper dedicated supports to perform well at low constellations. ・Elemental Skill allows him to float mid-air, making exploration easy. |
|||
 Nighttime Whispers in the Echoing Woods
 Crimson Witch of Flames
 Vermillion Hereafter
 Emblem of Severed Fate
 Nymph's Dream
 Desert Pavilion Chronicle
C Rank Main DPS Characters
| Character | Assumed Build | ||
|---|---|---|---|
 Yoimiya |
Weapon | Artifact | |
 Thundering Pulse |
|||
| ・Elemental Skill infuses Normal Attacks with Pyro, which has a high base scaling. ・Supports that can improve her resistance to interruption and ATK SPD are needed to improve her overall performance. |
|||
 Diluc |
Weapon | Artifact | |
 Beacon of the Reed Sea |
|||
| ・Weaves Normal Attacks and Elemental Skill together as his combat mechanic, which enables him to use the best supports like Xingqiu for Vaporize. ・Low energy cost for his Elemental Burst, which also covers a wide range. However, this burst pushes back lighter enemies. |
|||
 Itto |
Weapon | Artifact | |
 Redhorn Stonethresher |
|||
| ・High base scaling on his Charged Attacks and Elemental Skill, especially during Burst. ・Requires his high-energy Elemental Burst to start dealing damage, and switching out ends it. ・Requires high investment from his artifacts, weapons, and team comps to deal top-tier damage. |
|||
| Ayato |
Weapon | Artifact | |
 Haran Geppaku Futsu |
|||
| ・Wide range and continuous damage for his Hydro-infused Normal Attacks after using Elemental Skill. ・Can self-buff with his Normal Attack-increasing Elemental Burst. ・Can act as a driver for Hydro-related Elemental Reactions with his on-field and off-field Hydro application. |
|||
 Ganyu |
Weapon | Artifact | |
 Hunter's Path |
|||
| ・Level 2 Charged Shot is great vs mobs of enemies, with high damage potential with Melt. However, it takes a long time to charge, and she's susceptible to interruptions. ・Elemental Burst, in-combination with ally pull-in effects, can quadratically target and attack enemies in one location. |
|||
 Tighnari |
Weapon | Artifact | |
|
Hunter's Path
|
|||
| ・Damage primarily comes from Charged Attacks and Elemental Bursts ・Deals big damage by using the Spread Dendro Elemental Reaction. ・Can distract most enemies with his taunt. |
|||
 Sethos |
Weapon | Artifact | |
|
Hunter's Path
|
|||
| ・Versatile playstyles as he can choose either Charged Attack spamming, or Normal Attack spamming through his Elemental Burst, depending on his current Energy. ・Charged Attack form makes him stationary and susceptible to interruptions. ・Stats is inherintly on the low-side due to him being a 4-star. |
|||
 Ifa |
Weapon | Artifact | |
|
Sunny Morning Sleep-In
|
|||
| ・Comparable to Sucrose and C2 Mizuki as an on-field Swirl Driver but focuses more on Electro-Charged, but he can heal and also use normal attack. ・Tied to a specific character and archetype but otherwise free-to-play friendly. |
|||
 Keqing |
Weapon | Artifact | |
|
Mistsplitter Reforged
|
|||
| ・Good with either Aggravate or Physical build. Recent introduction of the element bumped up her performance and became competitive with other Quicken DPS. | |||
 Noelle |
Weapon | Artifact | |
|
Redhorn Stonethresher
|
|||
| ・Balances ATK and DEF stats for great sustain DMG, with her power spike increasing further with her C6. ・Self-sufficient as well with her shields and healing. |
|||
| Eula |
Weapon | Artifact | |
 Song of Broken Pines |
 Pale Flame
x4 |
||
| ・Elemental Burst covers a significant amount of Eula's overall DMG to a wide range, especially if the enemy is Superconducted. ・Consuming 2 stacks from Elemental Skill debuffs enemies and raises DPS output. ・If Elemental Burst doesn't hit or crit, the bulk of Eula's damage is lost. |
|||
 Shimenawa's Reminiscence
 Husk of Opulent Dreams
 Echoes of an Offering
 Wanderer's Troupe
 Thundering Fury
D Rank Main DPS Characters
| Character | Assumed Build | ||
|---|---|---|---|
 Yanfei |
Weapon | Artifact | |
|
Lost Prayer to the Sacred Winds
|
|||
| ・Good Pyro Normal and Charged attacks user, but scaling for damage is to be expected for a regular 4-star character like her. ・Stamina consumption is big but made easier with C1. |
|||
 Heizou |
Weapon | Artifact | |
|
Tulaytullah's Remembrance
|
|||
| ・Focuses on Swirl DMG or CRIT to do DPS. Can be used as either a driver for Viridescent Venerer, or as a quick-swap burst damage dealer. ・Elemental Skill can easily deal max DMG easily with Swirls as a Catalyst user, although his other damage sources aren't up to par. |
|||
 Kaveh |
Weapon | Artifact | |
 Mailed Flower |
|||
| ・Decent Dendro driver for Bloom-specific teams and buffs. ・Low personal DMG. |
|||
 Freminet |
Weapon | Artifact | |
|
Song of Broken Pines
|
Pale Flame
x4 |
||
| ・Can work as both a Cryo DPS and/or a Physical DPS, depending on the preferred playstyle and teamcomps. ・4-Star rarity weights down his stats to compete with other Main DPS. |
|||
 Ningguang |
Weapon | Artifact | |
|
Lost Prayer to the Sacred Winds
|
|||
| ・Decent Geo DPS damage with a combination of her Normal and Charged Attacks. ・Requires high investment on her constellations to play optimally. |
|||
 Dehya |
Weapon | Artifact | |
|
Beacon of the Reed Sea
|
|||
| ・Deals low Elemental Skill and Burst damage without multiple buffs. Needing a lot of Energy to have her Burst back again. ・Requires more constellations to perform optimally. |
|||
 Xinyan |
Weapon | Artifact | |
|
Redhorn Stonethresher
|
Pale Flame
x2 |
||
| ・Elemental Burst can be used as a nuke damage for Physical Builds. ・Scaling as a a Main DPS, especially with Physical, is split. She will either need to focus on ATK or DEF, which severely impacts her performance. |
|||
 Aloy |
Weapon | Artifact | |
|
Thundering Pulse
|
|||
| ・Can increase own Normal ATK DMG with Elemental Skill, but requires bomblets to be hit by the pellets to gain access to infusion. ・No access to constellations means that her performance is only limited to a point forever. |
|||
 Flower of Paradise Lost
 Vourukasha's Glow
 Bloodstained Chivalry
Best Sub DPS Characters in Genshin
| Jump to a Section | ||
|---|---|---|
| Best DPS |
Best Sub DPS
|
Best Support |
SS Rank Sub-DPS Characters
| Character | Assumed Build | ||
|---|---|---|---|
| Odette |
Weapon | Artifact | |
 Whitelake Frostfeather |
|||
| ・Enables both Stellar-Conduct and Stellar-Swirl, giving her more room in teams. ・Strong auto-tracking Cryo summon that deals Stellar Glimmer damage. ・Enhances existing Stellar-Glimmer damage in the team. |
|||
 Yae Miko |
Weapon | Artifact | |
 Kagura's Verity |
|||
| ・Elemental Skill is easy to use, has a short cooldown, and does a lot of damage, but needs lengthy setup. ・Damage is competitive when run with a Dendro team comp for Aggravate. |
|||
| Columbina |
Weapon | Artifact | |
 Nocturne's Curtain Call |
|||
| ・Applicator of Hydro element while off-field, while bringing formidable damage. ・Gravity Ripple allows her to repeat Lunar damage of teams, which serve as both a Sub-DPS and Support ability. ・Best teams are still pre-existing Lunar teams. |
|||
 Ineffa |
Weapon | Artifact | |
 Fractured Halo |
|||
| ・Enabler for Lunar-Charged reaction that can also CRIT, with great personal damage to boot. ・Superb Electro application with 100% uptime and duration can be reset. ・Great defensive slot as she can also shield. |
|||
 Linnea |
Weapon | Artifact | |
 Golden Frostbound Oath |
|||
| ・Lunar-Crystallize Sub-DPS unit similar to Ineffa in both effectiveness and ease of building, and is able to participate in both sustained and burst playstyles. ・Enables Lunar-Crystallize as a teamwide reaction, allowing her to function independently of other Nod-Krai characters so long as Geo and Hydro are present. |
|||
 Lauma |
Weapon | Artifact | |
 Nightweaver's Looking Glass |
|||
| ・Strong personal damage with Lunar Bloom. ・Consistent Dendro application which can also provide support through Bloom CRITS. |
|||
 Golden Troupe
 Aubade of Morningstar and Moon
 Deepwood Memories
S Rank Sub-DPS Characters
| Character | Assumed Build | ||
|---|---|---|---|
 Durin |
Weapon | Artifact | |
 Athame Artis |
|||
| ・Extremely flexible Pyro Sub-DPS who can fit on any teams that require one. ・Best in slot for Overloaded, Burning, and other Pyro-related reactions that aren't Vaporize or Melt. ・Little to no Energy Recharge requirements if skill is levelled up. |
|||
| Mavuika |
Weapon | Artifact | |
|
A Thousand Blazing Suns
|
|||
| ・Off-field Pyro application, which is easy to access from her Elemental Skill also targets all enemies within the circle, is rare in the game. ・Can still act on-field as a quick-swap option that should still decimate opponents due to its sheer scaling. |
|||
| Furina |
Weapon | Artifact | |
 Splendor of Tranquil Waters |
|||
| ・Elemental Skill can apply Hydro off-field with a semi-infinite duration due to her cooldown times. ・High-damage scaling. ・May not necessarily outpace the likes of Xingqiu or Yelan in terms of Hydro application. |
|||
| Escoffier |
Weapon | Artifact | |
 Symphonist of Scents |
|||
| ・High off-field damage specializing in Freeze reaction with 100% uptime, with RES shred and healing. ・Core member of Freeze teams but with a restriction similar to Chevreuse albeit a bit more flexible. ・Easy plug-and-play playstyle for any content. |
|||
 Fischl |
Weapon | Artifact | |
|
Polar Star
|
|||
| ・Oz stays on the field to deal continuous Electro DMG, but needs full constellations to achieve the optimal level. ・Rotating between Elemental Skill and Burst let's Oz have permanent field time. |
|||
 Scroll of the Hero of Cinder City
A Rank Sub-DPS Characters
| Character | Assumed Build | ||
|---|---|---|---|
| Raiden |
Weapon | Artifact | |
 Dragon's Bane |
|||
| ・Can trigger Hyperbloom cores easily as a Sub DPS with her Elemental Skill. Her Skill can also be used for other reactions such as Superconduct, Electro-Charged, or Overloaded. | |||
 Nilou |
Weapon | Artifact | |
 Key of Khaj-Nisut |
|
||
| ・Focus on Dendro Core Reaction Damage with Bloom, which is top-tier for AoE content. ・Talents are exclusive to Dendro + Hydro team comps, which makes her restricted to a niche team comp. |
|||
 Shinobu |
Weapon | Artifact | |
 Freedom-Sworn |
|||
| ・Currently one of the best Hyperbloom trigger and considered a must-have for any teams that require her mobile Electro application and healing for this reaction. ・ Her kit also allows her to use the Elemental Mastery scaling as an added bonus for healing, which lets her free a slot for another DPS that would've been occupied by a healer. |
|||
 Ororon |
Weapon | Artifact | |
 Elegy for the End |
|||
| ・Enables the Electro-Charged niche with his personal damage and the ability to hold the Scroll of the Hero of Cinder City Artifact Set, and a decent battery as long as he's in Electro-Charged. ・Locked in Electro-Charged teams and subpar on any other reactions. |
|||
 Aino |
Weapon | Artifact | |
 Flame-Forged Insight |
|||
| ・Low Burst cost and cooldown and decent off-field Hydro application, while being extremely easy to use, but also very low personal damage and restrictive kit that involves having Nod-Krai characters in your team. | |||
 Prune |
Weapon | Artifact | |
 Skyward Atlas |
|||
| ・Provides both damage and buffs to all allies which scale off of her own ATK, while still letting her slot into a damage-oriented role. | |||
 Mona |
Weapon | Artifact | |
 The Widsith |
|||
| ・Elemental Skill applies Hydro off-field but only to a limited area. ・Elemental Burst massively amplifies reaction DMG. |
|||
 Sucrose |
Weapon | Artifact | |
 A Thousand Floating Dreams |
|||
| ・Good driver for Swirling multiple Elements for multiple reactions and deal persistent damage. | |||
| Chiori |
Weapon | Artifact | |
 Uraku Misugiri |
|||
| ・Great Geo applicator for Crystallize with good off-field damage especially for teams with Navia or Itto. ・Allows fast swap to the next party member under her with her Elemental Skill. |
|||
 Jahoda |
Weapon | Artifact | |
|
Elegy for the End
|
|||
| ・Applicator of PHEC elements while off-field. ・Long on-field time may be a detriment to team DPS. |
|||
 Rosaria |
Weapon | Artifact | |
 The Catch |
|||
| ・Applies off-field Cryo with her Elemental Burst, good for Freeze and decent for Melt teams. ・At C2, the duration of her Burst is increased. |
|||
 Tenacity of the Millelith
 Silken Moon's Serenade
B Rank Sub-DPS Characters
| Character | Assumed Build | ||
|---|---|---|---|
 Thoma |
Weapon | Artifact | |
 Kitain Cross Spear |
|||
| ・Elemental Burst applies Pyro, which can be used as the best trigger currently for Burgeon reactions. ・C2 increases the duration of his Elemental Burst, and C4 solves his energy issues. |
|||
| Ganyu |
Weapon | Artifact | |
|
Elegy for the End
|
|||
| ・Elemental Burst can easily set up Cryo reactions, especially Freeze. ・Her Burst can be used off-cooldown, provided you have enough Energy Recharge with another Cryo character. |
|||
 Collei |
Weapon | Artifact | |
|
Elegy for the End
|
|||
| ・Deals off-field Dendro damage, perfect for triggering Elemental Reactions. ・Elemental Burst AoE is small, so enemies can easily get outside of the AoE. |
|||
 Traveler (Pyro) |
Weapon | Artifact | |
 Favonius Sword |
|||
| ・Decent off-field Pyro application although a bit slower than Xiangling and lesser uptime. ・Great nuking from their Elemental Burst ・Means to unlock and upgrade the Pyro Traveler is not new player friendly. |
|||
 Kokomi |
Weapon | Artifact | |
 Everlasting Moonglow |
|||
| ・Has a persistent off-field Hydro application with her Elemental Skill that can be refreshed with her Elemental Burst. ・When using the Clam artifact, her heals would also deal good off-field damage. |
|||
 Beidou |
Weapon | Artifact | |
|
Serpent Spine
|
|||
| ・Works great as an off-field Electro Sub-DPS, which arcs and spreads to and from enemies. ・Has a high energy cost and requires another either high ER or Electro batteries. |
|||
 Kaeya |
Weapon | Artifact | |
|
x
|
|||
| ・Low Elemental Skill cooldown and good Cryo coverage for Freeze, Melt, or Superconduct. ・Elemental Skill will persist on the Main DPS especially with his C2, although his damage scaling isn't that high. |
|||
 Traveler (Dendro) |
Weapon | Artifact | |
|
Freedom-Sworn
|
|||
| ・Electro Lotus Lamp transfigurations deals fast Dendro damage. ・Elemental Skill scales with Elemental Mastery, which synergizes well when built for triggering Dendro Elemental Reactions. |
|||
 Lynette |
Weapon | Artifact | |
|
Freedom-Sworn
|
|||
| ・Decent off-field Viridescent Venerer debuffer, but there are better options. ・Requires more constellation to be decent. ・Good exploration skill. |
|||
 Ocean-Hued Clam
C Rank Sub-DPS Characters
| Character | Assumed Build | ||
|---|---|---|---|
 Kachina |
Weapon | Artifact | |
 Footprint of the Rainbow |
|||
| ・Okay off-field damage that can also provide multiple uses. ・Can equip Scroll of the Hero of Cinder City, which is a powerful artifact set restricted for Natlan units. |
|||
| Dehya |
Weapon | Artifact | |
|
Beacon of the Reed Sea
|
|||
| ・Provides consistent off-field Pyro damage to set up reactions like Burgeon. ・Needs more constellations as a 5-star to perform optimally. |
|||
 Lisa |
Weapon | Artifact | |
|
The Widsith
|
|||
| ・Elemental Burst provides good off-field Electro application in an AoE. ・C2 provides DEF buff and makes her debuff easier to apply. |
|||
| Chongyun |
Weapon | Artifact | |
 Skyward Pride |
|
||
| ・Elemental Burst is a quick-swap nuke that can deal high amounts of damage, especially with its low energy cost. | |||
 Sayu |
Weapon | Artifact | |
 Makhaira Aquamarine |
|||
| ・Elemental Skill allows her to be a driver for Swirl-related reactions, but has to be on-field to do this. ・Her Elemental Burst, especially at high constellations, enable her to apply Viridiescent Venerer to opponents, but has a high energy requirement. |
|||
 Noblesse Oblige
D Rank Sub-DPS Characters
| Character | Assumed Build | ||
|---|---|---|---|
| Xinyan |
Weapon | Artifact | |
|
Skyward Pride
|
Pale Flame
x2 |
||
| ・Elemental Skill can provide a weak off-field Pyro DMG over time, which is decent albeit inconsitent for Burgeon or other Pyro-related reactions. ・C2 guarantees a CRIT Hit from using Xinyan's Elemental Burst, which can be used for quick-swap builds. |
|||
 Traveler (Geo) |
Weapon | Artifact | |
 Skyward Blade |
|||
| ・High Elemental Skill DMG. ・Can block enemies with Elemental Skill and Burst. ・C4 increases Elemental Burst Recharge Rate. |
|||
 Amber |
Weapon | Artifact | |
|
Elegy for the End
|
|||
| ・Can apply AoE Pyro with Burst. ・Use Elemental Skill to taunt enemies away from Main DPS. ・C6 Constellation provides party-wide buffs with Elemental Burst. |
|||
 Traveler (Anemo) |
Weapon | Artifact | |
|
Freedom-Sworn
|
|||
| ・Provides AoE crowd control with Elemental Skill and Burst. | |||
 Traveler (Hydro) |
Weapon | Artifact | |
 Primordial Jade Cutter |
|
||
| ・Clunky playstyle with an unremarkable Elemental Burst. ・Unreliable when it comes to applying Hydro. |
|||
Best Support Characters in Genshin
| Jump to a Section | ||
|---|---|---|
| Best DPS |
Best Sub DPS |
Best Support
|
SS Rank Support Characters
| Character | Assumed Build | ||
|---|---|---|---|
| Odette |
Weapon | Artifact | |
|
x
|
|||
| Columbina |
Weapon | Artifact | |
|
Nocturne's Curtain Call
|
|||
| ・Enables and empowers Lunar damage. ・Amplifies Lunar damage even further in her Lunar domain. ・Best teams are still pre-existing Lunar teams. |
|||
| Linnea |
Weapon | Artifact | |
 Favonius Warbow |
|||
| ・Elemental Burst provides healing that can be competitive in endgame scenarios due to DEF-scaling. ・Enables Lunar-Crystallize reactions for the whole team, allowing her to serve in place of someone like Columbina if both are not available. |
|||
| Lauma |
Weapon | Artifact | |
|
Nightweaver's Looking Glass
|
|||
| ・A new staple support for Dendro teams wherein she elevates the Bloom-related reactions including Nilou Bloom and Hyperbloom. ・Can provide Dendro and Hydro RES shred, with the former being extremely rare. ・Consistent Dendro application with 100% uptime. |
|||
| Nicole |
Weapon | Artifact | |
 Angelos' Heptades |
|||
| ・Elemental Skill creates both ATK buffs and sustainability for most ATK-based units in the game ・Further specializes into Hexerei team comps, giving her a place in endgame. ・Buffs and shield are tied to the active character, making it immensely more convenient for use. |
|||
 Bennett |
Weapon | Artifact | |
|
Skyward Blade
|
|||
| ・Elemental Burst provides heals, ATK Buffs, and also Pyro infusion at C6. ・Has a high Elemental Recharge rate as he can spam his skill. |
|||
 Iansan |
Weapon | Artifact | |
 Calamity Queller |
|||
| ・High ATK buffs and healing rivaling that of Bennett, although with the caveat that she required characters who can move a lot to satisfy the conditions of her buffs. ・Buff indicator follows the character and not restricted to position. |
|||
 Citlali |
Weapon | Artifact | |
 Starcaller's Watch |
|||
| ・Specialist for Melt or Freeze teams that can also shred Hydro and Pyro RES. ・Shield lasts longer than its cooldown ・Shield character specializing more on offense than defence. |
|||
| Ineffa |
Weapon | Artifact | |
|
Fractured Halo
|
|||
| ・Enough shielding that lasts for the entire duration of her Skill, and scales with the same stat as her offensive stat. ・Can also provide her active character and herself a sizable number of Elemental Mastery based on her ATK. |
|||
| Sucrose |
Weapon | Artifact | |
 Thrilling Tales of Dragon Slayers |
|||
| ・Elemental Skill and Burst provides crowd control. ・Swirling increases your party's Elemental Mastery by a great deal, which enables your party to have increased reaction damage. |
|||
 Celestial Gift
S Rank Support Characters
| Character | Assumed Build | ||
|---|---|---|---|
| Vodyanitsa |
Weapon | Artifact | |
 Hymn of the Maelstrom |
|||
| ・Provides high dosages of healing alongside formidable Cryo and Hydro RES shred. | |||
 Qiqi |
Weapon | Artifact | |
|
Skyward Blade
|
|||
| ・Her healing is extremely potent to keep your party alive, although her cooldowns are very high. ・She cannot regenerate enough energy on her own to keep her Elemental Burst up. |
|||
| Furina |
Weapon | Artifact | |
|
Splendor of Tranquil Waters
|
|||
| ・Universal buffing for all team-comps as long as you have a healer. ・HP Drain opens up new playstyles to other characters that don't have HP fluctuations in their kit. ・Healing mode with her Pneuma form is useful for easing overworld exploration. |
|||
 Chevreuse |
Weapon | Artifact | |
 Black Tassel |
|||
| ・Powerful RES Shred debuff, ATK buffs, and healing as the best support for Overloaded team comps at C6. ・Her team comps are inherently niche, and she doesn't necessarily fix the problem of Overloaded knocking enemies away, thus she's only better against bosses than other similar supports. |
|||
 Alyosha |
Weapon | Artifact | |
 Favonius Lance |
|||
| ・Dual support capabilities by enhancing ATK% and healing members with their Elemental Skill and Burst. ・Good solo Electro application to enable Stellar-Conduct with. |
|||
 Xilonen |
Weapon | Artifact | |
 Peak Patrol Song |
|||
| ・Provides easy to access Resistance Shreds for Pyro, Cryo, Electro, Hydro, and Geo, and can also heal once her conditions are met. ・ Excellent vertical exploration ability on scaling cliffs. |
|||
| Escoffier |
Weapon | Artifact | |
|
Symphonist of Scents
|
|||
| ・Superb RES shred and healing but otherwise tied to one reaction and related-elements only. ・Elevates current Cryo characters especially for charaters who excel in Freeze. |
|||
| Faruzan |
Weapon | Artifact | |
|
Elegy for the End
|
|||
| ・Buffs Anemo DMG and decreases enemy Anemo RES. ・Has an extremely high Energy requirement without her C6 constellation, which makes her a high investement character. |
|||
 Heart of the Furnace
A Rank Support Characters
| Character | Assumed Build | ||
|---|---|---|---|
 Xianyun |
Weapon | Artifact | |
 Crane's Echoing Call |
|||
| ・Enables plunging playstyle with healing and great buffs for her dedicated teams. | |||
 Baizhu |
Weapon | Artifact | |
 Jadefall's Splendor |
|||
| ・Great comfort healer for all content. ・Provides decent shielding that can act as an interrupt resistance. ・Applies decent off-field Dendro for reactions. |
|||
 Zhongli |
Weapon | Artifact | |
|
Black Tassel
|
|||
| ・Can provide the strongest and most durable shield in the game while also offering free unconditional Elemental RES shred. | |||
 Jean |
Weapon | Artifact | |
|
Skyward Blade
|
|||
| ・Elemental Skill and Charge attack can crowd control enemies. ・Elemental Burst acts as a powerful burst AoE heal for the whole party. Her burst field also creates a field of persistent healing. ・C4 provides Anemo RES shred for Anemo DPS characters. |
|||
 Lan Yan |
Weapon | Artifact | |
 Memory of Dust |
|||
| ・Provides a sturdy shield which can adapt in contact to Swirlable elements, and can also wield the Viridescent Venerer artifact to give Elemental RES shred. ・No off-field Anemo application and her shield duration is short. ・C2 refreshes her already good shields via the use of Normal Attacks. |
|||
| Kokomi |
Weapon | Artifact | |
|
Everlasting Moonglow
|
|||
| ・Has an incredibly strong and reliable healing which can also apply Hydro off-field. ・A staple for Freeze and certain Bloom teams. |
|||
 Gorou |
Weapon | Artifact | |
|
Elegy for the End
|
|
||
| ・Best Geo Support for DEF-focused Geo teams who can provide Geo DMG and DEFbuffs, and interruption resistance. ・Turns into a well-rounded offensive support and healer with C4, and a top-tier support at his niche at C6. |
|||
| Diona |
Weapon | Artifact | |
 Sacrificial Bow |
|||
| ・Provides shields, heals, and off-field Cryo application. ・Also becomes a buffer for Elemental Mastery at C6. |
|||
 Yaoyao |
Weapon | Artifact | |
|
Favonius Lance
|
|||
| ・Applies Dendro to enemies and heals while off-field with her Elemental Skill. ・Elemental Burst has strong party healing but Yaoyao has to be on-field to make it work. |
|||
 Charlotte |
Weapon | Artifact | |
|
Skyward Atlas
|
|||
| ・Good panic healing when stuck in a pinch, although the AoE for it is small. ・Constellation improves her efficiency with healing. |
|||
 Layla |
Weapon | Artifact | |
|
Favonius Sword
|
|||
| ・Provides very strong shields ・Her constant off-field DMG from her Elemental Skill makes it ideal to use the Tenacity of the Millelith Artifact set for a permanent buff. ・Breaking her shield ends her off-field DMG from her Elemental Skill and ends the Artifact buff. |
|||
 Kirara |
Weapon | Artifact | |
|
Key of Khaj-Nisut
|
|
||
| ・Can shield effectively against Bloom Cores or for other general purposes. | |||
| Shinobu |
Weapon | Artifact | |
|
Freedom-Sworn
|
|||
| ・Elemental Skill heals in intervals, and has a short cooldown, but otherwise only active for your on-field character. | |||
B Rank Support Characters
| Character | Assumed Build | ||
|---|---|---|---|
| Jahoda |
Weapon | Artifact | |
|
Elegy for the End
|
|||
| ・Heals at her base kit and buffs Lunar-teams at C6. ・Comparable to Sucrose but loses out on max damage per rotation as her buffs doesn't overtake Sucrose's potential. |
|||
 Yun Jin |
Weapon | Artifact | |
|
Favonius Lance
|
|||
| ・Boosts normal attack damage with Elemental Burst. ・Normal attack damage buff increases when in party with different elements. ・C6 also gives Normal ATK SPD buffs, which is greatly appreciated for Normal Attack-focused team comps. |
|||
 Sara |
Weapon | Artifact | |
 Skyward Harp |
|||
| ・Increases party members' ATK. ・Becomes the best Electro Support buffer after unlocking C6, but is clunky and energy hungry at low constellations. |
|||
| Mizuki |
Weapon | Artifact | |
|
Sunny Morning Sleep-In
|
|||
| ・Buffs Swirl Damage dealt to opponents and also sustain characters, although the restriction cripples her supportive capabilities. | |||
 Sigewinne |
Weapon | Artifact | |
 Silvershower Heartstrings |
|||
| ・Comfortable healing in the overworld. ・Low uptime on her heals and Elemental Skill ticks. ・ Low uptime on her buffs for off-field Elemental Skills. ・ No useful utility on Elemental Burst or Special Charged Attacks. |
|||
| Thoma |
Weapon | Artifact | |
|
Favonius Lance
|
|
||
| ・Decent Pyro shields that refreshes everytime your active character uses their Normal Attacks. ・Becomes a proper offensive support at C6, which boosts Normal, Charged, and Plunged Attack damage when shielded with his Elemental Skill. |
|||
| Dehya |
Weapon | Artifact | |
 Portable Power Saw |
|||
| ・Provides strong interruption resistance and damage mitigation with her pseudo-shield, with decent Pyro application. | |||
 Song of Days Past
C Rank Support Characters
| Character | Assumed Build | ||
|---|---|---|---|
 Mika |
Weapon | Artifact | |
|
Favonius Lance
|
|||
| ・Decent Physical DMG or ATK Speed Buffer, but only a few character can reliably exploit his buffs. ・Provides good burst healing for the entire party but slow sustained healing for the active character. |
|||
| Sayu |
Weapon | Artifact | |
 Wolf's Gravestone |
|||
| ・Off-field healing that has wide coverage, especially at C2. Her initial trigger for her Elemental Burst also has strong party-wide healing. ・The amount of HP recovered can be increased with Elemental Mastery. ・Elemental Burst healing is improved by her constellations. |
|||
 Dahlia |
Weapon | Artifact | |
|
Favonius Sword
|
|||
| ・Decent Hydro shielder but with no off-field application, which is needed for most Hydro units. ・Decent ATK SPD Buffs but not entirely required on his best teams. ・Best teams in Freeze but does not necessarily require his assistance. |
|||
 Barbara |
Weapon | Artifact | |
|
Thrilling Tales of Dragon Slayers
|
|||
| ・Has burst healing and aura to sustain the party. Although her Elemental Skill cooldown and Burst cost is high. ・At Constellation Level 6, gains the ability to revive downed teammates to 100% health. |
|||
 Traveler (Electro) |
Weapon | Artifact | |
|
Skyward Blade
|
|||
| ・Elemental Skill helps in filling up the active character's energy and increases their Energy Recharge. ・Electro Traveler's usage is highly situational. Moreoever, other characters that fulfill the same niche has more utility. |
|||
| Rosaria |
Weapon | Artifact | |
|
Favonius Lance
|
|||
| ・Her Burst increases CRIT Rate for all party members by 15% of Rosaria's CRIT Rate. ・Aim to make Rosaria's CRIT Rate 100%. ・At C6, she decreases enemy Physical RES by -20%, a very strong debuffer for Physical DMG mains! |
|||
 Candace |
Weapon | Artifact | |
|
Favonius Lance
|
|||
| ・Increases Elemental Normal Attack damage. ・Infuses Sword, Claymore, and Polearms with Hydro that enable characters to trigger Hydro reactions on their own, but highly situational. |
|||
 Dori |
Weapon | Artifact | |
 Favonius Greatsword |
|||
| ・Provides flat Energy Recharge for any character. ・Okay single-target healing but is only limited to her burst. ・Can apply Electro if tether is placed nearby enemies, letting you setup reactions should you need an Electro applicator. |
|||
D Rank Support Characters
| Character | Assumed Build | ||
|---|---|---|---|
| Noelle |
Weapon | Artifact | |
 Whiteblind |
|||
| ・Can heal with her Normal and Charged Attacks, but she has to be on-field and her shield active to activate. ・Elemental Skill has a high cooldown. |
|||
| Chongyun |
Weapon | Artifact | |
|
Wolf's Gravestone
|
|||
| ・Elemental Skill increases ATK Speed and provides Cryo DMG infusion for melee characters. ・High Recharge Rate makes Elemental Skill application constant. |
|||
| Lisa |
Weapon | Artifact | |
|
Thrilling Tales of Dragon Slayers
|
|||
| ・Lowers enemy DEF by 15% from passive talent. | |||
| Xinyan |
Weapon | Artifact | |
 Sacrificial Greatsword |
|
||
| ・Can provide a decent shield that scales with the amount of enemies hit. | |||
 Retracing Bolide
Exploration Tier List
Tier List Summary
|
   
|
|---|---|
|

|
|
|
|
 
|
|
   
|
Tier List has been updated to September 23, 2026. This list is not ordered from highest to lowest.
Exploration Tier List Criteria
|
SS Tier |
Characters who have Skills or Talents that make either land, air, or sea exploration the easiest, or have talents that are considered invaluable for farming materials, puzzle solving, or ease of survival. |
|---|---|
|
S Tier |
Characters who have talents for land, air, or sea exploration, but are less comparable against the characters in the SS tier. |
|
A Tier |
Characters who have talents that can increase movement speed or reduce stamina consumption. Characters who have talents that help farming overworld materials are also included. |
|
B Tier |
Characters who at least have some utility inherent with their weapon or Element, such as elemental totem activation, or target practice with bows. Talents that help with the game's secondary content like Fishing are also included. |
|
C Tier |
Characters having limited or no utility at all for overworld exploration. |
Genshin Impact Related Guides
All Tier Lists

List of Tier Lists
| All Genshin Impact Tier Lists | |
|---|---|
 Character Tier List |
 Best Team Comp |
 Weapons Tier List |
 Artifact Tier List |
 Reroll Tier List |
 Best Free Characters |
Comment
 Anonymous 1 day
... and afterl liyue inazuma buff can't wait raiden + kokomi buff awesome , rly can't wait for this 2 best chars in this game so far for me :)




7.1 Tier List and the Best Characters as of October 2026

Premium Articles
Rankings
Gaming News





Popular Games

Genshin Impact Walkthrough & Guides Wiki
Fire Emblem: Fortune's Weave (FEFW) Walkthrough & Guides Wiki
Aniimo Walkthrough & Guides Wiki
Wuthering Waves Walkthrough & Guides Wiki
Dragon's Dogma 2 (DD2) Dark Arisen Walkthrough & Guides Wiki
Umamusume: Pretty Derby Walkthrough & Guides Wiki
Honkai: Star Rail Walkthrough & Guides Wiki
Zenless Zone Zero Walkthrough & Guides Wiki
Pokemon TCG Pocket (PTCGP) Strategies & Guides Wiki
AION 2 Walkthrough & Guides Wiki









Recommended Games
Where Winds Meet Walkthrough & Guides Wiki
Fire Emblem Heroes (FEH) Walkthrough & Guides Wiki
Diablo 4: Lord of Hatred Walkthrough & Guides Wiki
Super Smash Bros. Ultimate Walkthrough & Guides Wiki
Persona 3 Reload Walkthrough & Guides Wiki
The Legend of Zelda: Tears of the Kingdom Walkthrough & Guides Wiki
Elden Ring Walkthrough & Guides Wiki
Pokemon Brilliant Diamond and Shining Pearl (BDSP) Walkthrough & Guides Wiki
Cyberpunk 2077: Ultimate Edition Walkthrough & Guides Wiki
Monster Hunter World Walkthrough & Guides Wiki










All rights reserved
Copyright© 2012-2024 HoYoverse — COGNOSPHERE. All Rights Reserved.
The copyrights of videos of games used in our content and other intellectual property rights belong to the provider of the game.
The contents we provide on this site were created personally by members of the Game8 editorial department.
We refuse the right to reuse or repost content taken without our permission such as data or images to other sites.
... also perhaps kamisato siblings, kazuha .... thats crazy :)