
Best Builds
NEW 9/29: Monster Hunter Outlanders 10/29 release!
Read Game8's exclusive interview with Capcom and TiMi producers!
✧ Game8 Best Games Survey
Vote for your favorite games and share your voice!
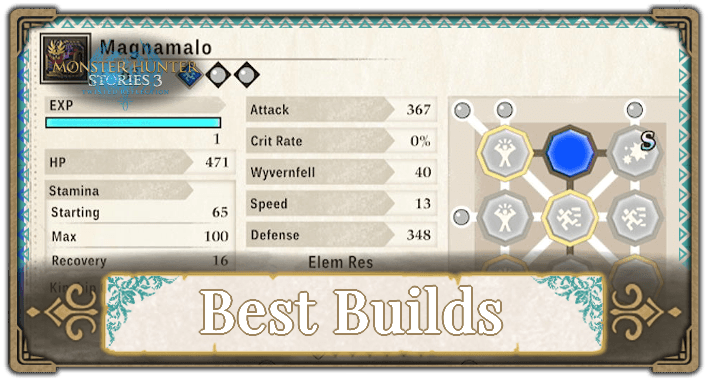
This is a list of the best builds in Monster Hunter Stories 3 (MHS3). Find out which genes, Monsties, and equipment are needed for each build here!
List of Contents
Best Builds for Monster Hunter Stories 3 (MHS3)
| Best MHS3 Builds |
|---|
|
|

Status Ailment Build
| Recommended Monsties | Recommended Battle Ally | ||||
|---|---|---|---|---|---|
 Canyne Attack Type: Speed
Element: Non-Elemental  Silverwind Nargacuga Attack Type: Speed
Element: Non-Elemental |
|||||
| Genes | Recommended Equipment | ||||
 Salt in Wound (XL) Type: Passive Effect: Significantly increases damage dealt to enemies with abnormal statuses.  Debilitating Lilt Type: Active Effect: Grants Ailment Inflct Rate Up to the user.  Hyper Shot+ Type: Active Effect: Deals non-elemental damage to one enemy. Chance to inflict Stun.  Omni Chaser P Type: Active Effect: Deals non-elemental damage to one enemy. Targets inflicted with an abnormal status take more damage.  Inflict Rate Up (XL) Type: Passive Effect: Significantly increases abnormal status inflict rate.  Drowsy Fang Type: Active Effect: Deals non-elemental damage to one enemy. Chance to inflict Sleep.  Non-Elem Atk Boost (L) Type: Passive Effect: Greatly increases damage dealt by non-elemental attacks.  Egg Skill: Solar Cry Type: Active Effect: Fills the Kinship Gauge.  Soul Kinship (XL) Type: Passive Effect: Kinship Gauge fills significantly faster. |
Weapons ・
Armor Mud Shot |
||||
| Environment Skills | |||||
| Battle Thirst (Azuria) |
High Morale (Canalta Timberland) |
Hardiness (Azuria) |
|||
 Ogden

Genes
The Status Ailment build lets your Monstie proc Stun and Sleep, denying turns from the opponent Monster and allowing you to gain tempo. Debilitating Lilt and Inflict Rate Up increase the chances of inflicting status ailments as much as possible, and Omni Chaser P with Salt In Wound leads to increased damaged on Monsters inflicted with status ailments.
Recommended Monsties
Canyne, Green Nargacuga, and Silverwind Nargacuga are extremely fast Monsties that allow you to proc your status effects before the opponent can act. Since they are Non-Elemental Monsties, your Skills will deal additional damage as well.
Recommended Equipment
Vicello Nulo Green lets you cast Deceptive Melody, which can also grant your Monstie Ailment Inflict Rate Up along with Ailment Exploit. Using Mud Shot, you can proc sleep as well, combined with your Espinas Armor, which also has Inflict Rate Up. Finally, you can follow up on your Monstie's attacks using Veldian Ensis's Lunge Stance.
Recommended Battle Ally
Ogden's Pukei-Pukei also focuses on inflicting Status Ailments and has Omni Chaser in conjunction with Salt in Wound (L), similar to your Monstie's build.
Thunder Crit Build
| Recommended Monsties | Recommended Battle Ally | ||||
|---|---|---|---|---|---|
 Boltreaver Astalos Attack Type: Technical
Element: Thunder |
|||||
| Genes | Recommended Equipment | ||||
 Elemental Breaker (L) Type: Passive Effect: Greatly increases damage dealt to monster parts when exploiting a monster's elemental weakness.  Critical (XL) Type: Passive Effect: Significantly increases Crit Rate.  Egg Skill: Bolt Flash Type: Active Effect: Deals thunder damage to all enemies.  Boltcall Type: Active Effect: Increases damage dealt by the user for 2 turns.  Free Bingo Gene Type: Effect: These genes can form a bingo with any type of gene. Each Monstie can only possess one of these at a time.  Stamina Surge (L) Type: Passive Effect: Greatly increases Stamina regeneration.  Thunder Atk Boost (L) Type: Passive Effect: Greatly increases damage dealt by thunder attacks.  Crit-Heal (XL) Type: Passive Effect: Recovers a moderate amount of the user's HP on a critical hit.  Ray Blade+ Type: Active Effect: Deals thunder damage to one enemy. Chance to inflict Paralysis. |
Weapons Armor |
||||
| Environment Skills | |||||
| Battle Thirst (Azuria) |
Unscathed (Canalta Timberland) |
Hardiness (Azuria) |
|||
Genes
The Thunder Crit build focuses on dealing tons of damage with critical hits with the Critical Gene, and an attack boost in Boltcall. Your critical hits work in conjunction with Crit-Heal, and with Stamina Surge, you now have sustain for both your Monstie's health and Stamina.
Recommended Monsties
Boltreaver Astalos has a High Attack and Critical stat that makes it the perfect Monstie suited for this build.
Recommended Equipment
Blue Blade Bow lets you inflict Defense Down on an opponent Monster, further boosting the damage your Monstie can deal. You can also boost your Monstie's attack and critical rate with your Veldian Sibilus by casting Power Paean. Finally, your Khanga Edge has a 10% Crit Rate, which can be boosted by your Regios Armor's Critical (L) skill, allowing you to deal critical hits on your own with your Long Sword's lunge stance.
Recommended Battle Ally
Ogden can cast Power Paean, increasing the Attack and Critical Hit Rate of your Monstie even further.
Kinship Build
| Recommended Monsties | Recommended Battle Ally | ||||
|---|---|---|---|---|---|
| Silverwind Nargacuga Attack Type: Speed
Element: Non-Elemental  Black Diablos Attack Type: Power
Element: Non-Elemental | |||||
| Genes | Recommended Equipment | ||||
| Soul Kinship (XL) Type: Passive Effect: Kinship Gauge fills significantly faster.  Kinship Skill+ (XL) Type: Passive Effect: Significantly increases Kinship Skill damage. Debuff Chaser S Type: Active Effect: Deals non-elemental damage to one enemy. Targets with decreased stats take more damage. Wild Breaker Type: Active Effect: Deals non-elemental damage to one enemy and inflicts Defense Down. Free Bingo Gene Type: Effect: These genes can form a bingo with any type of gene. Each Monstie can only possess one of these at a time. Non-Elem Atk Boost (L) Type: Passive Effect: Greatly increases damage dealt by non-elemental attacks.  Debuff Chaser T Type: Active Effect: Deals non-elemental damage to one enemy. Targets with decreased stats take more damage.  HtH Master (L) Type: Passive Effect: Winning a Head-to-Head makes the Kinship Gauge fill much faster. Egg Skill: Solar Cry Type: Active Effect: Fills the Kinship Gauge. |
Weapons ・
Armor Sandpipe |
||||
| Environment Skills | |||||
| Resonance (Tarkuan) |
Battle Thirst (Azuria) |
Best Buds (Tarkuan) |
|||
 Kora
Genes
The goal of the Kinship Build is to build the Kinship Gauge as fast as possible, with Soul Kinship providing a boost everytime you gain Kinship Gauge. Having each attack type means you can win every Head-to-Head and trigger Double Attacks on one Monstie, and HtH Master means you'll be building your Kinship Gauge even faster. Most importantly, you must activate Solar Cry when you have a free turn in order to ride your Monstie as soon as you need to.
Recommended Monsties
For Monsties, you want Non-Elemental Monsties to take advantage of the Bingo Bonuses and Monsties with Good Kinship Skills. Some Monsties that fit in both of these criteria are Silverwind Nargacuga with a Kinship skill that boosts its Attack afterward and has a high critical chance or Black Diablos with a 120 base power AoE Kinship Skill.
Recommended Equipment
First, Barroth Leader has Taunt, which directs Head-to-Heads your way and allows you to trigger Double Attacks as often as possible. The Sandpipe Hunting Horn also has Kinship Chorale, which grants Kinship Charge Up to your whole party. Finally, you can take advantage of your Double Attacks by attacking with your Long Sword, Veldian Ensis, which gains a charge each time you win a Head-to-Head/Double Attack with a medium chance to gain an additional charge when you do so.
Your whole setup is then enhanced by your Lagiacrus Armor, which also has Soul Kinship and Kinship Skill+.
Recommended Battle Ally
Kora's Taunt and Shielding Stance makes Monsters focus on her, allowing you and your Monstie to safely build up the Kinship Gauge.
Fire Blastblight Build
| Recommended Monsties | Recommended Battle Ally | ||||
|---|---|---|---|---|---|
 Dreadqueen Rathian Attack Type: Speed
Element: Fire  Dreadking Rathalos Attack Type: Power
Element: Fire |
|||||
| Genes | Recommended Equipment | ||||
| Inflict Rate Up (XL) Type: Passive Effect: Significantly increases abnormal status inflict rate.  Bombardier (L) Type: Passive Effect: Greatly increases damage dealt by Blastblight and explosives. Salt in Wound (XL) Type: Passive Effect: Significantly increases damage dealt to enemies with abnormal statuses.  Lava Cascade Type: Active Effect: Deals fire damage to one enemy. Chance to inflict Blastblight. Free Bingo Gene Type: Effect: These genes can form a bingo with any type of gene. Each Monstie can only possess one of these at a time. Magma Counter Type: Active Effect: Deals fire damage to all enemies. Detonates Blastblight on targets.  Soul Kinship (L) Type: Passive Effect: Kinship Gauge fills much faster.  Fire Atk Boost (L) Type: Passive Effect: Greatly increases damage dealt by fire attacks. Egg Skill: Solar Cry Type: Active Effect: Fills the Kinship Gauge. |
Weapons Armor |
||||
| Environment Skills | |||||
| Resonance (Tarkuan) |
Battle Thirst (Azuria) |
Hardiness (Azuria) |
|||
Genes
The Blastblight build focuses on inflicting Blastblight with Lava Cascade and immediately detonating it with Magma Counter. Inflict Rate Up increases the chance to inflict Blastblight while Bombardier increases Blastblight damage. This works in conjunction with Salt In Wound, which increases damage against Monsters inflicted with status ailments.
Recommended Monsties
Dreadking Rathalos and Dreadqueen Rathian are Fire Monsties that have high attack stats and balanced stats overall, allowing you to maximize the damage that you deal using the build without relying on fragile Monsties.
Recommended Equipment
Sinister Bow has Blast Coating, which can also inflict Blastblight, paired with the Espinas Armor, which has Inflict Rate Up. You can also cast Deceptive Melody using Sinister Strum to further boost you or your Monstie's chance to inflict Blastblight. Finally, Veldian Ensis' Lunge Stance allows you to follow-up on your Monstie's attacks.
Recommended Battle Ally
Ogden's Pukei-Pukei can deal more damage on a Monster inflicted by Blastblight due to its Omni Chaser skill and its Salt in Wound passive. Alternatively, you can use Thea, who has Blast Coating, to increase your chances of inflicting Blastblight.
Non-Elemental Blastblight Build
| Recommended Monsties | Recommended Battle Ally | ||||
|---|---|---|---|---|---|
 Magnamalo Attack Type: Speed
Element: Non-Elemental  Brachydios Attack Type: Power
Element: Non-Elemental  Bloodbath Diablos Attack Type: Speed
Element: Non-Elemental |
|||||
| Genes | Recommended Equipment | ||||
| Hellfire Shot Type: Active Effect: Deals non-elemental damage to one enemy. Chance to inflict Blastblight. Bombardier (L) Type: Passive Effect: Greatly increases damage dealt by Blastblight and explosives. Hellfire Retribution Type: Active Effect: Deals non-elemental damage to all enemies. Deals increased damage to those afflicted with Blastblight, then detonates it immediately. Non-Elem Atk Boost (L) Type: Passive Effect: Greatly increases damage dealt by non-elemental attacks. Free Bingo Gene Type: Effect: These genes can form a bingo with any type of gene. Each Monstie can only possess one of these at a time. Salt in Wound (XL) Type: Passive Effect: Significantly increases damage dealt to enemies with abnormal statuses. Inflict Rate Up (XL) Type: Passive Effect: Significantly increases abnormal status inflict rate. Soul Kinship (XL) Type: Passive Effect: Kinship Gauge fills significantly faster. Egg Skill: Solar Cry Type: Active Effect: Fills the Kinship Gauge. |
Weapons Armor |
||||
| Environment Skills | |||||
| Resonance (Tarkuan) |
Battle Thirst (Azuria) |
Hardiness (Azuria) |
|||
Genes
The Non-Elemental Blastblight build works similar to the Fire Blastblight build, but the Non-Elemental version gives you access to Hellfire Retribution, which not only detonates Blastblight immediately, but deals increased damage to Monsters afflicted with Blastblight as well.
Recommended Monsties
For this build, you can use a Magnamalo as its pre-equipped with Hellfire Shot and Hellfire Retribution. Other options include Brachydios or Bloodbath Diablos which can maximize the build's damage with their high Attack stats.
Recommended Equipment
You will still be bringing the same equipment as in the Fire Blastblight Build. Use the Sinister Bow to inflict Blastblight, use the Sinister Strum to raise you or your Monstie's Status Inflict Rate, and deal follow-up damage with your Veldian Ensis. The Espinas Armor will increase your chances of inflicting Blastblight due to its Inflict Rate Up passive.
Recommended Battle Ally
Like the Fire Blastblight Build, you can either bring Ogden for the synergy with his Pukei-Pukei, or bring Thea to try and apply Blastblight more often.
Dragon Crit/Wyvernfell Build
| Recommended Monsties | Recommended Battle Ally | ||||
|---|---|---|---|---|---|
 Malzeno Attack Type: Speed
Element: Dragon  Ebony Odogaron Attack Type: Speed
Element: Dragon |
|||||
| Genes | Recommended Equipment | ||||
 Dragon Eater Type: Active Effect: Deals dragon damage to one enemy, then rcovers the user's HP by an amount relative to damage dealt. Self-Heal (L) Type: Passive Effect: Recovers a decent amount of HP at the end of each turn.  Dragon Buster (XL) Type: Passive Effect: Significantly increases Wyvernfell power. Critical (XL) Type: Passive Effect: Significantly increases Crit Rate. Free Bingo Gene Type: Effect: These genes can form a bingo with any type of gene. Each Monstie can only possess one of these at a time. Crit-Heal (XL) Type: Passive Effect: Recovers a moderate amount of the user's HP on a critical hit.  Dracophage Shot Type: Active Effect: Deals dragon damage to one enemy and inflicts Wyvernsoul Defense Down. Stamina Surge (L) Type: Passive Effect: Greatly increases Stamina regeneration.  Dragon Atk Boost (L) Type: Passive Effect: Greatly increases damage dealt by dragon attacks. |
Weapons Armor |
||||
| Environment Skills | |||||
| Resonance (Tarkuan) |
Battle Thirst (Azuria) |
Hardiness (Azuria) |
|||


Genes
The Dragon build will try to apply Wyvernfell Def Down using Dracophage Shot, which will make your Monstie deal more damage to a Monster's Wyvernsoul Gauge when mixed with the Dragon Buster passive. Afterward, your Monstie can sustain itself through Dragon Eater, Self-Heal, and Crit-Heal in conjunction with the Critical passive.
Recommended Monsties
Malzeno and Ebony Odogaron both have high Attack and decent Defense stats, allowing them to lower a Monster's Wyvernfell Defense for multiple turns while surviving a few hits then healing themselves up afterward.
Recommended Equipment
Yeti Hammer's Perfect Strike (HVY) deals a significant amount of Wyvernfell, and the Striking Secret (L) passive means you can reduce a Monster's Wyvernsoul gauge effectively without Stamina. Veldian Sibilus can grant Wyvernfell Up (M), increasing you and your Monstie's damage to the Wyvernsoul Gauge even further. Once you have toppled a Monster, you can deal a lot of damage using Berserker Sword's Rage Slash combined with the guaranteed critical hit.
Recommended Battle Ally
Kora's Gravios can cast Bishaten Embers, extending the duration of the Wyvernsoul Def Down debuff without having to constantly reapply it using your Monstie.
Water Dancer Build
| Recommended Monsties | Recommended Battle Ally | ||||
|---|---|---|---|---|---|
 Almudron Attack Type: Power
Element: Water  Namielle Attack Type: Technical
Element: Water  Soulseer Mizutsune Attack Type: Speed
Element: Water |
|||||
| Genes | Recommended Equipment | ||||
 Water Atk Boost (L) Type: Passive Effect: Greatly increases damage dealt by water attacks. Dancer (L) Type: Passive Effect: Enables nimble movements when HP is full, greatly increasing attack and defense.  Foxflame Bubbles Type: Active Effect: Deals water damage to one enemy and inflicts Accuracy Down. Chance to inflict Burn. Bubbly Dance Type: Active Effect: Grants Water Attack Up, Dodge Up, and Regenerate to the User.  Mud Torrent Type: Active Effect: Deals water damage to one enemy, then sets a trap that continuously deals water damage. Evasion Ability (S) Type: Passive Effect: Slighty increases Evasion  Egg Skill: Surface Break Type: Active Effect: Deals water damage to one enemy and inflicts Wyvernsoul Defense Down. Stamina Surge (L) Type: Passive Effect: Greatly increases Stamina regeneration. Soul Kinship (L) Type: Passive Effect: Kinship Gauge fills much faster. |
Weapons Armor |
||||
| Environment Skills | |||||
| Unscathed (Canalta Timberland) |
High Morale (Canalta Timberland) |
Resonance (Tarkuan) |
|||
Genes
The Water Dancer build focuses on maintaining the massive buffs gained from the Dancer skill by consistently evading every attack through Evasion Ability, Bubbly Dance, and inflicting Darkness + Accuracy Down (L).
Recommended Monsties
Soulseer Mizutsune and Namielle both have high Attack and decent Defense stats, allowing them to make full use of the Dancer buff. In the early game, you can instead use an Almudron as it is a midrange powerhouse with solid utility!
Recommended Equipment
Tigrex Archer's access to Flash Coating allows you to guarantee the dodge. Furthermore, its other coatings allow you to adjust based on what you need!
Spirit Dragonwood Horn has access to Springy Staccato and Militant March, allowing you to actively use and buff your Mizutsune's Dodge Up. Lastly, Sinister Long Sword is included since Counters are a solid strategy here, since you will actively avoid being hit.
As for the armor, we recommend getting the Espinas Armor to further increase your chances of inflicting the Darkness ailment!
Recommended Battle Ally
Kora's Gravios can cast Bishaten Embers, extending the duration of the Accuracy Down and Wyvernsoul Down debuff without having to constantly reapply it using your Monstie.
Elemental Assault Ice Build
| Recommended Monsties | Recommended Battle Ally | ||||
|---|---|---|---|---|---|
 Aurora Somnacanth Attack Type: Technical
Element: Ice  Lunagaron Attack Type: Speed
Element: Ice  Velkhana Attack Type: Technical
Element: Ice |
|||||
| Genes | Recommended Equipment | ||||
| HtH Master (L) Type: Passive Effect: Winning a Head-to-Head makes the Kinship Gauge fill much faster.  Elemental Assault (L) Type: Passive Effect: Greatly increases damage dealt to the Wyvernsoul Gauge when exploiting a monster's elemental weakness.  Ice Atk Boost (L) Type: Passive Effect: Greatly increases damage dealt by ice attacks.  Icicle Breath Type: Active Effect: Deals ice damage to one enemy and inflicts Defense Down.  Inhibiting Breath Type: Active Effect: Deals ice damage to one enemy and inflicts Speed Down.  Icicle Storm Type: Active Effect: Deals ice damage to random enemies and inflicts Accuracy Down. Frost Veil Type: Active Effect: Grants Ice Attack Up and Speed Up to the user. Stamina Surge (L) Type: Passive Effect: Greatly increases Stamina regeneration.  Frosty Furrow Type: Active Effect: Deals ice damage to one enemy. |
Weapons ・
Icespiel
・
 Icebrink ・
Armor Twinfang |
||||
| Environment Skills | |||||
| Resonance (Tarkuan) |
Battle Thirst (Azuria) |
Hardiness (Azuria) |
|||
 Thea
Genes
The Ice build mainly focuses on exploiting the elemental weakness of your opponent to deal as much raw Ice damage as possible. Aim to buff yourself with Frost Veil whenever possible, and then deal as much damage with Head-to-Heads.
Recommended Monsties
Lunagaron and Velkhana both have high Attack and decent Defense stats, allowing them to make full benefits of aiming for elemental weaknesses. In the early game, you can instead use an Aurora Somnacanth as it is powerful during the second region!
Recommended Equipment
Icespiel allows you to buff your Ice Damage even more while also giving you access to multiple offensive buffs such as Power Paean and Springy Staccato.
Icebrink, then, is mainly ice coverage for the Slash body parts, and then Twinfang allows you to force a Head-to-Head with an enemy using Single Combat.
As for the armor, we recommend getting the Artian Armor to make up for the lack of Kinship increasing skills!
Recommended Battle Ally
It is recommended to get Thea and have her use the Hunting Horn for additional offensive buffs. Double down on all the Ice damage by having her bring Gnocchi as well!
Monster Hunter Stories 3 (MHS3) Related Guides
 Monster Hunter Stories 3 Wiki Front
 Looking for Great Games! |
Is Monster Hunter Stories 3 one of your favorite games? Answer our Best Games Survey and share your unique voice with Game8's readers! |
|---|
Guides by Category
 Monsters |
 Weapons |
 Characters |
 Tips and Tricks |
 Bosses |
 Interactive Map |
 Items |
 News |
 Main Story |
 Side Story |
 Side Quests |
 Trophies |
 Armor |
 Small Monsters |
 Skills |
- |
Recommended Guides
Comment
 Elysium 6 months
I see in the water dancer build the water at boost is shown as a speed skill, I could be dumb but aren't all atk boosts power? If so does having that as a power skill affect the build much or does the speed bingo not really matter?



Author

Rankings
- We could not find the message board you were looking for.
Gaming News




Popular Games

Genshin Impact Walkthrough & Guides Wiki
Fire Emblem: Fortune's Weave (FEFW) Walkthrough & Guides Wiki
Aniimo Walkthrough & Guides Wiki
Wuthering Waves Walkthrough & Guides Wiki
Dragon's Dogma 2 (DD2) Dark Arisen Walkthrough & Guides Wiki
Umamusume: Pretty Derby Walkthrough & Guides Wiki
Honkai: Star Rail Walkthrough & Guides Wiki
Zenless Zone Zero Walkthrough & Guides Wiki
Pokemon TCG Pocket (PTCGP) Strategies & Guides Wiki
AION 2 Walkthrough & Guides Wiki







Recommended Games
Fire Emblem Heroes (FEH) Walkthrough & Guides Wiki
Where Winds Meet Walkthrough & Guides Wiki
Diablo 4: Lord of Hatred Walkthrough & Guides Wiki
Super Smash Bros. Ultimate Walkthrough & Guides Wiki
Persona 3 Reload Walkthrough & Guides Wiki
The Legend of Zelda: Tears of the Kingdom Walkthrough & Guides Wiki
Elden Ring Walkthrough & Guides Wiki
Pokemon Brilliant Diamond and Shining Pearl (BDSP) Walkthrough & Guides Wiki
Cyberpunk 2077: Ultimate Edition Walkthrough & Guides Wiki
Monster Hunter World Walkthrough & Guides Wiki









All rights reserved
©CAPCOM CO., LTD, and CAPCOM CO. logos are trademarks or registered trademarks of CAPCOM. All rights reserved.
The copyrights of videos of games used in our content and other intellectual property rights belong to the provider of the game.
The contents we provide on this site were created personally by members of the Game8 editorial department.
We refuse the right to reuse or repost content taken without our permission such as data or images to other sites.
Was wondering why the dragon crit/wyvernfell build for Malzeno and Ebony Odogaron has a large dragon attack gene instead of an extra large one