
Best Builds
These are the best builds for Emma and Koo in Beast of Reincarnation. Discover the best weapons, armor, skills, and attributes for Emma and Koo for the best build, in this guide!
List of Contents
Emma Best Build
Build Summary
| Stat Priority | |||||
|---|---|---|---|---|---|
| ① Strength | ② Florescence | ③ Vitality | |||
| Main Skill Tree and Skill Priority | |||||
 Entanglement Overdrive |
|||||
| Expand Entanglement Gauge | Instant Entanglement | ||||
| Entanglement Gauge Recovery | Recovery Boost | ||||
| Extend Blade Effect | Critical Boost | ||||
| Execution Assist | Execution Recovery | ||||
| Other Recommended Skills | |||||
| Attack Dog (Track Shot) |
Lucky Shot (Track Shot) |
||||
| Roll (Track Shot) |
Cloaking Grass (Hair) |
||||
| Swords | |||||
 Cirrus Sword |
 Purity |
||||
| Ranged Weapons | |||||
 Flame Arrow |
 Standard Arrow |
||||
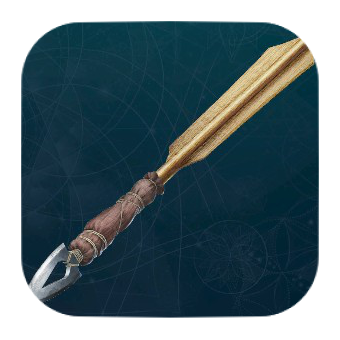 Fire Bolt |
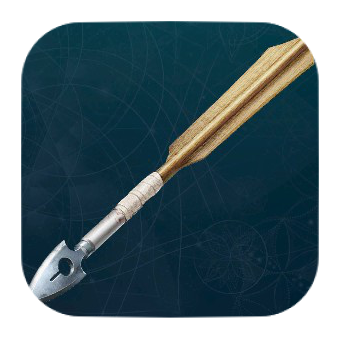 Standard Bolt |
||||
| Armor | |||||
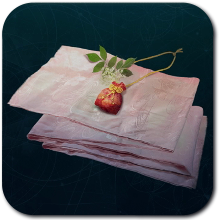 Floral Wraps |
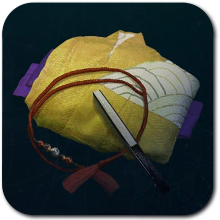 Dance Attire |
||||
| Spirit Stones | |||||
 Entanglement Parry |
Entanglement Dodge |
||||
 Entanglement Increase |
Critical Damage Increase |
||||
 Florescent Recovery |
 Iron Wall |
||||
This build focuses on the Strength Attribute and Entanglement Overdrive Main Skill to improve melee combat. With this build, your main way of attacking is with your sword combined with combos from Blade Arts.
Stat Priority
| ① Strength | Increases Attack and Defense. Unlocks the Entanglement Overdrive Main Skill. |
|---|---|
| ② Florescence | Increases Skill Power and HP. Unlocks Track Shot Main Skill. |
| ③ Vitality | Increases HP. Unlocks Hair Main Skill. |
Most of your Attribute Points should go into Strength to increase base damage and defense, and unlock the Entanglement Overdrive Main Skill. It will also unlock the sub-skills needed for the build.
Florescence will increase your skill's damage, which is necessary when casting Blade Arts. It also adds some points to your HP whenever you increase it. You can put points into this for those reasons, and unlock the Roll Skill that will help you get out of sticky situations.
Although Vitality is last in priority, you should still add points into it as bosses and mobs in the later parts of the story has the ability to kill you in a few hits. You may also unlock the Cloaking Grass skill to help with stealth and exploration.
Best Skills
| Main Skill Tree | |
|---|---|
| Entanglement Overdrive |
|
| Expand Entanglement Gauge | Extends Entanglement Gauge. |
| Instant Entanglement | Grants a chance to fill Emma's Entanglement Gauge to full when defeating a foe. |
| Entanglement Gauge Recovery | Grants a chance for Emma to restore 0.3 Entanglement Guage when performing normal attacks. |
| Recovery Boost | Grants a chance to restore Emma's Entanglement Gauge by 1 and Koo's FP by 1 when foe is defeated. |
| Extend Blade Effect | Increases weapon effect duration. |
| Critical Boost | Increases damage when Emma lands a critical hit. |
| Execution Assist | When Emma executes an enemy, Koo will execute other nearby enemies. |
| Execution Recovery | When Emma executes an enemy, Koo will execute other nearby enemies. |
| Other Recommended Skills | |
| Attack Dog (Tracking Shot) |
Koo's damage is increased 1.2x when told to run ahead and fight alone. |
| Lucky Shot (Tracking Shot) |
Ranged attacks have a chance to not consume ammunition. |
| Roll (Tracking Shot) |
Gives Emma the ability to Roll by pressing Dodge twice. |
| Cloaking Grass (Hair) |
Sprouts thick grass around Emma to conceal her for a time while crouching. |
You should focus on the Entanglement Overdrive Main Skill and its sub-skills for this build. Most of the skills you need for close quarter combat can be found here.
You can also dabble with the sub-skills in other main skills to help you cover some bases that the Entanglement Overdrive sub-skills can't.
Entanglement Overdrive Skill Progression
| Entanglement Overdrive | |
|---|---|
┗ Main Skill (141 SP to Lv. 5, Requires 18 Strength)
┣ Recovery Effect Boost (8 SP)
┗ Expand Entanglement Gauge (8 SP)
┣ Iaido (8 SP)
┗ Instant Entanglement (8 SP)
┣ Entanglement Gauge Recovery (8 SP)
┗ Recovery Boost (8 SP)
┣ Extend Blade Effects (8 SP)
┗ Critical Boost (8 SP)
┗ Execution Assist (50 SP)
┗ Execution Recovery (8 SP)
|
|
| Total SP Spent | 263 Skill Points (Only counting the unlocks for the sub-skills) |
| AP Spent to Strength | 13 Attribute Points (5 Base Attribute + 13 Attribute Points) |
Hair Skill Progression
| Hair | |
|---|---|
┗ Main Skill (48 SP to Lv. 3, Requires 12 Vitality)
┣ Sprout Shakuyaku (8 SP)
┣ Helm Splitter (8 SP)
┗ Cloaking Grass (8 SP)
|
|
| Total SP Spent | 72 Skill Points (Only counting the unlocks for the sub-skills) |
| AP Spent to Vitality | 7 Attribute Points (5 Base Attribute + 7 Attribute Points) |
Track Shot Skill Progression
| Track Shot | |
|---|---|
┗ Main Skill (23 SP to Lv. 2, Requires 9 Florescence)
┣ Entanglement Follow-Up (12 SP)
┗ Attack Dog (24 SP)
┗ Lucky Shot (7 SP)
┗ Roll (30 SP)
|
|
| Total SP Spent | 96 Skill Points (Only counting the unlocks for the sub-skills) |
| AP Spent to Florescense | 4 Attribute Points (5 Base Attribute + 4 Attribute Points) |
Best Weapons
Best Swords
| Weapon | Details |
|---|---|
|
Cirrus Sword
|
Element: Impact Melee Attack: 27 Ability: Clear Skies Effect: Increases Emma's damage ×1.02 and Koo's damage ×1.02 for 5 second(s). |
|
Purity
|
Element: Slash Melee Attack: 27 Ability: Vampiric Blade Effect: Recover Emma’s HP equal to 3.5% of damage dealt for 5 second(s). |
The best weapons for this build are the Cirrus Sword and Purity. Cirrus Sword's ability increases the damage of Emma and Koo in battle, allowing you to deplete the enemies' HP faster.
Purity is the best replacement for Cirrus. It gives Emma lifesteal, which allows her to recover HP by damaging enemies once the ability activates.
For bosses, you can always opt for an Elemental Sword that can exploit their weakness.
Best Ranged Weapons
| # | Crossbow | Bow |
|---|---|---|
| 1 | Fire Bolts |
Flame Arrows |
| 2 | Bolts |
Arrows |
The best ammo for ranged weapons currently are the Fire Bolts and Flame Arrows. Once the status buildup is full, it will burn the targets and deal a good amount of damage. It works great on bosses and elite enemies in the overworld.
If you ran out of Fire Bolts and Flame Arrows, you can rely on regular ammo as they deal significant amount of damage even without the extra effect. Plus, you can equip more of them compared to elemental arrows and bolts.
Best Armor
| Armor | Details |
|---|---|
|
Floral Wraps
|
Defense: 31 Spirit Stone Slots: 6 Enemy Awareness: Low  Acid Resist: 50 |
|
Dance Attire
|
Defense: 39 Spirit Stone Slots: 6 Enemy Awareness: Low  Flame Resist: 60  Lightning Resist: 60 |
The best armor for this build would be the Dance Attire. It gives elemental resistance to Flame and Lightning, and has 6 Spirit Stone Slots that allow for additional stats and effects. Aside from those, it gives low enemy awareness, making way to stealthly play during explorations.
Floral Wraps can cover the base while Dance Attire is not currently in your possession. It has a slightly lower defense and different elemental resistance, but it has the same Spirit Stone Slots and low enemy awareness.
Replace for Endgame Armor
| Armor | Details |
|---|---|
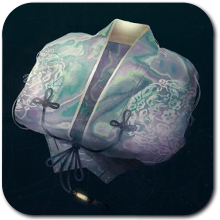 Ornate Robe |
Defense: 54 Spirit Stone Slots: 5 Enemy Awareness: Low Flame Resist: 80
Lightning Resist: 80
|
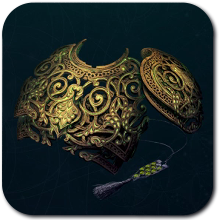 God Tree Guard |
Defense: 59 Spirit Stone Slots: 6 Enemy Awareness: High  Poison Resist: 80
Acid Resist: 80 |
You can replace both of them once you get the Ornate Robe in Chapter 8 or the God Tree Guard in Chapter 12. These armor have superior stats compared to Floral Wraps and Dance Attire.
Best Spirit Stones
| Spirit Stone | Stats and Effects |
|---|---|
| Entanglement Parry |
・Critical Rate Parrying has a chance to restore Emma's Entanglement Gauge by 0.2 and Koo's FP by 1. |
| Entanglement Dodge |
・Critical Rate Perfect Dodges have a chance to restore Emma's Entanglement Gauge by 0.2 and Koo's FP by 1. |
| Entanglement Increase |
・Critical Rate ・HP Exploiting an elemental weakness has a chance to restore Emma's Entanglement Gauge by 0.2 and Koo's FP by 1. |
| Critical Damage Increase |
・HP Boosts Emma and Koo's Critical Damage. |
| Florescent Recovery |
・Skill Power ・Critical Rate Bloom Arts restore Emma and Koo's HP every 5 seconds. |
| Iron Wall |
・Defense
・Critical Rate Reduces damage Emma take, but decreases health recovery by half. |
These Spirit Stones' stats increase the Critical Rate of Emma, giving her a chance to multiply her damage with each hit. It also replenishes her Entanglement Gauge fast, which means she can cast more Blade Arts and combine them with other moves.
Florescent Recovery and Iron Wall Spirit Stones will allow her to recover HP and take hits without dying. It should help a lot if Emma has a very low Vitality at the moment.
Koo Best Build
Build Summary
| Stat Priority | |||||
|---|---|---|---|---|---|
| ① Strength | ② Vitality | ③ Florescence | |||
| Main Skill Tree and Skill Priority | |||||
 Pounce |
|||||
| Taunt | Healing Bouquet | ||||
| Healing Garden | Photosynthesis | ||||
| Other Recommended Skills | |||||
| Binding Fang (Skill Amber) |
Destructive Fang (Skill Amber) |
||||
| Mod: Battleborn (Guard) |
Mod: Healing Energy (Guard) |
||||
| Mod: Swamp Summoner (Incantation) |
Mod: Last Stand (Incantation) |
||||
| Charms | |||||
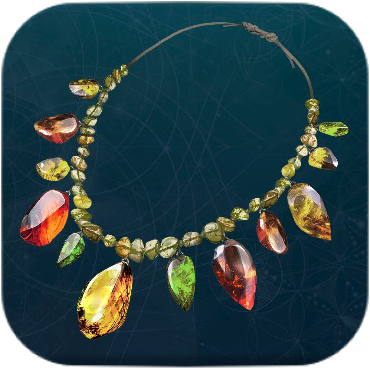 ATK Charm |
 Skill Charm |
||||
 Critical Charm |
- | ||||
| Charm Effects | |||||
| Crit Boost | Experience | ||||
| Extra Hit | Lucky | ||||
| Critical | Burn | ||||
| Items | |||||
| Recovery Tonic | Golem Censer | ||||
| Life Censer | Archery Censer | ||||
This build focuses on balance between supporting Emma while not overlooking Koo's power in battle. Most of the skills here will focus on backing up and boosting Emma's damage in battle, while the Charms and the Attribute Points allocation will lean towards Koo's damage and a bit of defense.
Stat Priority
| ① Strength | Increases Attack and Defense. Unlocks the Pounce Main Skill. |
|---|---|
| ② Vitality | Increases HP. Unlocks Guard Main Skill. |
| ③ Florescence | Increases Skill Power and HP. Unlocks Incantation Main Skill. |
Strength makes way to the Pounce Main Skill and sub-skills, and gives a bonus to Attack and Defense stats. Pounce is a very strong skill that gives Koo a chance to kill a target instantly. The skills under it are mostly support-focused, like the 2 healing skills to increase Emma's survivability.
You will only add Attribute Points into Vitality to unlock the Mod: Healing Energy, which gets activated if you use the Bloom Arts where it's attached. It removes all debuffs and status effects on Emma once activated. It's best to get this early in the game and focus on the Strength and Florescence next.
Florescence opens up the way to other mods that can help Emma, while also buffing his skill's damage. The best skill under this will be far and will consume a lot of Skill Points and Attribute Points, so only focus here once you get the Mod: Healing Energy from Guard and the Healing skills under Pounce.
Best Skills
| Main Skill Tree | |
|---|---|
| Pounce |
|
| Taunt | Koo howls, temporarily drawing attacks from nearby foes. |
| Healing Bouquet | Bring forth flowers to restore HP. Continuously reecover HP in the area. |
| Healing Garden | Bring forth a big flower field to restore HP. Continuously reecover HP in the area. |
| Photosynthesis | Koo's FP increases by 2. |
| Other Recommended Skills | |
| Binding Fang (Skill Amber) |
Damages enemies and causes a buildup of Bind. |
| Destructive Fang (Skill Amber) |
Damages and weakens enemy. Temporarily lowers the defense of weakened enemies. |
| Mod: Battleborn (Guard) |
Force activates a sword's special effects. |
| Mod: Healing Energy (Guard) |
Removes Emma's status effects + buildup. |
| Mod: Swamp Summoner (Incantation) |
Creates a swamp that slows foes at target location. |
| Mod: Last Stand (Incantation) |
As Emma's HP declines, her damage increases. |
Most of these skills support Emma during battle, so she can keep plowing through enemies. Don't worry about Koo's not dealing damage from this skills, as you will be able to get enough through adding points into Strength, Charms, and Charm Effects.
Koo can futher support Emma while damaging enemies by getting the Binding Fang and Destructive Fang skills from Skill Ambers. Binding Fang can immobilize foes once the buildup meter is full. Destructive Fang, on the other hand, lowers the attack of enemies hit. These skills work against bosses as well.
Pounce Skill Progression
| Pounce | |
|---|---|
┗ Main Skill (141 SP to Lv. 5, Requires 18 Strength)
┣ Lay Landmine (8 SP)
┗ Lay Flame Trap (8 SP)
┣ Taunt (22 SP)
┣ Healing Bouquet (22 SP)
┗ Healing Garden (70 SP)
┣ Snatch (25 SP)
┗ Steal (25 SP)
┗ Internal Respiration (70 SP)
┗ Photosynthesis (80 SP)
|
|
| Total SP Spent | 471 Skill Points (Only counting the unlocks for the sub-skills) |
| AP Spent to Strength | 13 Attribute Points (5 Base Attribute + 13 Attribute Points) |
Guard Skill Progression
| Guard | |
|---|---|
┗ Main Skill (48 SP to Lv. 3, Requires 12 Vitality)
┣ Mod: Status Effect Amp (12 SP)
┣ Mod: Battleborn (12 SP)
┗ Mod: Full Bloom Recovery (12 SP)
|
|
| Total SP Spent | 60 Skill Points (Only counting the unlocks for the sub-skills) |
| AP Spent to Vitality | 13 Attribute Points (5 Base Attribute + 13 Attribute Points) |
Incantation Skill Progression
| Incantation | |
|---|---|
┗ Main Skill (141 SP to Lv. 5, Requires 18 Florescence)
┣ Mod: Status Effect Amp (12 SP)
┗ Mod: Swamp Summoner (15 SP)
┣ Mod: Shocking Vigor (12 SP)
┣ Mod: Vital Eye (12 SP)
┗ Mod: Odd Appetite (12 SP)
┗ Mod: Last Stand (17 SP)
|
|
| Total SP Spent | 221 Skill Points (Only counting the unlocks for the sub-skills) |
| AP Spent to Florescense | 13 Attribute Points (5 Base Attribute + 13 Attribute Points) |
Best Charms and Charm Effects
Best Charms
| Charm | Base Effect |
|---|---|
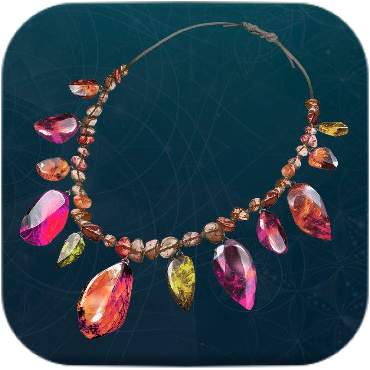
| ATK Charm |
Boost Attack |
| Skill Charm |
Boost Skill Power |
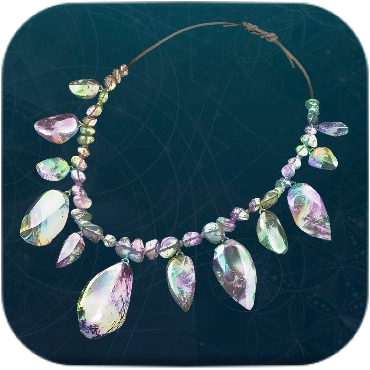
| Critical Charm |
Boost Critical Rate |
You should prioritize Charms that will boost Koo's damage. Koo will almost never go down in battle, so HP and Defense boosts are not exactly needed for his build.
Best Charm Effects
| Charm Effect | Details |
|---|---|
| Experience | Boosts Experience Points gained. |
| Crit Boost | When Emma and Koo land a critical hit, Koo's damage increases. Lasts 10 seconds. |
| Critical | Boosts Critical Rate. |
| Burn | Normal attack inflict burn. Increases burn buildup. |
| Extra Hit | All attacks on enemies with a status effect receive bonus damage. |
| Lucky | Boost Amber gained. |
You should look for these effects when wearing the recommended Charms for Koo. Experience and Lucky are helpful when grinding levels and Ambers, while all the other effects here boosts his damage.
Best Items
| Item | Effect |
|---|---|
| Recovery Tonic | Gradually recovers HP. |
| Golem Censer | Temporarily grants a boost to defense. |
| Life Censer | Temporarily grants a boost to HP. This is added on top of your max HP. |
| Archery Censer | Temporarily grants a boost to ranged attack power. |
The best items to equip on Koo are Recovery Tonic, Golem Censer, Life Censer, and Archery Censer. Choose only one or two items here to make space for his skills, which are a lot better than items.
All Build Guides
| Emma and Koo Builds | |
|---|---|
| Emma Crit Build | Best Koo Build |
Beast of Reincarnation Related Guides
 Beast of Reincarnation Wiki
 Looking for Great Games! |
Is Beast of Reincarnation one of your favorite games? Answer our Best Games Survey and share your unique voice with Game8's readers! |
|---|
Beast of Reincarnation Wiki
| Wiki Contents | |
|---|---|
 Main Quests |
 Tips and Tricks |
 Characters |
 Bosses |
 Weapons |
 Armor |
 Spirit Stones |
 Builds |
 Skills |
 Outfits and Skins |
 Manuals |
 Items and Materials |
 Interactive Map |
 News and Game Info |
 Review |
|
Recommended Guides
 All Strongbox Locations
 All Elite Enemy Locations
 All Keeper Golem Locations
 All Memory Chip Locations
 All Electronic Brain Locations
 All Generator Device Locations
 All Fertilized Egg Locations
 All Camp Locations
 All Facility Module Locations
 All Crop Seedling Locations
 All Shrine Locations
 All Weapon Locations
 All Document Locations
 All Paintings of Lore Locations
 All Recipe Locations
 All Skill Amber Locations
Comment



Author


Rankings
- We could not find the message board you were looking for.
Gaming News




Popular Games

Genshin Impact Walkthrough & Guides Wiki
Fire Emblem: Fortune's Weave (FEFW) Walkthrough & Guides Wiki
Aniimo Walkthrough & Guides Wiki
Wuthering Waves Walkthrough & Guides Wiki
Dragon's Dogma 2 (DD2) Dark Arisen Walkthrough & Guides Wiki
Umamusume: Pretty Derby Walkthrough & Guides Wiki
Honkai: Star Rail Walkthrough & Guides Wiki
Zenless Zone Zero Walkthrough & Guides Wiki
Pokemon TCG Pocket (PTCGP) Strategies & Guides Wiki
AION 2 Walkthrough & Guides Wiki










Recommended Games
Where Winds Meet Walkthrough & Guides Wiki
Fire Emblem Heroes (FEH) Walkthrough & Guides Wiki
Diablo 4: Lord of Hatred Walkthrough & Guides Wiki
Super Smash Bros. Ultimate Walkthrough & Guides Wiki
Persona 3 Reload Walkthrough & Guides Wiki
The Legend of Zelda: Tears of the Kingdom Walkthrough & Guides Wiki
Elden Ring Walkthrough & Guides Wiki
Pokemon Brilliant Diamond and Shining Pearl (BDSP) Walkthrough & Guides Wiki
Cyberpunk 2077: Ultimate Edition Walkthrough & Guides Wiki
Monster Hunter World Walkthrough & Guides Wiki










All rights reserved
© 2026 Fictions, Inc. All other marks and trademarks are the property of their respective owners. All rights reserved.
The copyrights of videos of games used in our content and other intellectual property rights belong to the provider of the game.
The contents we provide on this site were created personally by members of the Game8 editorial department.
We refuse the right to reuse or repost content taken without our permission such as data or images to other sites.