
All Puzzle Solutions
✪ Game8 Best Games Survey
Vote for your favorite games and share your voice!

There are 17 story-related puzzles to solve in order to progress through Resident Evil 4 Remake (RE4). Read on to learn how to solve all puzzles, such as the combination lock, church puzzle, clock puzzle, as well as all puzzle rewards!
List of Contents
All Puzzle Solutions
List of Puzzles and Solutions
| Puzzle | Chapter | Solution Summary |
|---|---|---|
| Hexagonal Emblem Puzzle | Chapter 2 | Rotate left the piece once then Flip/Turn Around |
| Combination Lock Code | Chapter 2 | Code: Crop - Pig - Babe |
| Crystal Marble Puzzle | Chapter 2 | Rotate the pellets until it matches the insignia |
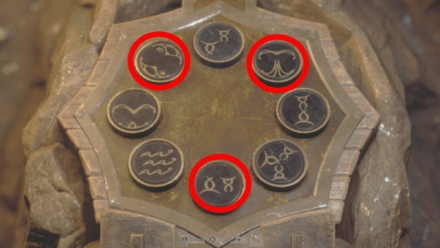
| Large Cave Shrine Puzzle | Chapter 4 | Press the buttons: Top Left, Top Right, Bottom |
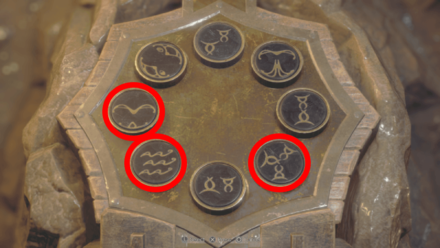
| Small Cave Shrine Puzzle | Chapter 4 | Press the buttons: Left, Bottom Left, Bottom Right |
| Stone Pedestal Puzzle | Chapter 4 | Insert all missing hexagonal pieces Assisted/Standard: Rotate lower-left piece once, then rotate upper piece once Hardcore/Professional: Rotate lower-right piece twice, rotate lower-left piece twice, then rotate upper piece once. |
| Church Stained Glass Puzzle | Chapter 4 | Find missing blue dial first inside a cabinet on the right side of the Church Rotate blue dial until shape matches lower-right "wing". Then, rotate green dial until shape matches the right "wings". Finally, rotate the red dial to fill in the white gaps. |
| Four Swords Puzzle | Chapter 7 | Get Bloodied Sword behind the closed gate first Place the swords, from left to right: Iron Sword, Golden Sword, Bloodied Sword, Rusted Sword |
| Animal Gong Puzzles | Chapter 7 | Ring/shoot Deer gong, then shoot Bird and Snake gong behind the gate. |
| Lithographic Castle Tile Puzzle | Chapter 8 | Match symbols and shape Top: Red Square Shield Left: Red Hexagon Helmet Right: Blue Square Sword Bottom: Blue Hexagon Armor |
| Crimson Lantern Puzzle | Chapter 8 | Obtain Crimson Lantern by defeating the Cultist Leader and placing it on the staute by the locked gate. |
| Courtyard Maze Puzzle | Chapter 9 | Pull all 3 levers on the towers of the courtyard |
| Headless Statue Puzzle | Chapter 9 | Place the Snake Head, Lion Head, and Goat Head onto the statue. The pieces are found in the Grand Hall rooms. |
| Dining Hall Bell Puzzle | Chapter 9 | Getting the Snake Head: (Based on default map orientation) Order Ashley to sit on the upper-right chair of the southern table, then Leon sits on the upper-left chair of the northern table. |
| Grandfather Clock Puzzle | Chapter 9 | Set time to 11:04 (Assisted/Standard) or 7:00 (Hardcore or Professional) |
| Mausoleum Lamp Puzzle | Chapter 9 | (Based on default map orientation)
West Slot: Crescent Moon North Slot: Full Moon East Slot: Star |
| Electronic Lock Puzzles | Chapter 13 Chapter 14 |
Rotate the nodes and connect the power lines on all the power or lightning icons. |
Chapter 2 Village Puzzles
Hexagonal Emblem Puzzle Solution
| Hexagonal Emblem Puzzle Solution | |
|---|---|
 |
 |
Once you acquire the Hexagonal Emblem, simply interact with the hexagonal indentation. The solution to the gate puzzle is to rotate to the left once, then flip the emblem. Afterward, you will now be able to open the gate.
Hexagonal Emblem Puzzle Location
| Map Location | In-Game Location |
|---|---|
 |
 |
| Valley - Chapter 2 | |
Combination Lock Puzzle Solution
| Combination Lock Puzzle Solution | |
|---|---|
 |
 |
The combination lock code is Crop - Pig - Babe. The answer is found on the Illuminados 4:3 file on top of the drawer on the second floor of the manor.
Combination Lock Puzzle Location
| Map Location | In-Game Location |
|---|---|
 |
 |
| Village Chief's Manor - Chapter 2 | |
Combination Lock Code and Puzzle Solution
Crystal Marble Puzzle Solution
| Crystal Marble Puzzle Solution |
|---|
 |
Rotate the Crystal Marble until the white pellets form and match the insignia.
You will need to complete the Combination Lock Puzzle to obtain the Crystal Marble inside the cabinet behind the dining area on the first floor of the manor.
Crystal Marble Puzzle Location
| Map Location | In-Game Location |
|---|---|
 |
 |
| Village Chief's Manor - Chapter 2 | |
Chapter 4 Village Puzzles
Large Cave Shrine Puzzle
| Large Cave Shrine Solution | ||
|---|---|---|
 |
||
| 1st Symbol | 2nd Symbol | 3rd Symbol |
 |
 |
 |
Press the top-left, top-right, and bottom buttons to solve the Large Cave Shrine Puzzle. The symbols are found on walls of the cave nearby.
Large Cave Shrine Puzzle Location
| Map Location | In-Game Location |
|---|---|
 |
 |
| Chapter 4 | |
Small Cave Shrine Puzzle Solution
| Small Cave Shrine Solution | ||
|---|---|---|
 |
||
| 1st Symbol | 2nd Symbol | 3rd Symbol |
 |
 |
 |
Press the left, bottom-left, and bottom-right buttons to solve the Small Cave Shrine Puzzle. The symbols are found on the wooden walls.
Small Cave Shrine Puzzle Location
| Small Cave Shrine Map | Small Cave Shrine Location |
|---|---|
 |
 |
| Chapter 4 | |
Stone Pedestal Puzzle Solution
Assisted / Standard Difficulty
| Stone Pedestal Puzzle Solution - Assisted / Standard | |
|---|---|
 |
|
| Step 1 | Step 2 |
| Rotate the lower left section. | Rotate the uppermost section. |
Hardcore / Professional Difficulty
| Stone Pedestal Puzzle Solution - Hardcore / Professional | ||
|---|---|---|
|
||
| 1st | 2nd | 3rd |
| Rotate lower right twice. | Rotate lower left twice. | Rotate upper piece once. |
If you make a mistake, we suggest reloading an earlier save, as figuring out the puzzle past its initial position may take a lot of time.
Hexagon Piece Locations
| Map Location | In-Game Location | |
|---|---|---|
| Hexagon Piece A |  Chapter 3 |
 Quarry Merchant |
| Hexagon Piece B |  Chapter 3 |
 Fish Farm |
| Hexagon Piece C |  Chapter 4 |
 Small Cave Shrine |
You can find Hexagon Piece C in the Small Cave Shrine in Chapter 4, which you can find at the northeastern corner of the lake. Complete the shrine puzzle, then turn right to find the chest containing the puzzle piece beside the Blasphemer's Head.
Stone Pedestal Puzzle Location
| Map Location | In-Game Location |
|---|---|
 |
 |
Hexagon Pieces and Stone Pedestal Puzzle
Church Stained Glass Puzzle Solution
| Church Stained Glass Puzzle Solution |
|---|
 |
 |
 |
Upon entering the Church in Chapter 4, get the Blue Dial inside the cabinet on the right side. After that, use the lever near the altar at the center of the church to reveal the colored dials.
Rotate the dials one by one until it matches shape on the insignia based on the images above until there are no more white gaps.
Church Stained Glass Puzzle Location
| Map Location | In-Game Location |
|---|---|
 |
 |
| Church - Chapter 4 | |
Chapter 7 Castle Puzzles
Four Swords Puzzle Solution
| Four Swords Puzzle Solution | |
|---|---|
 |
|
Place the four swords from left to right: Iron Sword, Golden Sword, Bloodied Sword, and Rusted Sword to open the locked door.
Three swords are found on the mural itself, while the Bloodied Sword is obtained behind the gate on the same room unlocked by the Animal Gong Puzzle.
Four Swords Puzzle Location
| Map Location | In-Game Location |
|---|---|
 |
 |
| Treasury - Chapter 7 | |
Animal Gong Puzzle Solutions
How to Solve First Animal Gong Puzzle
| First Animal Gong Puzzle Solution | ||
|---|---|---|
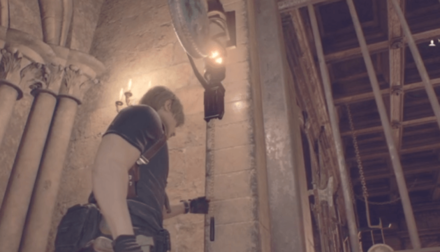 1st - Deer Gong |
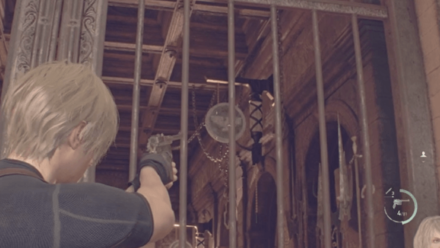 2nd - Bird Gong |
 3rd - Snake Gong |
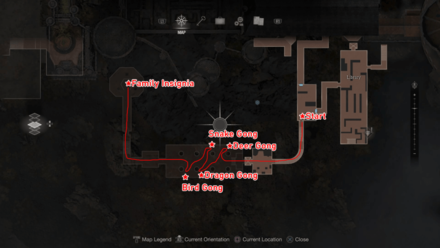
Ring/shoot the Deer gong, then shoot the Bird and Snake gongs behind the gate.
How to Solve Second Animal Gong Puzzle
| Second Animal Gong Puzzle Solution | |
|---|---|
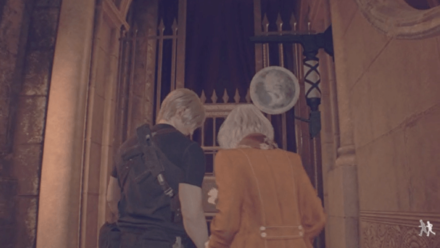 1st - Dragon Gong |
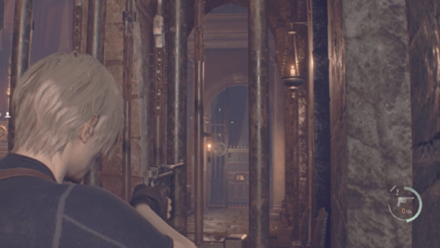 2nd - Snake Gong |
Shoot the Dragon gong, then shoot the Snake gong on the other side by crossing the chandelier.
How to Solve Third Animal Gong Puzzle
| Third Animal Gong Puzzle Solution | |
|---|---|
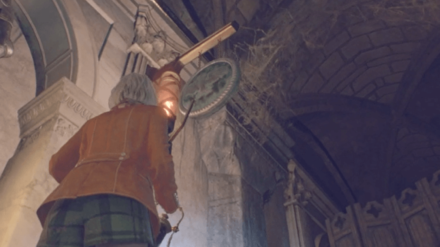 1st - Bird Gong |
 2nd - Snake Gong |
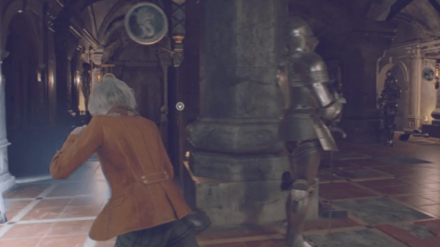 3rd - Dragon Gong |
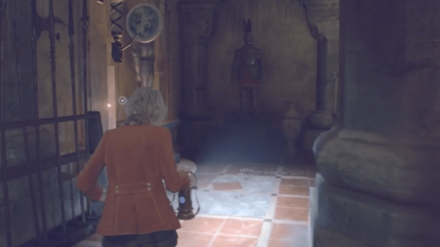 4th - Deer Gong |
Ring the Bird, Snake, Dragon, and Deer gongs found on the walls in the area while avoiding Armaduras by freezing them with Ashley's lantern.
Animal Gong Puzzle Locations
| Animal Gong 1 Map | Animal Gong 1 In-Game |
|---|---|
 |
 |
| Animal Gong 2 Map | Animal Gong 2 In-Game |
 |
 |
| Animal Gong 3 Map | Animal Gong 3 In-Game |
 |
 |
| Chapter 7 | |
Chapter 8 Castle Puzzles
Lithographic Castle Tile Puzzle Solution
| Lithographic Castle Tile Puzzle Solution | |||
|---|---|---|---|
 |
|||
| Top Slot | Left Slot | Right Slot | Bottom Slot |
| Red Square Shield | Red Hexagon Helmet | Blue Square Sword | Blue Hexagon Armor |
Match the Lithographic Stones according to the color, symbol, and shape. You can flip the stones to reveal more markings.
Lithographic Castle Tile Puzzle Location
| In-Game Location | |
|---|---|
 |
|
| Assisted/Standard Map | Hardcore/Professional Map |
 |
 |
| Bindery - Chapter 8 | |
The location of the Lithographic Stones differ depending on which difficulty you're playing on.
Lithographic Castle Tile Puzzle
Crimson Lantern Puzzle Solution
You can solve this puzzle by getting the Crimson Lantern from the Cultist Leader and placing it on the Cultist Statue near the entrance.
Crimson Lantern Puzzle Location
| Map Location | In-Game Location |
|---|---|
 |
 |
| Wine Cellar - Chapter 8 | |
Chapter 9 Castle Puzzles
Courtyard Maze Puzzle Solution
| Courtyard Maze Puzzle Solution | ||
|---|---|---|
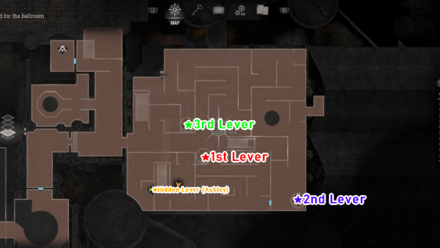 |
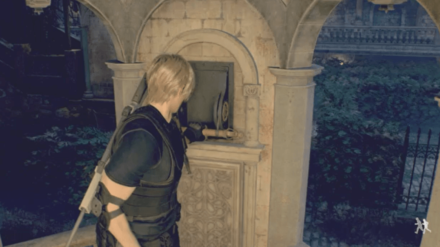
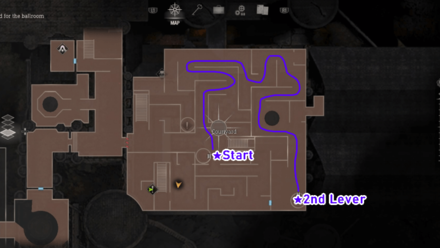
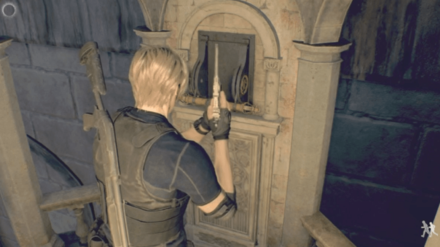
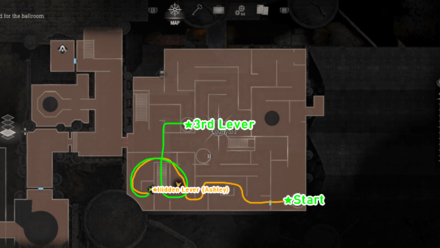
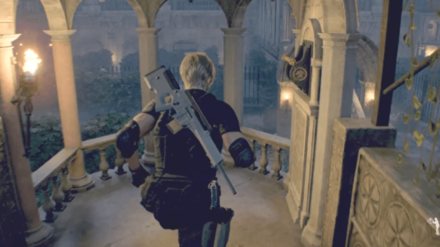
You can solve this puzzle by pulling all three levers to activate the Courtyard Flags. These levers can be found on the towers that are scattered throughout the courtyard area.
Courtyard Maze Puzzle Location
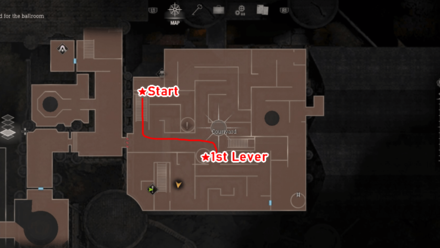
| 1st Lever Map | 1st Lever Location |
|---|---|
 |
 |
| 2nd Lever Map | 2nd Lever Location |
 |
 |
| 3rd Lever Map | 3rd Lever Location |
 |
 |
Headless Statue Puzzle Solution
| Headless Statue Puzzle Solution |
|---|
 Headless Statue Puzzle | Chapter 9 |
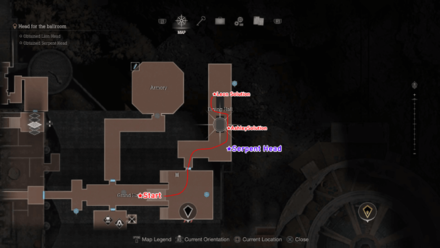
Where to Find the Serpent Head
| Map Location | In-Game Location |
|---|---|
 |
 |
| Serpent Head Location | |
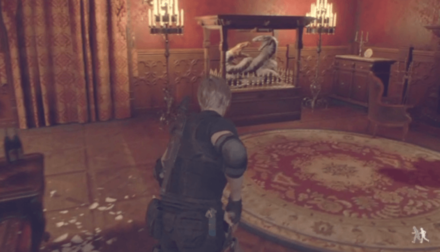
You can find the Serpent Head inside the Dining Hall on the northeast room of the Grand Hall. Solve the Dining Hall Bell Puzzle to unlock the cage where the Serpent Head is placed.
Where to Find the Lion Head
| Map Location | In-Game Location |
|---|---|
 |
 |
| Lion Head Location | |
The Lion Head is in the Armory, northwest room in the Grand Hall second floor. Drop down the ledge and fight off Armaduras to obtain the Lion Head and exit the Armory.
Where to Find the Goat Head
| Map Location | In-Game Location |
|---|---|
 |
 |
| Goat Head Location | |
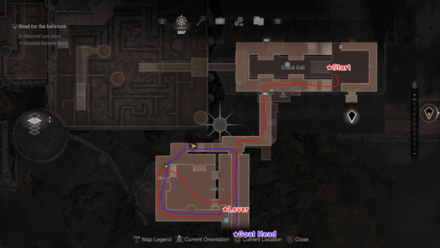
Find the Goat Head inside the Gallery on the southwest of the Grand Hall second floor. It's across a bridge that the enemies will disable. Activate the lever again to cross the bridge and obtain the Goat Head.
Dining Hall Bell Puzzle Solution
| Dining Hall Bell Puzzle Solution | |
|---|---|
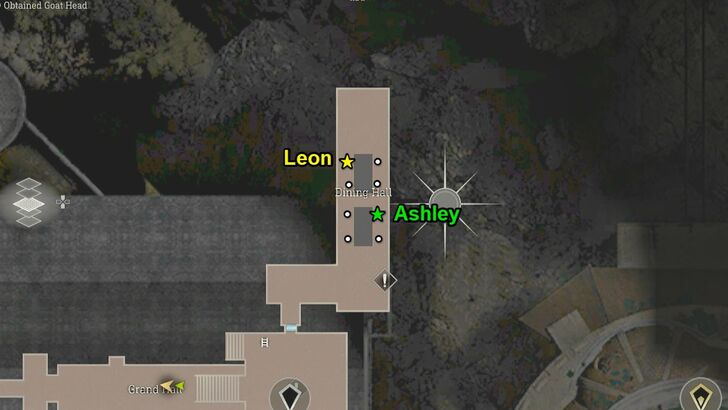 Default Map View |
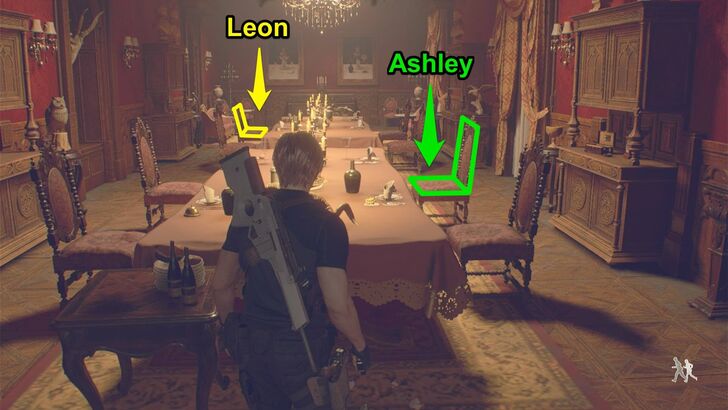 In-game View |
| Dining Table View | |
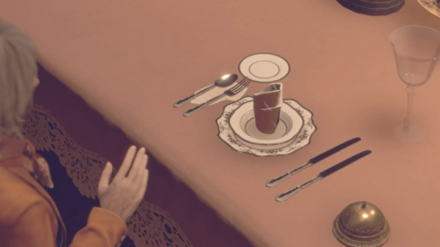 Ashley |
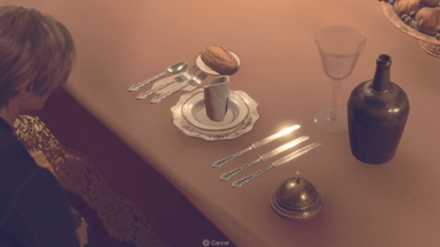 Leon |
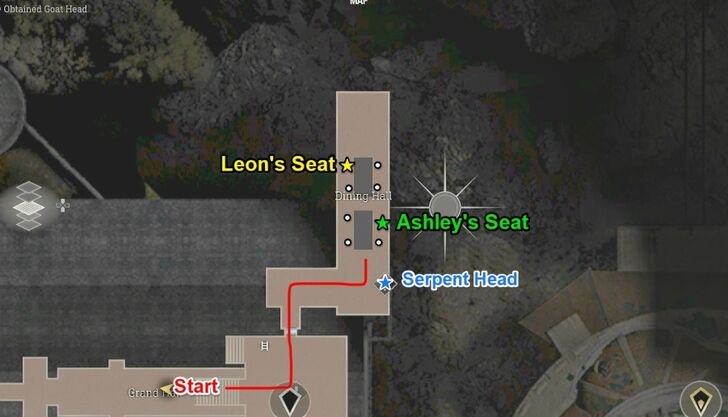
Leon and Ashley need to sit on the correct chairs and ring the bell to solve the Dining Hall Puzzle and unlock the cage to obtain the Serpent Head.
Dining Hall Bell Answers
| Dining Hall Bell Puzzle Portraits | |
|---|---|
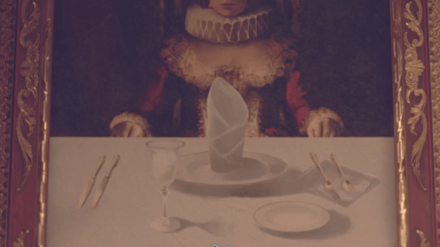 Female Portrait |
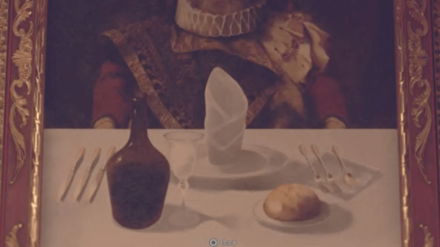 Male Portrait |
The answers to this puzzle is identified by matching the table setup to the female and male portraits found in the room.
Dining Hall Bell Puzzle Location
| Map Location | In-Game Location |
|---|---|
 |
|
| Chapter 9 | |
Ashley Grandfather Clock Puzzle Solution
| Ashley Grandfather Clock Puzzle Solution | |
|---|---|
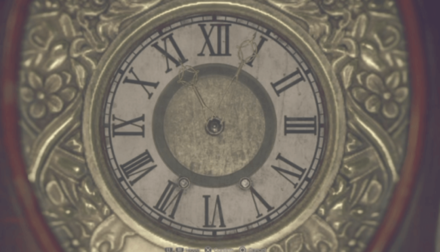 11:04 on Assisted / Standard Difficulty |
 7:00 on Hardcore / Professional Difficulty |
Wind the clock dials to the correct time to solve the Grandfather Clock Puzzle.
Grandfather Clock Puzzle Locations
| Map Location | |
|---|---|
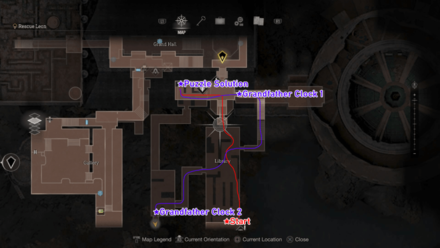 |
|
| In-Game Locations | |
 |
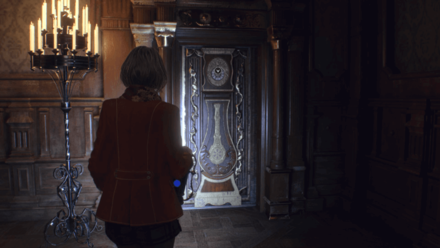 |
| Chapter 9 | |
Ashley Grandfather Clock Puzzle
Ashley Mausoleum Lamp Puzzle Solution
| Ashley Mausoleum Lamp Puzzle Solution | |
|---|---|
| West Slot | 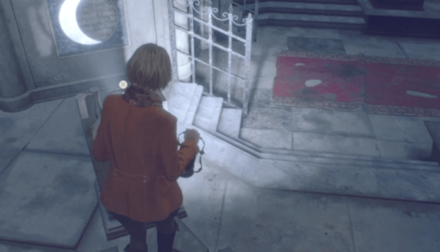 Crescent Moon |
| North Slot | 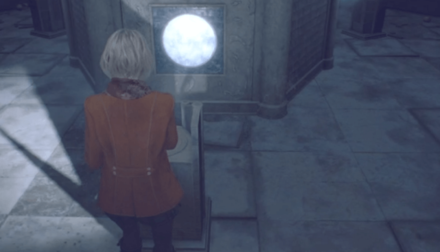 Full Moon |
| East Slot | 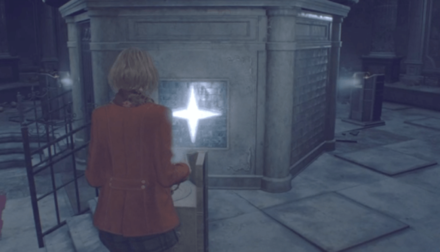 Star |
Based on the default map orientation, place the Crescent Moon lamp on the west slot, the Star lamp on the east slot, and the Full Moon lamp on the north slot to solve this puzzle.
Ashley Mausoleum Lamp Puzzle Locations
| Map | Location |
|---|---|
|
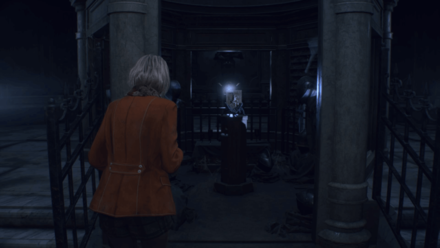 |
| Chapter 9 | |
Chapter 13 & 14 Island Puzzles
How to Solve All Electronic Lock Puzzles
How to Solve First Electronic Lock Puzzle (Dissection Room)
| First Electronic Lock Puzzle Solution | |
|---|---|
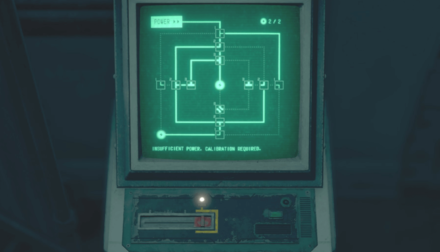 Assisted/Standard Mode |
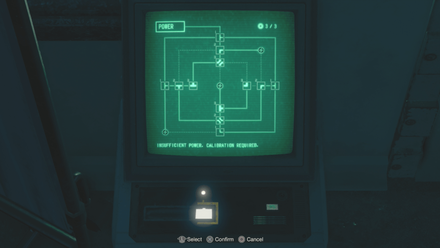 Hardcore/Professional Mode |
Rotate the nodes to connect the power input to the lightning icons and solve the Dissection Room Electronic Lock Puzzle.
Toggle which nodes to rotate by toggling the bottom computer switch left or right.
How to Solve Second Electronic Lock Puzzle (Freezer)
| Second Electronic Lock Puzzle Solution | |
|---|---|
 Assisted/Standard Mode |
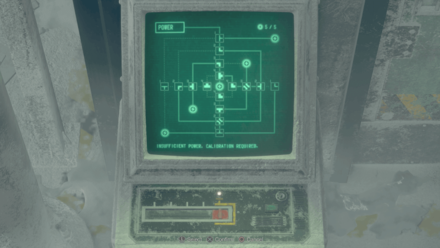 Hardcore/Professional Mode |
The second Electronic Lock puzzle in the Freezer is optional, but will let you obtain an LE 5 SMG.
How to Solve Third Electronic Lock Puzzle (Waste Disposal)
| Third Electronic Lock Puzzle Solution | |
|---|---|
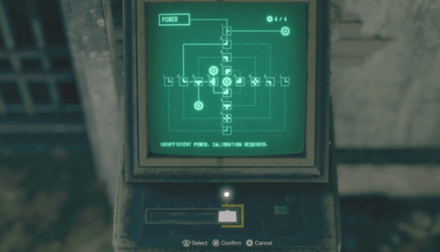 Assisted/Standard Mode |
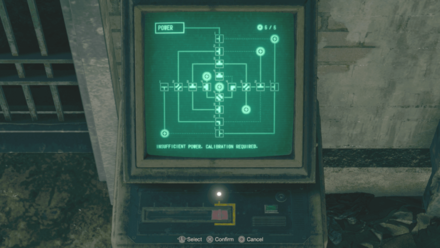 Hardcore/Professional Mode |
Similar to the previous Electronic Lock puzzles, rotate the nodes to connect the power input to the lightning icons to solve the puzzle.
Electronic Lock Puzzles Locations
| Map | Location |
|---|---|
 Chapter 13 |
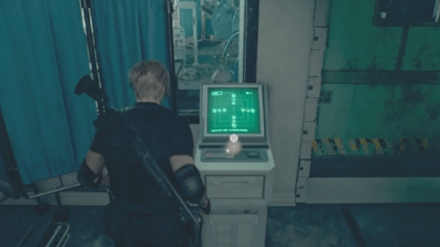 Dissection Room |
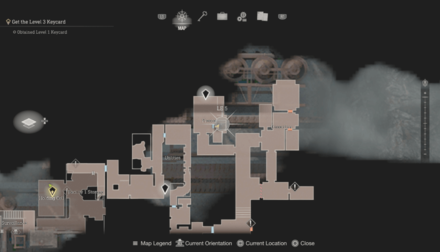 Chapter 13 |
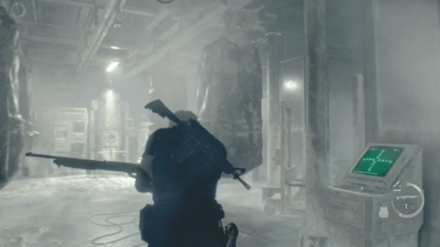 Freezer |
 Chapter 14 |
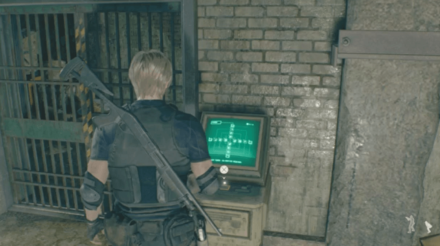 Waste Disposal |
Electronic Lock Puzzle Solutions
Resident Evil 4 Remake Related Guides
 Resident Evil 4 Remake Guide and Walkthrough
 Looking for Great Games! |
Is Resident Evil 4 Remake one of your favorite games? Answer our Best Games Survey and share your unique voice with Game8's readers! |
|---|
| Resident Evil 4 Remake Wiki | |
|---|---|
 Separate Ways |
 Story Walkthrough |
 Requests |
 Mercenaries Mode |
 Puzzles |
 Collectibles |
 Interactive Map |
 Tips and Tricks |
 Weapons |
 Items |
 Bosses |
 Enemies and Monsters |
 Keys and Locks |
 Secrets |
 Characters |
 News and Game Info |
Comment
 Anonymous over 1 year
If you are looking for this Software at a good price, I still recommend visiting the https://blixkey.com/ site.



Author

All Puzzle Solutions

Rankings
- We could not find the message board you were looking for.
Gaming News





Popular Games

Genshin Impact Walkthrough & Guides Wiki
Fire Emblem: Fortune's Weave (FEFW) Walkthrough & Guides Wiki
Aniimo Walkthrough & Guides Wiki
Wuthering Waves Walkthrough & Guides Wiki
Dragon's Dogma 2 (DD2) Dark Arisen Walkthrough & Guides Wiki
Umamusume: Pretty Derby Walkthrough & Guides Wiki
Honkai: Star Rail Walkthrough & Guides Wiki
Zenless Zone Zero Walkthrough & Guides Wiki
Pokemon TCG Pocket (PTCGP) Strategies & Guides Wiki
AION 2 Walkthrough & Guides Wiki










Recommended Games
Fire Emblem Heroes (FEH) Walkthrough & Guides Wiki
Where Winds Meet Walkthrough & Guides Wiki
Diablo 4: Lord of Hatred Walkthrough & Guides Wiki
Super Smash Bros. Ultimate Walkthrough & Guides Wiki
Persona 3 Reload Walkthrough & Guides Wiki
The Legend of Zelda: Tears of the Kingdom Walkthrough & Guides Wiki
Elden Ring Walkthrough & Guides Wiki
Pokemon Brilliant Diamond and Shining Pearl (BDSP) Walkthrough & Guides Wiki
Cyberpunk 2077: Ultimate Edition Walkthrough & Guides Wiki
Monster Hunter World Walkthrough & Guides Wiki










All rights reserved
©CAPCOM CO., LTD. ALL RIGHTS RESERVED.
The copyrights of videos of games used in our content and other intellectual property rights belong to the provider of the game.
The contents we provide on this site were created personally by members of the Game8 editorial department.
We refuse the right to reuse or repost content taken without our permission such as data or images to other sites.
Hello, we have the solution for this Electronic Puzzle in the "How to Solve Second Electronic Lock Puzzle (Freezer)" in our article. Thank you for supporting our guides!